Have you ever thought about what would happen to your photos if you happened to lose your iOS device? What if your iPhone crashed and the only option was to wipe it clean? What if your photos get lost after updating to iOS 13? These things do happen in real life. The photos you have on your iPhone probably tell an important story in your life. Hence, you need to keep them safe.
Maybe you have always thought of keeping your iPhone photos safe. The issue is that you never knew how to do this. There are free options which you can use to back up your iPhone photos even you are using iOS 13/14/15. In this article will focus on showing you how to backup photos from iPhone for free. You will not regret for reading to the 7th method at the end of this article.
- Free Plan A: Backup Photos from iPhone with Windows Photos App
- Free Plan B: Backup Photos from iPhone with AutoPlay
- Free Plan C: Backup Photos from iPhone to iCloud Photo Library
- Free Plan D: How to Backup Photos from iPhone with iTunes/iCloud
- Free Plan E: How to Backup Photos from iPhone to Flickr
- Free Plan F: Backup Photos from iPhone to Dropbox
- Free Plan G: Backup Photos from iPhone with Specialized Backup Tool
- Tip: Reviews of All the Above Methods
Free Plan A: Backup Photos from iPhone with Windows Photos App
It is possible to back up your iPhone photos to your Windows PC. All you have to do is connecting your iOS device to the Windows PC and use the Windows Photo App to import the pictures to your computer. Below, we show you how to backup photos from iPhone using the Windows Photos App:
Step 1: Download the latest iTunes version. To import your photos from your iOS device to your PC, you need to have iTunes 12.5.1 and above on the computer.
Step 2: Connect your iOS device to the PC using a USB cable. If you are asked for a passcode or to Trust This Computer, follow the onscreen instructions.
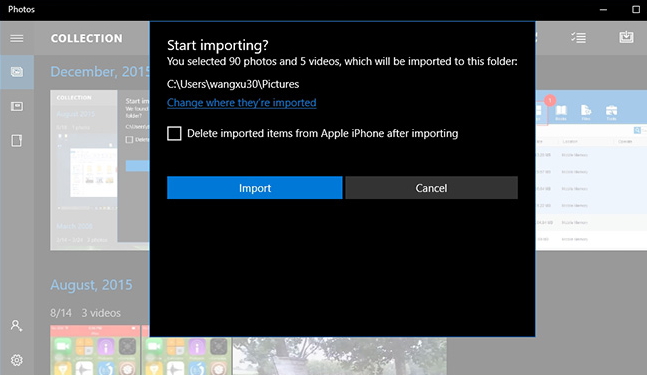
Step 3: On your Windows 10, tap the Start button and then choose Photos to launch the Photos app. Then, Choose Import -> From a USB Device.
Free Plan B: Backup Photos from iPhone with AutoPlay
This method works best for Windows 7 and 8. If you are on Windows 10, using the Photos App will work better. To learn how to backup photos from iPhone using AutoPlay on Windows 7 and 8, follow the steps outlined below:
On Windows 7
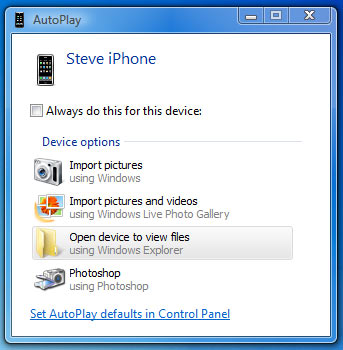
Step 1: Connect your iOS device to your PC. On AutoPlay, tap "Import pictures and videos".
Step 2: On the Window that appears, tap the Import Settings link. On the next page, change the folder to which you want your Camera Roll pictures to be imported to by simply tapping Browse next to "Import to" field.
Step 3: After choosing your import folder, tap OK and then choose a tag if you want to. Tap the Import button.
On Windows 8
Step 1: Connect your iOS device to the PC using a USB cable. If asked to Trust This Computer, follow the onscreen instructions.
Step 2: Open "This PC" and then right-click on your iOS device. Select "Import pictures and videos".
Step 3: Choose "Review, organize, and group items to import" if this is the first time you are importing photos. Choose "Import all new items now" if you had transferred photos from your iPhone before. Tap Next.
Step 4: Click the "More Options" link to select the folder where you wish to import photos. Tap OK and then click the Next button.
Step 5: Choose the photo groups you wish to import and then tap the Import button.
Free Plan C: Backup Photos from iPhone to iCloud Photo Library
Apple offers its iOS device users iCloud as a method for backing up their data. This service comes with a free basic plan that offers users a free 5GB storage space. When this free storage space becomes full, users have to upgrade. This method also supports iOS 13/14/15. To learn how to backup photos from iPhone using iCloud Photo Library, follow the simple steps below:
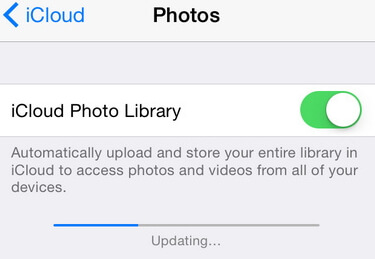
Step 1: Launch Settings, tap iCloud and then click Photos.
Step 2: Toggle on iCloud Photo Library. When this is toggled on, your iOS device will be backing up your iPhone photos automatically to iCloud when you connect to Wi-Fi. You can choose the "Optimize iPhone Storage" option to create more room on your iOS device.
Free Plan D: How to Backup Photos from iPhone with iTunes/iCloud
You can manually back up your iOS device photos on both iCloud and iTunes. Below, we show you how to backup photos from iPhone using these services.
Using iCloud
Step 1: Connect your iOS device to a stable Wi-Fi network.
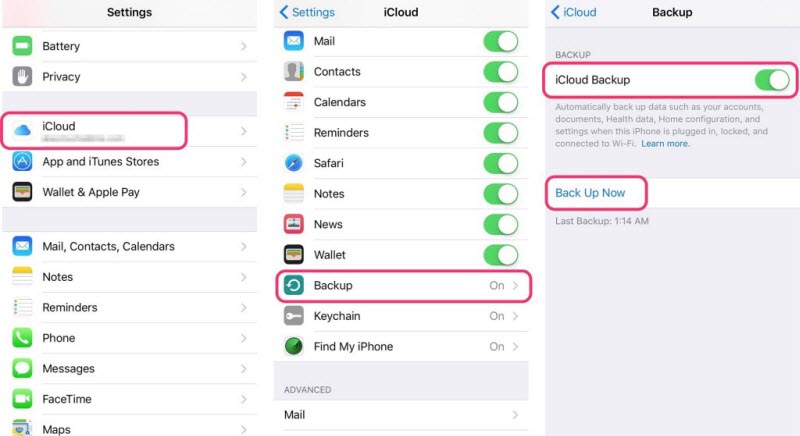
Step 2: Launch Settings, tap [your name], click iCloud, and then tap iCloud Backup. Toggle on iCloud Backup if it is off. Click Back Up Now and stay connected to the Wi-Fi until the backup process is complete.
Using iTunes
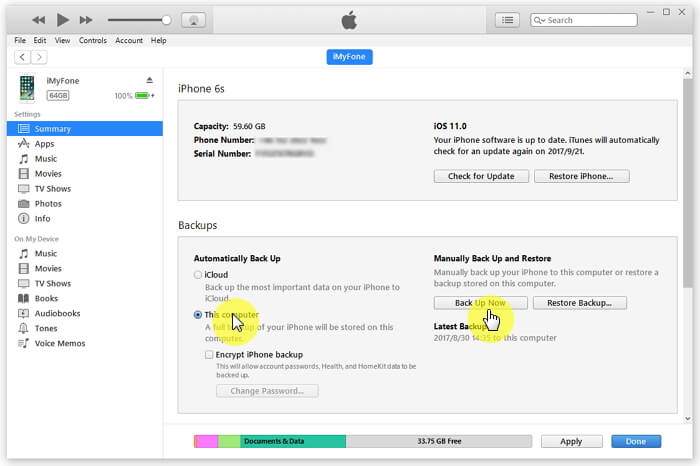
Step 1: Launch iTunes on your PC and connect your iOS device to the computer using a USB cable. If asked to Trust This Computer or for a passcode, follow the onscreen instructions.
Step 2: When your iOS device appears on iTunes, select it. To back up data that requires encrypting, select Encrypt [device] Backup and then choose a password you can remember. If your data does not require encrypting, just tap Back Up Now.
Free Plan E: How to Backup Photos from iPhone to Flickr
Flickr app for iPhone allows the iPhone users to upload their Camera Roll Photos to Flickr. This photo-sharing website offers up to 1 TB storage. Below, we show you how to backup photos from iPhone:
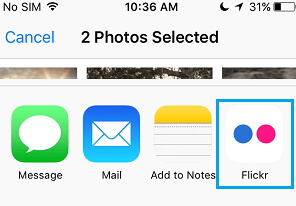
Step 1: Update the Flickr app to the latest version. Launch the Photos app on your iOS device and choose the photos or albums you wish to upload to Flickr.
Step 2: Click Share on the bottom-left corner and then select Flickr from the options that appear. Create an album title on the next screen and then choose whether to make it public or private. Tap upload on the screen top-right.
Free Plan F: Backup Photos from iPhone to Dropbox
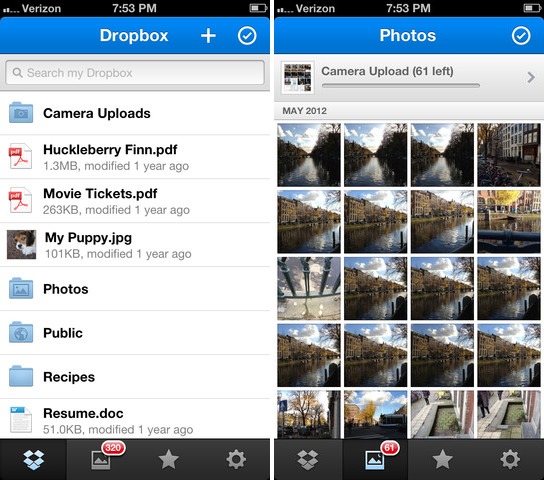
Dropbox will give you the capability to upload the photos you take on your iOS device automatically. You have to create a Dropbox account and install the Dropbox app on your iPhone first. Below, we guide you on how to backup photos from iPhone using Dropbox:
Step 1: Launch the Dropbox app -> go to Settings -> click Camera Upload -> choose On.
Step 2: Choose whether you want Dropbox to upload pictures only when you are on Wi-Fi or even when on Cellular data. Tap Enable and then tap OK when Dropbox asks access to your photos.
Free Plan G: Backup Photos from iPhone with Specialized Backup Tool
The methods we have outlined above are all great. However, they will they do not offer you much flexibility. A better tool that would offer you more flexibility is iMyFone iTransor (iOS 13/14/15 supported). This tool will allow you to back up your data selectively and also restore it selectively. During the restoration process, the tool will not overwrite the data currently available on your iOS device like iTunes and iCloud would. It also allows you to view the data present in the backup files available within both iCloud and iTunes. Below, we will show you how to backup photos from iPhone using iMyFone iTransor:
Step 1: Launch iTransor on your computer and connect your iOS device to the PC.
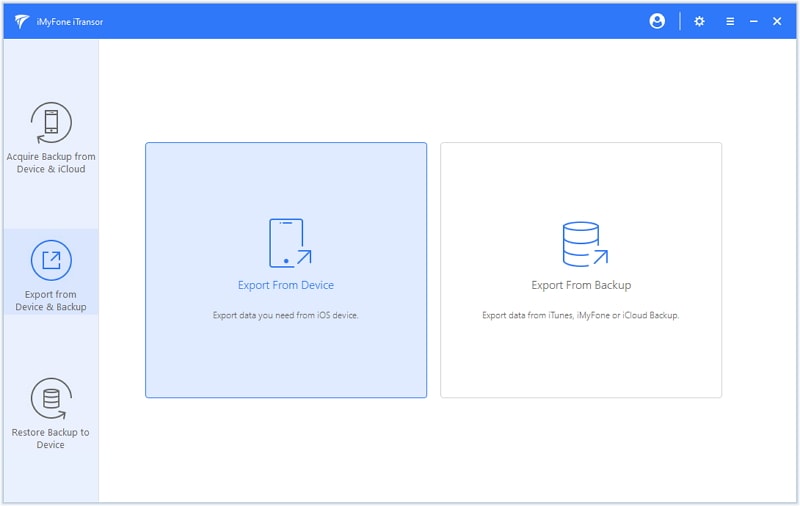
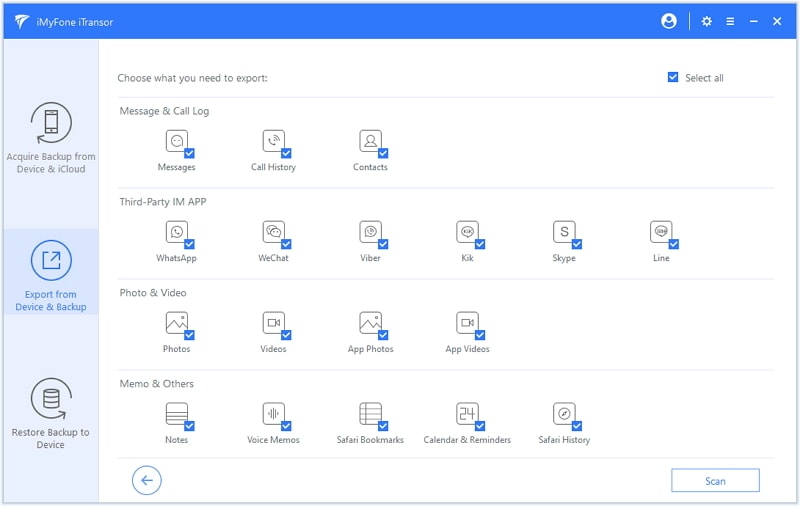
Step 2: Select Export from Device & Backup from the left-hand column and then tap Export from Device. On the next screen, choose Photos if you wish to only back up your pictures. You can select more data types. Tap Scan and allow iTransor to scan your device.
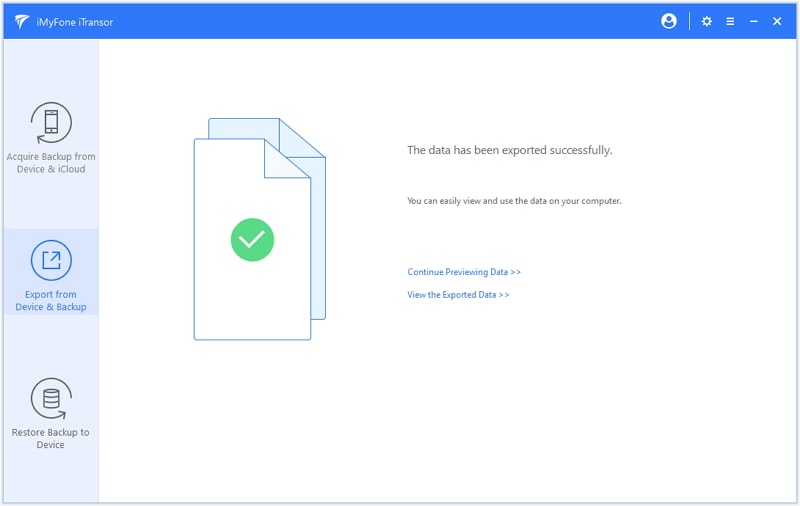
Step 3: After the scan, preview your photos. Tap Export and then choose a format and a location on computer to store them.
Tip: Reviews of All the Above Methods
| Pros | Cons | |
|---|---|---|
| Using Windows Photo App | It will allow you to store your photos on your computer without having to worry about the storage space. | The pictures you transfer can't be restored with a single click to your device. |
| Using AutoPlay | It will allow you to store your photos on your computer without having to worry about the storage space. | The pictures you transfer can't be restored with a single click to your device. |
| Using iCloud Photo Library | It will back up your photos automatically. | iCloud offers a fixed 5 GB free storage space. When this space is full, you will have to pay to upgrade. |
| Using Flickr | It offers up to 1 TB of storage space. | You won't have the ability to restore the pictures stored on this service directly. |
| Using Dropbox | It will make your photos be backed up automatically. | You won't be able to restore the photos available on Dropbox all at once. |
| Using iMyFone iTransor |
It allows you to selectively backup and restore their backups with a single click. It allows you to view the data available in backup files. You can merge contacts, messages, WhatsApp and WeChat data while restoring with no data loss. |
For now it cannot only backup and restore photos on iPhone. |
Conclusion
We have outlined the best 7 methods you can use to back up your iPhone photos for free. Compare these methods and choose the one that fits you most. We love comments. Feel free to leave your ideas below.


 August 23, 2021