If your iPod touch is displaying a message on its screen saying that it is disabled, then don’t worry. While the message may seem worse but fortunately there are ways to fix this iPod touch disabled issue so that you can use your iPod touch again without any problems.
iPod touch Disabled for 24 Million Minutes? Here Are the Solutions!
There are all 4 effective ways to fix iPod touch disabled for 24 million minutes. Some ways have the limits. Read the explanation carefully below and find your best way to fix your disabled iPod touch.
- Using the right tool iMyFone LockWiper is highly recommend because it doesn't have any limits. It's suitable for any disabled or unlocked situations.
- Use iCloud to erase your iPod touch when "Find My iPod" is enabled and your iPod is connected to internet. You should know the Apple ID and password.
- Use iTunes to restore iPod touch if you synced iPod touch before. But if it asks for password during the process, this way is ineffective.
- Put your iPod touch in recovery mode if you didn't sync your iPod touch to any computer.
1. Get You Back Into Disabled iPod touch with LockWiper
iMyFone LockWiper, a program that runs on Windows or Mac platforms, is a professional iPhone password unlocker. LockWiper is specifically developed to fix all iPhone/iPad/iPod touch screen issues including iPhone is disabled. Some Apple users complain that iPod touch will be locked or disabled after updating to iOS 12 at times, which is one of the common issues that LockWiper handles.
You Can Benefit a Lot from LockWiper:
- Easily get you back into iPod touch/iPhone/iPad when it's disabled, locked or broken
- Fix weird iPhone screen issues: stuck at black/white/Apple logo screen, recovery mode, keep waggling, etc.
- Remove iPhone screen lock without password in a few minutes
- Promise high success rate even to unlock used iPhone
- Fully compatible with iOS 12 and earlier versions and all models of iOS device
Now Download LockWiper Here to Fix Your 24 Million Minutes Disabled iPod touch
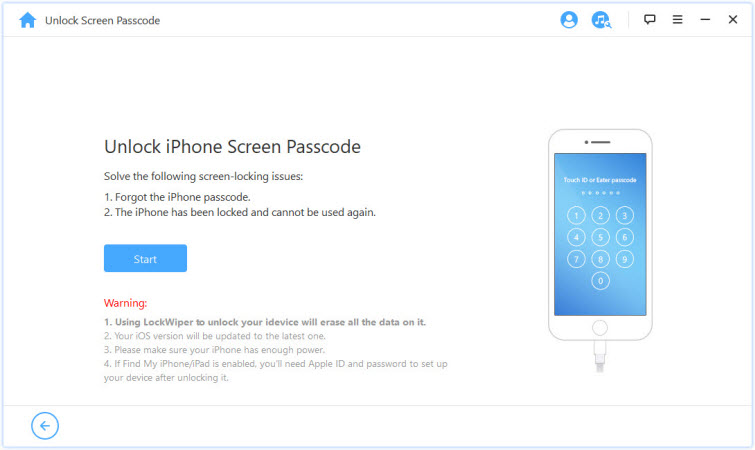
Step 1: Click the button below and install the program on your PC or Mac. Launch it when it's installed. Connect your iPod touch to computer and click "Start" on LockWiper screen.
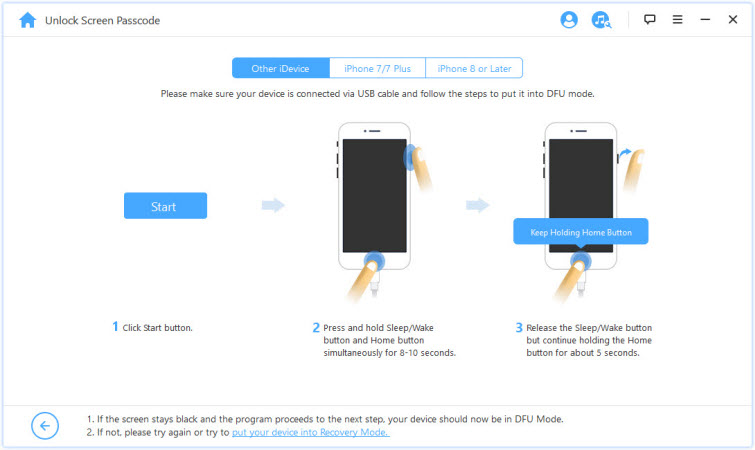
Step 2: Follow the LockWiper on-screen instructions to put your iPod touch into DFU mode. It's easy to do it if you follow the steps. When LockWiper jumps to the next page, you can release the buttons because your iPod touc is in DFU mode.
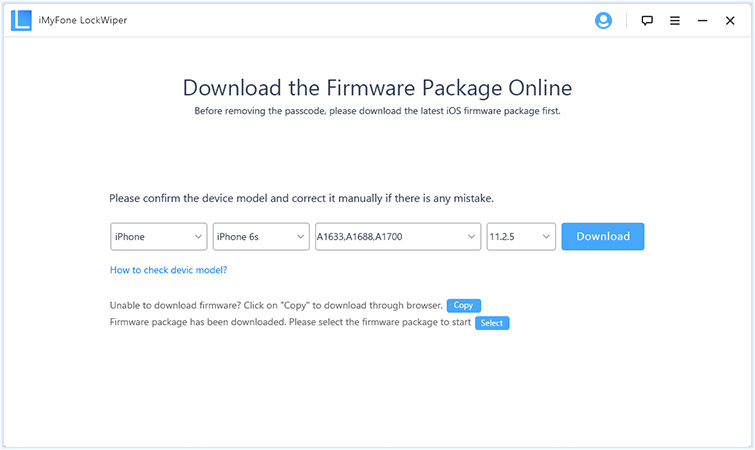
Step 3: Confirm the details of your device and click "Download". It will download the specific firmware for your iPod touch. When it's done, click "Start to Verify".
Step 4: Then click "Start Unlock". You will be asked to confirm the operation. Just type "000000" into the box and click "Unlock" to get started.

iMyFone LockWiper has been helped thousands of users to fix their iPhone, iPad or iPod touch. If you have any screen issue, get LockWiper to start it: Downalod for PC, Download for Mac. It will take a few minutes. LockWiper also receives positive feedback from authoritative IT review sites.
You May Like:
- Does iMyFone LockWiper Truly Work? Get the Facts Right >>
- Is There Free iMyFone LockWiper Official Registration Code >>
2. Fix a Disabled iPod touch via iCloud
This is the method you should use when you don’t have access to your iTunes. This method will reset your iPod touch if Find My iPod was enabled in iCloud and your iPod was registered with your Apple ID before it got disabled. You will need a working wireless network for this to work.
Follow these instructions to fix your disabled iPod touch:
Step 1. Use any other device (iDevice, Phone, Mac, Windows PC, etc.) and visit icloud.com/#find via a web browser. You can also use Find My iPhone app on any iDevice for this purpose.
Step 2. Log in with the same Apple ID that is associated with your disabled iPod touch.
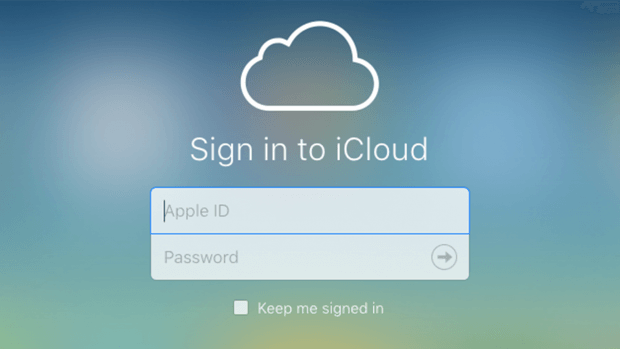
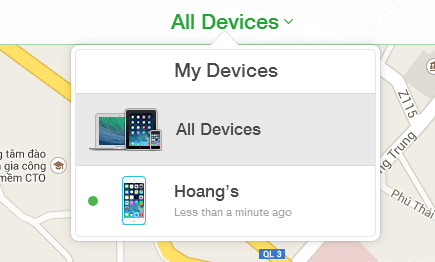
Step 3. After successfully logging in, navigate to All Devices section and find and select your iPod touch from the list.
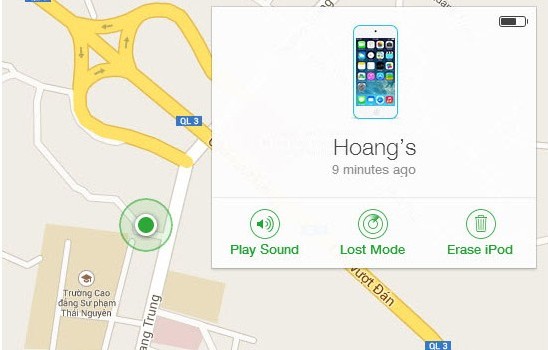
Step 4. Now click the Erase iPod and then confirm your action to proceed. The reset process will begin.
3. Reset a Disabled iPod touch with iTunes
If you have access to your computer, then it is recommended that you use this method to reset a disabled iPod touch and fix the problem. Here is steps on “iPod touch Disabled” fix:
Step 1. Connect your disabled iPod touch to your computer. Then launch iTunes and select your iPod touch.
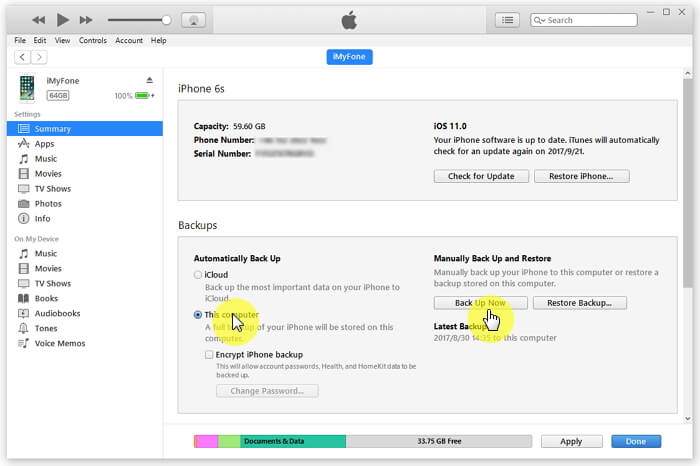
Step 2. Now create a backup of your iPod via the ‘Back Up Now’ option. When creating a local backup, make sure that ‘This Computer’ is selected. This is an essential step if you want to restore your data after resetting the iPod.
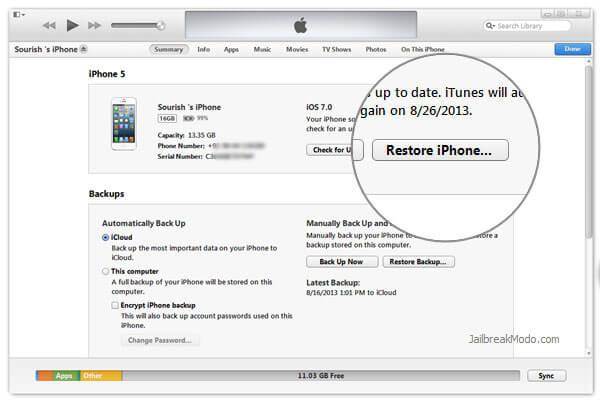
Step 3. Once the backup process is finished, click the ‘Restore iPod’ option to start the reset process.
Also Read:
- iPhone Could Not be Restored Can be Easily Solved >>
- Easily Fix “iTunes Was Not Installed Correctly Error 7” >>
4. iPod touch is Disabled? Fix This in DFU Mode
If none of the above mentioned methods worked, then you should give this method a try. DFU mode is just like the Recovery Mode of an iDevice. A lot of users claimed to have succeeded with this method when other methods failed. You will need to have iTunes installed on your computer for this method to work. However, your disabled iPod touch does not need to be synced with iTunes.
Follow these instructions to fix “iPod touch Disabled” issue:
Step 1. Turn off your iPod touch by using the Power button and sliding the Power slider when it is prompted.

Step 2. Connect the iPod touch to your computer when it is completely off and launch iTunes.
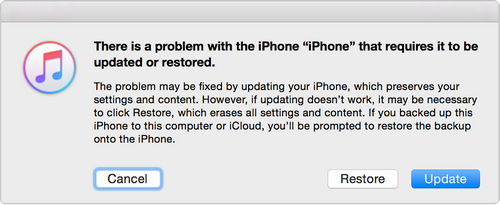
Step 3. Now press the Power button and Home button and hold them for a few seconds until iTunes reports that it has detected your iPod touch in Recovery mode.
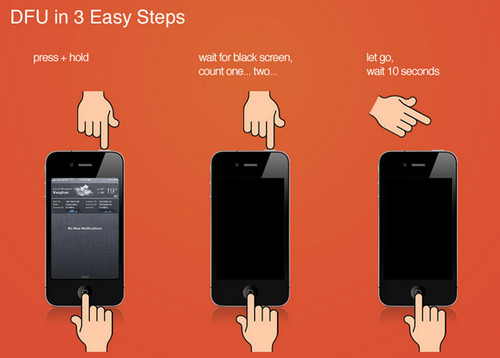
Step 4. Now click the Restore option to start the restore process. The restore process may take some time to complete.
Step 5. Once the process is completed, you will need to set up your iPod touch. When setting it up, you can use the backup (if it exists) to restore your data. If there is no backup, then all your existing data will be lost.


 August 24, 2023