


[Fixed] iCloud Notes Not Syncing: 5 Ways to sync Notes on iPhone, iPad and Mac
Category: iOS Data Recovery

8 mins read
Question
I'm facing an issue with my iPhone and iPad notes sync. Both devices share the same Apple ID, but I have 200 notes on iPad and only 56 on iPhone. Need help to resolve this syncing problem.
Apple's iCloud service lets you keep your data in sync across your iPhone, Mac, and iPad. This includes things like notes, contacts, photos, calendars, reminders, and even your Safari bookmarks and history. But sometimes, iCloud sync can go awry, and your notes might not be syncing between your devices.
If you're having trouble with iCloud sync, there are a few things you can do to fix it. In this article, we'll focus on how to fix iCloud notes not syncing across your iPhone, iPad, and Mac.
In this article:
- Part 1. Why Are My iCloud Notes Not Syncing on iPhone, iPad, and Mac?
- Part 2. 5 Ways to Fix iCloud Notes Not Syncing
- Way 1: Verify Apple System Status
- Way 2: Verify iCloud Account Consistency
- Way 3: Enable iCloud Service for Notes
- Way 4: Sign Out and Back In to iCloud
- Way 5: Restart Your iPhone and Mac
- Part 3. Effortless Method to Sync All iCloud Notes (Including Deleted)

- Part 4. How to Sync iPhone Notes to Mac or iPad
- Part 5. FAQs about iCloud Notes Not Syncing
Part 1. Why Are My iCloud Notes Not Syncing on iPhone, iPad, and Mac?
There are a few reasons why your iPhone notes might not be syncing with your other Apple devices.
- Your notes are stored locally: Make sure you haven't turned on the "On My iPhone" feature. This tells your device to store your notes locally instead of syncing them with iCloud.
- You're using different iCloud accounts: Check that you're using the same iCloud account on all of your Apple devices. If you're using different accounts, your notes won't sync.
- Your iOS is out of date: Make sure your iPhone and iPad are running the latest version of iOS. Outdated software can cause syncing problems.
- iCloud syncing for notes is turned off: Go to your iCloud settings and make sure that "Notes" is turned on. If it's off, your notes won't sync with iCloud.
iMyFone D-Back iPhone Recovery Expert
Safely & effectively retrieve your lost note, photos, messages, call history to iPhone/iPad/Mac without a backup
Part 2. 5 Ways to Fix iCloud Notes Not Syncing
Now that you know what might be causing your iPhone notes not to sync, let's go over how to fix it. Just follow these simple steps whenever you notice that your notes aren't syncing between your iPhone and Mac or other devices. Rest assured, the steps in this article are effective and easy to follow.
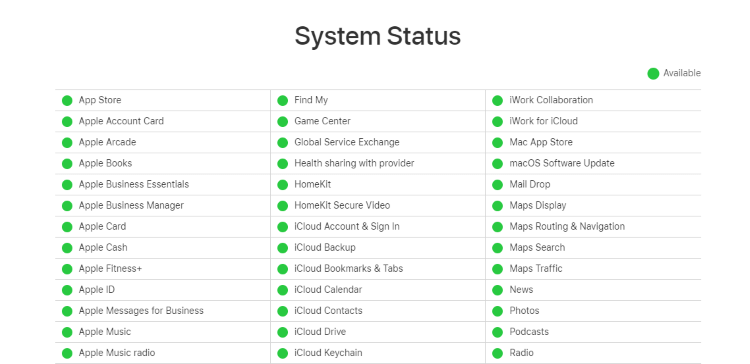
1 Way 1: Verify Apple System Status
Whenever you encounter issues with an Apple service, consult Apple's System Status page. Here, you can determine the status of various services. If the Apple Notes server is undergoing maintenance or is offline, Apple will provide information on the page, and you should wait until it's back online. If the status indicator is green, proceed to the next solution!
2 Way 2: Verify iCloud Account Consistency
If you notice a lack of synchronization between your iPhone and Mac notes, ensure both devices are linked to the same iCloud account.
Step 1: Open the 'Settings' on your iPhone.
Step 2: Select 'iCloud' or your profile name, and verify the login credentials. If not logged in, set up an iCloud account using your Apple ID and password. On your Mac, access 'System Preferences' and locate the iCloud option. For Windows users, install iCloud for Windows first.
For Your Mac:
Step : Navigate to System Preferences → Apple ID. You'll find your Apple ID on the left.
If the IDs differ, sign out, and sign back in with the desired Apple ID for syncing Apple Notes.
3 Way 3: Enable iCloud Service for Notes
Tips
Ensure that the iCloud service for Notes is enabled on both your iPhone and Mac to resolve syncing issues.
Enable iCloud Service for Notes on iPhone:
- Open "Settings" on your iPhone.
- Tap on your Apple ID at the top.
- Select "iCloud."
- Slide the switch next to "Notes" under "APPS USING ICLOUD" to the ON position.
Enable iCloud Service for Notes on Mac:
- Open "System Preferences."
- Click on "iCloud."
- Tick the checkbox next to "Notes."
4 Way 4: Sign Out and Back In to iCloud
Another effective solution to address notes not syncing between iPhone and Mac is to sign out of iCloud on both devices and then sign back in. This is particularly helpful when content is syncing to most devices but not one or two of them.
On iPhone:
1. Open "Settings."
2. Tap on your Apple ID at the top.
3. Scroll down and tap "Sign Out."
4. After about 30 seconds, sign in to your iCloud account again.
On Mac:
1. Open "System Preferences."
2. Click on "iCloud."
3. Click "Sign Out."
4. After about 30 seconds, sign in to your iCloud account again.
5 Way 5: Restart Your iPhone and Mac
If the issue of notes not syncing between iPhone and Mac via iCloud is due to uncertain software conflicts on either device, a simple restart can often resolve it. Regularly restarting your devices is advisable to prevent various software-related issues.
Restart iPhone 6/7/8:
1. Press and hold the "Sleep/Wake" button until the red slider appears.
2. Slide the slider to power off the iPhone.
3. After 30 seconds, press and hold the "Sleep/Wake" button until the Apple logo appears.
Restart iPhone X:
1. Press and hold both the Side button and either Volume Down or Volume Up buttons simultaneously until the slider appears.
2. Drag the slider to shut down your iPhone X completely.
3. After 30 seconds, press and hold the "Sleep/Wake" button until the Apple logo appears.
Restart Mac:
1. Click on the menu button in the upper left corner of your screen.
2. Click "Restart..." and confirm Restart on the pop-up menu.
Part 3. Effortless Method to Sync All iCloud Notes (Including Deleted)
If the steps above don't fix the problem, you might need to use a special tool to get your notes back. iMyFone D-Back is a professional data recovery tool that can help you get your iPhone notes back if they're not syncing.
1,000,000+ Downloads
Key Features:
- Selective or complete synchronization: Choose which notes you want to sync or sync all of them at once.
- Direct sync from iOS devices: Sync your notes directly from your iPhone or iPad to your computer.
- Sync from iTunes/iCloud backups: View and sync notes from your iTunes or iCloud backups to your computer.
- Sync deleted notes: Recover and sync even deleted notes if you need them.
- No impact on existing backups: Syncing your notes will not affect your existing backups.
- Multiple synchronization formats: Sync your notes in HTML or CSV format.
- Supports over 18 other data types: Sync more than just notes, including contacts, messages, photos, and more.
You have 3 options to sync your iPhone notes to Mac/iPad with D-Back:
- Option 1. Sync iPhone Notes Directly to Your Compute
- Option 2. Syncing iPhone Notes from iTunes Backup
- Option 3. Sync iPhone Notes from iCloud Backup
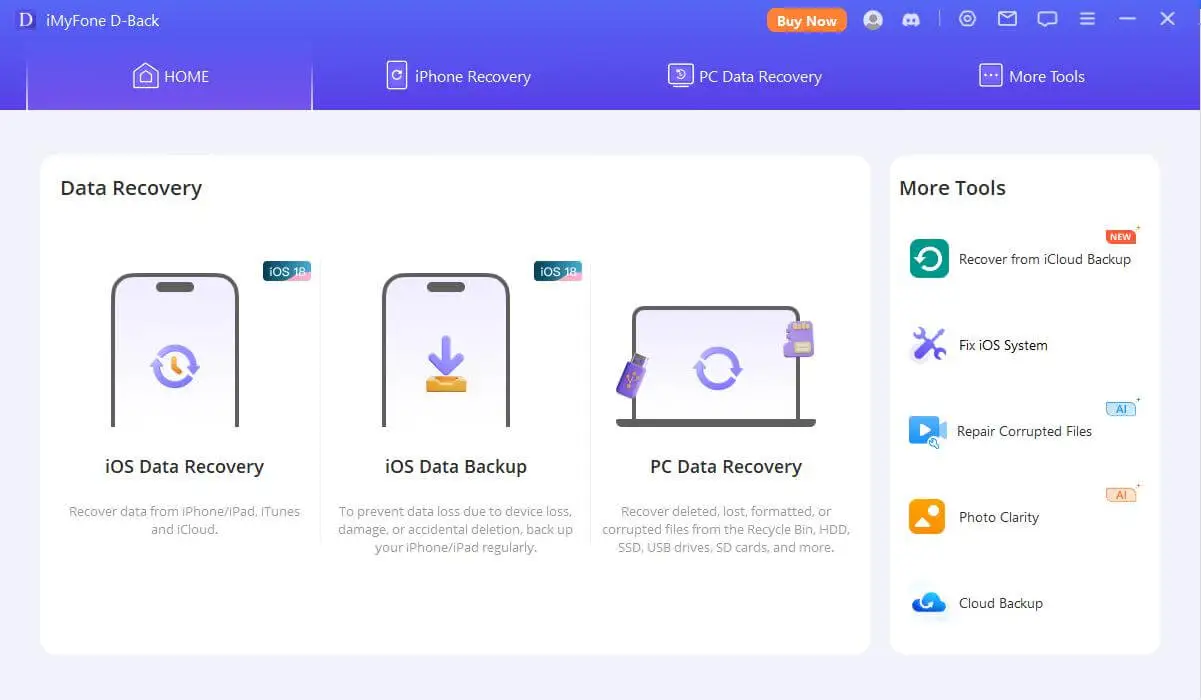
Option 1. Sync iPhone Notes Directly to Your Computer
Step 1: Launch it on your computer. Begin at the 'iPhone Recovery' tab and click 'Start'.
Step 2: Connect your device to the computer. Click 'Next' once the program detects your iDevice.

Step 3: In the menu, choose the notes type to sync. Tap 'Notes' among the options to initiate the scanning process.

Step 4 Once the scanning is complete, preview and choose the notes you want to sync.

Option 2. Syncing iPhone Notes from iTunes Backup
Step 1: Click 'Start' in the 'Recover from iTunes Backup' tab.

Step 2: Select the specific iTunes backup from which you want to recover the data and click 'Next'. Enter your password if the chosen backup is encrypted.
Step 3: In the menu, choose the type of data you want to recover. Tap 'Notes' among the options.
Step 4: After scanning is complete, preview and select the notes you want to sync by clicking 'Recover'.
Option 3. Sync iPhone Notes from iCloud Backup
Step 1: Click 'Start' in the 'Recover from iCloud Backup' tab.
Step 2: Input your account details. Rest assured, iMyFone does not retain any record of your account information or content.

Step 3: Choose the iCloud backup from which you want to sync data and click 'Next'.

Step 4: Choose the type of notes data to synchronize.
Tap 'Notes' among the options, then click 'Recover'.
Part 4. How to Sync iPhone Notes to Mac or iPad
Syncing iPhone Notes to Mac or iPad without iCloud
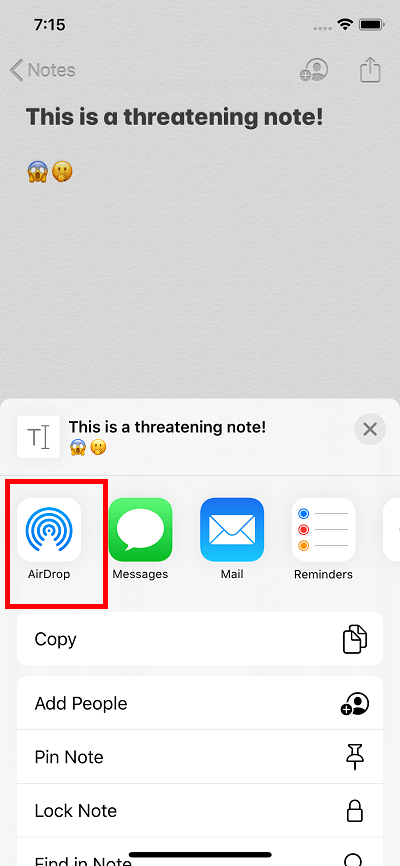
While iCloud is the most convenient way to sync notes across Apple devices, it's not the only option. You can also sync your iPhone notes to a Mac or iPad using AirDrop, a built-in wireless file-sharing feature. Here's how to do it:
Prerequisites:
Ensure that both your iPhone and Mac or iPad are turned on and connected to the same Wi-Fi network.
Steps:
- On your iPhone, open the Notes app and locate the notes you want to sync.
- Tap the Share icon .
- Choose the AirDrop option in the sharing menu.
- Choose the name of your Mac or iPad from the list of AirDrop recipients.
- On your Mac or iPad, a pop-up notification will appear asking you to accept the incoming notes.
- Click the Accept button.
The selected notes will be transferred from your iPhone to your Mac or iPad.
Part 5. FAQs about iCloud Notes Not Syncing
1 How can I check if iCloud Notes is enabled on my devices?
- On iPhone: Go to "Settings" > [Your Name] > "iCloud" > toggle "Notes" on.
- On Mac: Open "System Preferences" > "Apple ID" > check "Notes" under "Apps on this Mac using iCloud."
2 What if my notes are syncing to some devices but not others?
Sign out of iCloud on the affected devices, wait 30 seconds, and sign back in. Make sure all devices are linked to the same Apple ID.
3 Can I recover deleted icloud notes
Yes, you can recover deleted iCloud notes on iPhone. If you need to recover deleted iCloud notes within 30 days of deletion. Here's how:
- Go to iCloud.com and sign in with your Apple ID.
- Click on the Notes app.
- In the left sidebar, select Recently Deleted.
- Select the notes you want to recover and click on the Recover button.
The notes will be restored to your iCloud account and will be accessible on all of your devices that are signed in with the same Apple ID.
If you have deleted your iCloud notes more than 30 days ago, you will need to use a third-party data recovery tool to recover them. We recommend iMyFone D-Back iPhone data recovery software to retrieve deleted notes on iPhone, you can preview the deleted notes before the final recovery.
Conclusion
We hope this guide has helped you tackle those pesky syncing issues with your iPhone notes. Remember, you don't need to be a tech wizard to solve iCloud Notes Not Syncing problem. No need to rush to the phone repair shop for every minor hiccup.
Feel free to try out different methods until you find the one that suits your needs and preferences. If you're looking for a quick and effective solution, iMyFone D-Back is always a reliable choice. And we'd love to hear from you if you've got any other tips or tricks to share for overcoming note syncing woes. Let us know in the comments below!
- Supports a wide range of data types such as messages, photos, videos
- Fix a variety of iOS issues, including being stuck on the Apple logo, screen not turning on, recovery mode loop and black screen, ect.
- AI repair broken/corrupted files, photos and videos.
- 100% Work with a variety of data loss scenarios.
- Retrieve lost data from different types of devices
(Click to rate this post)
Generally rated 5 (256 participated)
Rated successfully!
You have already rated this article, please do not repeat scoring!