iPhone restrictions are supposed to be used as parental controls. They keep the iPhone user from accessing the restricted device functions. For example, they can help you restrict access to certain websites, the installation or purchase of certain apps from the App Store, and more. To make sure that the kids do not have the ability to change the restrictions, they are safeguarded using a 4-digit passcode.
Maybe your kid has grown and you want to change the restrictions to give the kid access to more features. If you have forgotten the 4-digit passcode, changing the restrictions can be hard. However, this does not mean that it is impossible. In this article, we plan on showing you how to disable restrictions without passcode. But, is this really doable?
1. Use iPhone Unlocker to Disable iPhone Restrictions without Passcod
For most users, they don’t want to affect the device data when disabling Restrictions. That’s why iMyFone LockWiper is the most recommended way to unlock Restrictions without passcode. It’s an iPhone passcode unlocker which can unlock various locks for iOS, including the Restrictions passcode. It’s not just the best method but also the easiest method. What makes it perfect is that it has more benefits to offer.
What You Can Enjoy with LockWiper:
- Just disable the Restrictions without requiring any passcode, leaving no damage of the device data.
- Recover 4-digit passcode for Screen Time on iOS 13/14/15/16 when you forgot it.
- Easily remove the previous Apple ID or iCloud account without password, leaving no traces.
- Instantly unlock iPhone screen password whenever it’s locked or disabled.
- Featuring in friendly interface and easy steps, it’s a self-service program that anyone can handle lock issue at home.
Here is the video tutorial to reset restrictions passcode with ease.
Only 3 Steps Needed to Disable Restrictions without Passcode:
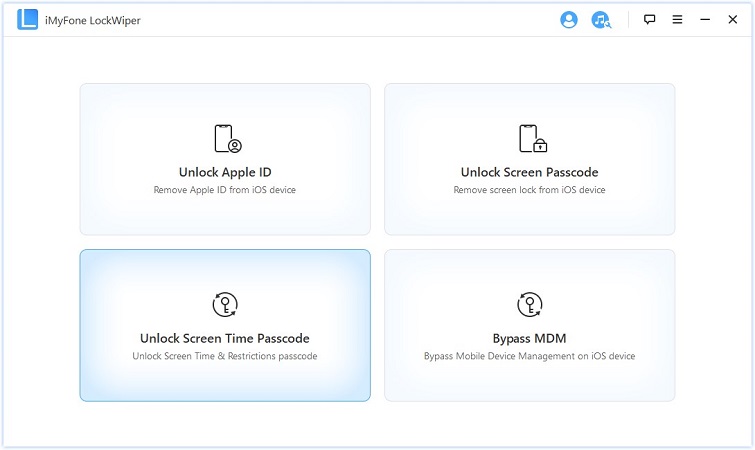
Step 1: After downloading iMyFone LockWiper on your PC or Mac, launch the tool and choose “Unlock Screen Time Passcode” feature.
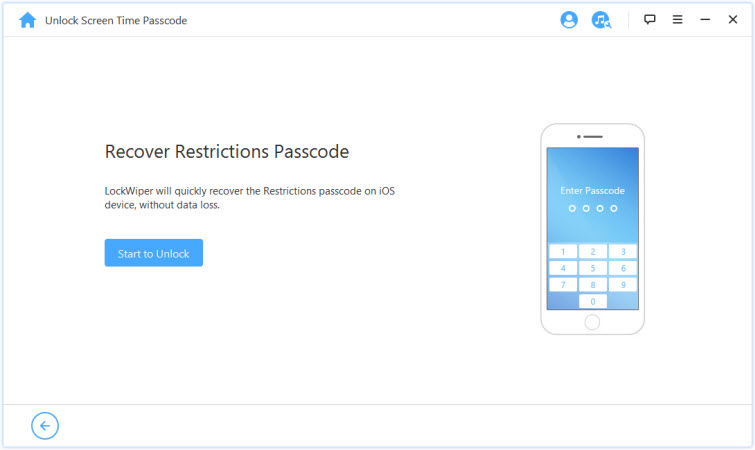
STep 2: Connect your device to the computer and trust it if required. Click “Start to Unlock” to proceed.
Step 3: LockWiper will start to load your device data and then recovering the Restrictions passcode. Just wait for a few minutes to complete it.
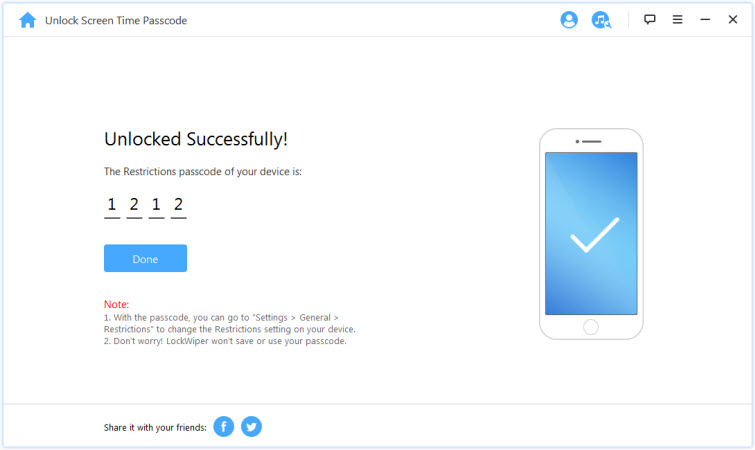
When it’s done, it’ll show you the existing 4-digit passcode for your Restrictions settings. Use the passcode, you can go to “Settings > General > Restrictions” to disable it.
2. Utilize iCloud to Remotely Disable Restrictions on iPhone without Passcode
The iCloud Find My iPhone feature can help you erase your iPhone data and settings remotely, and Restrictions is included. To learn how to turn off restricted mode on iPhone without passcode using iCloud, follow the steps below:
Step 1: On your computer’s web browser, visit icloud.com/find.
Step 2: Sign in using your Apple ID which was synced to your device.
Step 3: Find and click “Find iPhone” option.
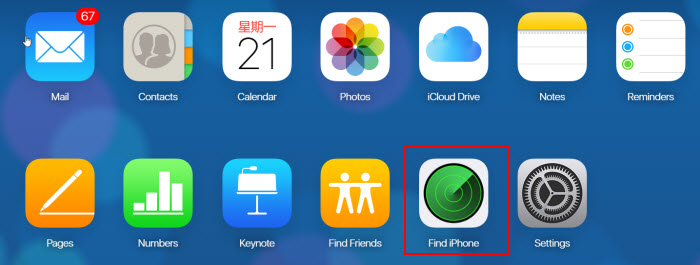
Step 4: Then tap All Devices at the top of the browser window.
Step 3: Choose the device whose restrictions passcode you wish to turn off. Tap Erase [device] to turn off the restriction’s passcode.
![RErase [device]](https://images.imyfone.com/en/images/2018/05/erase-iphone-from-icloud.jpg)
Limits of This Method:
- Your iPhone must be signed in with an iCloud account and have “Find My iPhone” enabled.
- Your iPhone should be connected to internet.
- All the data on your device will be completely removed from your device. There is no chance to recover it.
3. Use iTunes to Disable iPhone Restrictions without Passcode
If you had already synced your device with iTunes before, you can easily turn off the Restriction using the Apple tool. It will restore your iPhone and disable all the settings. You need to follow the steps below:
Step 1: Connect your iOS device to the computer you had synced with and launch iTunes.
Step 2: Allow iTunes some time for it to sync the device and create a backup.
Step 3: After the backup is created, tap Restore [your device] and confirm it.
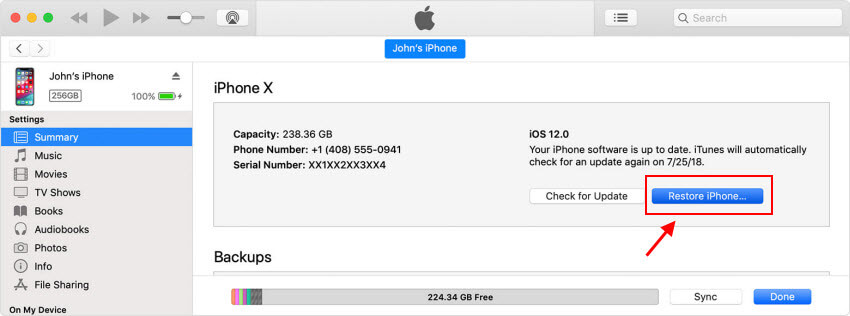
Step 4: Just follow the onscreen steps to complete it. When it’s done, you need to set up your device again.
Limits of This Method:
- The iTunes you use must be the one you have synced with your device before. If it asks you to enter passcode, you need to change to another synced computer.
- Everything on your device will be permanently removed. You’ll lose all your data.
Wrap Up
If you have Restrictions on a device, you will not have the ability to use the device fully. If you cannot remember the 4-digit Restriction’s passcode, it is impossible to change or turn off the restrictions. This article teaches you how to disable restrictions without passcode. The best method that you should use is the iMyFone LockWiper. Unlike iCloud and iTunes which will delete all your device data, LockWiper will keep your data intact. If you are worried that you may pay for it and find that it does not work, you don’t have to worry. The tool does have a free trial version.


 February 17, 2023

![Reset Restrictions Passcode in 1 Min! [2022 Latest Solution]](https://img.youtube.com/vi/RDMbi9BROOY/sddefault.jpg)