


How to Delete Header in Word with or Without Page Numbers
Category: Edit PDF

4 mins read
Headers can make a document look polished, but there are times when you just want them gone—especially if they interfere with page numbers or layout. Whether you're working on a resume, report, or template, knowing how to delete header in Word with or without page numbers can save you frustration. This post walks you through simple ways to clean up your Word document, and for those dealing with PDFs, we’ve got you covered there too with tips on removing headers from PDF files.

In this article:

How to Remove Header and Footer in Word
Want to give your Word document a clean, professional look? Removing headers and footers is easier than you think. Can’t delete header in Word? Here’s what to do:
Step 1: Open Your Document and Enter Header/Footer Mode
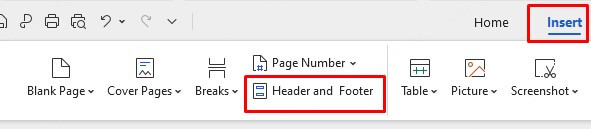
Begin by opening your Word document. To enter the header or footer section, go to the Insert tab on the top menu, then click Header or Footer. This will open the Header & Footer Tools ribbon and allow you to edit the selected section.
Step 2: Select and Delete the Content
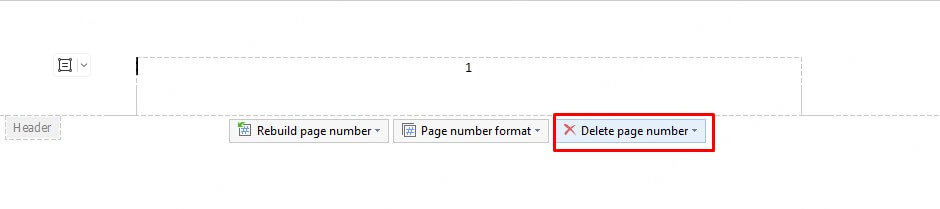
Once you're in the header or footer area, highlight all the content inside it—this may include text, images, lines, or page numbers. Then press the Delete or Backspace key on your keyboard to remove everything from that section.

Tips
If your document has multiple sections, you may need to repeat this process for each one individually. Also, check if the sections are linked—disable “Link to Previous” to avoid unintentional changes in other sections.
Step 3: Exit the Header and Footer View
To exit editing mode, click Close Header and Footer in the top-right corner of the toolbar. Alternatively, you can double-click anywhere outside the header or footer area. Your document will now be free of headers and footers.

How to Delete Header in Word Without Removing Footer
Need to remove the header from your Word document but keep the footer untouched? Whether you’re cleaning up a layout or updating a template, it’s easy to delete just the header without affecting anything below. Follow these simple steps:
Step 1: Access the Header Area
Open your Word document and double-click the top margin of any page to activate the header section. You’ll now be in header editing mode, and the Header & Footer Tools tab will appear at the top.
Step 2: Select and Delete Header Content
Carefully highlight only the content inside the header—this could include text, images, or logos. Make sure not to click or edit anything in the footer. Then press the Delete or Backspace key to remove the selected elements.

Step 3: Exit the Header and Footer View
To finish, click Close Header and Footer in the toolbar, or simply double-click outside the editable area. Your header will now be gone, while your footer—including any page numbers—will remain in place.
Your footer will remain untouched while the header is deleted.
How to Remove Headers from Specific Pages Only
Want to remove the header from just one page—like the cover page or a new section—without affecting the rest of your Word document? Microsoft Word gives you control over which pages display headers by using layout tools and section breaks. Here’s how to do it:
Option 1 Remove Header from the First Page Only
If you only want to remove the header from the first page (common for title pages or resumes), follow these steps:
Step 1: Open your document and double-click the header area to activate it.
Step 2: Go to the Header & Footer Tools > Design tab.
Step 3: Check the box for Different First Page.
Step 4: Delete the header content from the first page. The rest of your pages will keep their headers.
Option 2 Remove Header from a Specific Page Using Section Breaks
To remove a header from a specific page in the middle of your document, use section breaks:
Step 1: Place your cursor at the end of the page before the one where you want to remove the header.
Step 2: Go to Layout > Breaks > Section Breaks > Next Page.
Step 3: Now scroll to the page where you want the header removed and double-click the header.
Step 4: In the Header & Footer Tools, click Link to Previous to turn it off.
Step 5: Delete the header content from this section.
Step 6: Repeat the process if needed for the following sections.
Note: Make sure you’ve inserted another section break after the page as well, if you want the header to return in later pages.
How to Remove Header and Footer in PDF
Unlike Word documents, PDFs are designed to be consistent across devices—making them perfect for professional sharing, printing, and archiving. But if your file includes outdated or unnecessary headers and footers, it can affect readability and presentation. That’s where removing them directly from the PDF comes in handy.
Using a reliable tool like PDFacademy, you can delete headers and footers from your PDF quickly and without compromising the layout.
Found this helpful? Share it with others or explore more smart PDF solutions at PDFacademy.
Step 1: Launch PDFacademy and Open Your PDF
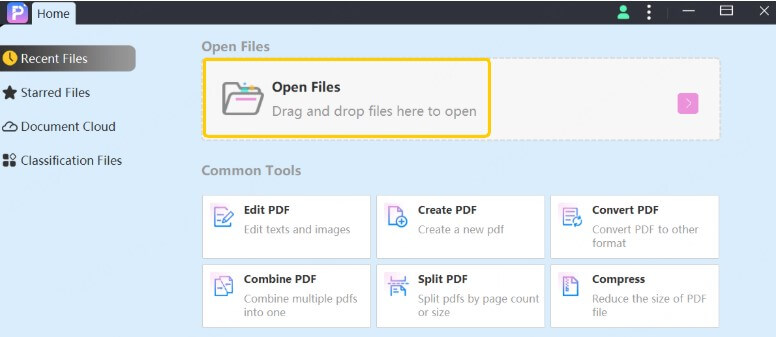
Open PDFacademy on your computer. Click on “Open File” or drag and drop your PDF into the interface. Once loaded, your document will be ready for editing.
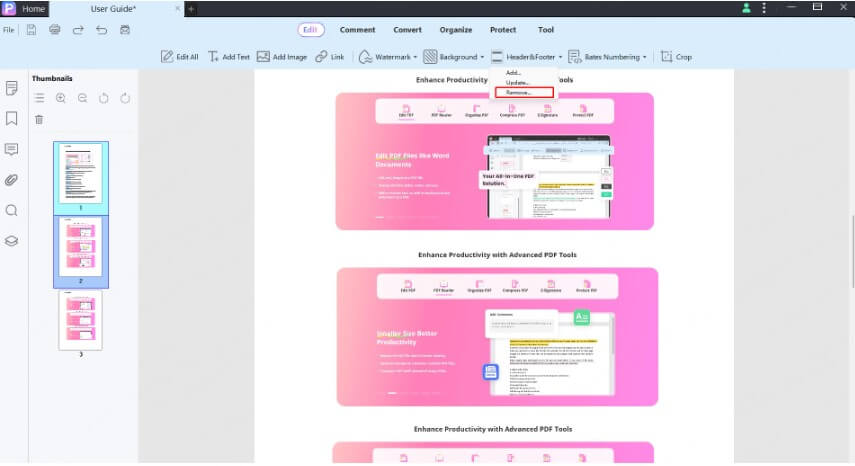
Step 2: Navigate to Edit > Header & Footer > Remove
Click the “Edit” option in the top toolbar. From the dropdown menu, select “Header & Footer”, then click on “Remove.” This command will delete all existing headers and footers from every page of your document instantly.
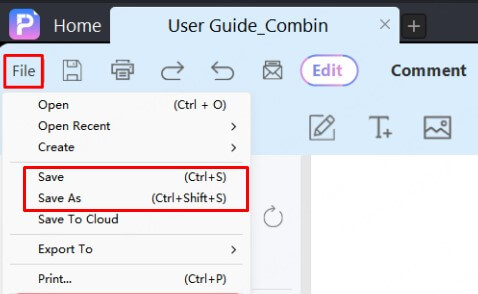
Step 3: Save Your Updated PDF
After the headers and footers are removed, click “File” > “Save” or press Ctrl + S (Windows) / Cmd + S (Mac) to save your clean version. You now have a polished PDF, free of any distracting top or bottom text.
FAQs about How to Delete Header in Word
1 What if my page numbers are in the header?
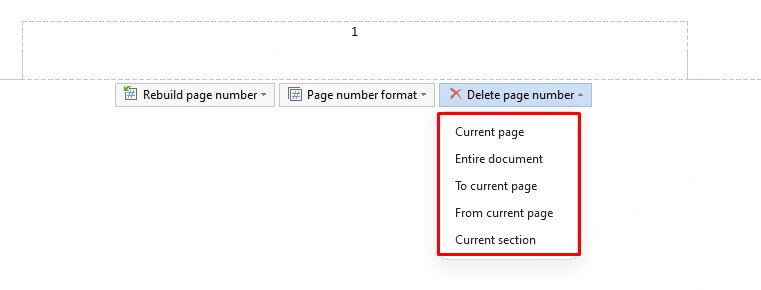
You can move the page numbers to the footer first. Go to Insert > Page Number > Bottom of Page, then delete the header without losing your page numbers.
2 Is it possible to remove all headers in a multi-section document at once?
Yes, you can remove all headers at once only if all sections in your Word document are linked using the “Link to Previous” feature. Otherwise, you’ll need to delete headers from each section individually. To avoid this hassle, you can convert your document to PDF and use PDFacademy to quickly remove all headers in one go, ensuring a clean, uniform look without worrying about section breaks or manual edits.
3 Will deleting the header affect my document layout?
Deleting the header in Word may reduce the top margin and affect your layout. You can fix this by adjusting the top margin under Layout > Margins. For PDFs, tools like PDFacademy let you remove headers cleanly without changing the original layout—making it quick and easy to finalize your files.
Conclusion
Deleting headers in Word—whether they include page numbers or not—is simple once you know the right steps. Remember to check where your page numbers are placed to avoid accidentally removing them. For an even easier and more reliable way to manage headers, especially in finalized documents, try using PDFacademy. With just a few clicks, you can remove headers and footers from PDFs without worrying about formatting issues. Give PDFacademy a try today to streamline your document editing!
(Click to rate this post)
Generally rated 4.7 (256 participated)
Rated successfully!
You have already rated this article, please do not repeat scoring!