


User Guide of iMyFone Fixppo
iMyFone Fixppo is a desktop software that supports one-click fixing iOS devices, with a total of five core functions, namely Apple System Repair, Reset Devices, iOS Upgrade/Downgrade, Data Backup/Restore and Free Enter/Exit Recovery Mode.
Part 1: Apple System Repair
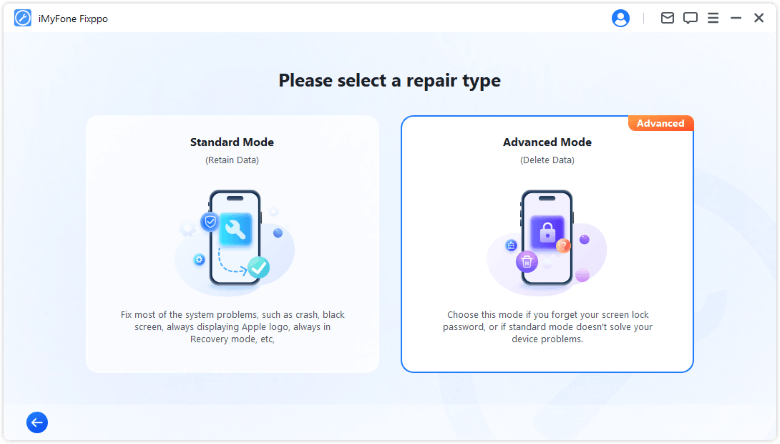
This section provides two primary features: Standard Mode Repair and Advanced Mode Repair.
- Standard Mode Repair - The choice of 90% of users: Solve common iDevices problems such as "iPhone boot loop", "iPhone stuck on Apple logo" without data loss.
- Advanced Mode Repair: Solves problems that standard mode can't, help you get rid of iOS problems and fix your system, but will erase the data.

Standard Mode Fix iOs/iPadOs/tvOS Without Losing Data
Step 1: Launch iMyFone Fixppo and Choose Standard Mode
If you don't want to lose any data, please select the Standard Mode after entering the Apple System Repair on the interface. This mode can effectively solve all common iOS/iPadOS problems.

Step 2: Connect Your Device to Computer
After selecting Standard Mode, please connect your iOS device to the computer. If your device is not detected, Fixppo will assist you in entering Recovery Mode first.
- To successfully fix iOS issues, it is highly recommended that you use Apple's original Lightning USB cable to connect your iOS device to the computer.

If your device can't be detected under Recovery Mode, please enter DFU Mode with the following instruction.

Step 3: Download the Firmware
Now, you need to download the firmware to fix your device. The program will automatically detect your device model and display all available firmware versions. Choose your preferred version and click the Download button.

Please note that this may take some time as the file size is approximately 5GB.

- If you failed to download the firmware package, you can download it through your browser by clicking the download via browser.
- If you have already downloaded the firmware package on your computer, simply click Select it to manually import the firmware.
Step 4: Fix iOS/iPadOS/tvOS Issues
Once the firmware is downloaded, click Start Standard Repair button for the program to begin fixing your device.

The program will now begin fixing your device. Please note that do not use or unplug your device during the process.

It won't take long for the program to repair your device, which will restart automatically after the process is complete.

If it fails to repair, you can retry or switch to Advanced Mode Repair.
Advanced Mode to Fix Severe iOS Issues
Step 1: Launch iMyFone Fixppo and Choose Advanced Mode
If you have forgotten the password or are unable to use Standard Mode to fix the problem, Advanced Mode is available to assist you. Please note that using this mode will erase all your data.
Step 2: Connect Your Device to Computer
After selecting Advanced Mode, please connect your iOS device to the computer. If your device is not detected, Fixppo will assist in entering the Recovery Mode.
If your device can't be detected under Recovery Mode, please enter DFU Mode with the following instruction.
Step 3: Download the Firmware
Likewise, choose the firmware you need then click the Download button to get it.

Please note that this may take some time as the file size is approximately 5GB.

- If you failed to download the firmware package, you can download it through your browser by clicking the download via browser.
- If you have already downloaded the firmware package on your computer, simply click Select it to manually import the firmware.
Step 4: Fix iOS/iPadOS/tvOS Issues
When the firmware is downloaded, click Start Advanced Mode button for Fixppo to begin repairing your deice.

The program will now begin fixing your device. Please note that do not use or unplug your device during the process.

The process will be completed shortly, and your iPhone will restart automatically once the program finishes its task.

Part 2: iOS Upgrade/Downgrade
This section provides two primary features: iOS Upgrade and iOS Downgrade.
- iOS Upgrade: For users who can't upgrade their iOS system through the normal steps, no data loss during the process.
- iOS Downgrade: For users who want to revert to the previous version, data will be erased and you need to make a backup first.

iOS Upgrade
Step 1: Select Upgrade iOS
Choose to upgrade the iOS system while retaining the device's data.

Step 2: Connect Your Device to Computer
Connect your device to the computer using a USB cable and follow the on-screen instructions to enter Recovery Mode.
Step 3: Download the Firmware
The program will detect your device and display the available firmware version for an upgrade. You can customize the download path. Then, click the Download button to get the iOS firmware.

Step 4: Start Upgrade iOS
Your device is now fully prepared for the iOS upgrade. Click Start Upgrade iOS button to begin the process of upgrading your device.

Then, please wait for the program to complete its task. It is important to keep the device connected to the computer during the entire process. When you see the Done message, you can continue using your device.

iOS Downgrade
Step 1: Select Downgrade iOS
Choose to downgrade the iOS system, but your device's data will be erased.

Step 2: Connect Your Device to Computer
Connect your device to the computer using a USB cable and follow the on-screen instructions to enter Recovery Mode.
Step 3: Download the Firmware
The program will detect your device and display the available firmware version for a downgrade. You can customize the download path. Then, click the Download button to get the iOS firmware.

Step 4: Start Downgrading iOS
Now, the firmware can be used to downgrade your iOS system. Click Start Downgrade iOS to begin the process.

Please wait patiently for the process to finish and avoid using it during the downgrading process. Once completed, you will see a pop-up message indicating Done, confirming that you have successfully downgraded your iOS system to the previous version.

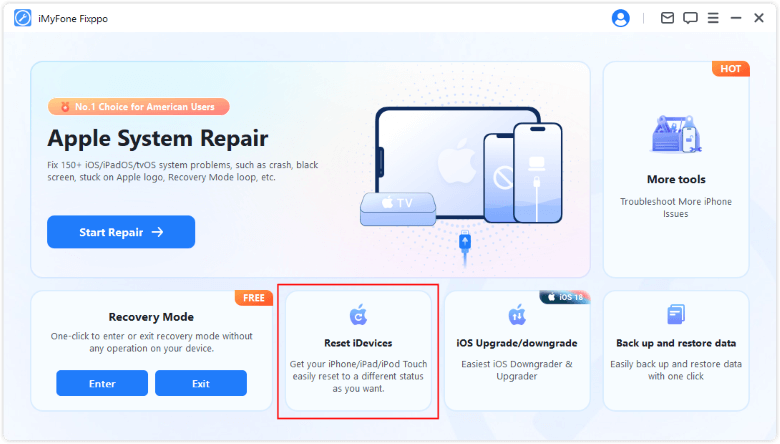
Part 3: Reset iPhone/iPad/iPod touch Easily
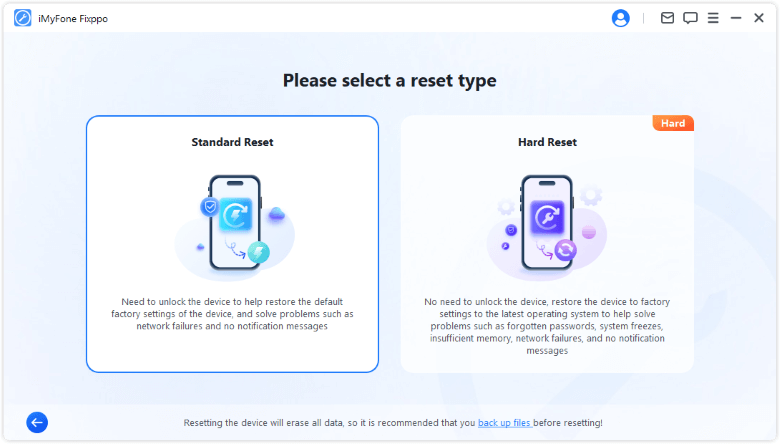
This section provides two primary features: Standard Reset and Hard Reset. Both features will cause data loss.
- Standard Reset: You can use this feature to reset your device with 1 simple click.
- Hard Reset: If you have forgotten your device password, we recommend that you perform a hard reset to return your device to its factory settings, and your device will be updated to the latest version of iOS.
Standard Reset
Step 1: Select Standard reset
This mode is recommended when you can unlock your device with the passcode.
Step 2: Connect Your Device to Computer
After selecting Standard Reset, connect your device to the computer. Enter your iDevice's password and trust the computer. Then, click the Start Standard reset button to begi the resetting process.

Congratulations! Your device has been successfully reset. Click Done button to complete the process.

Hard Reset
Step 1: Select Hard reset
When you are unable to unlock your iDevice or when your device is bricked not turning on, please choose the mode.

Step 2: Connect Your Device to Computer
Connect your device to the computer using a USB cable and follow the on-screen instructions to enter the Recovery Mode.

When you proceed, a pop-up window will appear asking if you want to back up the iPhone. If so, click Back Up Now.
Step 3: Download the Firmware
Aftering backing up your iPhone, iMyFone Fixppo will automatically detect the latest firmware version. Click the Download button to get it.

Step 4: Start Hard Reset
Now, the firmware can be used to perform a Hard Reset on your device. Click Start Hard Reset to initiate the reset process.

Please wait for the program to complete its task. It is important to keep the device connected to the computer without using it during the entire process. Finally, you will see a Done message indicating that the process is completed.

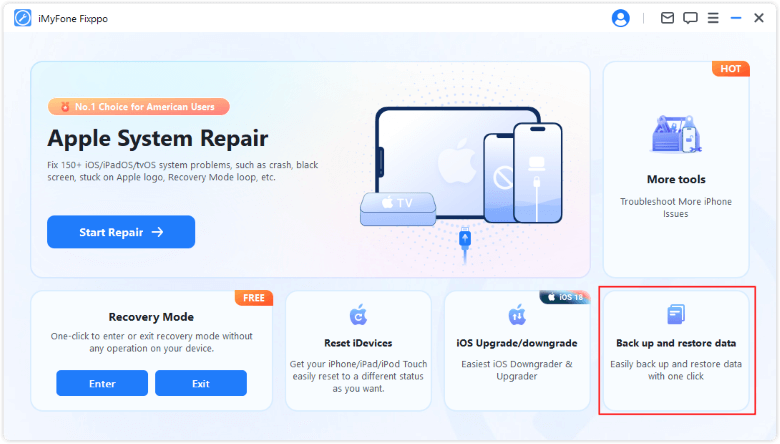
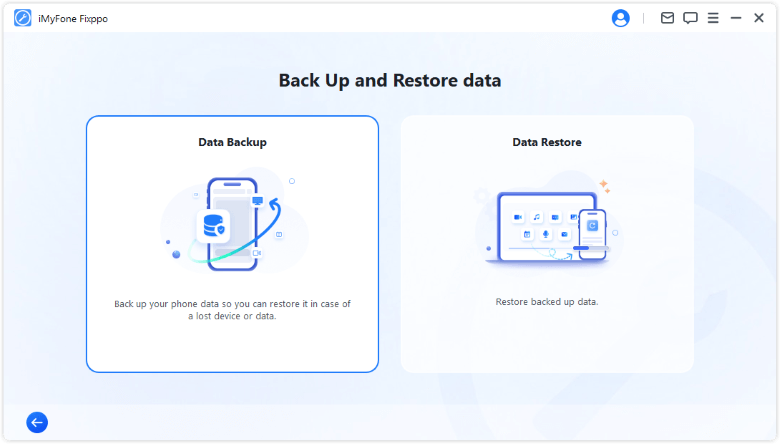
Part 4: Back Up/Restore Data
This section allows users to back up their data before downgrading, resetting or repairing the device, so that after the process is completed, the original data can be easily restored through the restore function, avoiding any data loss.
- Data Backup: You can easily backup the data of your entire iOS device with one click.
- Data Restore: Restore backed up data to your iOS device with a single click.
Data Backup
Step 1: Select Data Backup
Choose the Data Backup tab from the interface.
Step 2: Connect Your Device to Computer
Connect your device to your computer using the USB cable and follow the on-screen instructions.

Step 3: Start to Back Up
When your device is detected, you can see some info about it. Choose where you want to store the backup files and click the Start Back Up button to begin.

The software will automatically start backing up the data in the device to the preset path. Just be patient and wait for the backup to finish.

When you see the Done prompt, it means you've completed the backup process.

Data Restore
Step 1: Select Data Restore
Choose the Data Restore tab from the interface. You can restore the data to the original or a new device.

Step 2: Connect Your Device to Computer
Connect your device to the computer using a USB cable and follow the on-screen instructions.
Step 3: Choose the Backup Files You Need
In the list of data restore, select the files you have backed up before and click the Restore to Device button.

Notes: Read the Notes before restoring the backed-up files
Before restoring, please read a few notes ensure that your device can complete the data restore successfully. After confirming that there are no problems, click Start Restore button to begin.

The software will automatically start restoring the backup data to your device. The process won't take long.

When the Done message appears. your iPhone will be restarted automatically. You can turn it on to check out all the restored data.

Part 5: Free Enter or Exit Recovery Mode with One Click
With a single click, you can get your iPhone/iPad/iPod touch/Apple TV in or out of recovery mode for free. This is quite useful when your Home button is broken that you can't enter the recovery mode or your iPhone is stuck on recovery mode that you want to exit.

Enter Recovery Mode
Step 1: Connect Your Device to Computer
Please connect your iOS device to your computer.
- To ensure that you can enter the recovery mode successfully, it is highly recommended that you connect your iOS device to your computer using Apple's original Lightning USB cable.
Step 2: Click to Enter Recovery Mode
Once your device is connected to the computer, Fixppo will detect it. Then, you can click on the Enter button to get your device enter recovery mode directly.

In a short while, you will see a message confirming that you have entered recovery mode successfully.

Exit Recovery Mode
Step 1: Connect Your Device to Computer
Please connect your iOS device to your computer.
- To ensure that you can enter the recovery mode successfully, it is highly recommended that you connect your iOS device to your computer using Apple's original Lightning USB cable.
Step 2: Click to Exit Recovery Mode
Once your device is connected to the computer, Fixppo will detect it. Then, you can click on the Exit button to get your device out of recovery mode directly.

In a short while, you will see a message confirming that you have successfully exited recovery mode.

Part 6: Troubleshooting
Issue: Device connected but not recognized
Step 1: Unlock the device screen lock
Ensure that your device is turned on and unlocked. After unlocking, select "Trust" on the device so that the data cable can function properly.
Step 2: Check the USB port and reconnect the device
The USB port on your computer equipment might have poor contact. Try using a different USB port to reconnect the device.
Step 3: Replace the USB cable
If the data cable is damaged or can only be used for charging, consider replacing it with a new one. We recommend using Apple's original data cable for the best compatibility and performance.
