


User Guide of iMyFone D-Back Hard Drive Recovery for Windows
D-Back for PC data recovery is designed to help everyone recover deleted and lost files in a few easy steps. Available on both Windows and Apple computers, it supports the recovery of over 1000 file formats from internal hard drives, memory cards, USB drives, external hard drives, and even crashed computers.
Download and Install D-Back Hard Drive Recovery for Windows
Step 1: Download D-Back Hard Drive Recovery for Windows
D-Back for PC data recovery is compatible with both Windows and Mac OS; just download the version that suits your system.
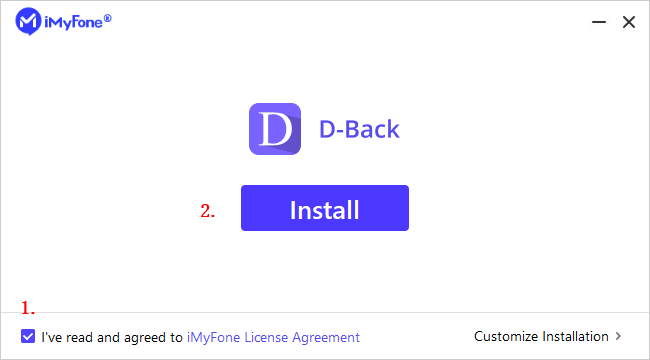
Step 2: Install D-Back Hard Drive Recovery for Windows
Double-click the downloaded file and follow the guide to complete the installation. Once you click on the "Install" option, it starts installing. Wait for a few minutes until it has completely installed, then launch it on your computer.
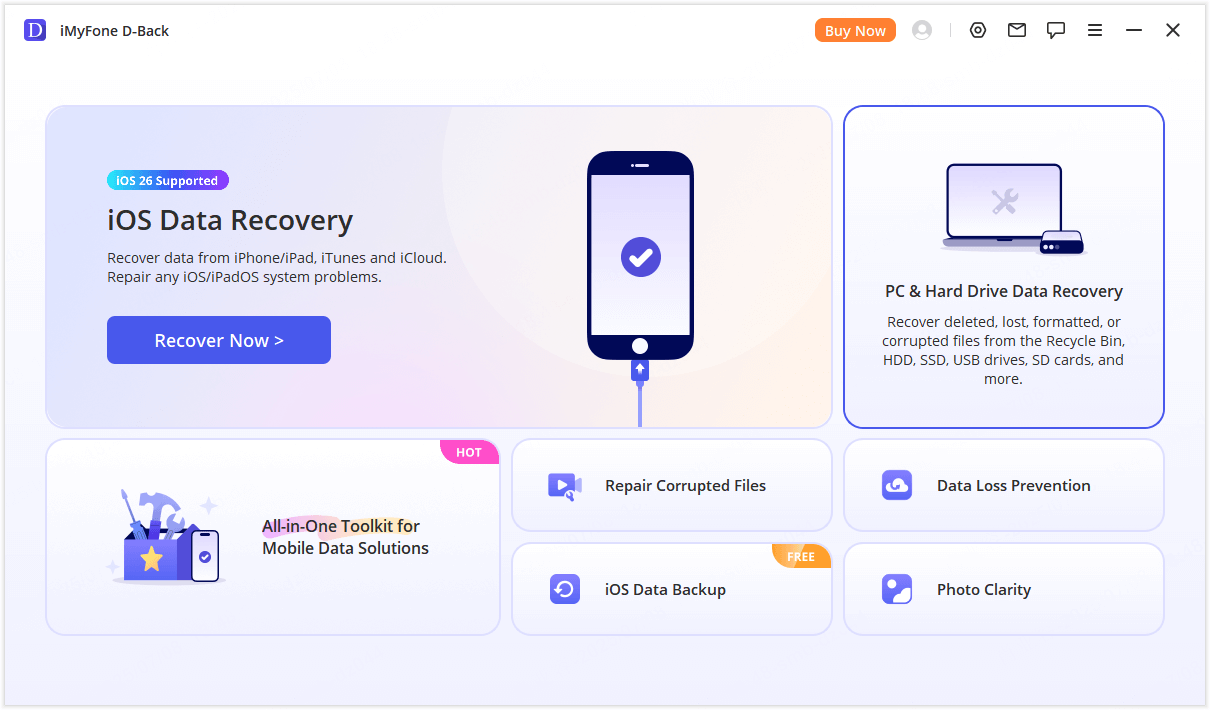
Recover Files from Computer
Step 1: Select the Function you Need
Start the program and select "PC & Hard Drive Data Recovery" on the main interface.
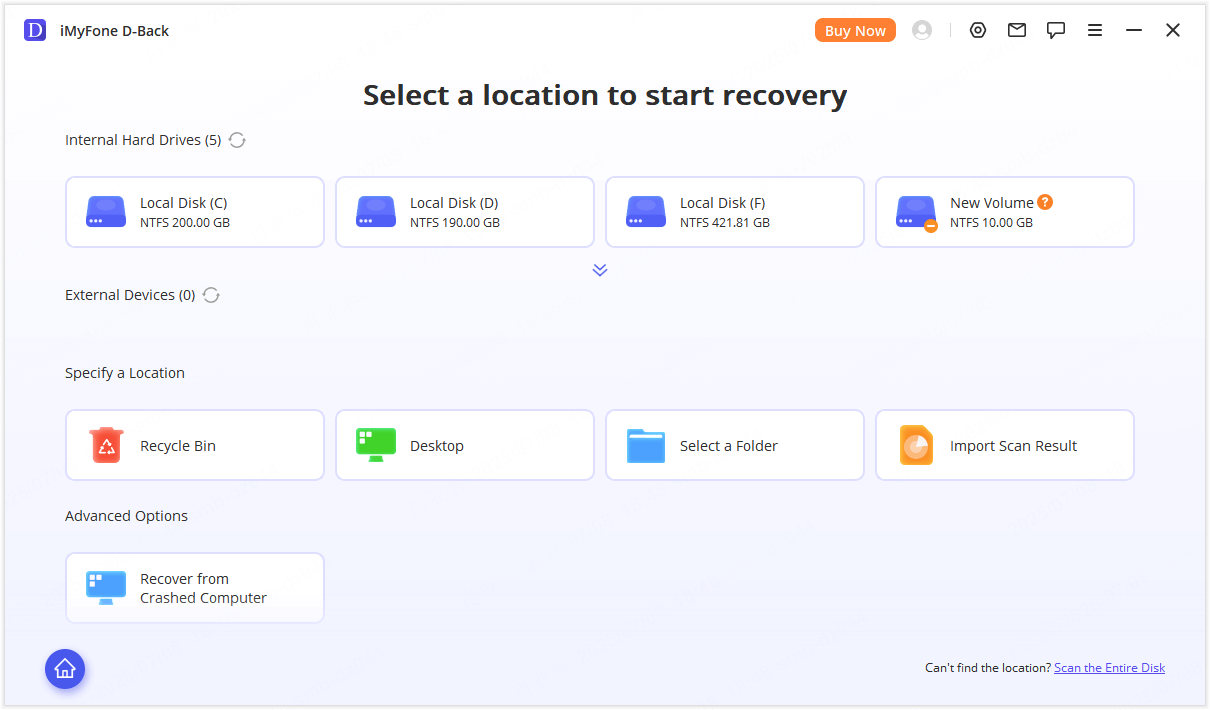
Step 2: Select a Location
Once you’ve launched the D-Back for Windows software on the computer, you will see a clean and intuitive interface that displays all the available locations from which you may recover data. Here, please select a hard drive or Desktop, then click on it.
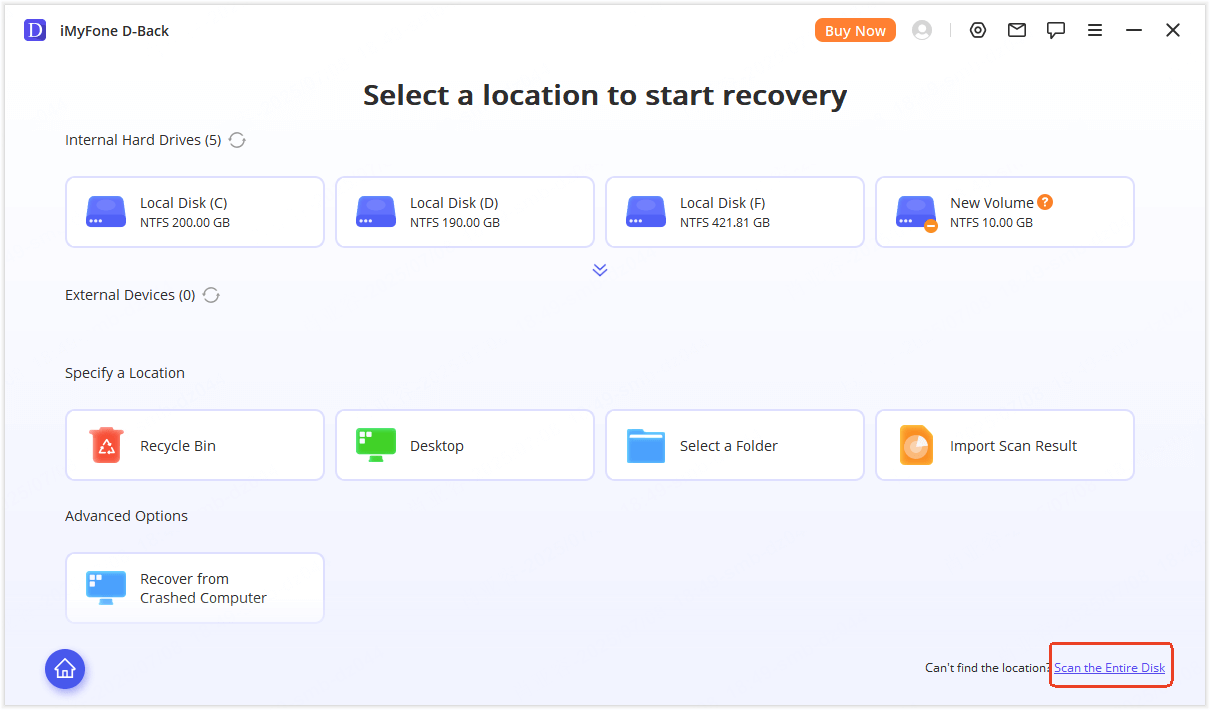
If you cannot find the partition you want to recover data from on the interface, you can click "Scan the Entire Disk" to perform a full disk scan.
Step 3: Preview and Recover Files
In the program's scanning interface, data is grouped by File Type and File Path, if you know the type or path of the lost data, you can quickly locate the files.
During scanning, you can also use search and filter functions, this helps you find the files to recover more efficiently.
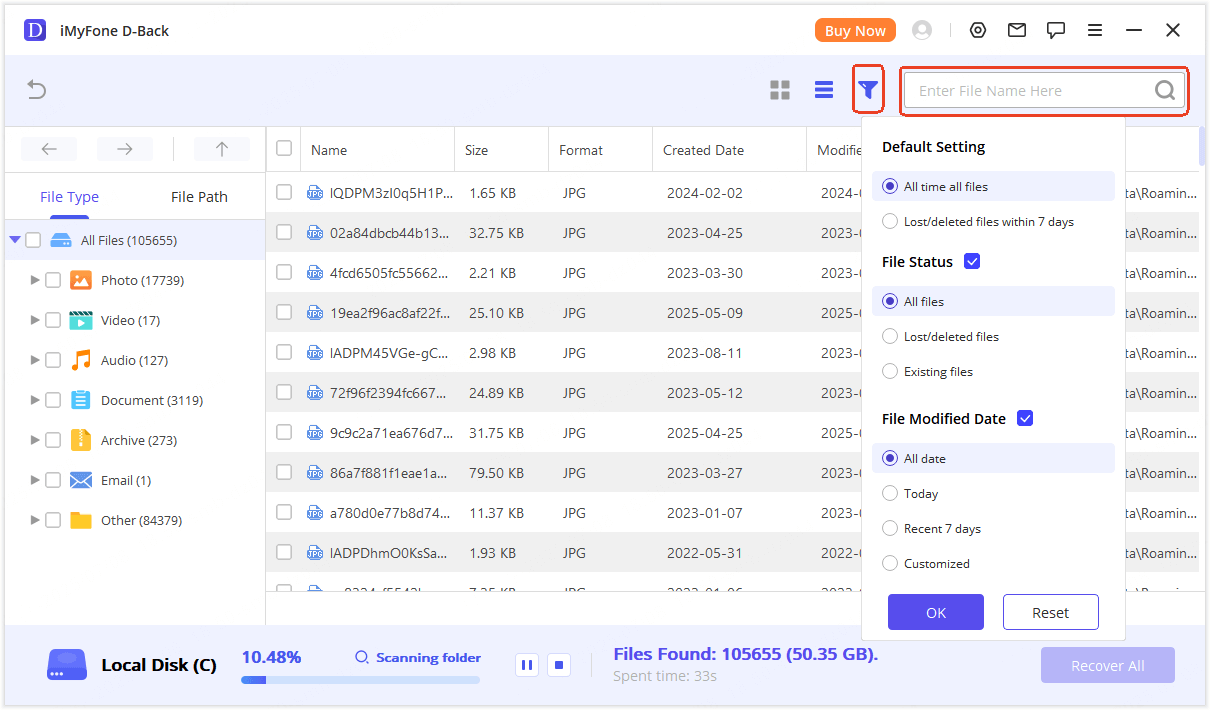
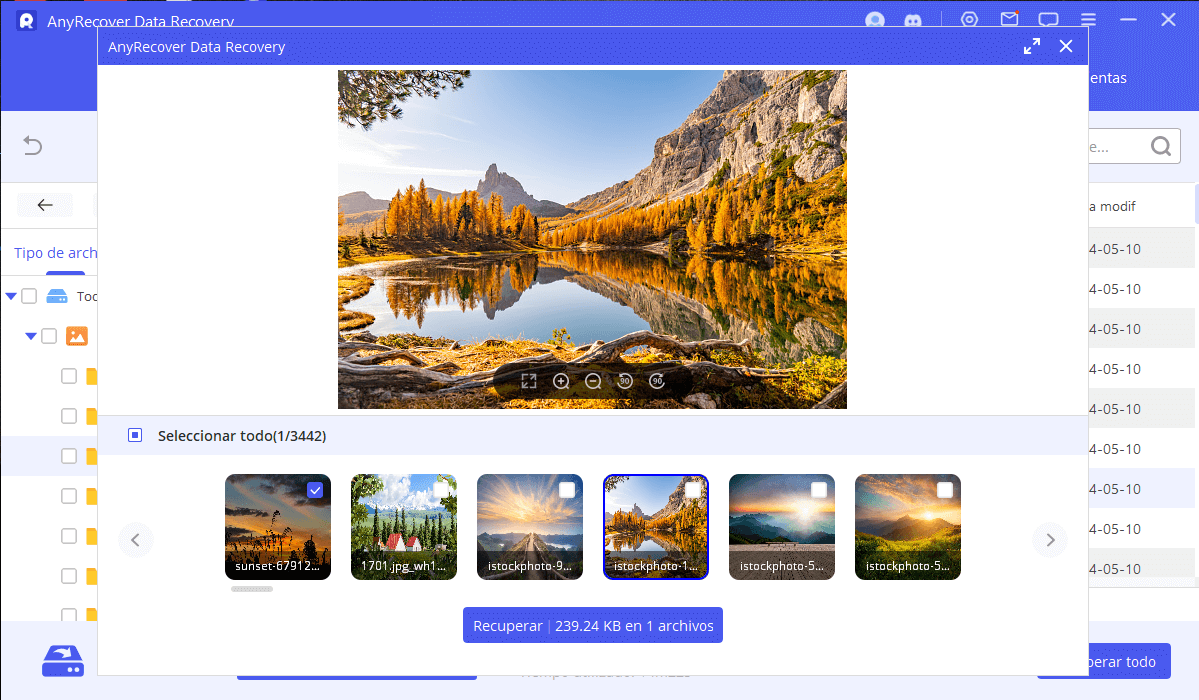
When you find the file you want to recover, double-click to preview it. (The program currently supports previewing documents, images, emails, audio, and video.)
The program supports previewing documents, images, emails, audio, and video. If the preview is fine, click “Recover” to restore the file to your device or external storage.
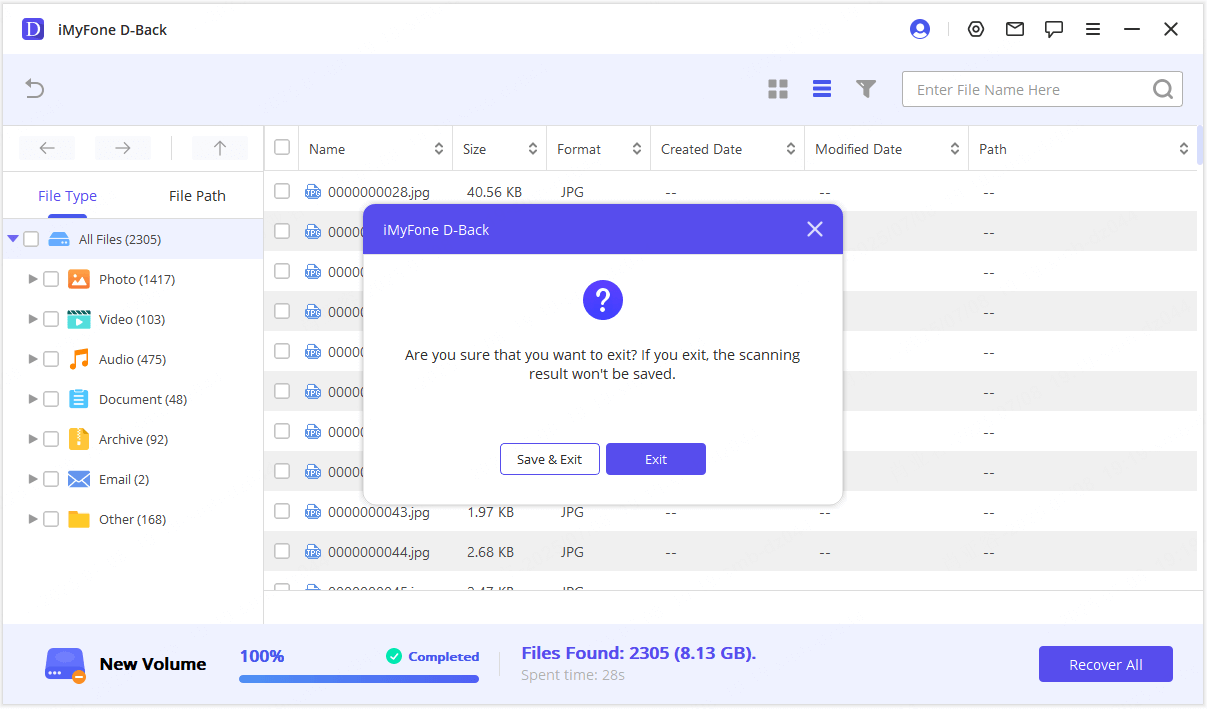
Step 4: Save Scan Result Files
After stopping or completing the scan, when returning to the main interface or exiting the program, you will be prompted to save the scan results.
If you don’t want to recover data now, save the scan file to import later and continue recovery directly.
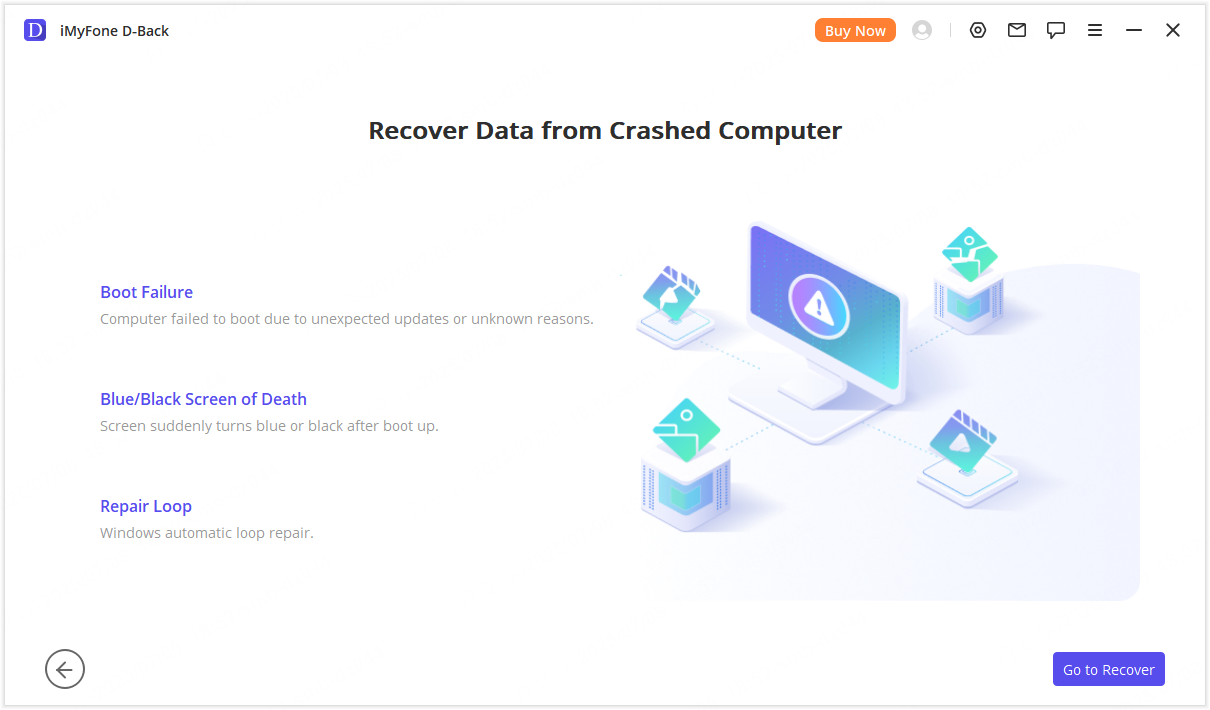
Recover Data from Crashed Computer
If your computer had crashed or is not able to boot up in an ideal way, D-Back for Windows can also help you create a bootable drive so that you may recover data.
Step 1: Preparation for Computer Crash Recovery
• Another working computer
• A blank USB drive or CD/DVD
Step 2: Create Bootable Media
Make sure that you’ve connected the USB drive or CD/DVD to the working computer and that it can be recognized, then let's start.
1. Start Computer Crash Recovery
Launch D-Back for Windows on the working computer, then choose “Recover from Crashed Computer”. Click on it to proceed.
2. Create a Bootable Drive Successfully
Select the drive you want to use to create a bootable drive, then click “Create” to begin.
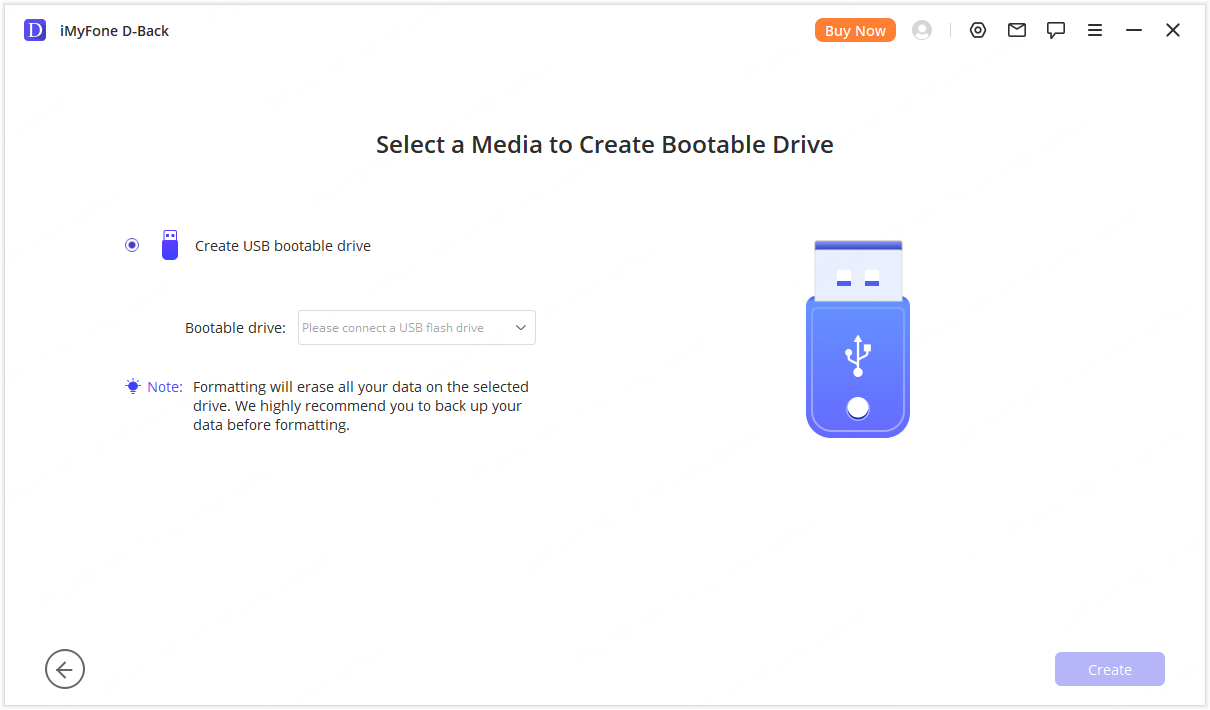
A message will pop up alerting you that this operation will format your drive. Make sure that you’ve backed up your important data, then click “Format”.
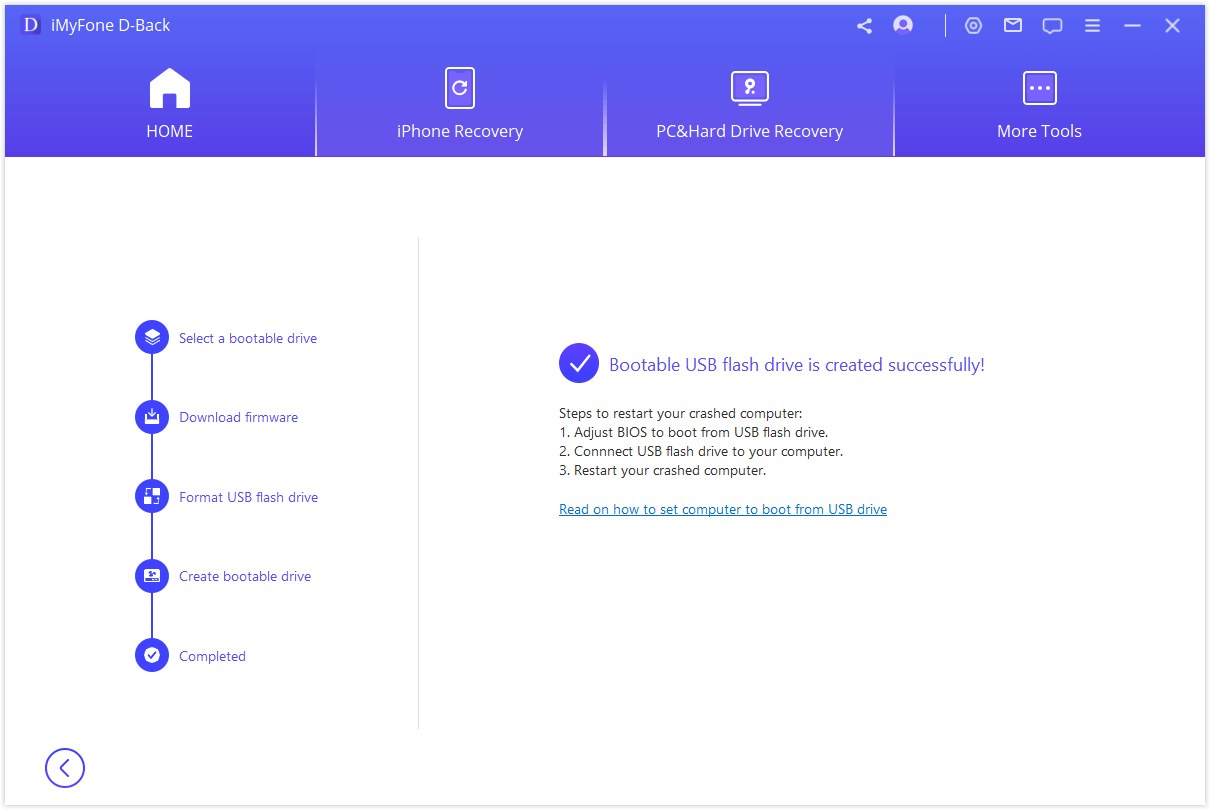
The program will start to download firmware. Once done, it will begin to format the USB drive or CD/DVD and create a bootable drive after that.
3. Boot Up the Crashed Computer
Once the bootable drive has been successfully created, follow the steps below to restart your crashed computer.
• Adjust BIOS to boot from USB flash drive or CD/DVD.
• Connect USB flash drive or CD/DVD to your crashed computer.
• Restart your computer.
Step 3: Recover Data from Crashed Computer
By following the steps above, your crashed computer will become bootable now. You can then recover files from the computer with D-Back for Windows data recovery tool.