


How To Make A Windows 11/10 Recovery USB For Another Computer?
Category: PC Data Recovery

5 mins read
Losing data due to some mistake or error can happen quite often, especially when you are working with USB, which is constantly transferring from one PC to another. In such a scenario, you must be worried about losing access to all your data but worry not! We are here to guide you about Windows 11 recovery USB methods.

In this article:

Part1: How To Create Windows 11/10 Recovery USB With an Efficient Method
There is a huge collection of free and paid data recovery solutions available online. However, we are bringing you the most efficient, easy, and accessible method to create Windows 11 recovery USB.
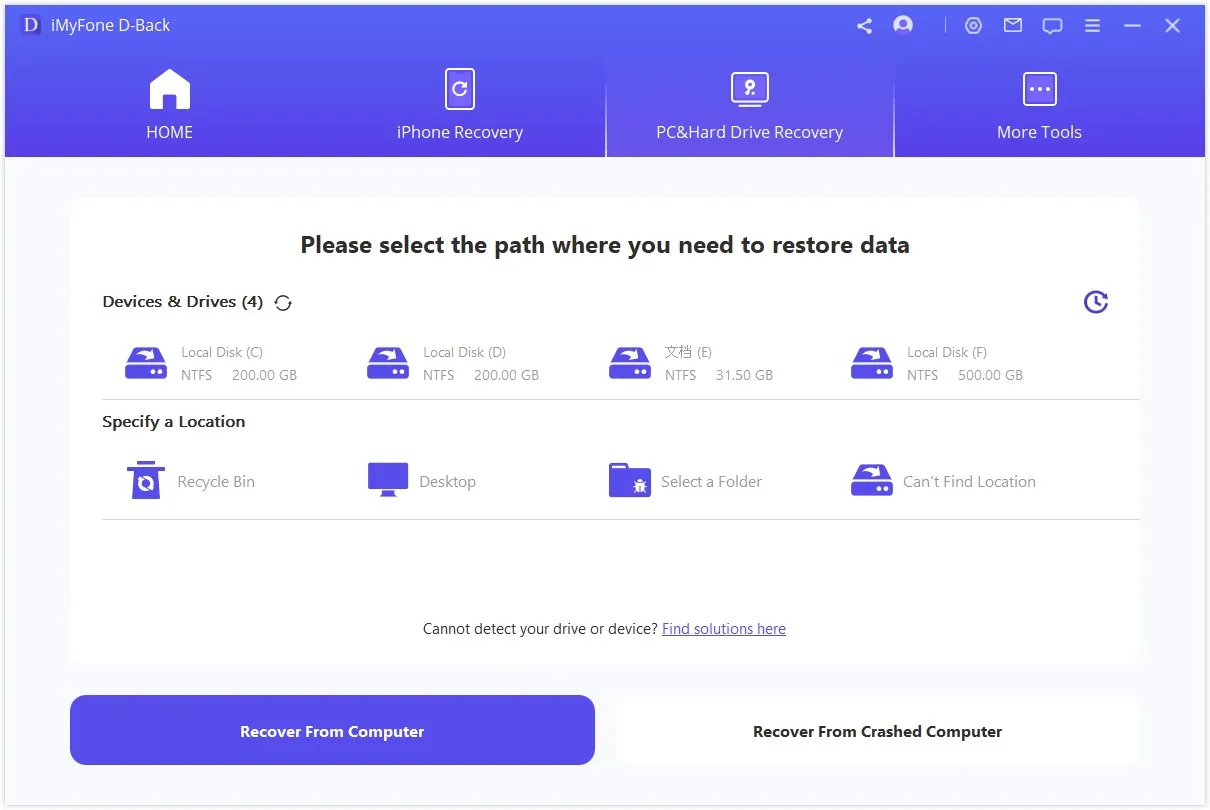
With the iMyFone D-back for Windows, you can easily recover all of your USB data with only a few clicks.
iMyFone D-Back
Restore Hard Drive Data with One Click.
Features Of iMyFone D-Back
Following is the list of Features of iMyFone D-Back:
Features
- Multiple Recovery Modes: Using iMyFone D-Back, you can choose between four different recovery options: "Recover from Windows Device," "Recover from OneDrive Backup," "Recover from USB," and "Smart Recovery."
- Preview Before Recovery: Previewing the data that may be recovered is a key feature of iMyFone D-Back since it ensures that only the requested data is restored.
- Supports Various Data Types: There are over twenty-two different file types that may be retrieved by the program.
- Recover Variety of Data Loss Scenarios: D-Back for Windows hard drive data recovery software is the best free data recovery program for recovering data from crashed hard drive or formatting, wiping, partition loss, disk damage, virus attacks, and more.
- Selective Recovery: Users can restore just the portions of the backup that include the required data with the assistance of iMyFone D-Back.
- Easy-to-use Interface: The program provides an intuitive user interface that makes it simple for users with no prior data recovery knowledge to retrieve lost information.
How to Use iMyfone D-Back for Windows?
You will require a Blank USB and a working computer in order to recover the data from a crashed computer. The following is the step-by-step guide to using iMyFone D-Back for this purpose.
Step Number 1: Launch iMyFone D-Back
Lauch iMyFone D-Back on a computer that is working, then choose the option called “Recover from Crashed Computer”.
Step Number 2: Creating Bootable USB
Now it will ask you to select either a USD or CD to create a bootable drive. Select USB option, set the location you would like to create a bootable drive and click on create.

After clicking, it will show you a pop up to format the USB. Click on “Format”. After that, the program will start downloading the firmware. The tool will now format the USB and create a bootable drive.

Step Number 3: Boot Up
As you have create a booted drive successfully, follow these 3 steps:Step 1:Set BIOS to boot from USB drive.
Step 2: Connect USB drive to the crashed computer.
Step 3: Restart the device.
Step Number 4: Start Recovering Files
Now, your crashed PC will become bootable. You can easily recover the files from the crashed computer using iMyfone D-Back for Windows tool.
Part 2. How To Download Windows 11/10 Recovery USB With Microsoft Tool
Having a Windows recovery USB is essential to troubleshoot and repair your system in case of any issues. In the following guides, we will go through the process of how to make a Windows 11 recovery USB using the Microsoft Tool.
2.1. How To Create Windows 11 Recovery USB With Windows ISO
To create Windows 11 recovery USB download with Windows ISO, you can follow these steps:
Step Number 1: Windows 11 recovery USB requires you to download the Windows 11 ISO from the official Microsoft website. On the website, click on the Download tool now.

Step Number 2: Insert a USB flash drive with at least 8GB of storage capacity into your computer.
Step Number 3: Click on the ISO that you download. Accept the terms and conditions, and you will see two options. Select the “Create Installation Media” option and click next.

Step Number 4: Now, the tool will ask you to select edition, architecture, and language. Simply check the box below for recommended options and click on next.

Step Number 5: Select the USB flash drive as the installation media and click next.

Step Number 6: Finally, start the creation of an installation media within the USB.
You now have a Windows 11 recovery USB that you can use to troubleshoot and repair your system if necessary.
2.2. Download Windows 11 Recovery USB With Recovery Drive
To download a Windows 11 recovery USB with the Recovery Drive feature, you can follow these steps:
Step Number 1: Plug in your Windows 11 recovery USB and start your computer. It will show you a few options. Select “Troubleshoot” from the list of options.

Step Number 2: After that, you will see another list of options. Click on “Advanced Options.”

Step Number 3: After clicking, it will show you grides with system recovery options. Click on “System Restore” to recover your Windows.

Step Number 4: Select the “Recover from a drive” option to install Windows 11 from the recovery USB.

Now you know how to reinstall your Windows 11 file from a Windows 11 recovery USB.
Part 3. How Do I Clean Install Windows 11 With USB?
To perform a clean install of Windows 11 with a USB drive, follow these steps:
Step Number 1: Create a Windows 11 installation USB drive using the Microsoft Media Creation Tool.
Step Number 2: Connect the USB drive to your computer and restart it. After that, enter your computer's BIOS settings by pressing the key specified on the screen during the boot process.
Step Number 3: Navigate to the "Boot" section of the BIOS and set the USB drive as the first boot device. Save the changes and exit the BIOS settings.
Step Number 4: Your computer will now boot from the USB drive, and you'll be presented with the Windows 11 installation screen. Follow the on-screen instructions to select your language, time zone, and keyboard settings.

Click "Install now" and accept the license terms.

Step Number 5: Choose the "Custom" installation option and select the hard drive or partition where you want to install Windows 11.

Step Number 6: Click "Next" to begin the installation process. Wait for the installation to complete, which may take several minutes.
Note
Once the installation is complete, your computer will restart, and you'll be presented with the Windows 11 setup screen. Follow the on-screen instructions to set up your computer and complete the installation process.
select the hard drive or partition where you want to install Windows 11.

After that, simply follow the instructions to setup the Windows. Once everything is provided, the clean installation will begin.
You now have a clean installation of Windows 11 on your computer.
Part 4. FAQs
1 How Long Does It Take To Create A Windows 11 Recovery USB?
Generally, the process of creating a Windows 11 recovery USB takes around 10 to 20 minutes, but it may take longer if you have a slower computer or a larger ISO file.
2 How To Recover Data From Crashed Computer?
Recovering data from a crashed computer can be a challenging task, but there are several methods you can try to retrieve your data. We would recommend going for the iMyfone D-Back for Windows. However, here are some possible ways to recover data from a crashed computer:
Boot From A Live USB Drive
You can create a live USB drive similar to the one mentioned in Part 2. This will allow you to boot your computer and access your data on the hard drive.
Use Data Recovery Software
Many data recovery software programs are available to help you recover lost or deleted files from a crashed computer. Some examples include iMyfone D-Back for Windows.
Conclusion
Now you don’t have to worry about your lost data anymore. In this article, we have discussed two efficient methods to create a Windows 11/10 recovery USB.
The first method is to use reliable data recovery software like iMyfone D-Back for Windows to recover lost data from a USB. The second method is by using Microsoft's built-in tool to download the Windows 11/10 recovery USB directly from their website.
You can choose any as per your preference. We would advice to go for iMyfone D-Back for Windows, as it can help you restore your data in a few minutes without any technical expertise.
(Click to rate this post)
Generally rated 4.5 (256 participated)
Rated successfully!
You have already rated this article, please do not repeat scoring!