


6 Proven Ways to Recover Files on Mac After Emptied Trash Bin
Category: PC Data Recovery

7 mins read
Many people mistakenly believe that emptying the trash bin on their Mac permanently deletes their files. However, this is not the case. In today's modern era, there are several effective methods for recovering deleted files, even after emptying the trash.
If you have accidentally deleted important files, don't panic! This article will guide you through six practical methods on how to recover deleted files on a Mac after emptying the trash.
In this article:
- Part 1. Recover Deleted Files on Mac in 6 Ways
- Way 1. Recover Deleted Files on Mac with Professional Tool

- Way 2. Recover Deleted Files on Mac with Undo (Immediately After Deletion)
- Way 3. Recover Deleted Files on Mac from the trash
- Way 4. Recover deleted Live files via Mac Terminal
- Way 5. Recover Deleted Files from Emptied Trash with Time Machine
- Way 6. Recover Deleted Files from iCloud Backup
- Part 2. How to Back up Your Mac with Time Machine
- Part 3. Hot FAQs about Mac Data Recovery
Part 1. Recover Deleted Files on Mac in 6 Ways
Whether you accidentally deleted something important, emptied the Trash, or even formatted a drive, there's still hope. This guide will unveil five proven methods to recover your deleted Mac files. But for the quickest solution, check out the video below and get your files back in a flash!

iMyFone D-Back Data Recovery Expert
Safely & effectively recover deleted data without a backup.
1 Way 1. Recover Deleted Files on Mac with Professional Tool
To save you time, we'll start with the most effective and quickest method: using a professional data recovery tool.iMyFone D-Back is a powerful and user-friendly tool that makes recovering files from emptied trash easy. With just a few simple steps, you can recover permanently deleted files, whether it's because you accidentally deleted them, emptied the trash, or formatted them, you can easily find them back. It will deeply scan your computer, you can quickly filter the files based on their type and the date you deleted them, directly preview all the files, and then selectively recover the files you want.
In addition, you can also do the following on d-back:

Key Features:
- Retrieve deleted files from formatted drives, lost partitions, and RAW devices.
- Restore precious memories from SD cards, external hard drives, cameras, and more - both on Windows and Mac.
- Repair corrupted photos, videos, and other files.
- Our software is 100% safe and secure, with 24/7 technical support available to assist you.
Here's a step-by-step guide on how to use iMyFone D-Back to recover deleted files from your emptied trash:
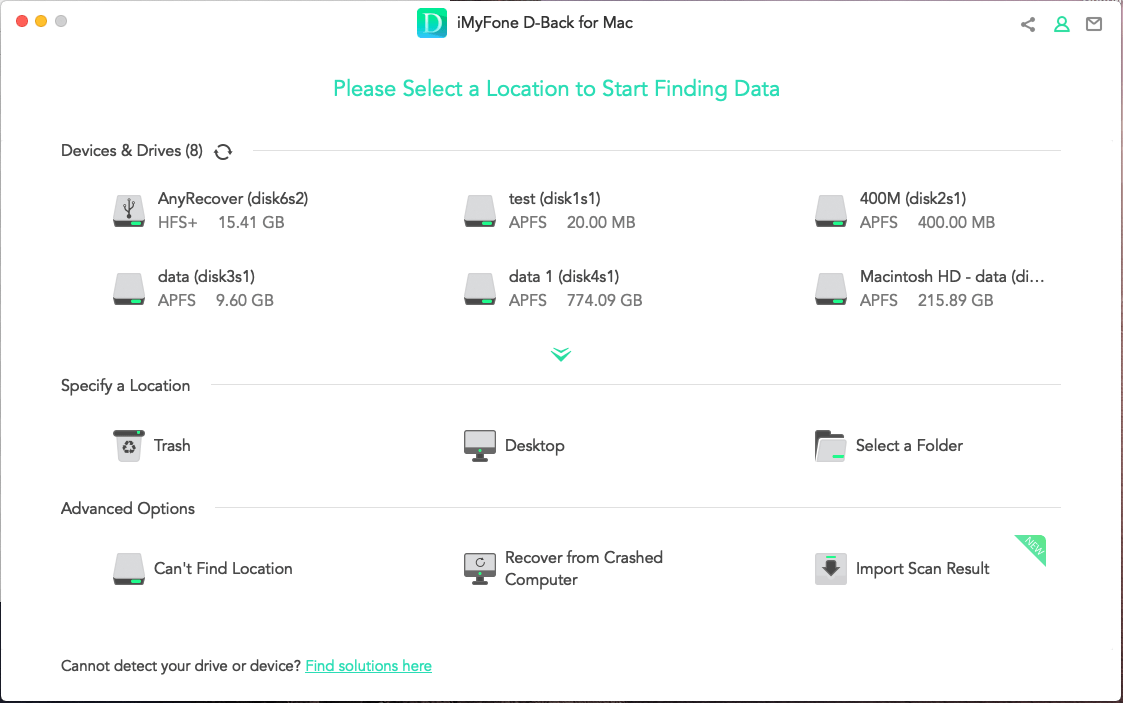
Step 1: Launch iMyFone D-Back. Its intuitive interface will display various recovery options. Click on "Trash" from the "Specify Location" tab to target the emptied trash files.
Step 2: Click "Start" to begin the scan. The software will search for your deleted files. This process may take a few minutes, so be patient.

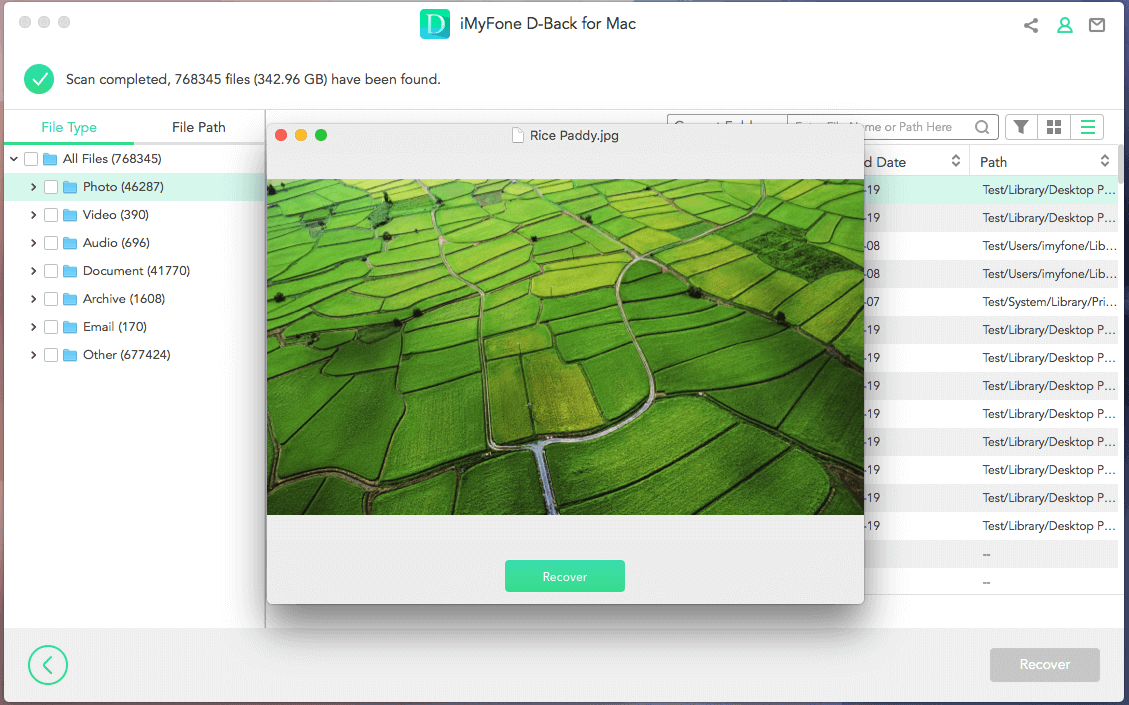
Step 3: Preview and Recover: Once the scan is complete, you'll see a preview of the recoverable files. You can browse the files or use the search bar to find specific ones. Select the files you want to recover and click "Recover" at the bottom.
2 Way 2. Recover Deleted Files on Mac with Undo (Immediately After Deletion)
If you accidentally delete important files, you can easily restore them on Mac by using the undo option. This method works best if you haven't performed any other actions after deleting the file. Here's how to use it:
Step 1: Press Command (⌘) + Z keys simultaneously. This is the quickest way to undo the last action, including deleting a file.
Step 2: Open the application where you deleted the file. Click on the "Edit" menu at the top of the screen. Select "Undo Move" from the dropdown menu.
Note
These methods only work if you haven't performed any other actions after deleting the file. If you've done something else, the undo history might be overwritten.
3 Way 3. Recover Deleted Files on Mac from the trash
The next method is directly restoring to leave files on a Mac from the trash. This method works if you haven't permanently deleted the file by emptying the Trash. Here's how to retrieve them:
Step 1: Click on the Trash can icon in your Dock. This will open a window displaying all the files you've recently deleted.
Step 2: Locate and Restore Files
Option 1: Drag and Drop: Browse through the files in the Trash window. Find the file(s) you want to restore. Drag and drop them to your desired location, such as your Desktop or a specific folder.
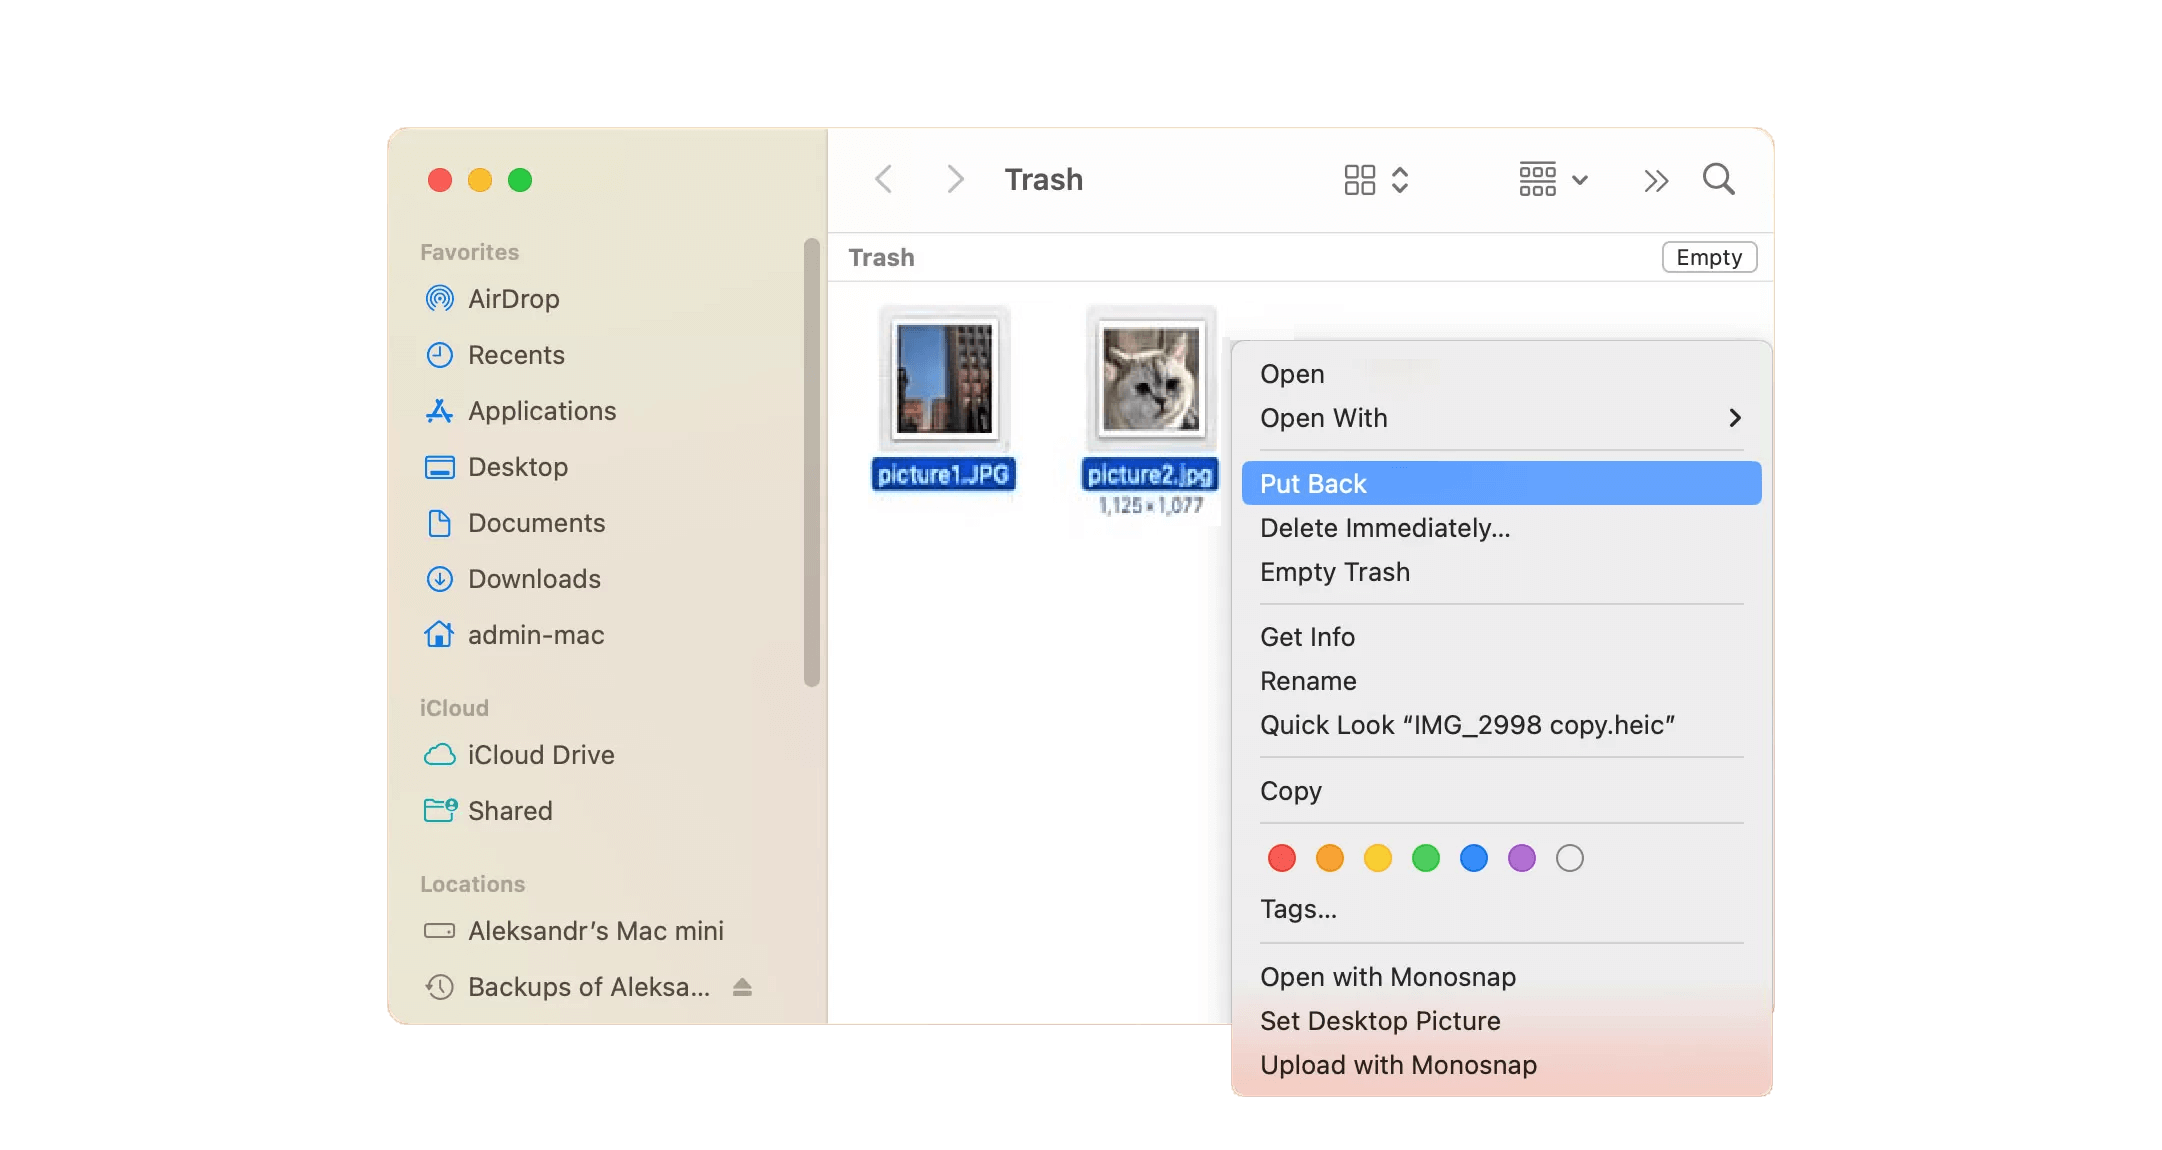
Option 2: Put Back: Right-click on the file(s) you want to recover. A context menu will appear.
Select "Put Back" from the menu. This will restore the file(s) to their original location.
Note
Files in the Trash are automatically deleted after 30 days. Be sure to restore any important files before then.
4 Way 4. Recover deleted Live files via Mac Terminal
Step 1: Open the Terminal application.
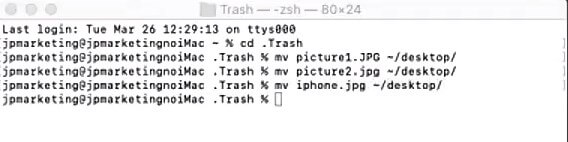
Step 2: Enter the following command in Terminal and press Enter: cd .Trash

Step 3: To recover a file, run another Terminal command and press Enter: mv filename ~/Desktop/
Note
Replace filename with the actual name of the file you want to recover.
If the file name has spaces, add a \ between each word.
- ~/Desktop/ is the location where the recovered file will be placed.
Example: mv 2023.png ~/Desktop/
If you want to recover multiple files, you need to enter a separate command for each file, making sure to enter the complete file name and extension correctly.
If you forgot the name of the file you want to recover. You can access Terminal by searching for it in Launchpad. Simply open Launchpad and type "terminal" in the search bar.
- Type cd .Trash to navigate to the "Trash" folder.
- Type ls -al ~/Trash to see the contents of the "Trash" folder.
- cd .Trash changes the current directory to the "Trash" folder.
ls -al lists all the files in the current directory, including hidden files, and displays detailed information about each file.
~/Trash is the path to the "Trash" folder.
ls -al ~/Trash command will show you a list of all the files in the "Trash" folder, including their names, sizes, and dates of deletion. You can then use this information to identify the file you want to recover.
Note
Terminal cannot recover permanently deleted files or files that Mac automatically deletes from the Trash after 30 days.
5 Way 5. Recover Deleted Files from Emptied Trash with Time Machine
Time Machine is a built-in feature on your Mac that automatically backs up your data. This means you can recover accidentally deleted files, even after emptying the Trash. Let’s start with the steps and see how this feature’s algorithm works.
Step 1: Open Time Machine (click the clock icon in your menu bar or search for it).
Step 2: Use the up and down arrows on the right to navigate through time. Look for the date and time before you emptied the Trash and deleted the files.
Step 3: As you move through the timeline, the contents of your Mac will appear on the screen as they were at that specific point in time. Locate the folder where the deleted files were originally stored. Browse through the files and folders to find the specific ones you need.
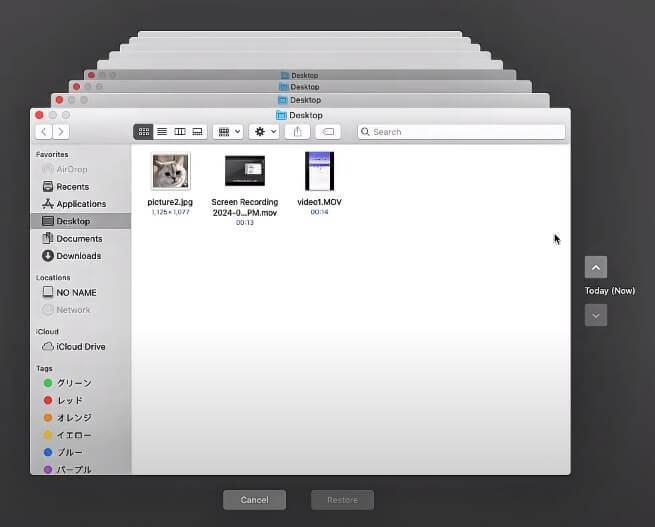
Tip: You can use the search bar in the top right corner to search for specific file names.
Step 4: Click the "Restore" button located in the bottom right corner.
6 Method 6. Recover Deleted Files from iCloud Backup
If you've accidentally emptied your trash and need to recover some files, you can try using your iCloud backup. Here's what you'll need:
Step 1: Go to iCloud.com and sign in with your Apple ID.
Step 2: Click on your account settings. It's usually represented by your name or initials in the bottom left corner.
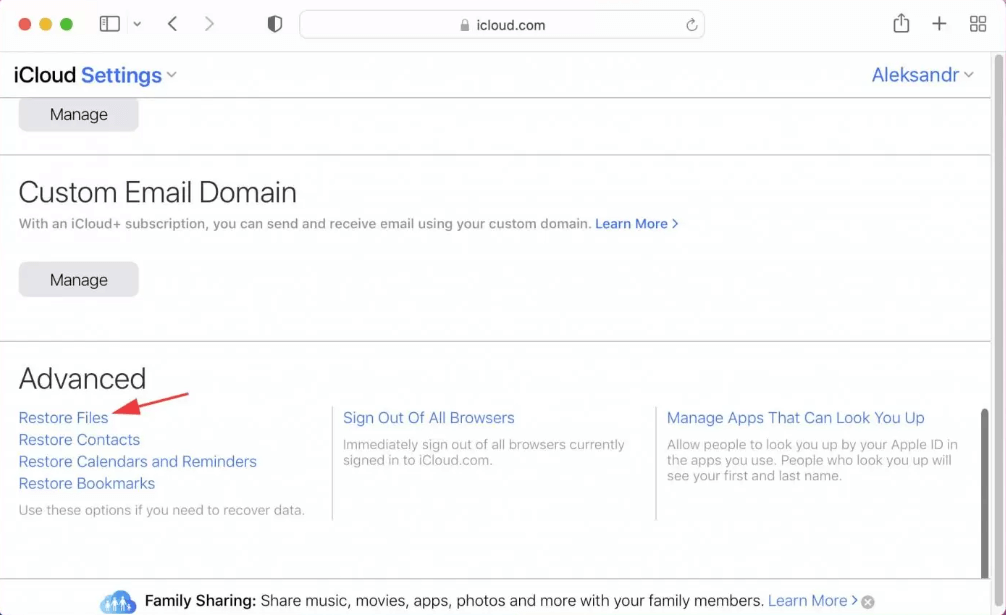
Step 3: Find the "Restore Files" option. It might be under a section labeled "Advanced."
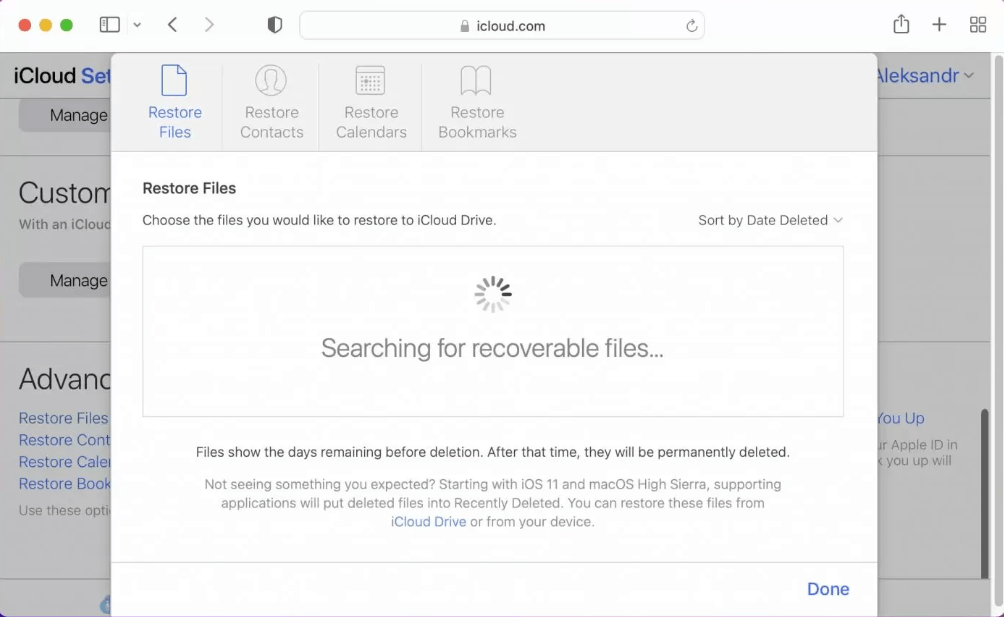
You should see a list of recently deleted files. Select the ones you want to recover.
Step 4: Click "Restore Files". The files will be restored to your iCloud Drive.
Note
This method only works if you have iCloud Backup enabled for the device where you deleted the files.
Part 2. How to Back up Your Mac with Time Machine
Safeguard your Mac data from surprises with Time Machine, macOS's built-in backup tool. Set up automatic backups to ensure you never lose precious files. Here's how to use Time Machine to back up your Mac:
Step 1: Connect an external storage device:
- You'll need an external hard drive with enough storage space to hold your backups.
- Make sure it's formatted correctly (usually macOS Extended (Journaled)).
Step 2: Set up Time Machine.
Step 3: Choose your backup disk:
- Click Select Backup Disk.
- Choose your external drive from the list.
- You can optionally encrypt your backups for additional security by checking the "Encrypt backups" box.
- Click Use Disk.
Step 4: Automatic Backups (Optional):
- By default, Time Machine will automatically back up your Mac hourly, daily, and weekly.
- To confirm automatic backups are enabled, look for the checkbox "Back Up Automatically".
Step 5: Manual Backups:
- Click the Time Machine icon in the menu bar (if enabled) and select "Back Up Now".
Part 3. Hot FAQs about Mac Data Recovery
1 Why Files Suddenly Disappear on Mac
Your Mac and iCloud Drive (iDrive) aren't always in sync. This can lead to missing files due to various reasons like deleting them on another device, connection issues, or even mistakes during the syncing process.
Sometimes, we're the ones to blame! Accidentally deleting files, shutting down during saves, or forgetting to save entirely can make them disappear.
Tech troubles can happen too. A computer crash or unexpected shutdown might cause your files to vanish.
2 How to Recover Files on Mac after Crash?
Many Mac users worry about retrieving unsaved Word documents after a crash. While the AutoRecover function can sometimes help, it's not foolproof. You can also search for the lost file in Finder, Trash, or any data backup services you might be using. For the most reliable recovery, consider using a data recovery software like D-Back.
3 Can I Recover Permanently Deleted Files from Mac
When you permanently delete a file, it's gone from your computer and can't be found unless you have a backup. However, you can use specialized Mac data recovery software to try to recover permanently deleted files.
4 How do I permanently delete data from my Mac?
While pressing Shift-Command-Delete or Option-Shift-Command-Delete directly removes files without using the Trash, there are other ways permanent deletion can occur on your Mac:
- Delete Immediately: This option allows you to bypass the Trash when deleting files from within the Finder window.
- Terminal Commands: Using commands like rm or rmdir in the Terminal app directly erases files and folders.
- Third-Party Apps: Some third-party utilities offer forceful deletion options that bypass the Trash.
- Emptying Trash Automatically: Enabling the "Remove items from the Trash after 30 days" setting in Finder Preferences automatically deletes files that have been in the Trash for a month.
Final Say
While recovering deleted files from the emptied Trash on Mac OS X is possible, it may not always be successful. For a more reliable and efficient way to recover your valuable files, consider using D-Back data recovery software.
- Supports a wide range of data types such as messages, photos, videos
- Fix a variety of iOS issues, including being stuck on the Apple logo, screen not turning on, recovery mode loop and black screen, ect.
- AI repair broken/corrupted files, photos and videos.
- 100% Work with a variety of data loss scenarios.
- Retrieve lost data from different types of devices
(Click to rate this post)
Generally rated 5 (256 participated)
Rated successfully!
You have already rated this article, please do not repeat scoring!