


How to Convert Images to PDF: 5 Quick and Easy Ways
Category: Edit PDF

8 mins read
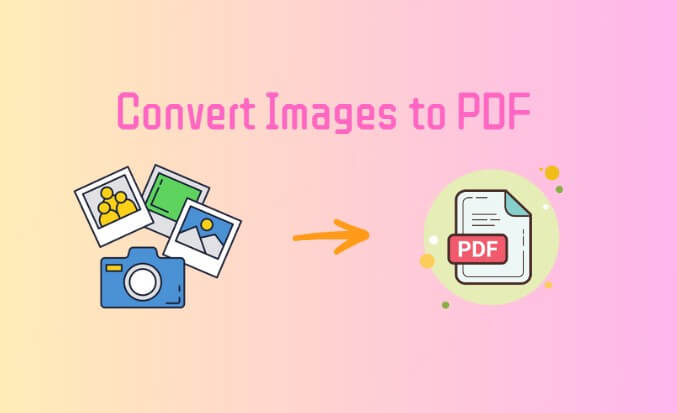
Tired of managing a clutter of image files? Converting images to PDF is a quick and efficient way to organize, share, and store your files in one easy-to-manage document. Whether you're looking to create a professional presentation, compile receipts, or just clean up your digital space, converting images to PDF doesn’t require advanced skills or software.
In this guide, we'll show you 5 quick and easy ways to convert images to PDF, no matter what device you're using. Let’s dive into the simplest methods to get it done!
Let’s explore together!
In this article:

A Convenient Way: How to Convert Images to PDF with PDFacademy
Converting images to PDF doesn’t get easier than this. Whether you’re working with PNGs, JPGs, or other common image formats, PDFacademy makes the process fast and effortless. Follow these three simple steps to get started:
iMyFone PDFacademy
PDFacademy is an all-in-one PDF tool to read, edit, convert, and secure documents quickly and easily.
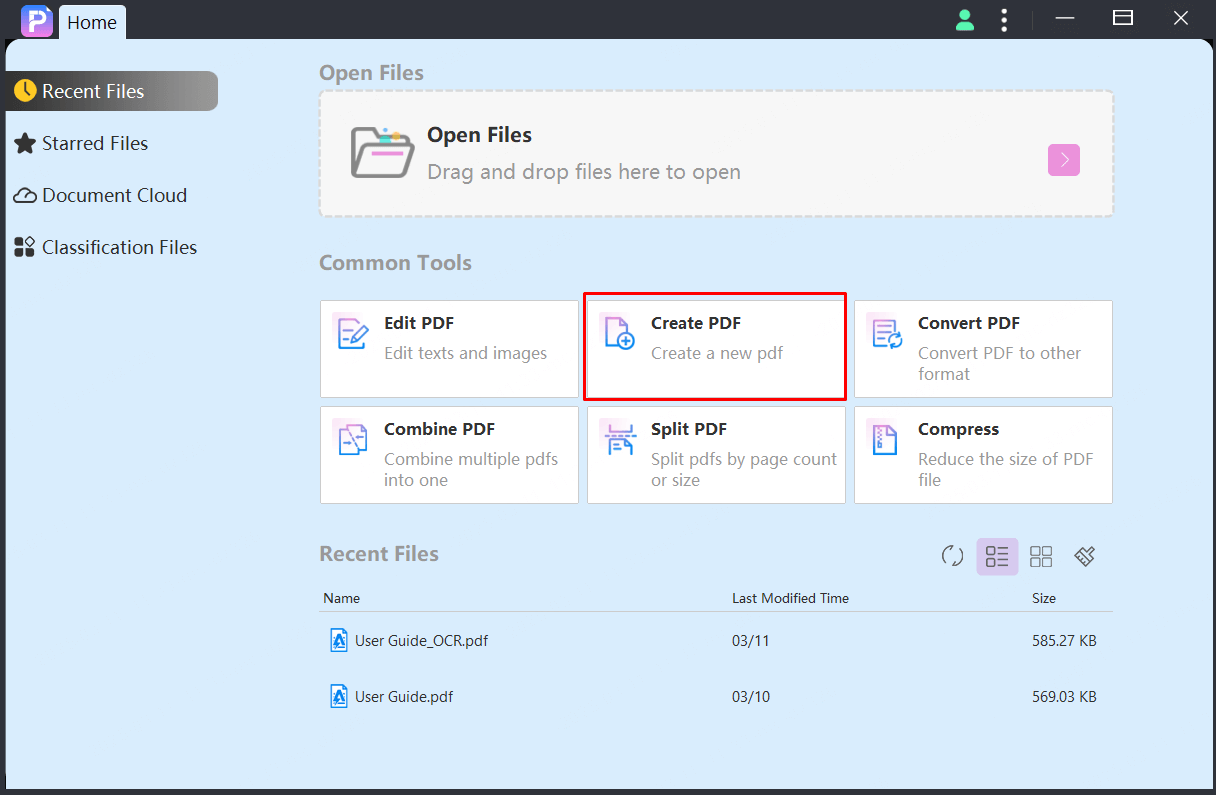
Step 1 Open PDFacademy
Launch PDFacademy and head over to the “Recent Files” page. Under the “Common Tools” section, click on the “Create PDF” button. This is where you'll begin the image-to-PDF conversion process.
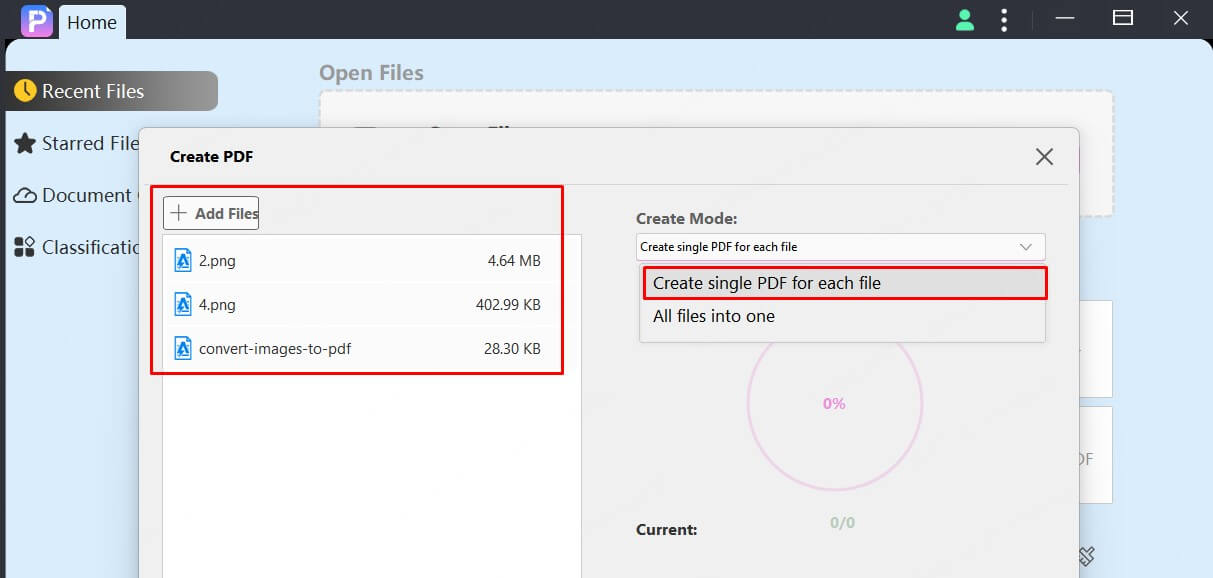
Step 2 Upload Your Image Files
Click “Add Files” to upload your images—whether they’re PNG, JPG, BMP, or others. To combine multiple images into separate PDFs, choose the option “Create a single PDF for each file.” It’s flexible, fast, and ideal for organizing your image documents.
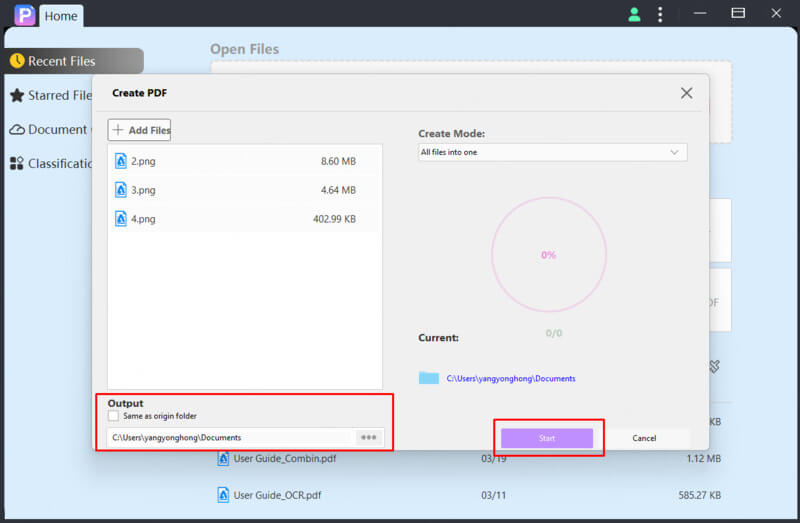
Step 3 Start the Conversion
Choose your preferred output folder to save the converted PDFs. Then simply click “Start”—PDFacademy will do the rest. In just a few seconds, your images will be ready as polished PDF files, ready to share or archive.
Other 4 Quick Methods to Convert Images to PDF
In addition to using PDFacademy for converting images to PDF, there are a few other simple methods you can try. Depending on your device and preferences, here are 4 quick alternatives for converting your images to PDF.
Method 1 Use Windows Print to PDF Feature
Windows offers a built-in "Print to PDF" feature that makes converting images to PDF a seamless process, without the need for third-party software. Follow these simple steps:
Step 1: Select Your Image(s)
Navigate to the folder where your images are stored. Choose the images you want to convert. If you wish to select multiple images, hold the Ctrl key while clicking each image.
Step 2: Right-click and Select Print
Once your images are selected, right-click on one of them and choose the Print option from the context menu.
Step 3: Choose 'Microsoft Print to PDF'
In the print dialog box, you’ll find a list of available printers. Select Microsoft Print to PDF from the printer options. This ensures your images will be saved as a PDF, not printed on paper.
Step 4: Adjust Settings
Customize the print settings according to your preferences. You can choose the paper size, adjust the photo layout, and decide the number of images per page. For multiple images, you can opt to place each image on a separate page or merge them into a single PDF.
Step 5: Click Print
Once you’ve configured the settings, click Print. You’ll be prompted to select a location to save the PDF file.
Step 6: Save the PDF
Choose a destination folder, give your PDF file a name, and hit Save. In just a few moments, your images will be converted and saved as a PDF!
Best for: This method is ideal for Windows users who prefer a quick, no-fuss way to convert images to PDF, without installing any extra software.
Method 2 Convert Images to PDF Using Preview on macOS
If you're using a Mac, Preview is a built-in app that makes converting images to PDF incredibly easy. Here’s how you can do it:
Step 1: Open Your Image(s) in Preview
Double-click on the image file you want to convert to open it in Preview. If you have multiple images, select them all and open them together in Preview.
Step 2: Arrange Your Images (Optional)
If you want to combine several images into a single PDF, ensure all the images are opened in the Preview sidebar. You can easily drag and drop to reorder them.
Step 3: Go to the Print Menu
Once you have your images arranged, click on File in the menu bar, then select Print. Alternatively, press Cmd + P to open the print dialog.
Step 4: Choose 'Save as PDF'
In the Print dialog, click the PDF button at the bottom-left corner and select Save as PDF from the dropdown.
Step 5: Name and Save the PDF
Enter a name for your PDF, select the destination where you want to save it, and click Save. Your images will now be combined and saved as a single PDF document.
Best for: This method is perfect for Mac users who want to quickly convert or combine multiple images into a PDF using the built-in Preview app without needing any additional software.
Method 3 Use a Mobile App (Android or iOS)
If you need to convert images to PDF on the go, using a mobile app is a convenient option. Apps like Adobe Scan, CamScanner, and Microsoft Lens are perfect for quickly turning your images into PDFs directly from your smartphone. Here’s how you can do it:
Step 1: Install a PDF Converter App
Download a PDF conversion app from the Google Play Store or Apple App Store. Popular apps include Adobe Scan, CamScanner, and Microsoft Lens. Install the app of your choice.
Step 2: Open the App and Select Image(s)
Launch the app and follow the instructions to either take a photo of your image or upload existing images from your gallery. Most apps allow you to select multiple images at once.
Step 3: Edit and Arrange Images (Optional)
Many apps offer basic editing features, such as cropping, rotating, and adjusting brightness. You can also reorder the images if necessary.
Step 4: Convert to PDF
Once you’re satisfied with the images, select the option to Save as PDF. The app will convert the images into a single PDF file.
Step 5: Save and Share the PDF
After conversion, save the PDF to your device or cloud storage. You can also directly share the PDF via email or messaging apps.
Best for: This method is ideal for mobile users who need a quick and easy way to convert images to PDF while on the go, without relying on a desktop computer.
Method 4 Use Google Drive + Google Docs
If you're already using Google Drive and Google Docs, you can easily convert images to PDF without needing any additional software. This method works well for both single and multiple images. Here’s how to do it:
Step 1: Upload Your Image(s) to Google Drive
Open Google Drive in your web browser and upload the images you want to convert by clicking on New > File Upload. Select the images from your device.
Step 2: Open the Image with Google Docs
Once the image is uploaded, right-click on the file in Google Drive and select Open with > Google Docs. The image will be inserted into a blank document.
Step 3: Adjust the Image (Optional)
If needed, you can resize or adjust the image within Google Docs. You can also add additional images to the document by inserting them via Insert > Image.
Step 4: Download as PDF
Once you're happy with the arrangement, click on File in the menu bar, select Download, and then choose PDF Document (.pdf) from the options. Google Docs will convert the document (with your image) into a PDF file.
Step 5: Save and Share the PDF
The PDF will be downloaded to your computer, and you can save it wherever you like. You can also share it directly from Google Drive if you wish.
Best for: This method is great for Google Drive users who want to convert images to PDF using familiar tools, and it works well for both single and multiple images.
Conclusion
There are several quick and easy ways to convert images to PDF, whether you’re using built-in tools on your computer, mobile apps, or cloud services like Google Drive. However, if you're looking for a fast, efficient, and hassle-free method, PDFacademy is the perfect solution. With its user-friendly interface and seamless conversion process, PDFacademy ensures that your images are converted to high-quality PDFs in just a few clicks.
Ready to get started? Try PDFacademy today and experience how simple converting images to PDF can be!
(Click to rate this post)
Generally rated 4.9 (256 participated)
Rated successfully!
You have already rated this article, please do not repeat scoring!