


iMyFone UltraRepair - User Guide
iMyFone UltraRepair is designed to repair corrupted/unopenable/unsupported videos, photos, files and audio, supporting dozens of formats.
In addition to file repair, UltraRepair can also easily enhance blurry/pixelated/old videos and photos to high quality and resolution.
You can also convert photo/video format for free.
Part 1: Video/Photo/File/Audio Repair
Here are the steps on how to repair corrupted photos, videos, files or audio with common repair mode and advanced repair mode.
1. Try Common Repair Mode
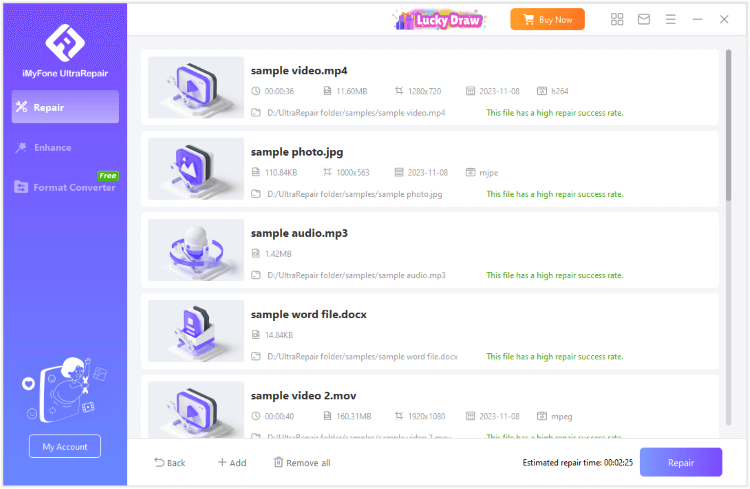
Step 1: Launch the Program to Add Corrupted Files
Download and install iMyFone UltraRepair, click the Add button to upload any videos/photos/files/audio for repairing. You can batch add and repair multiple files at one go.

Step 2: Start to Repair Damaged Files
After adding the files for repairing, click the Repair button and the program will automatically start to repair the damaged files.
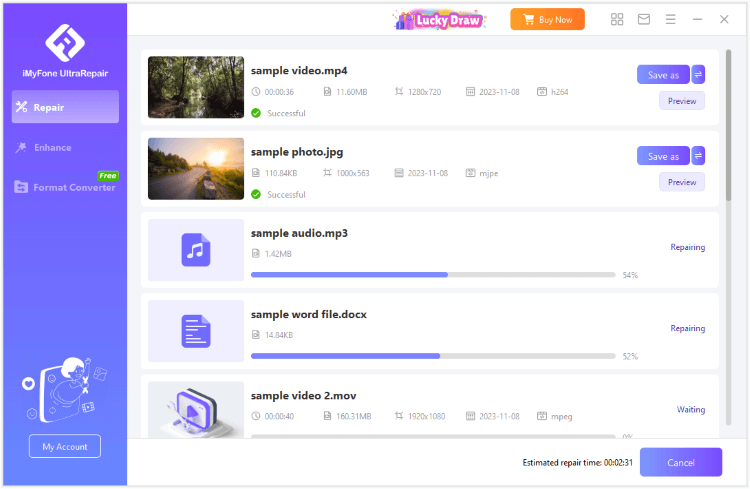
Step 3: Wait for Repairing
The entire repairing process is generally fast and has a high success rate, but if the files need repairing are relatively large, it may take a long time to wait.
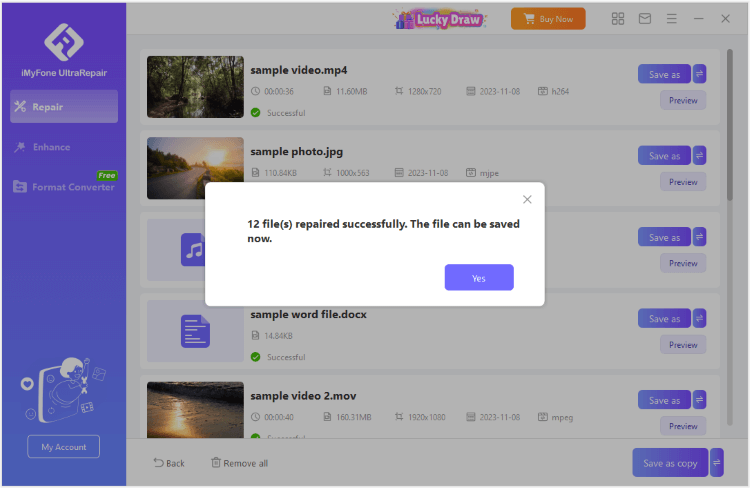
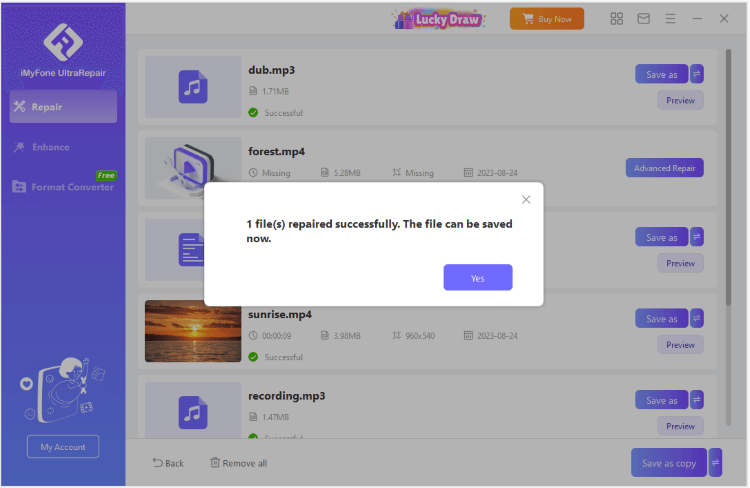
Step 4: Preview and Save Repaired Files
After repairing, you can click to preview or save the fixed videos/photos/files/audio to your computer directly.
2. Try Advanced Repair Mode
Step 1: Choose Advanced Repair
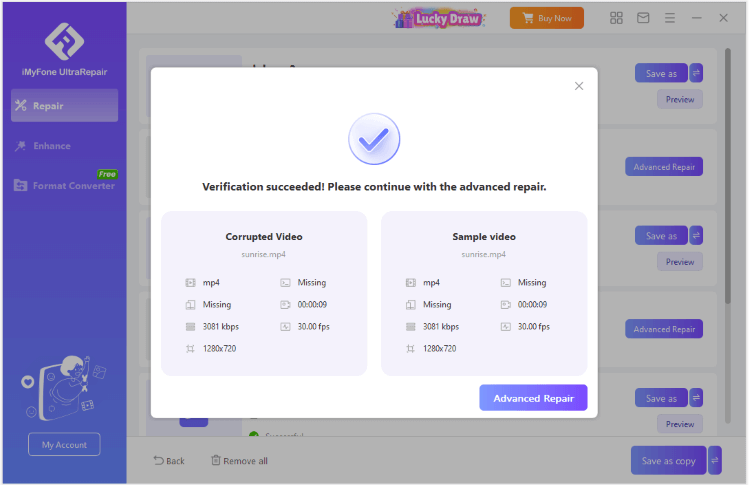
If it fails to repair, for videos/photos/audio, we provide advanced repair mode for in-depth repair. Click Advanced Repair to upload a sample file.
The software will automatically examine whether the file you upload meets the standards of the sample file. If not, please re-upload it. If it does, you can click Advanced Repair to start the advanced repair process.
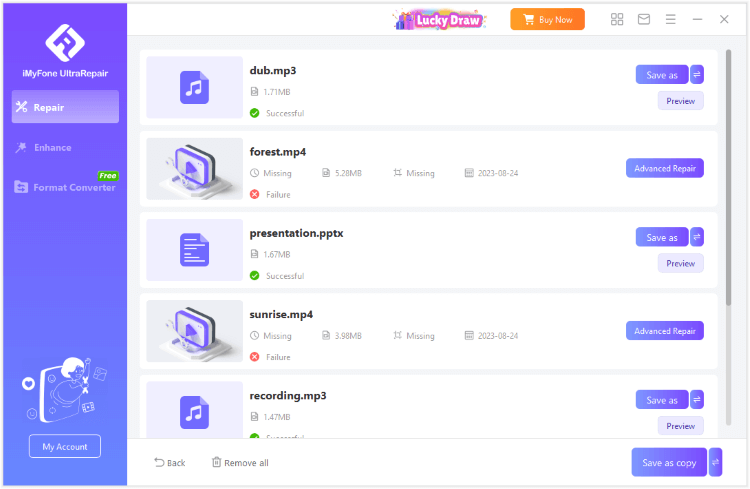
Step 2: Detect the Files
The software will automatically detect whether your files can be used in advanced repair mode or not. If detected, click Advanced Repair to begin.
Step 3: Save Repaired Files
Once the advanced repair is done, click to preview or save the repaired files directly.
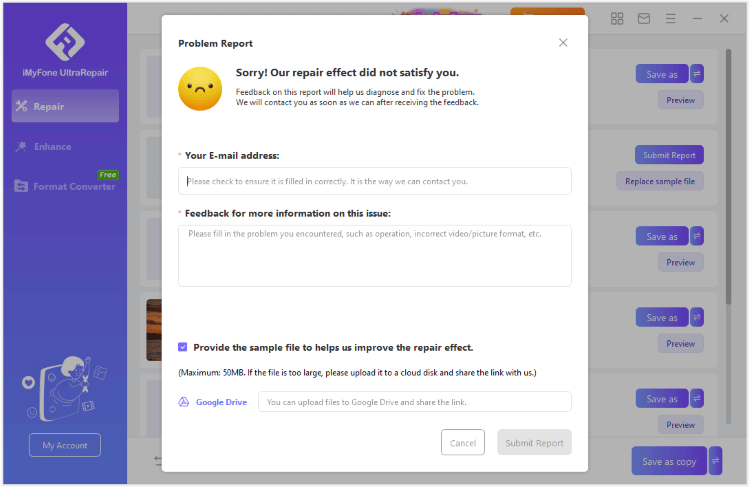
If the problem still exists after repairing, you can submit the problem directly to us or contact our customer service, we will help you repair it manually.
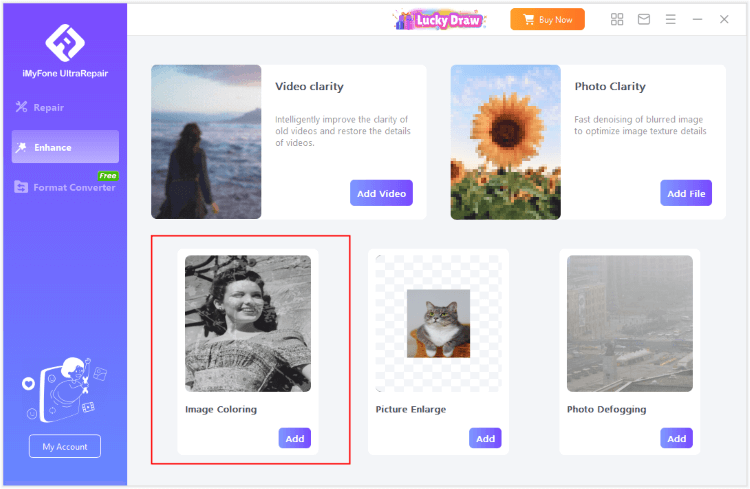
Part 2: Video/Photo Enhancement
1. Video Clarity
Step 1: Choose Video Clarity
Click the Video Clarity section under Enhance and add the video you want to improve.

Step 2: Adjust Settings
You can choose Anime Model or General Model for enhancement, and you can also select the enhancement multiple, 1x/2x/4x;
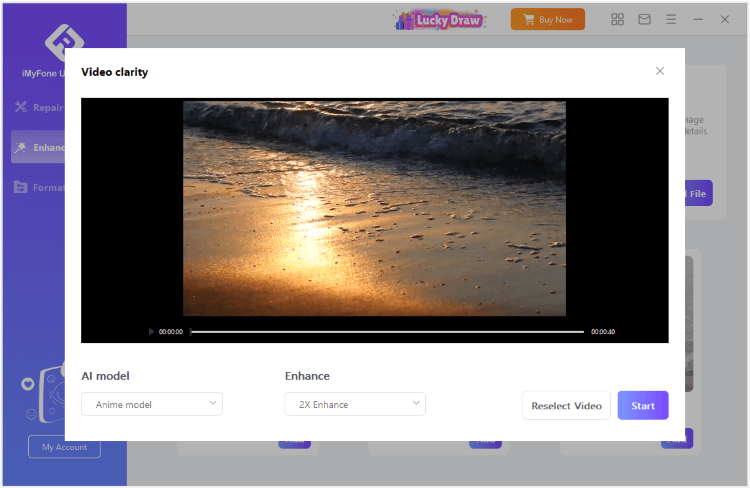
Step 3: Start to Enhance Video
Click the Start button and the software will begin to improve the video quality. The process may take a lot more time, please wait patiently.
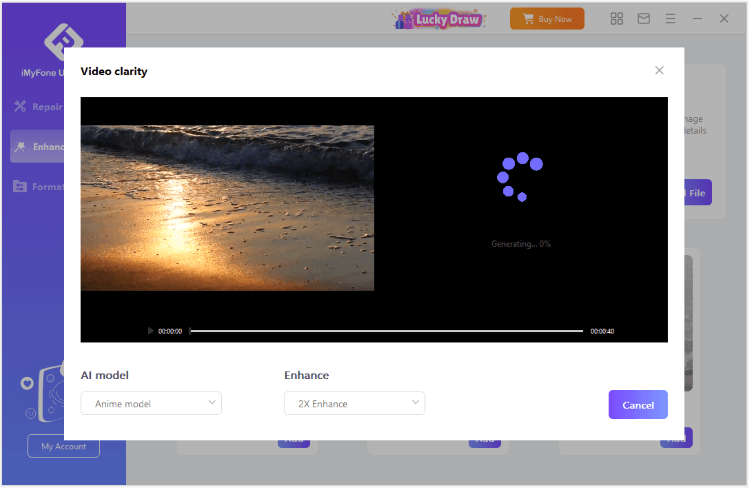
Step 4: Check the Result
When the video is improved, you can check the comparison result before and after enhancement. Or, save the enhanced video directly.
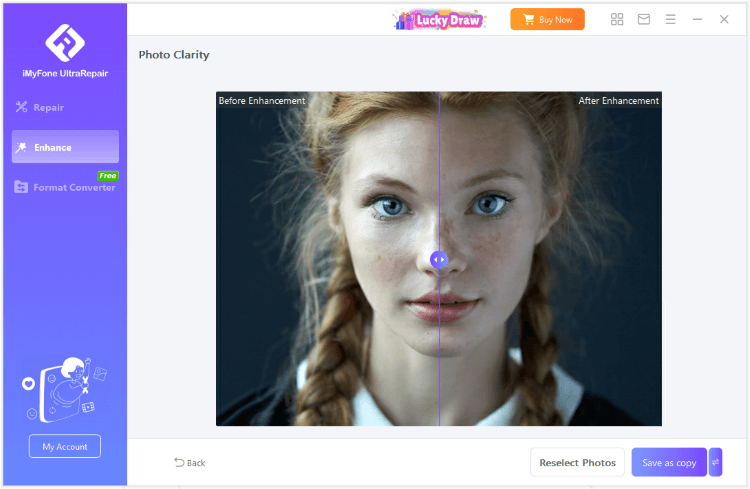
2. Photo Clarity
Step 1: Choose Photo Clarity
Click the Photo Clarity section and add the photo you want to improve.

Step 2: Start to Enhance Photo
Once the image is uploaded, the software will automatically start to process and enhance the photo quality.
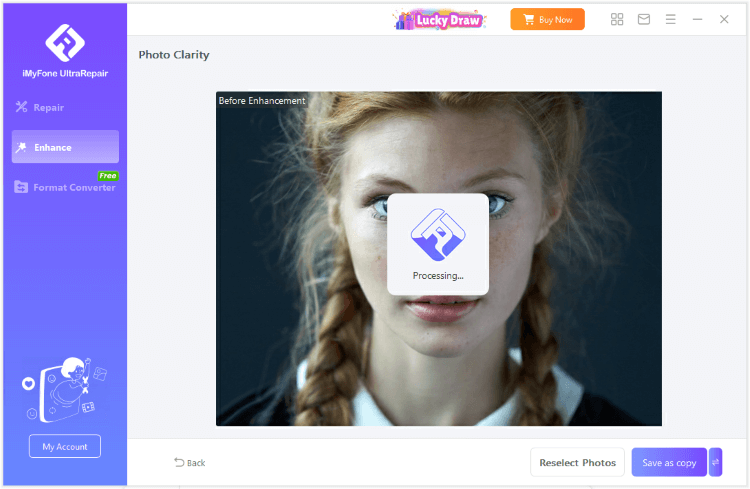
Step 3: Check the Result
When the photo is improved, you can check the comparison result before and after enhancement. Or, save the enhanced photo directly.
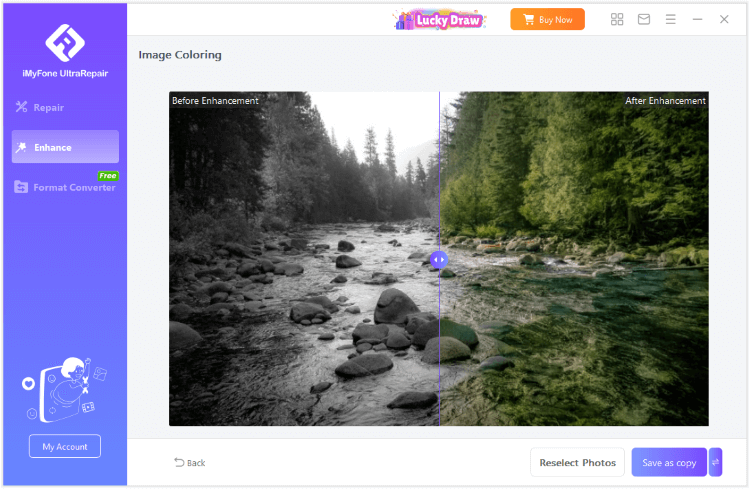
3. Image Coloring
Step 1: Choose Image Coloring
By using AI technology, this software can naturally colorize black and white images. Enter the interface and click the Image Coloring section and add the photo you want to improve.
Step 2: Save Colorized Image
When the photo is colorized, you can check the comparison result before and after enhancement. Or, save the enhanced photo directly.
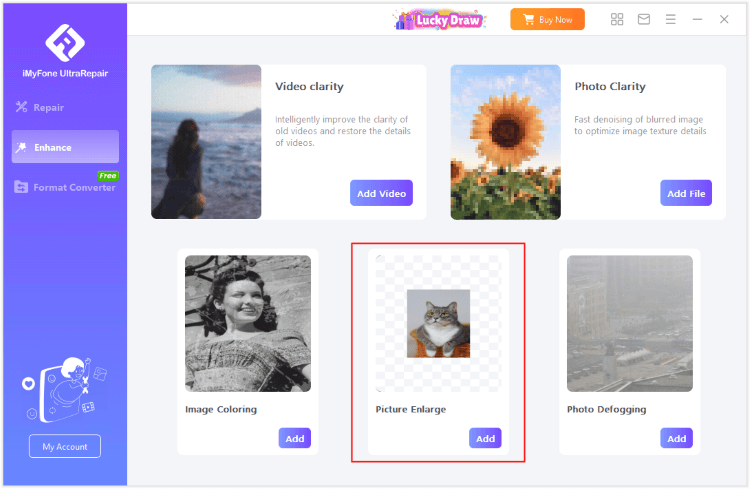
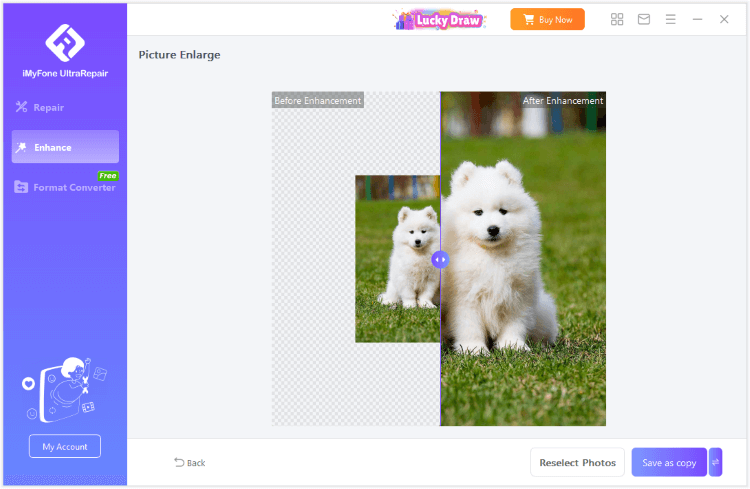
4. Picture Enlarge
Step 1: Choose Picture Enlarge
Enter the main interface and click the Picture Enlarge section to add the photo you want to improve, the pictures can then be enlarged two times losslessly .
Step 2: Save Enlarged Picture
When the photo is enlarged automatically, you can check the comparison result before and after enhancement. Or, save the enlarged picture directly.
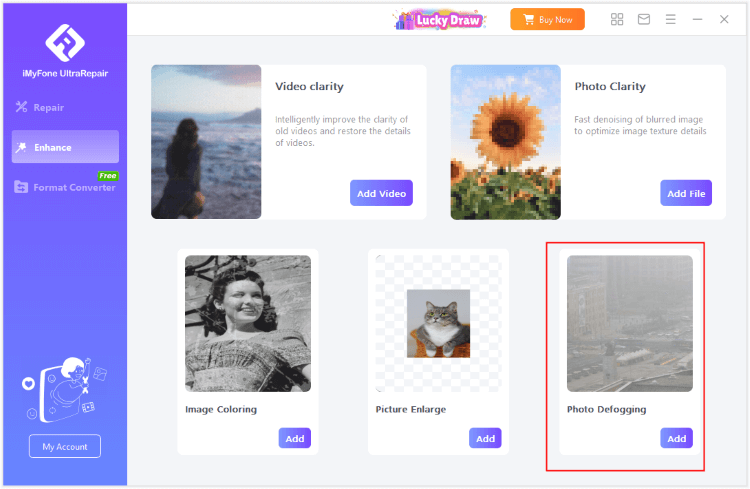
5. Photo Defogging
Step 1: Choose Photo Defogging
You can also enhance foggy/hazy photos without quality loss. Enter the main interface and click the Photo Defogging section to add the photo you want to improve.
Step 2: Save defogged Photo
After defogging, you can check and save the enhanced photo directly.

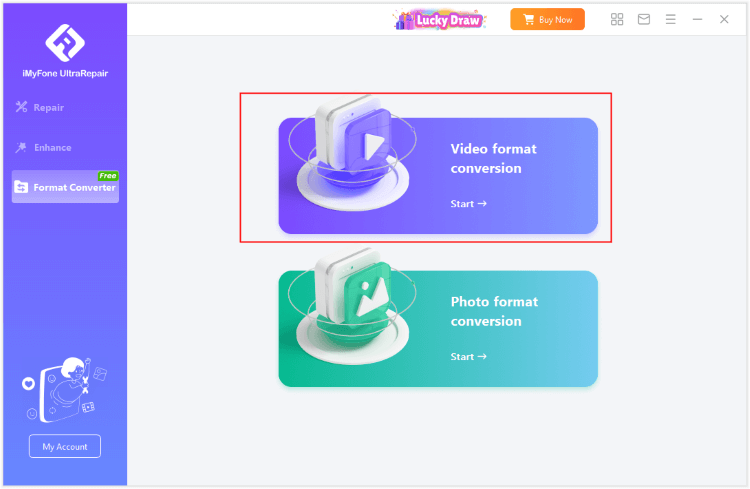
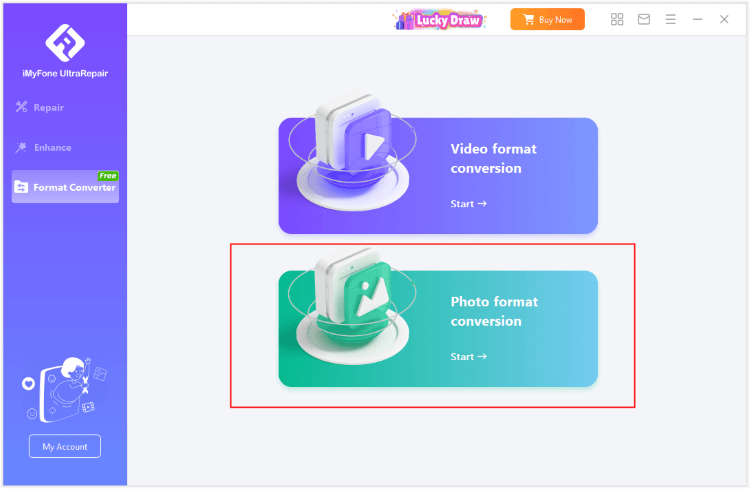
Part 3: Video/Photo Format Converter - Free
1. Video Format Conversion
Step 1: Choose Video Format Conversion
Choose the first tab of video format conversion.
Step 2: Upload Video Files for Conversion
Click to add multiple video files you want to convert, then choose the output video format.
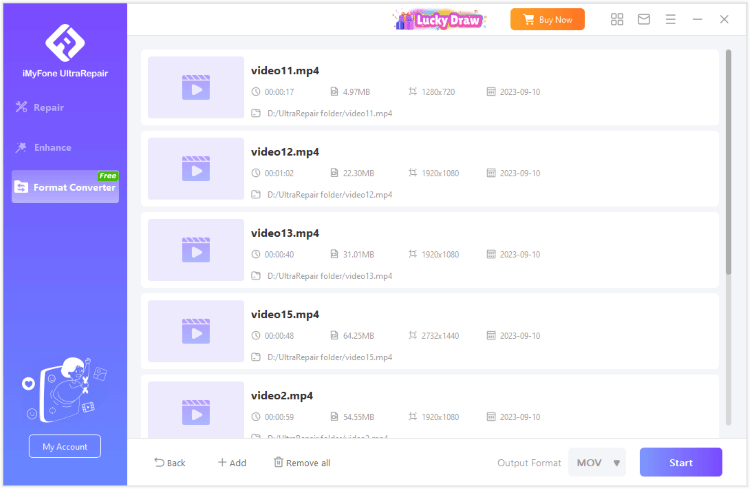
Step 3: Start to Convert
Click Start to begin converting videos. After a few seconds, you can click to save the converted video files.
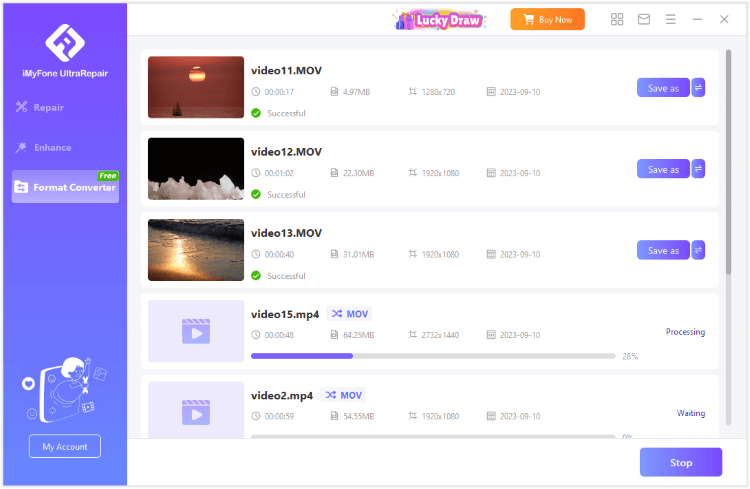
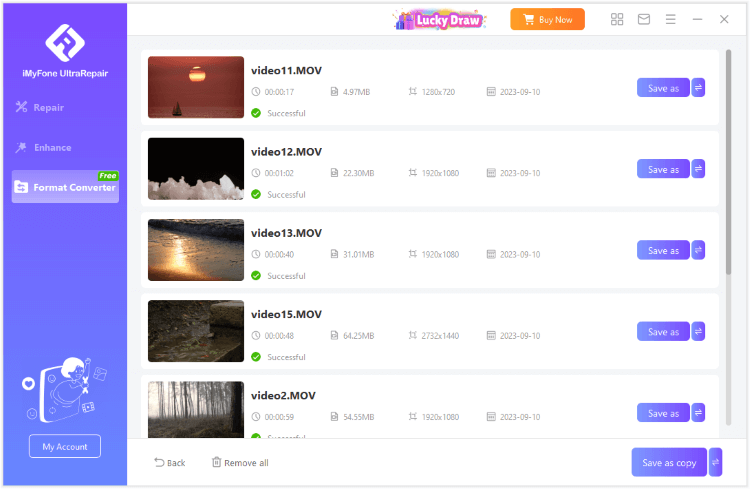
Step 4: Save Converted Videos
After a few seconds, the videos can be converted and you can click to save them.
2. Photo Format Conversion
Step 1: Choose Photo Format Conversion
Choose the second tab of Photo format conversion.
Step 2: Upload Photo Files for Conversion
Click to add multiple photo files you want to convert, then choose the output photo format.

Step 3: Start to Convert
Click Start to begin converting photos. After a few seconds, you can click to save the converted photo files.
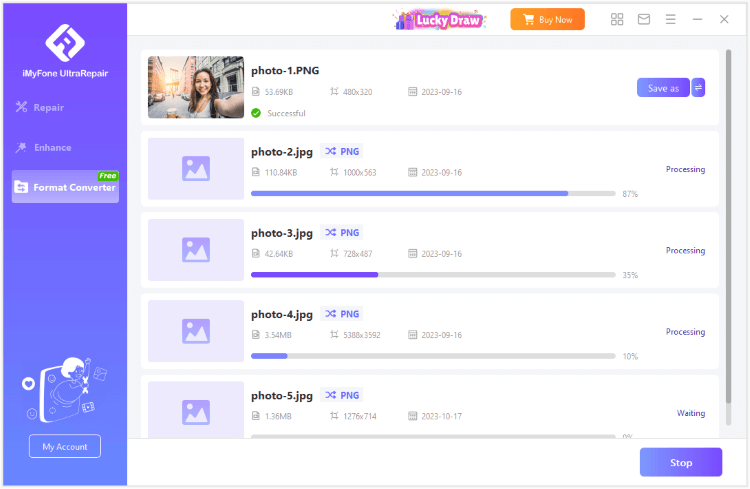
Step 4: Save Converted Photos
After a few seconds, the photos can be converted and you can click to save them.

Still Need Help?
Go to Support Center >