


 March 29, 2023
Are you looking for the easiest way of getting your Chrome cached files or pages for free? If yes, then read this article carefully. It is all about how to recover cache files in google chrome. We will share four different methods of using Chrome and Chrome extensions for this purpose. Other than this, well-known and worth appreciated software will also be shared with a full guide on how to recover deleted Cache files in Google Chrome. So, let's start!
Table of Content [Hide]

Part 1. How to View Cache Pages and Files in Chrome
In this section, we will see the three most common and effective methods to view cache pages using Chrome services. These three methods allow users to have a look at the cached files/pages for free.
Let's have a look at them one-by-one. Remember, you will have to save or add a particular link to the cached file list before finding the cached file. Through all these methods, we will explain the method of adding a file in the cached file list in the first method.
Method 1. Visit from the Address Bar
- First of all, figure out the website which you want to be saved as your Chrome cached file. At the front of the website result, click on the three-dots icon.
- This will open a new popup window on the screen from where you can easily add the site as a cached file by clicking on the Cached option.
- After saving the file, go to the Chrome address bar and type "cache:".


This will show you the text form list of the cached file from where you can have quick and easy access to your important sites.
Method 2. Use Chrome Extension
- Add the files to the cached file list by following the first two steps of Method 1. Now type Chrome Web Store in the Chrome search bar. Once the web store is opened, search for the Web Cache Viewer.
- Install it on your Chrome browser and add the extension to your account. This extension will help you to have a look at all the cached files at once with a single click.
- Now right-click on any of the websites and select the Web Cache Viewer from the drop-down menu. This will display all the cached sites on the screen.

Method 3. Use Google Search Engine
- Follow the first two steps of Method 1 to save files as cached files on your Chrome browser.
- Write down the keyword related to your cached file in the Chrome search bar. Choose the resultant file and click on the downward-facing arrow at the end of the URL.
- This will show you a menu. Click on the Cached option, and the cached files related to that keyword will appear on the screen.
Method 4. Get Cached Page with Wayback Machine Archive
- Follow steps 1 and 2 of method 1 of this article to save the file as a Chrome-cached file.
- Type the address of the missing page in this Wayback Machine Archive and press Enter.
- An interface of calendar type will appear on the screen. This will show you all the archived and cached files from where you can access them easily.

Part 2. Best Chrome Cache Viewer to Recover Lost Cache Files from Chrome on Mac
Besides the above-mentioned Chrome suggested methods, there is another worthwhile alternative that can give you multiple benefits other than recovering the deleted chrome cached files. iMyFone D-Back is an amazing software to support outstanding data recovery of almost 1000+ different data types, including images, audio, documents, videos, and many more. You can use this software to recover your lost cache files from Chrome that were saved on your computer.
Not only from a computer, but it helps to recover data from various sources in a very simple and easy way. The software is up-to-date and can support the latest devices and Mac and Windows versions. Here are some more interesting and high-end features of D-Back Hard Drive Recovery Expert.
Main Features
- Quick, safe, and secure data recovery software. Simple and easy to use.
- Recover more than 1000 different files from different sources.
- Allow previewing data before restoring the files.
- Perform deep scanning of the data mining location.
- Compatible with Windows XP, 7/8/10/11 and the newest MacOS.
Steps to Use D-Back for PC on Mac:
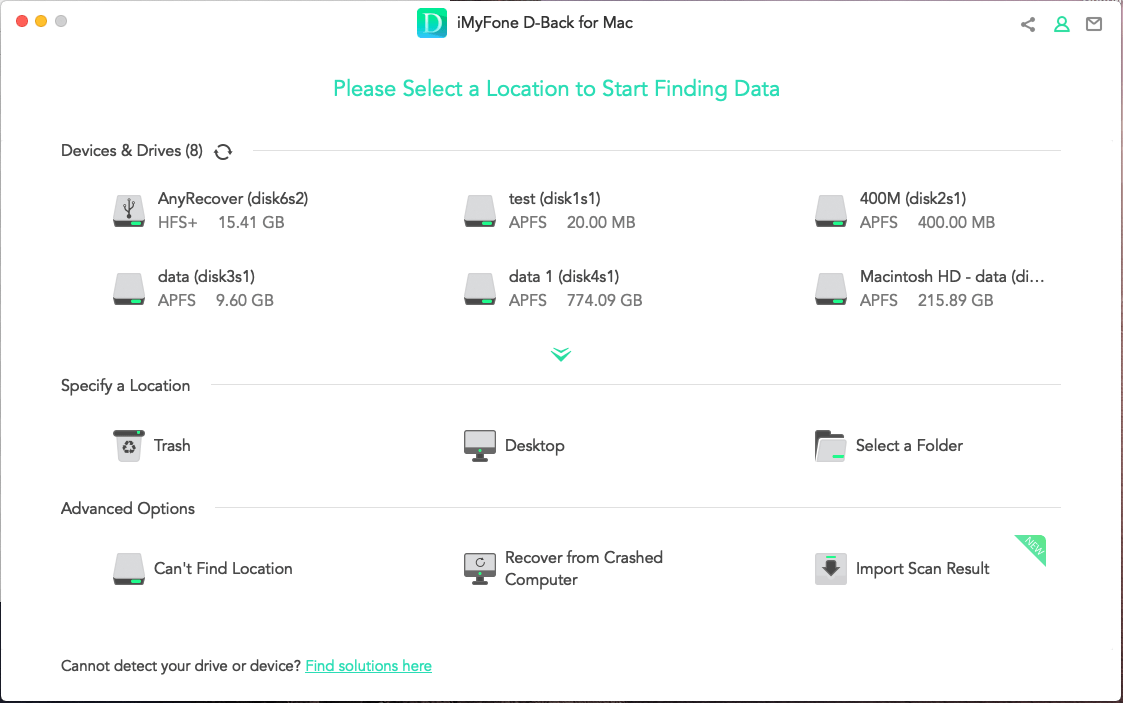
Step 1.Download and install the software on your device. After installation, open the software and click on the location where the Chrome files were located.
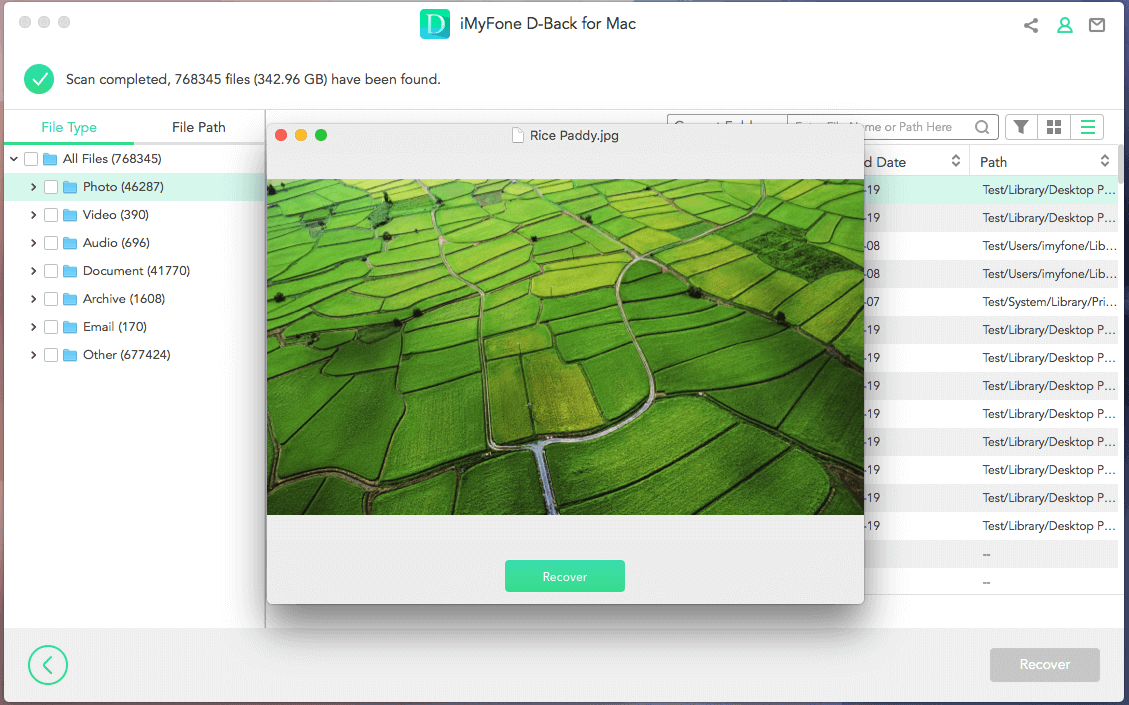
Step 2.Clicking on the location/folder will start scanning that particular site. After scanning, all the recoverable files from that location will appear on the screen. Select the file which you want to recover and click on it to preview it.

Step 3.In the end, click on the blue Recover button and give the location where you want to restore the file on your computer.
Conclusion
It is difficult to keep all the Chrome sites and addresses in your mind at the same time. For this issue, Chrome has shared a feature of Chrome cached files through which users can get access to their important searched sites on Chrome. We have shared four different methods to view the cache in Chrome easily. You can follow any of these methods to enjoy safe results. Moreover, we have also introduced the iMyFone D-Back, which is one of the best data recovery tools available on the internet. We suggest this because it can perform data recovery of multiple files with multiple factors in a very easy, safe, and fast way.