


How to Recover Deleted Word Document in 2024
Category: PC Data Recovery

8 mins read
Question
Urgent Assistance Needed! I made a big oopsie – I deleted a Word document thinking it was no big deal, but now it's turned out to be super important. Anyone got the scoop on how to recover a deleted Word file on my laptop? Help a fellow out, please!
It can be really frustrating when you've worked hard on a document, and suddenly it's gone because you deleted it, your computer had an issue, or Microsoft Word crashed. But don't worry, there's good news – things you delete from your computer aren't gone forever. In this article, we'll show you easy ways to get back those lost Word files. So, if you're wondering how to recover deleted or unsaved Word documents, keep reading to find out!
In this article:
- Part 1. Can You Recover Deleted Word Files without a backup?
- Part 2. How to Recover Deleted Word Document Files – 6 Methods
- Method 1. Retrieve Deleted Word Files by Professional Recovery Tool

- Method 2. Recover Deleted Word Documents Using Backup
- Method 3. Previous Windows 10/11 Versions
- Method 4. Windows Command Prompt
- Method 5. Using System Restore
- Method 6. System Image Recovery
- Part 3. Ultimate Way to Recover GoPro Video – 100% Work
- Part 4. How to Fix Corrupted GoPro Video via D-Back
- Part 5. Hot FAQs about GoPro Camera Video Recovery
Video: How to Recover Deleted Word Document
Part 1. Can You Recover Deleted Word Files without a backup?
Absolutely, you can easily recover your Word files if you choose the right tool for your needs. There are specific steps and precautions to follow to make sure you recover your files safely and effectively. Since Word documents are widely used, they can sometimes be accidentally deleted without you realizing it until later.
But if you notice your file is missing and you need it back, start the recovery process right away – the sooner, the better. You might find your files in the Recycle Bin or use simple methods to retrieve them on your own.
If these methods don't work, or if you used Shift + Delete to remove the file, you can turn to professional data recovery software.
Part 2. How to Recover Deleted Word Document Files – 6 Methods
1 Method 1. Retrieve Deleted Word Files by Professional Recovery Tool
If your Word Document has been permanently deleted and the methods you've tried haven't worked, there's a powerful solution: using professional recovery software. Tools like iMyFone D-Back Hard Drive Recovery Expert can dig deep into your computer to locate lost files and folders that regular computer tools might overlook.
But how does it work?
When files and folders are permanently deleted, they're concealed from view but not entirely erased. With its advanced deep-scan algorithm, D-Back Hard Drive Recovery Expert, a professional data recovery tool, can successfully retrieve your permanently deleted or unsaved documents.

iMyFone D-Back
- It can aid in the retrieval of lost Word documents resulting from accidental deletion, using Shift + Delete, overwriting, and other causes.
- D-Back enables the recovery of deleted files from various storage mediums like SD cards, USB drives, external hard drive, SSDs and more.
- It is support both Windows and Mac computer, allows you to recover Word Document on Mac.
Simple Steps to Recover Deleted Word Documents using D-Back Hard Drive Recovery Expert:
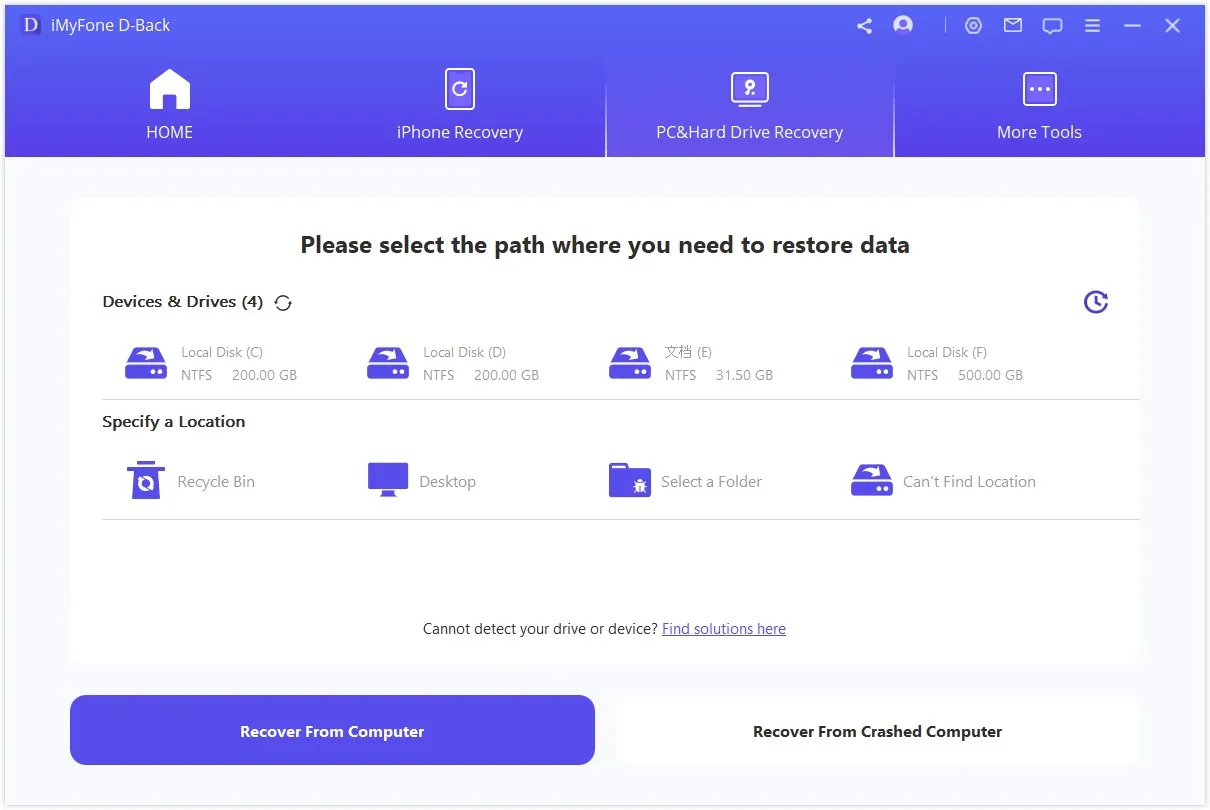
Step 1: Download and launch D-Back Hard Drive Recovery Expert on your computer.

Step 2: Choose the location where the Word document was lost. Confirm the selection and click "Start."
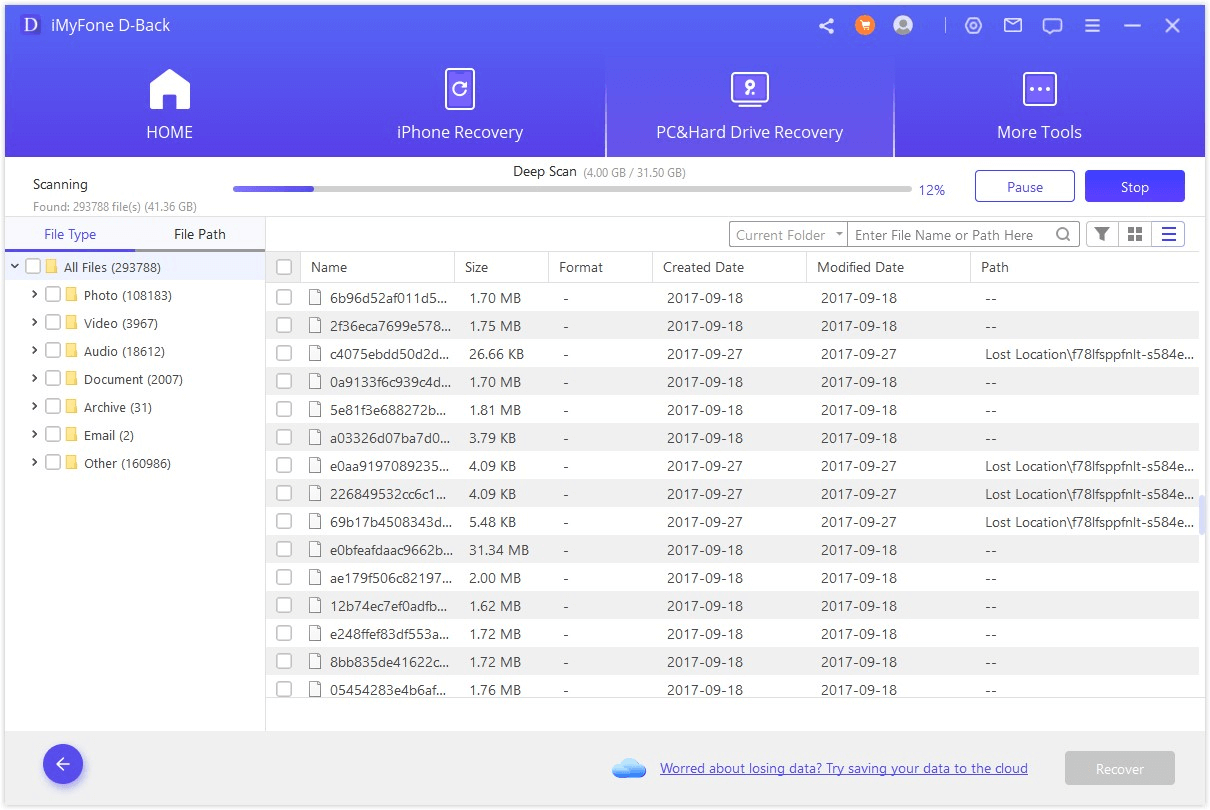
Step 3: The scanning process will begin, and you can pause or stop it if needed.
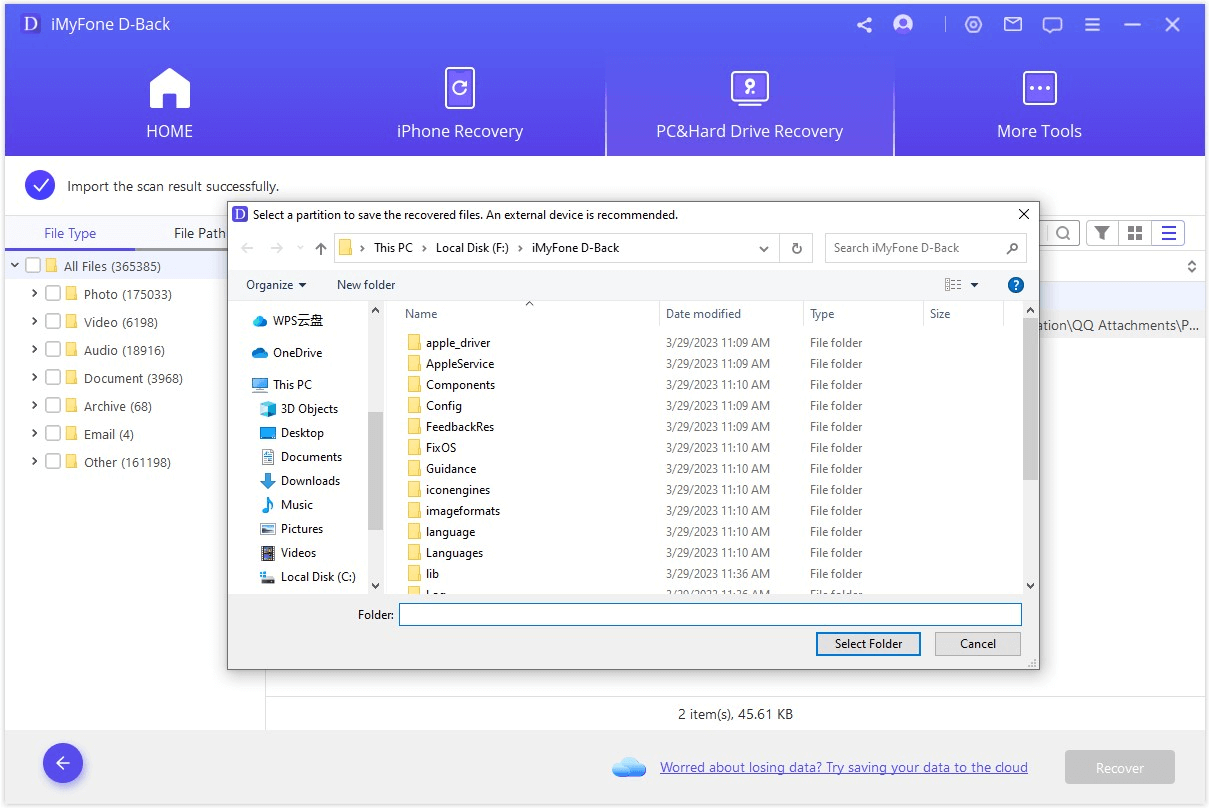
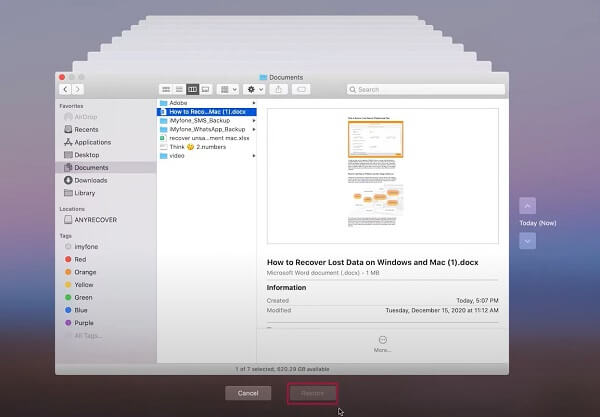
Step 4: Once the scan is complete, D-Back Hard Drive Recovery Expert will display a list of your lost files. You can preview and select the deleted Word document for recovery.
2 Method 2. Recover Deleted Word Documents Using Backup
Windows 10 and 11 offer a new feature called Backup and Restore, allowing you to create backups of your data for future recovery. To recover permanently deleted files through this feature, you need to have previously enabled it on your Windows device.
Here's how to do it:
Step 1: Connect the external storage device containing the backup to your main device.
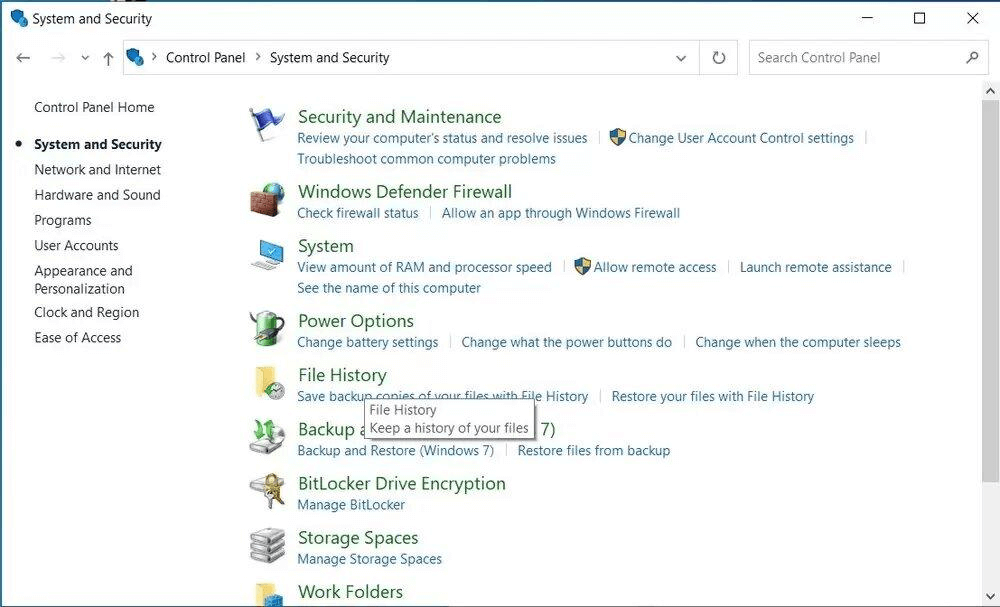
Step 2: Access the "Control Panel," select "System and Security," and then click on the "Backup and Restore (Windows 7)" option.
Step 3: In the Backup and Restore menu, select "Restore my files." A Restore wizard will appear to guide you through the file recovery process.
Step 4: If you don't see the "Restore my files" option, choose "Select another backup to restore files." Another wizard will assist you in recovering your files.
Tips
Keep in mind that using Backup and Restore will replace the current data on your Windows device with the backed-up data. To prevent additional data loss, ensure that the backup includes all the essential information.
3 Method 3. Recover Deleted Word Documents Using Previous Windows 10/11 Versions
Windows 10 and 11 provide an additional convenient feature for restoring permanently deleted files known as "File History." If you had enabled this option before deleting a document, you can utilize it to recover permanently deleted files without requiring extra software.
Here's how to proceed:
Step 1: Type "File History" in the Start menu or the Windows search bar.
Step 2: Select "File History Settings."
Step 3: In the pop-up window, choose "Restore personal files" from the left panel.
Step 4: Navigate through the backups you want to restore. Use the navigation buttons at the bottom to switch between backups, preview dates, and explore folders within them.
Step 5: Once you've found the backup containing the deleted documents, click the "Restore" button to recover the files to their original location.
Step 6: If Windows indicates that a file with the same name already exists in the destination folder, select the "Replace the file in the destination" option.
Step 7: Finally, close the window and check if the recovery process was successful.
4 Method 4. Recover Deleted Word Documents Using Command Prompt
Occasionally, files and folders may become hidden due to the "Hidden files and folders" feature in Windows. You can attempt to recover them using the Command Prompt.
Here's how:
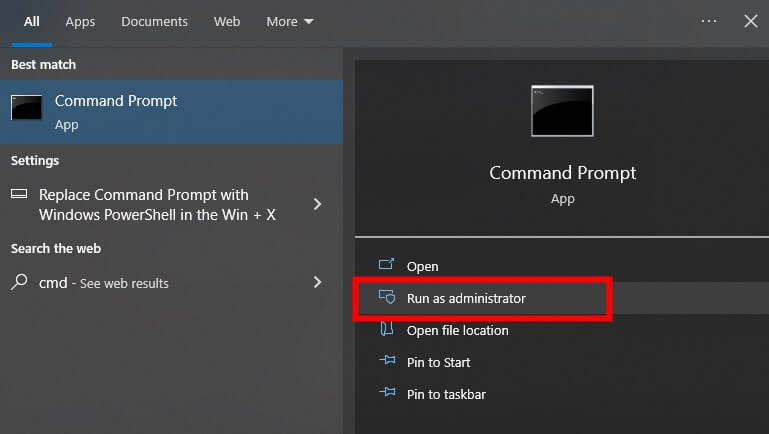
Step 1: Type "cmd" in the Search Bar of the Start menu.
Step 2: Right-click on "Command Prompt" and choose the "Run as administrator" option.
Step 3: In the Command Prompt, type chkdsk *: /f. Replace the "*" with the appropriate letter of your hard drive. Press "Enter."
Step 4: Next, type ATTRIB -H -R -S /S /D D:*.* in the Command Prompt window. Replace "D" with your hard drive's letter. Press "Enter" again.
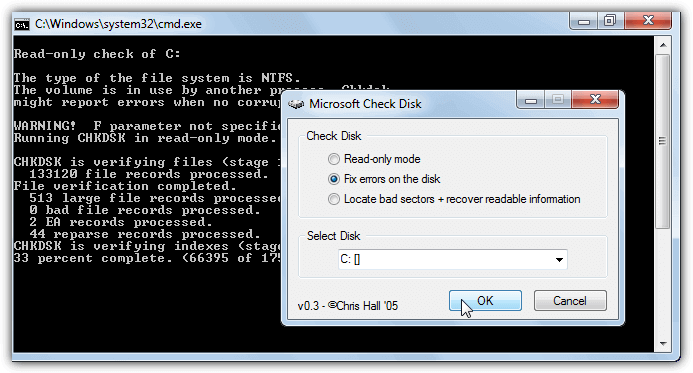
If you've followed these steps correctly, a recovery process should initiate immediately. Allow it to complete and then check if your files have been successfully restored.
5 Method 5. Using System Restore
If you're using Windows 10 or 11, you have the option to utilize System Restore to recover permanently deleted files. System Restore takes regular snapshots of your entire operating system, allowing you to undo undesired changes by reverting your system to a previous point in time.
However, it's important to have activated the System Restore option beforehand.
To recover deleted files via System Restore, follow these steps:
Step 1: Type "create a restore point" in the Start menu or Windows search bar and press "Enter."
Step 2: Select "System Restore."
Step 3: Review available system restore points and choose the most suitable one to recover your deleted document. Click "Next."
Step 4: Confirm the chosen restore point and select "Finish."
Step 5: Your PC or laptop will restart to apply the changes made by Windows.
Keep in mind that while this option is convenient, System Restore might impact recently installed drivers, programs, and browser updates. Its main purpose is to repair your Windows environment, which means it will take your device back to a previous version. This version might lack some recently installed programs or updates.
Before initiating the System Restore process, you'll receive a window listing all programs affected by it. This allows you to back up potentially affected programs and files before proceeding with the system reversion.
6 Method 6. System Image Recovery
System Image backup allows you to back up your entire Windows 10 or 11 operating system. However, it doesn't support individual file and folder backup, so recovering specific documents might not be possible.
To recover documents using System Image Recovery, follow these steps:
Step 1: Type "settings" in the Start menu or Windows search bar and press "Enter."
Step 2: Click on "Update & Security."
Step 3: From the left-hand options, select "Recovery."
Step 4: Ensure all open documents and programs are saved.
Step 5: Click the "Restart now" button under "Advanced Startup."
After your system restarts, follow these steps:
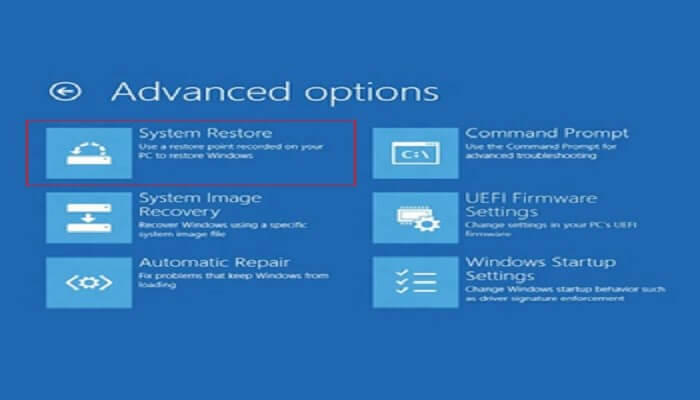
Step 1: Click on "Troubleshoot," then choose "Advanced Options," followed by "See more recovery options," and finally select "System Image Recovery."
Step 2: Browse the list of System Image backup files and choose the one containing the deleted document.
Step 3: Click "Next" and select additional restore options if needed.
Step 4: Review System Image properties and click "Finish" to initiate the restoration process.
After the restoration is finished, the deleted document will be returned to where it was originally or to a different location if you set that in the Restore settings.
Part 3. Where Can I Find AutoSave Word Documents on My Computer?
AutoRecover is designed to automatically recover the last version of your Word document in case of power failures or crashes when you open the app. Once AutoRecover loads the recovery file, it's advisable to save it before making any changes or closing it.
However, you might want to locate AutoRecover files on your computer for various reasons. Here's how:
Step 1: Open Finder.
Step 2: Click on "Go."
Step 3: Click on "Go to Folder" (you can also use the SHIFT + COMMAND + G shortcut).
Step 4: Input the specific folder path for Word, Excel, or PowerPoint:
For Word:
/Users/Your_Username/Library/Containers/com.Microsoft/Data/Library/Preferences/AutoRecovery
For Excel:
/Users/Your_Username/Library/Containers/com.microsoft.Excel/Data/Library/Application Support/Microsoft
For PowerPoint:
/Users/Your_Username/Library/Containers/com.Microsoft.Powerpoint/Data/Library/Preferences/AutoRecovery
Remember to replace "Your_Username" with your actual username.
Since the AutoRecovery folder is hidden, it's not visible through Finder navigation. That's why you should use the "Go to Folder" option and input the complete path to access the folder.
Also, keep in mind that if you close a Word document and select "Don't Save," the AutoRecover option won't be active. The feature assumes everything is fine and deletes the AutoRecover file, thinking you won't need it.
Part 4. FAQs about Word Files Recovery
1 How Can I Adjust Microsoft Word's AutoRecover Interval to Every Minute?
When dealing with crucial data in your Word documents, waiting 10 minutes for an AutoRecover version might feel risky. Luckily, Microsoft provides the flexibility to set your preferred AutoRecover interval:
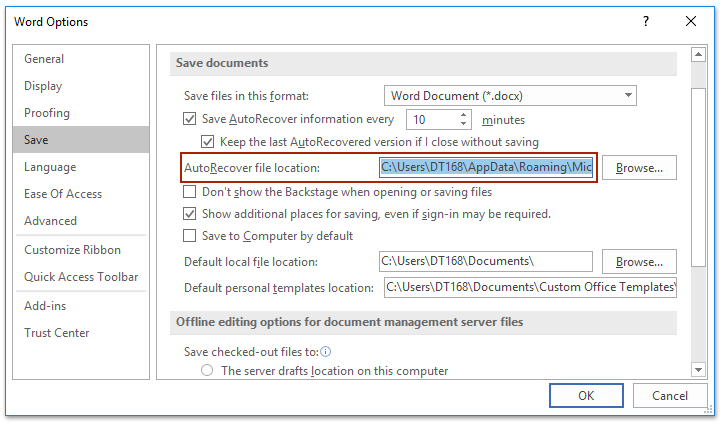
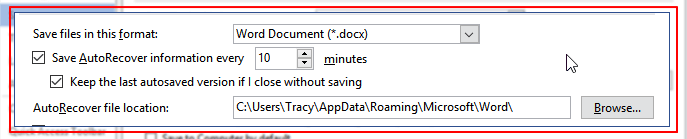
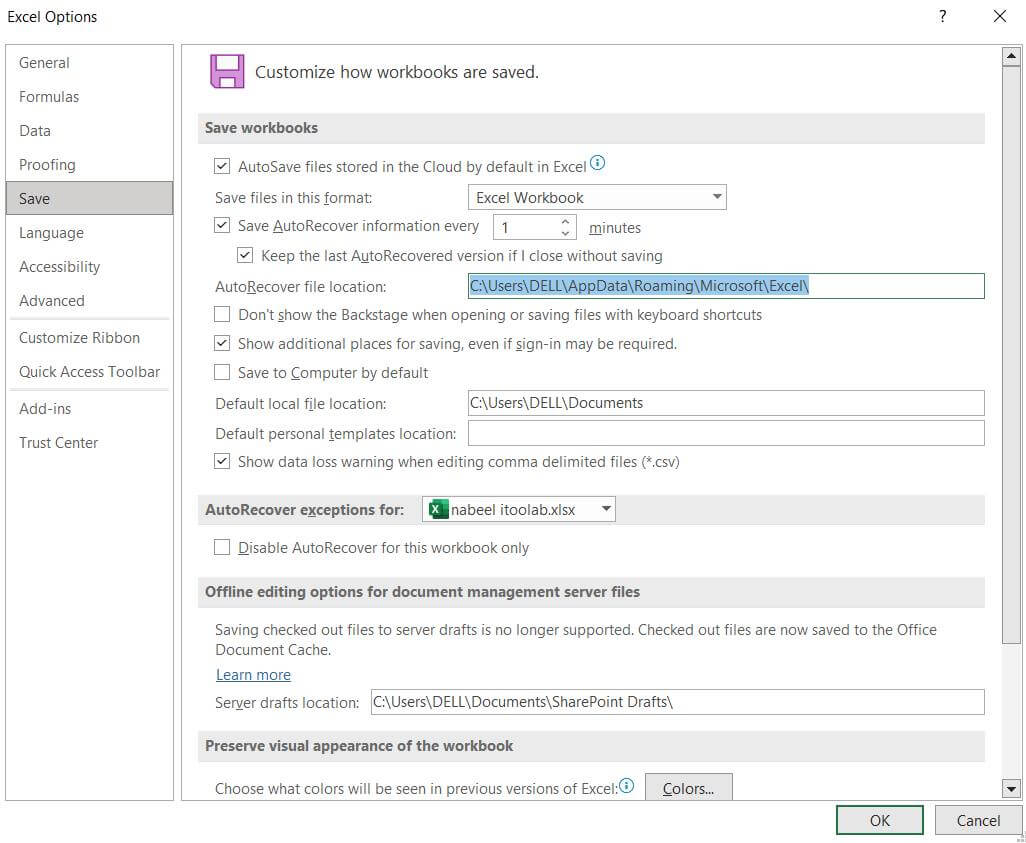
- Open Word and go to File -> Options -> Save.
- In the "Save documents" section, enter your desired time interval (in minutes) in the "Save AutoRecover information every (…)" field.
- Click "OK" to confirm.
- To change the storage location for AutoRecover documents:
- Go to File -> Options -> Save.
- In the "Save documents" section, specify the desired save path for AutoRecover files in the "AutoRecover file location" box.
- Click "OK."
AutoRecover settings also allow you to:
- Disable AutoSave by default for OneDrive and SharePoint online files.
- Modify the cache location for AutoRecover files.
- Activate AutoSave by default on your computer.
Note that local AutoSave isn't available in Office 2019 or 2021. However, the AutoRecovery feature remains operational, periodically safeguarding your Word files from accidental losses due to crashes."
2 How to Retrieve a Unsaved Word Document You Didn't Save
If you accidentally deleted a Word document without saving, here's how to recover it:
Step 1: Open Word and click on the File Tab at the top left.
Step 2: Choose Manage Document and then select Recover Unsaved Documents.
Step 3: Look for your missing file in the dialogue box.
Step 4: Open the retrieved Word document and click on the "Save As" button to save it correctly.
3 How to Find Missing Files after upgrading Windows 10
Numerous users experience file loss following a Windows 10 upgrade due to temporary account usage. To confirm this, follow these steps:
Step 1: Open Settings.
Step 2: Click on Accounts.
Step 3: Select Sync your settings.
Step 4: Check for the message: 'You are logged on with a temporary profile. Roaming options are currently unavailable.'
To retrieve your files:
Simply sign in with your regular account, and your files will be restored."
Conclusion:
If you've accidentally deleted a Word document, there's no need to panic. The methods mentioned above offer a strong possibility of recovering your deleted files. This is particularly true if you have iMyFone D-Back Hard Drive Recovery at your disposal, which can delve deep into your computer's hard drive and successfully retrieve your lost files!
iMyFone D-Back
Recover Word Documents/Files from Windows and Mac with Ease
(Click to rate this post)
Generally rated 4.6 (256 participated)
Rated successfully!
You have already rated this article, please do not repeat scoring!