


 March 29, 2023
Time Machine is the backup utility and a data recovery tool for MacOS. It is the ideal tool for those who have lost data on Macs and are trying to recover it. It backs up your data locally onto external storage devices and is easy to use. Everything from hourly to monthly backups is kept, and you can recover data with a click.
In this article, we will explore multiple data recovery options for macs that include how to recover data from a time machine locally, recover files from a time machine on another computer, and recover files in case of no backup.

Part 1. How To Use Time Machine to Restore Files
As a native MacOS data backup and recovery tool, the time machine is a lifesaver for many, but that is only if you know how to use it right and backup your data regularly. Another thing Apple allows you to do is to backup your data through your iCloud.
Time machine lets you either restore
Your entire MAC is back to how it was on a specific date. This would mean recovering all the files previously present at the selected time, not just a specific few.
Selective files. Time machine can let you preview and restore a single file or specific files like recovering emails from time machine backup.
In this section, we will cover how to restore files using a time machine when it is running, and your files are backed up.
Your data can quickly be restored from a time machine with these quick steps.
Step 1. To enable the data recovery option, you must first ensure that your external device containing your time machine MAC backups is connected to your computer. Only then will the backups be available for recovery.
Step 2. Now open a Finder window showing where the data was previously kept. If the data is on your desktop, you do not need to complete this step.
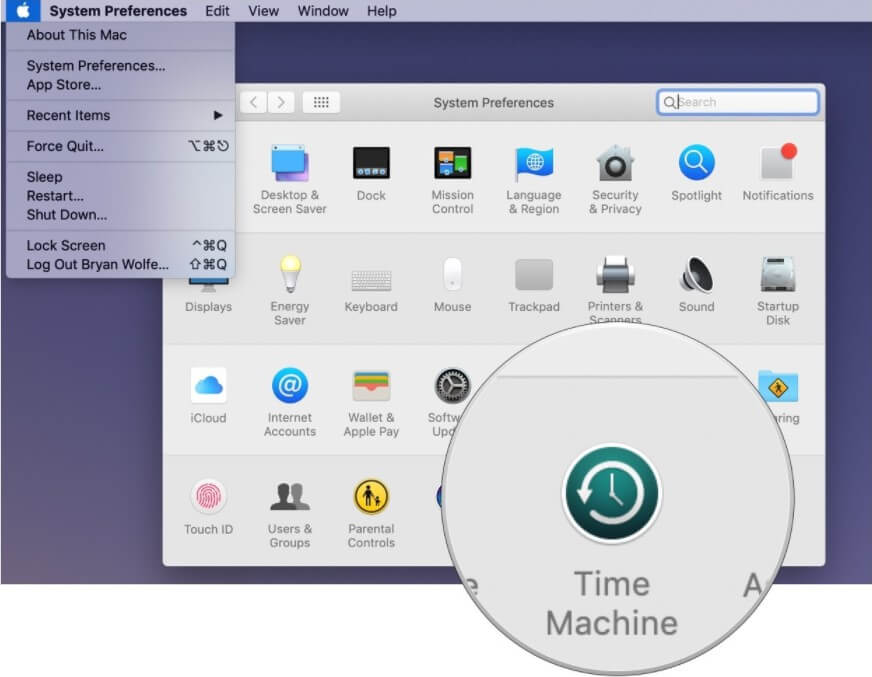
Step 3. Please select the time machine icon on the menu bar to open it. You could also open the time machine using the launchpad if it is not on your menu bar.
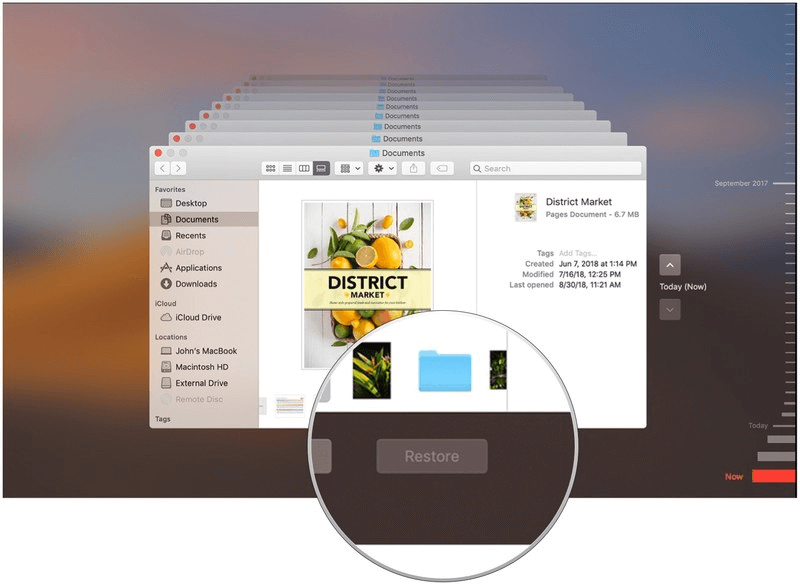
Step 4. Now browse through time machine backups and local snapshots using its timeline. Select the items you want to restore from the time machine.
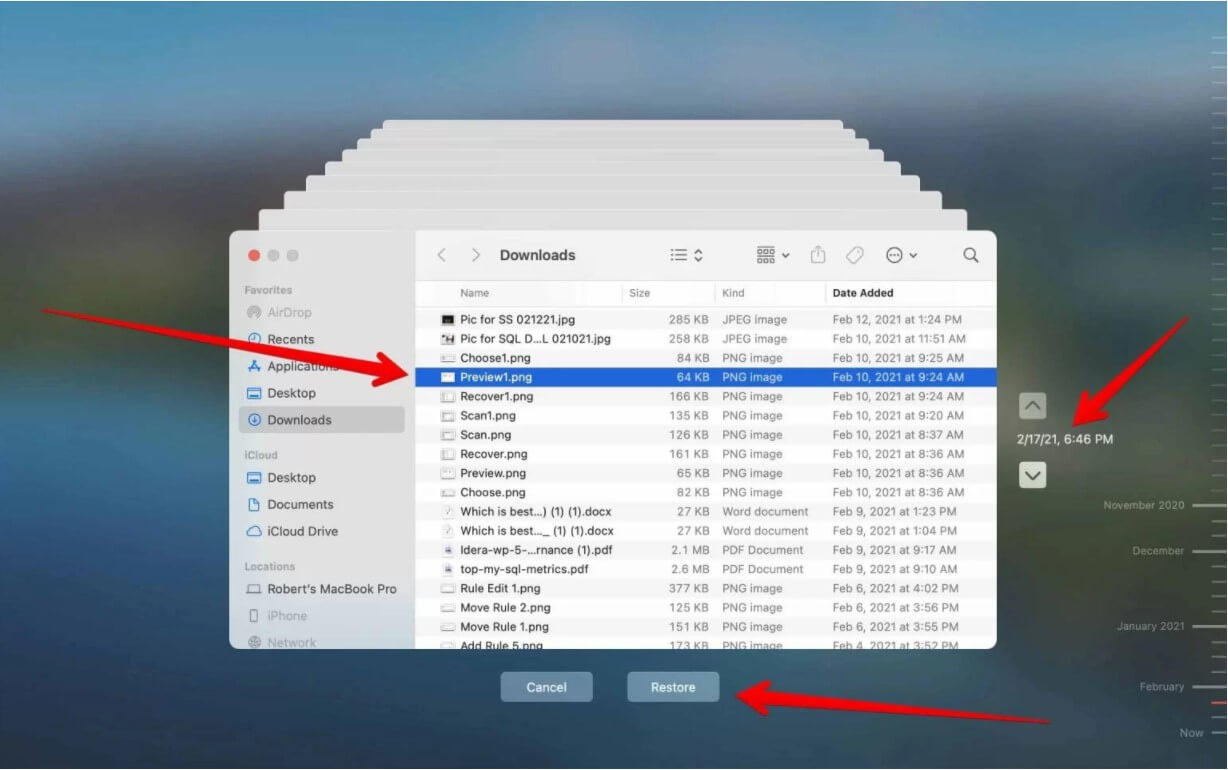
Step 5. Click the restore button, and now your data restoration is complete. You can find the retrieved files in their original location before deletion.
The restoration process might take time, depending on how big the file is.
Part 2. How to Restore Files from Time Machine to Another Mac/Computer
Sometimes you change your computer or Mac and want to transfer all the data kept on your Mac to another computer. In cases like this, you can use the time machine again to copy all your files onto another computer.
This section will cover how to recover files from a time machine on another computer. Follow the below steps if you want to know how to recover data from a time machine.
Step 1. Restoring files from a time machine to another mac is easy because a time machine stores your backups on an external hard drive, so all you need to do is plug in the hard drive that has your backups onto your new computer.
Make sure that your new computer has a time machine running.
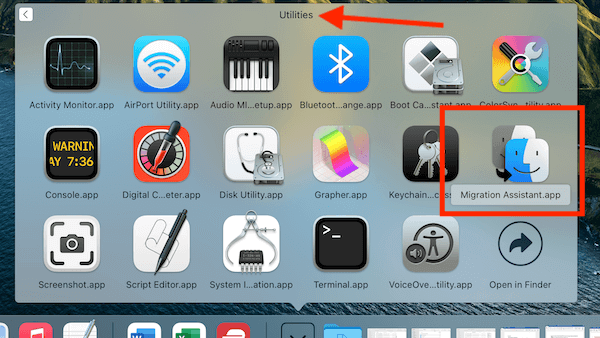
Step 2. Next, you must recover the data as you would on your own Mac. Restore your data by opening the Utility folder.
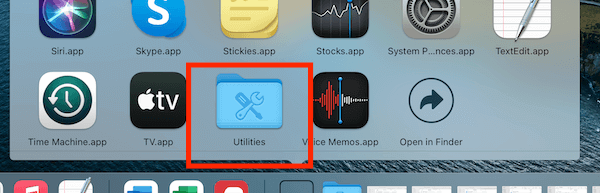
Now, select the migration assistant app.
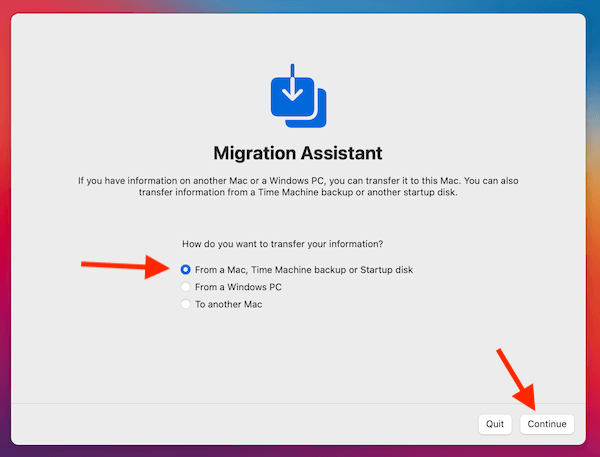
Step 3. When selecting a data transfer method, choose "from a MAC, time machine startup, or disc" and click "continue."

Step 4. Select your time machine backup for recovery and click continue. Then choose which backup you will use and click continue again.
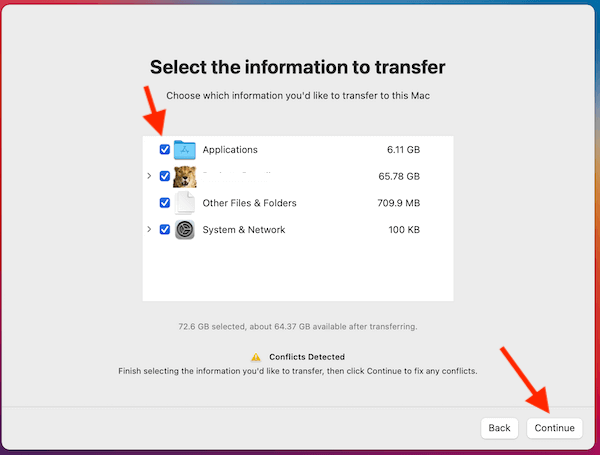
Step 5. In the final step of restoring files from the time machine to another mac, specify the information you wish to transfer, such as files, folders, accounts, system settings, and applications. Click continue and restore files from the time machine to another mac.
Part 3. How to Recover Files from Time Machine without Backup
Sometimes you lose data that a time machine has not backed up. In cases like this, a time machine will not be able to help you in data recovery.
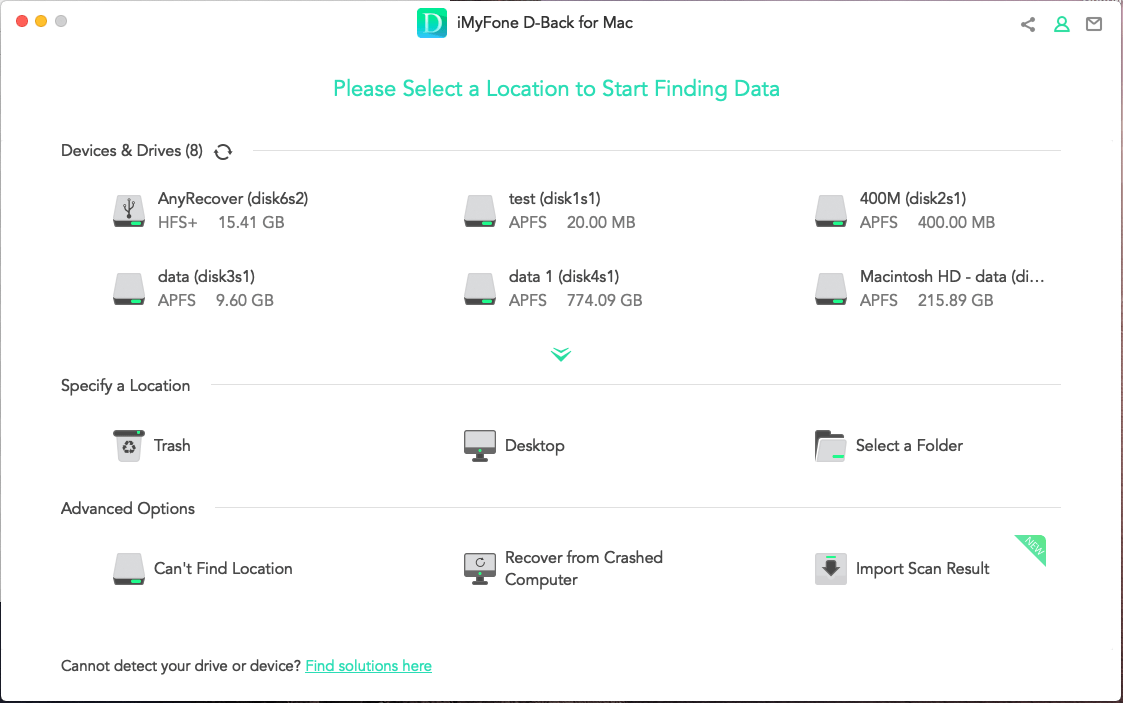
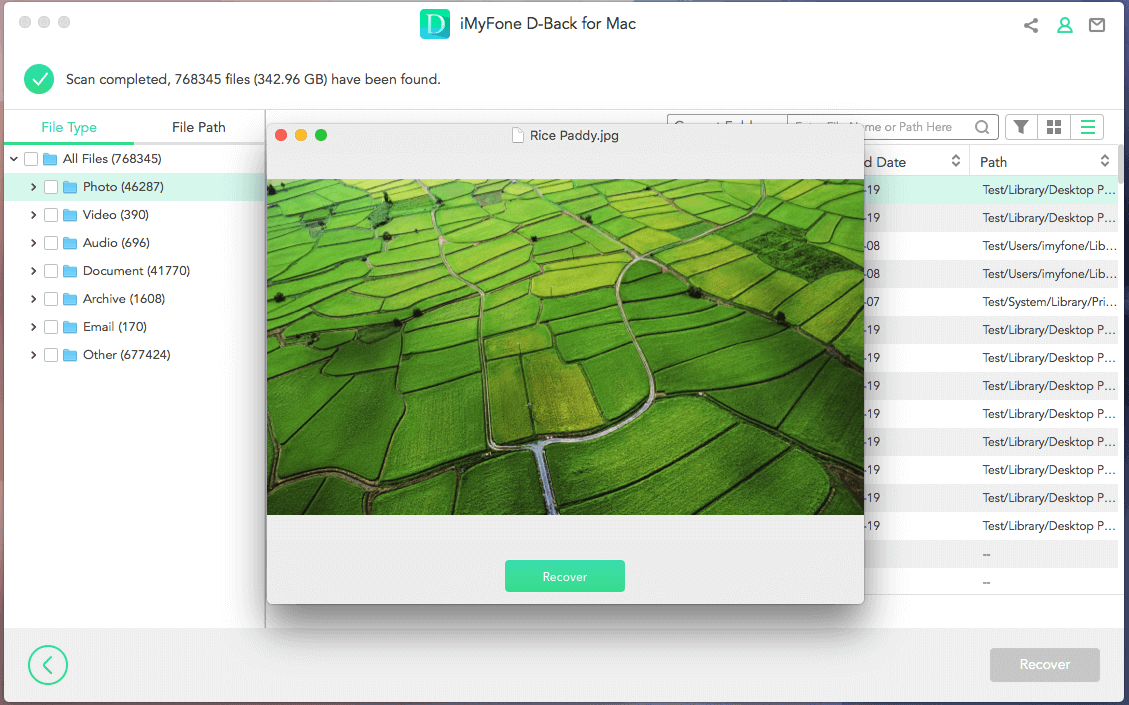
This is where you will need a trusty app like iMyFone D-Back to get you your data back. With three easy steps, you can retrieve your data in no time.
Main Features about iMyFone D-Back:
- You can preview all the files before your start the recovery process.
- You can quickly restore all your essential data from USB drives, SD Cards, external devices, and MAC hard drives.
- More than 1000 file types can be recovered. You can recover all media, including phone, video, and other vital data.
Step 1. Launch the iMyFone D-Back. Select the location you want to scan.
Step 2. Once the location is selected, the scanning process will start.

Step 3. Preview your files, select the ones you want to restore, and click Restore.
Part 4. FAQs
4.1 How to recover deleted notes from Mac on a time machine
You can follow the below steps to restore deleted notes:
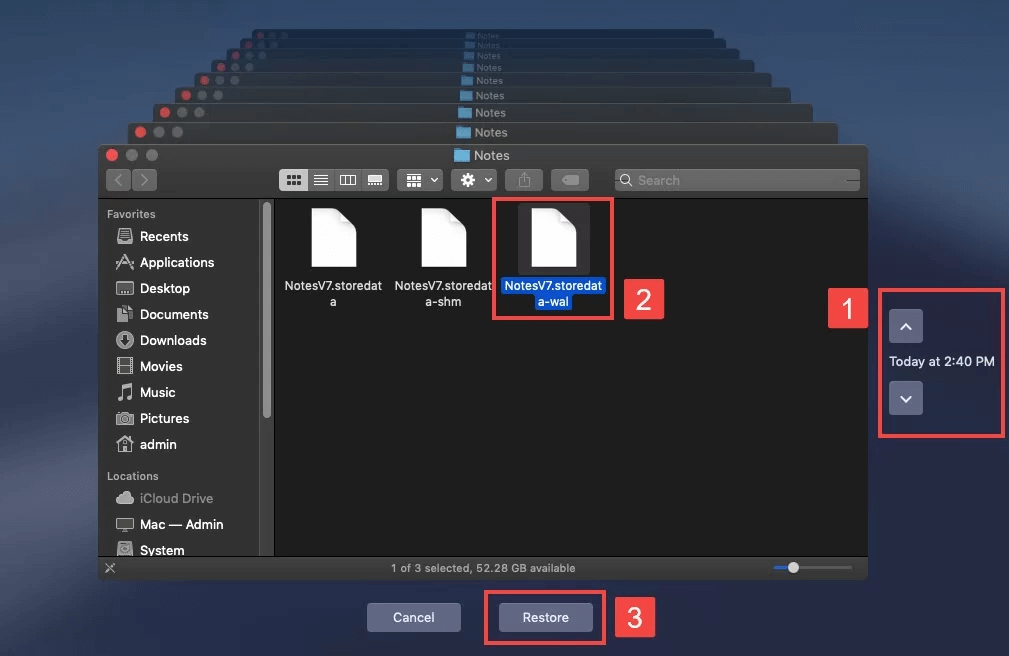
Step 1. Connect your Time Machine disk and open the Finder option. Open the Go and open the Go to folder option.
Step 2. You can recover your notes by pasting this location
~/Library/Containers/com.apple.Notes/Data/Library/Notes/.

Step 3. Select the Time Machine option and "enter the time machine.
Step 4. Use arrows for the previous version of the notes. Click Restore to start the restoration process.
4.2 How to access time machine backup
You can access your time machine backups by clicking the time machine icon on your menu bar and then choosing "enter the time machine." If the icon cannot be found in your menu bar, you can display it by selecting the"show time machine in menu bar" option in the system preferences.
Conclusion
Now you know how to properly use a time machine to keep track of your data and backups and restore them at will. Alternatively, if you haven't backed any data that is now lost, you can use iMyFone D-Back to restore any lost data in any folder on your Mac. This tool can help restore your files in 3 simple steps without hassle.