Imagine about this: on your iPhone, you have many vital data that you often consult. Your everyday activities depend on them. For some reasons, you haven't saved these iPhone data. Then, the unimaginable happens. You lost your iPhone. Your daily activities were severely affected, and you lost a substantial amount of income in the process.
Have you ever found yourself in the above scenario? If so, you would readily testify that it is the worst thing to happen to anyone, especially someone who uses his iPhone to conduct business. This brings up the need for iPhone users to save their data – contacts, photos, videos, files, apps, etc. – to a computer. If your iPhone is stolen or got damaged, you can easily access your saved data on your computer. But, how may you do this? Let us discuss 3 ways you can save iPhone data to computer.
Way 1 Save Data from iPhone to Computer with iTunes
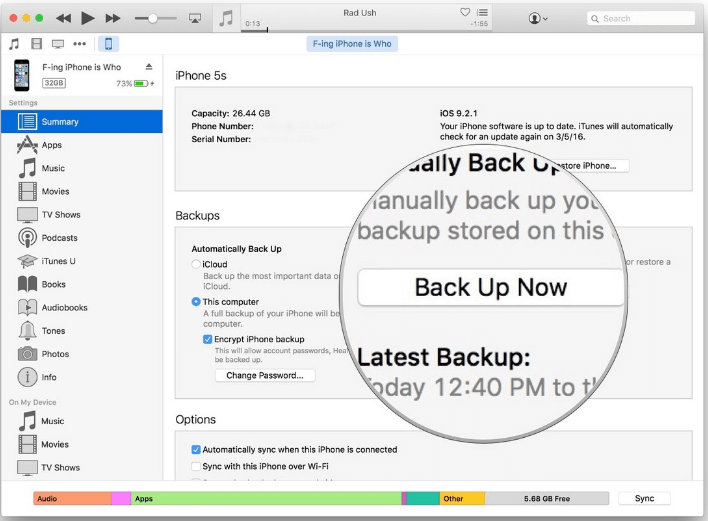
The very first method of saving your iPhone data to your computer is to use iTunes. This is very easy, and you can follow the steps below to do it.
- Go to iTunes and connect your iPhone to computer.
- If you were required to provide passcode, do so. Then choose your device on iTunes.
- Click on Back Up Now.
- Go to iTunes Preferences, then Devices to see if your back up was successful.
Saving Health and Activity data from your device may trigger encryption. If that happens, locate and tap the box "Encrypt backup" and create a password.
One particular advantage of saving all data from iPhone tocomputer using iTunes is that it comes directly from Apple. That means the method is reliable. Besides, it is free and easy to follow. However, this method has two disadvantages. One is the inability to view the data in iTunes backup, and the other is the inability to save just a particular file.
Way 2 Save Photos and Videos from iPhone to Computer
This is the second method that looks more specific. Photos and videos are the most important data on iPhone, and the last thing you want is losing them. You can transfer them to your computer using Windows . Follow the steps below.
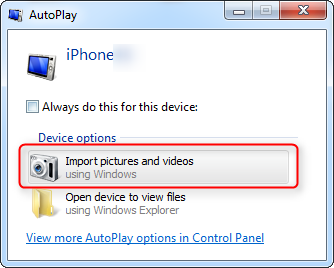
- Connect your iPhone to PC.
- When AutoPlay appears, click "Import pictures and videos."
- Input your desired import setting.
- Click OK, and you are done.
This method has the unique advantage of being free and easy, but you may not be able to import and save more than the photos and videos. Besides, it is only those with access to a window that can benefit.
Way 3 Save Data from iPhone to Computer Selectively with iMyFone D-Port
This is the third and the most useful method of downloading iPhone information to computer. iMyFone iTransor is a powerful iOS data exporter that allows you to save data from iPhone to PC/Mac selectively. This means you can choose which data you want to save. And it can do more than you imagine. See its key features.
Key Features:
- Save Different iPhone Files: Up to 20 different types of iPhone files can be transferred.
- Save Selectively: It helps you to select a particular file to transfer.
- Third Party Apps: Third party instant messaging apps like Whatsapp, WeChat, etc. can be saved.
How to Save Data from iPhone to Computer with iMyFone iTransor
With easy steps, iMyFone D-Port can help you save various types of data. Follow the steps below.
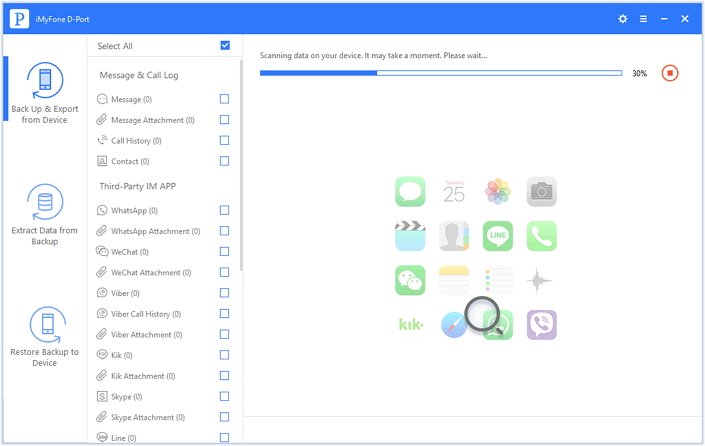
1, Download, install and run the software on your computer. On the left panel of the screen, click on Back Up & Export from Device. Then click the option of Export Data to select the file types you want to save from your iPhone. You can check all of them.
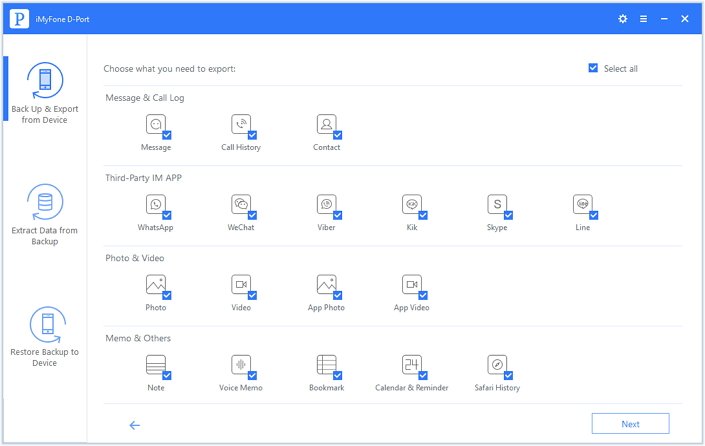
2, Connect your iPhone with iMyFone D-Port and click Scan button after the detection. This iPhone data exporter will begin to scan all the data on your iPhone and it will take a while which depends on how much space has been used on your iPhone. Kindly wait for it.
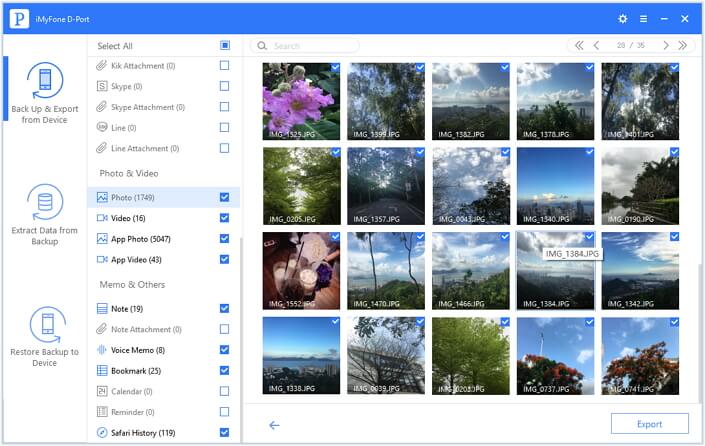
3, After scanning, you can preview the scanning result and select data you wanna save, and then click Export. Follow the on-screen information to store iPhone data on computer.
iMyFone D-Port versus Other Methods
The other methods we discussed above are all good, but they have k-leg. None of them can save all iPhone data to computer let alone selectively transferring such. They are incapable of what iMyFone D-Port can do – selectively transferring 20+ types of data on iPhone and read them on your computer. Thus, only iMyFone D-Port iOS Data Exporter stands out. And the best part is that you can test its efficacy by using the free trial version before purchasing. Would not you rather go for iMyfone D-Port!


 September 14, 2021
