I am here to ask if it is POSSIBLE and how to do it.
Situation - my girl friend's iPhone was stolen last night. She had backed up the iPhone 13 to her Windows Asus computer. Now she is urgent to view some iMessages on the phone because important business info is in the iMessages. Is there any way to look at all of her iMessages? My initial thought is that since she has an iTunes backup and she can restore the backup to another iOS device such as her iPad. But that will overwrite her existing iPad data. I would think there is another way to bring all the iMessages from iTunes backup. So is that probably how she is doing it?
We found this question in Mac Rumors and we believe the question is common for Apple users. Here in the article we will offer two ways to view and read iMessages in iTunes backup, including view iMessages on iTunes by directly extracting them to computer and view iMessages on iTunes by restoring backup.
Way 1 Extract iMessages from iTunes Backup to Computer to View
You can use an iTunes backup extractor to extract iMessages from iTunes backup and then view them on your computer when your iPhone is damaged, stolen or lost. Here we recommend iMyFone D-Port iTunes Backup Extractor to you. The professional data extractor is specially researched and developed by iMyFone company, which owns the highly-praised iMyFone D-Back iPhone Data Recovery and iMyFone Umate Pro iPhone Data Eraser. Armed with the following powerful functions, the program can serve you better in data exporting and data extraction than competitors.
Key Features:
- Views 20 types of data in iTunes backup such as photos, videos, WhatsApp and it will supports more.
- Reads content in iCloud backup without restoring it to any iOS device.
- Exports data from almost all iPhone models and iOS versions including the latest iPhone 13 and iOS 15.
- Offers all the users with 30-day money back guarantee and free trial version.
Steps to View and Read iMessages in iTunes on Your Computer
See how to use iMyFone D-Port to view and read your iMessages on iTunes. Of course, you will have to download the free trial version to your Windows or Mac computer.
1. Select Data Types and iTunes Backup to Scan
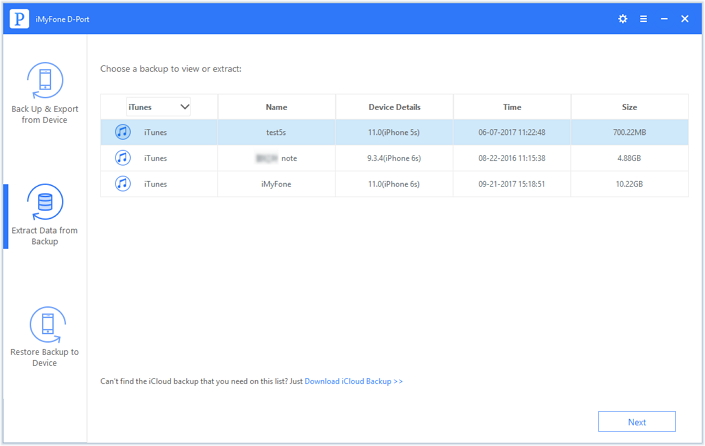
Run the iMyFone program and select the iTunes backup after clicking Extract Data from Backup. Then click Next to continue.
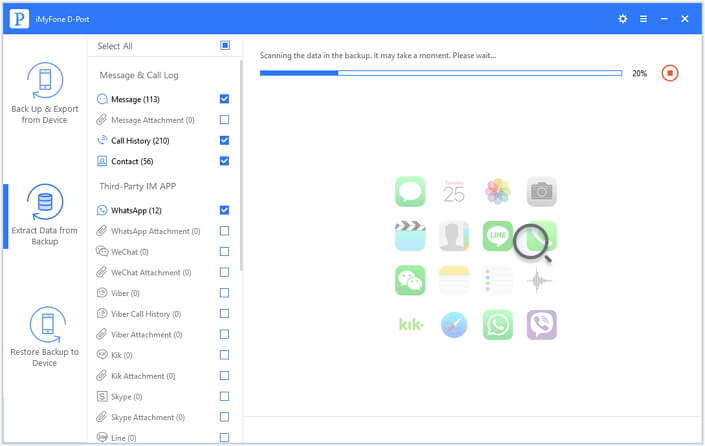
You can choose Message, or more types so that the program can find for you. Then click Next and D-Port will scan the data in the iTunes backup. It will last for a little while, generally less than 10 minutes.
2. Scan and Preview iMessages in iTunes Backup
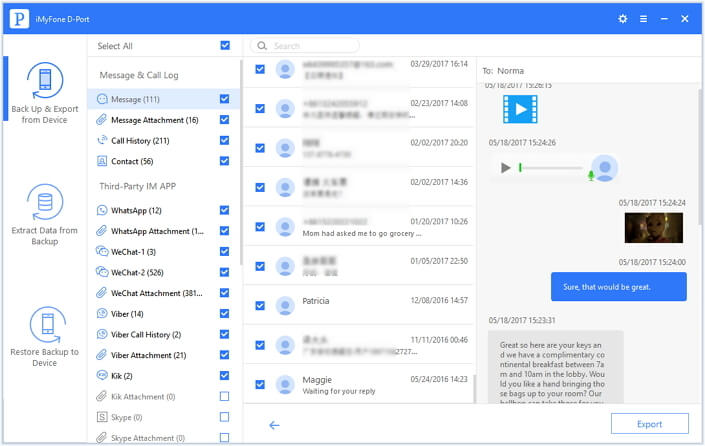
After scanning, the program will list all the iMessages in the backup for your preview. Click any of them to see the specific content.
3. Transfer iMessages to Computer and View
Check the ones you need to view and click the Export button. D-Port will prompt you to choose one folder on computer to store the iMessages and other data. After transfer, you can view and read your iMessages on computer whenever you need it.
See? Pretty easy and user-friendly, iMyFone D-Port iTunes Backup Extractor helps you make what you want.
Way 2 View iMessages on iTunes by Restoring Backup to iOS Device
Step 1. Open iTunes and then connect your iOS device to it.
Step 2. Click the icon of iPhone, or icon of iPad if what you have connected is an iPad. And locate the Backups option.
Step 3. Click Restore Backup and iTunes will let you choose an iTunes backup. Click the one including iMessages you need to read.
Step 4. It will take some time to restore the whole backup, which is depending on the size of backup.
Step 5. After restoring, you can view your iMessages on the device.
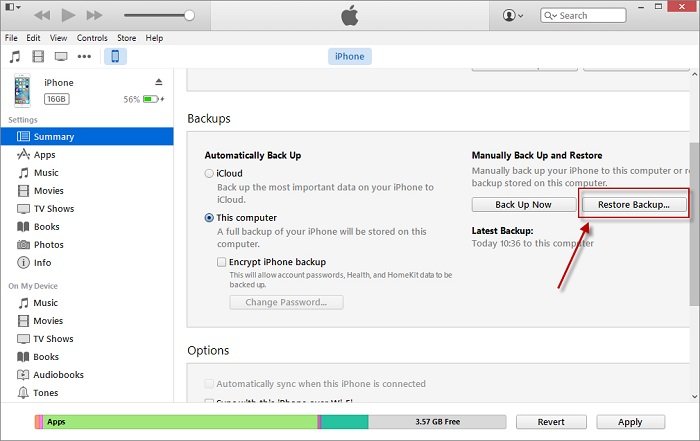
Now you have two ways to view and read iMessages in iTunes backup and each has its advantages and disadvantages. Way 1 offers users more flexibility but it is not free. You can only use the free trial version to view your iMessages on its interface. Way 2 is free and comes from Apple. However, you cannot selectively restore what you need and restoring will overwrite your data in device. Just try the free trial version and choose the one which is more appropriate for you.


 September 14, 2021
