So you're trying to back up your iPad, and you keep getting this super annoying message that says "Not Enough Storage: This iPad cannot be backed up because there is not enough iCloud storage available. You can manage your storage in Settings." Why is your iPad nagging you about this, and what can you do to stop the iPad not backed up message? Luckily, there are a few easy ways to sort this out—some that cost money, and some that don't.
1. Buy More iCloud Storage to Stop the Annoying Prompt
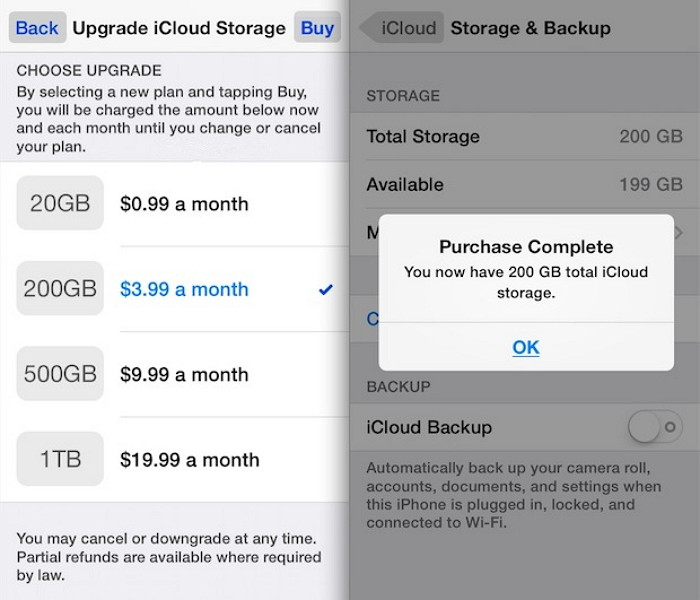
The root of this problem is that iCloud is hungry for more space and it wants to be fed—with your money. Since you only get 5GB for free, once you go over that, you'll have to start paying. So the first and most obvious method for stopping this annoying prompt is to just buy more iCloud storage space! Hey, this wouldn't be the first time that Apple annoyed you into paying them money, would it?
Here's how to do it:
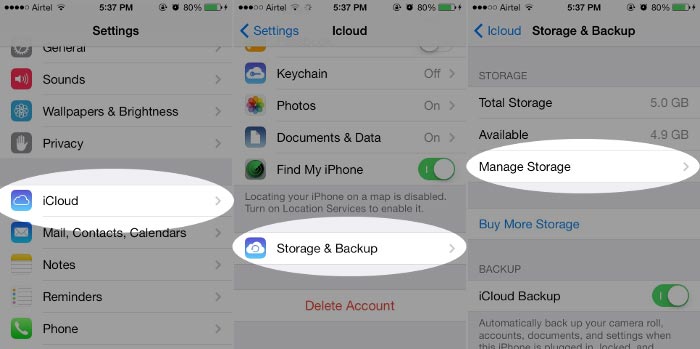
(1) On your device, go to your Settings, and then tap on your name, then iCloud, then Manage Storage (or iCloud Storage). For devices using iOS 10.2 or earlier, you just go to Settings > iCloud > Storage.
(2) Simply tap where it says Buy More Storage or tap where it says Change Storage plan and choose a different plan.
(3) Tap Buy and follow the directions on the screen.
2. Delete Unnecessary Backups on iPad
If you don't want to pay for more iCloud storage, you could also just delete a backup of your iPad, so that you could save a new one. You can simply go to your Settings > [Your Account Name] > iCloud > Storage, then tap where it says Manage Storage. From here, you can tap on your device name and then tap Delete Backup to get rid of its current backup.
3. Back Up Fewer Apps on iPad
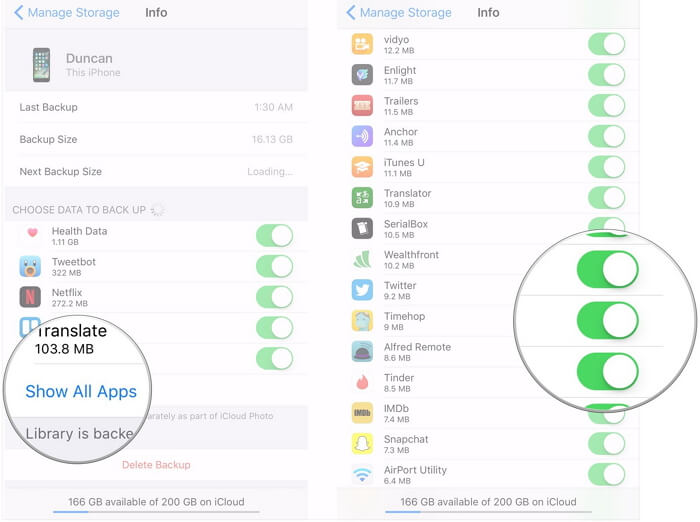
Nowadays, you can be a bit more selective about what apps go into your backup. This only works on iOS 10.3 or later, though. Basically, what you do is that you go into your Settings and navigate to the Manage Storage screen, using the methods mentioned above, depending on your version of iOS. It is Settings > iCloud > Storage > Manage Storage on iOS 10.2 or earlier; Settings > [Your Account Name] > iCloud > Storage > Manage Storage on anything after. In iOS 11, you will have to take a step further and tap where it says Backups.
After that, tap on the name of your device. Look for the heading that says Choose Data to Back Up, and de-select the apps that you don't want to back up.
4. Back Up iPad with A Better iCloud Alternative
You can also use an alternative to iCloud that allows you to back up your iPad wherever you want—even to your computer or an external drive. It's an application called iMyFone D-Port Pro, and it has a lot of advantages over iCloud:
Key Features:
- No storage limits. If you have the space on a hard drive or somewhere else, you can have huge backups and it doesn't matter.
- Since you're backing up to a private storage instead of the cloud, it's more secure.
- It can back up types of data that iCloud can't, such as your settings.
- Making new backups for your iPad with D-Port Pro won't overwrite your old backups.
- Users can back up specific kinds of data without restoring entire backups if they don't want to.
- The backup function of D-Port Pro is completely free. (Restoring requires you to buy the software.)
How to Back Up iPad With iMyFone D-Port Pro
(1) Download D-Port Pro to your computer and plug your iPad into your computer's USB port.
(2) Launch D-Port pro and click where it says Back Up & Export From Device.
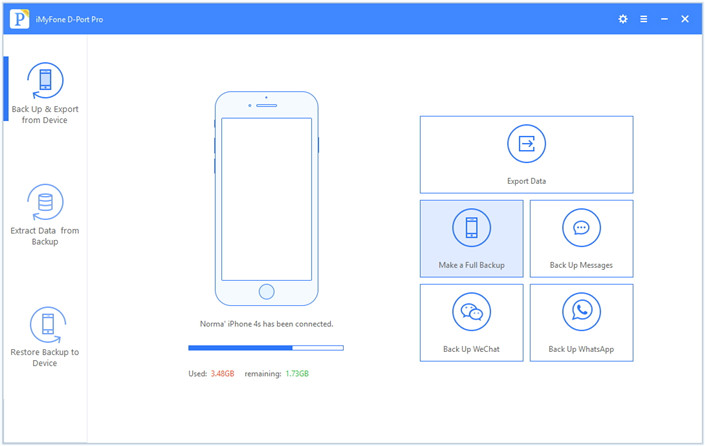
(3) Click where it says Make a Full Backup to back up your device in its entirety.
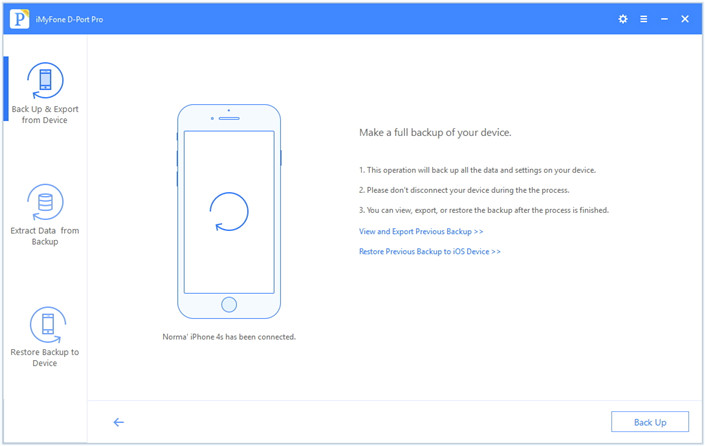
(4) After confirming the notice, click Back Up to continue.
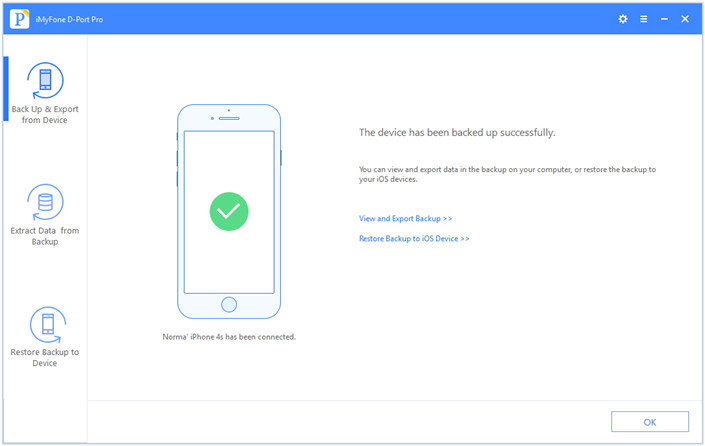
(5) Wait while the software backs up your iPad.
Additional Tip: How to View Your iCloud Backup for iPad
(1) Open D-Port Pro and click where it says Extract Data from Backup.
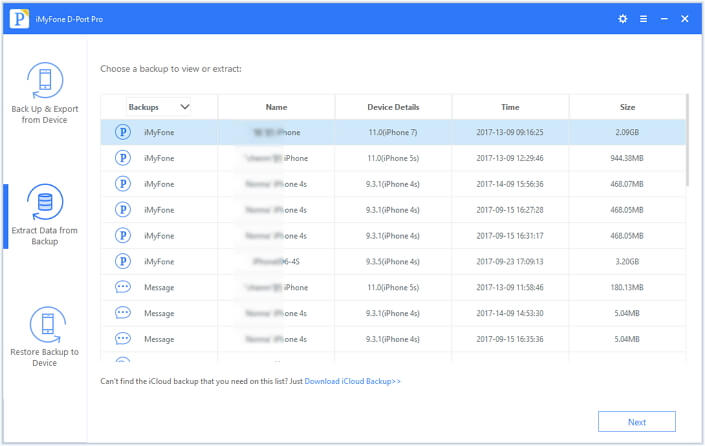
(2) Click Download iCloud Backup and sign in with your Apple ID.
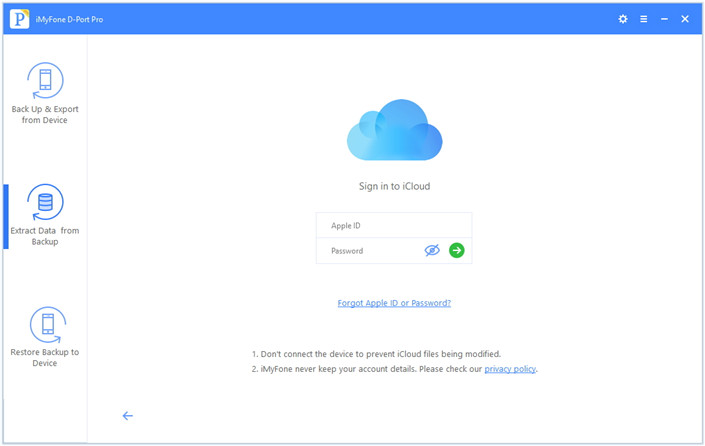
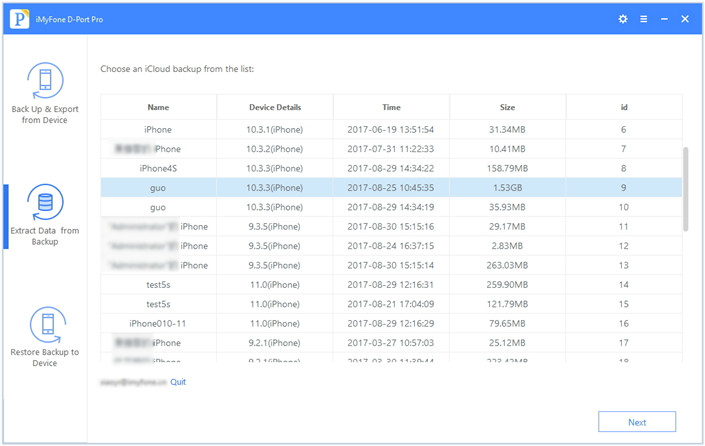
(3) When you see a list of backups, choose the one you want to view and click Next.
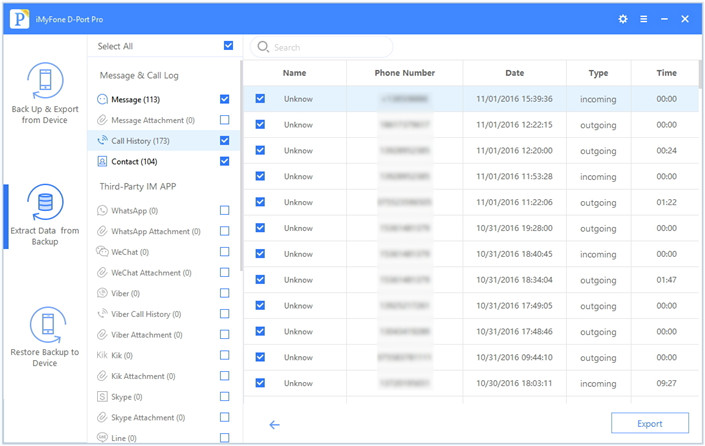
(4) Choose the data type you want to view and click Next. After that, you will be able to go through specific data on your device. You can view it and choose to extract it if you want.
If you are getting an annoying message telling you that iPad won't backup for you don't have enough iCloud storage space, don't worry! This is just Apple's way of letting you know that they would like some more money from you. Instead of paying every month for a bit more storage, though, why not just store your backups locally using iMyFone D-Port Prowithout any cost? Download and try it now!


 September 17, 2021
