Saving your photos in iCloud is one of the ways you can keep your photos on device safe from data loss. It also provides an easier way to share your photos across all your devices if they share the same iCloud account. This ability can make it very easy to not just manage your photos but also manage the storage space on your device. If the photos are safely stored in iCloud, you can create more space for other types of data.
There are two ways you can save photos from iPhone to iCloud - iCloud Photo Library and My Photo Stream. The two methods vary from one another and knowing the difference can help you choose the one that suits you best. Here's an outline of how the two work to save iPhone photos to iCloud;
1. iCloud Photo Library vs. My Photo Stream
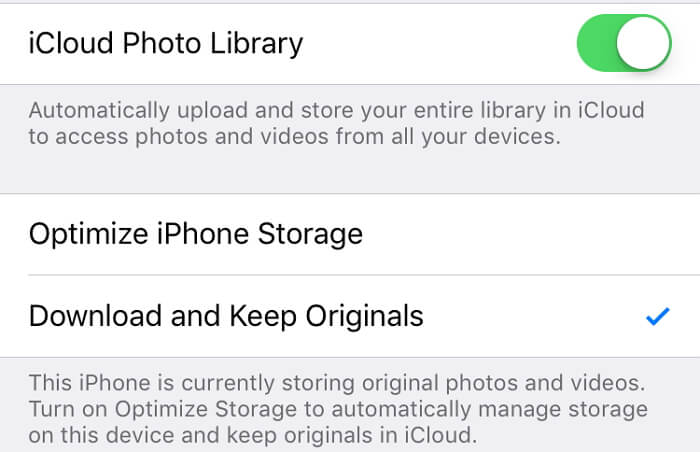
The iCloud Photo Library uses your iCloud storage and you can store as many photos and videos as you like as long as you have adequate storage space. All photos and videos are stores in their original format and at full-resolution. Every edit you make to the photos and videos on your device is updated on the cloud and across all devices.
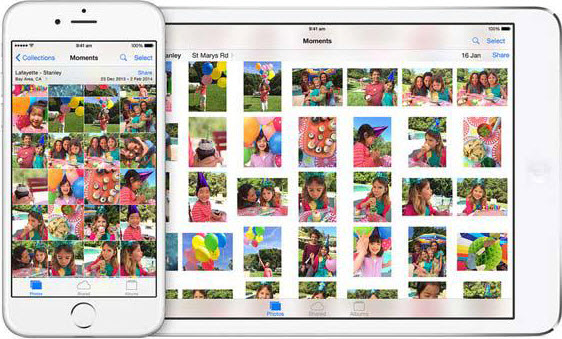
My Photo Stream doesn't use up your iCloud Storage space. Photos and videos on your device from the last 30 days are uploaded. You can upload up to 1000 photos. These photos are downloaded in full-resolution on your Mac and PC and in device-optimized resolution on your iPhone, iPad and iPod Touch. Any edits you make to the photos or videos will not update across devices.
2. Save Photos from iPhone to iCloud via iCloud Photo Library
If you choose to use the iCloud Photo Library, follow these simple steps to save photos and videos;
Before you begin, ensure that your iPhone is running the latest version of iOS on your device and set up iCloud all devices.
- Step 1: On your iPhone, go to Settings > [Your Name] iCloud or for iOS 10.2 and earlier, go to Settings > iCloud > Photos.
- Step 2: Click on "Photos" and then turn on "iCloud Photo library".
3. Save iPhone Photos to iCloud via My Photo Stream
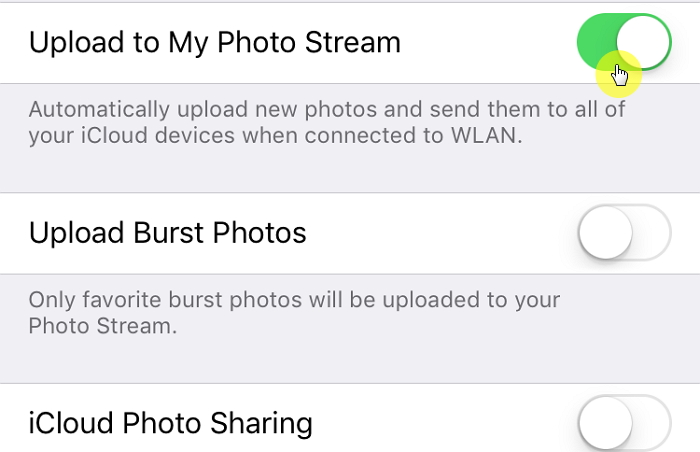
To save photos to My Photo Stream, you need to turn it on in settings. Follow these simple steps to do it;
- Step 1: Tap on Settings > [Your Name] > iCloud > Photos or Settings > iCloud > Photos in earlier versions of iOS.
- Step 2: Turn on “Upload to My Photo Stream.”
4. Download Photos from iCloud Photo Library to PC
You can easily access photos in the iCloud photo Library on any Apple device that is signed in to the same iCloud account. But what can you do when you want to download the photos from iCloud Photo Library to your Windows computer?
One of the best ways to do this is to use iMyFone D-Port Pro that is designed to help you transfer data from your iOS device to your computer very easily. The following features make D-Port Pro the ideal tool to help you download photos from your iCloud Photo Library to your Windows Computer;
Key Features:
- Downloading photos to your Windows computer using D-Port Pro is easy; all you have to do is choose the photos you need or select all photos and easily export them to PC.
- You can choose to download the photos from your iCloud Photo Library.
- D-Port Pro is compatible with all versions of iOS and all iOS device models, including the iOS 15.
How to Download Photos from iCloud Photo Library to PC using D-Port Pro
To use the program to download photos from your iCloud Photo Library to your PC, follow these simple steps;
Step 1: Install the program on your computer and then launch it. From the main window, select “Extract Data from Backup” and then click on “Download iCloud Backup.” Log in to your iCloud account to access the iCloud backup files you need.
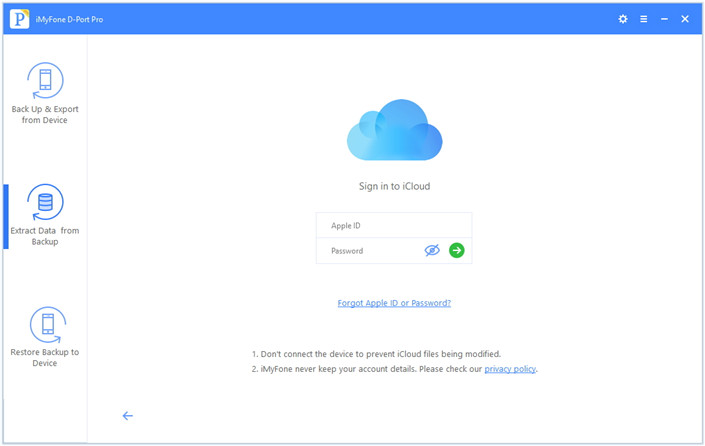
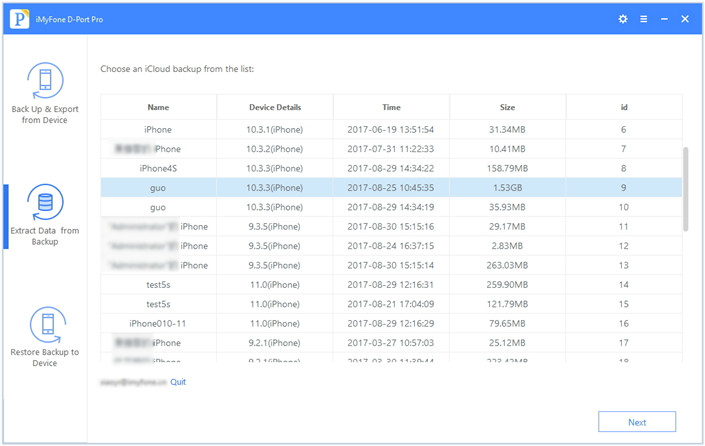
Step 2: From the backup files listed, choose the one that contains the photos you want to download to PC and then click “Next.” The program will begin downloading the iCloud Backup file.
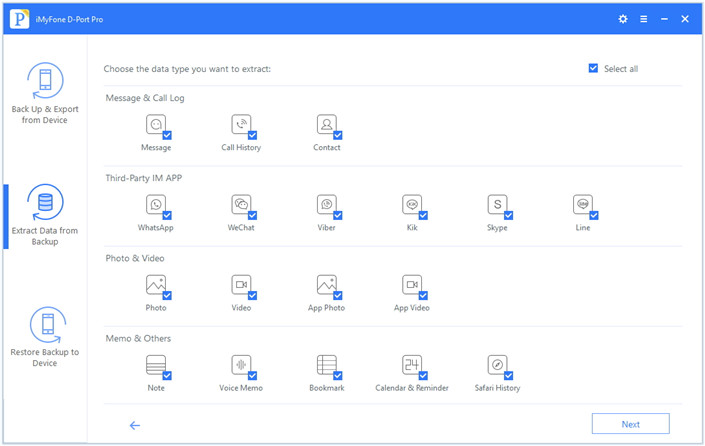
Step 3: Select the type of data you need to download. Keep in mind that you can select photos and other data as well. Click “Next” when you’re ready.
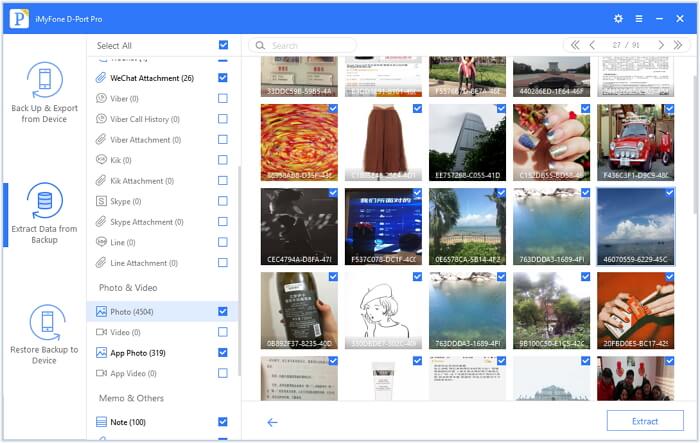
Step 4: In the next window, you'll see a list of all the photos in that backup file. Select the ones you want to download and click "Export" to save them to your PC.
Now you know how to save your iPhone pictures to iCloud. Besides, iMyFone D-Port Proprovides an efficient way for you to save photos from your iCloud Photo Library to PC. The fact that you can also use it to easily transfer data from your iPhone to PC is an added bonus. Try the free trial version of it to see what it can do for you.


 December 20, 2021
