A great many users prefer to back up their iPhones via iCloud. It can perform a backup whenever and wherever as there is no need to connect your device to a computer when backing up with iCloud, which is very convenient. However, it is always reported that restoring from iCloud backup taking forever too long when iOS users try to restore their iPhone from its backup.
In this post, I will walk you through different reasons that cause iPhone restoring from backup to take forever too long and the ways to fix it.
Why is the iPhone Restoring from Backup Taking Forever Too Long?
You may wonder how long should it take to restore from iCloud backup. Even with the strongest network connection, it might still take hours to complete.
If it seems to go on forever too long, you need to think about if something went wrong. Most of the time, such a situation occurs because of the instability of the application in restoring the content from the backup file. In some cases, the reasons are due to poor battery life, issues with applications present on the backup file or during iOS 15/14 update. Although the reasons are unknown, many applications tend to refuse to set up on the new iPhone.
3 Methods to Fix iPhone Restoring from Backup Taking Forever Too Long
1 Stop Restoring iPhone
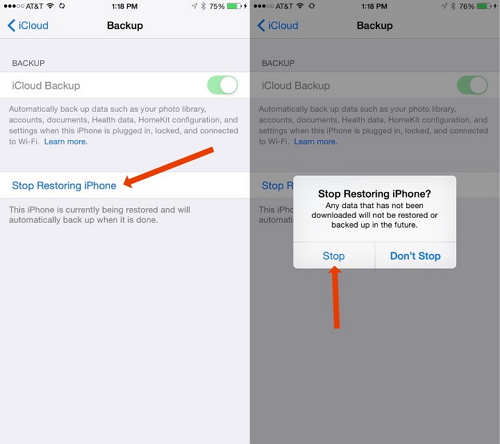
If the restoration process is taking forever too long, the process got stuck due to a glitch and will not continue no matter how long you wait. A better way is to stop the process manually. As the restoration is stuck, you will have to revert the process manually.
Steps to Stop Stuck iCloud Recovery
- Step 1. Sail to the "Settings" on your iPhone and scroll down to find "iCloud" from the list then tap.
- Step 2. Inside the iCloud menu, scroll the list to see "Backup". Click and active it.
- Step 3. In the same window, tap on the "Stop Restoring iPhone" option.
Note
Selecting this option will halt the restoration process. You will not be getting contacts or other applications on the new iPhone. It is preferable to perform a factory reset and freshly reinstall the iOS operating system, including iOS 15.2 Avoid Unnecessary Backups
Some data is unnecessary to backup on your phone. To speed up iCloud backup, you should try to avoid backup useless data.
Let's see how to disable unnecessary backups:
- Step 1: Go "Setting", and click "iCloud" > "Manage Storage", and select your device.
- Step 2: Click "Show All Apps" and find the useless App, toggle it off. And then hit "Turn off & Delete", and the procession is finished.
3 Delete Old Backups
You can choose to delete old iCloud backups if you hardly use them. Those unused data will stop the process of restore because there is no more space for running. Delete the old backup data to free up more space for your iCloud storage.
Alternative Tool to Restore iPhone from iCloud Flexibly
As you have seen from the steps mention that restoring an iPhone from iCloud backup is tedious. To save your time and makes the process finish quickly, you should try to use a third-party app. Here we highly recomended iMyFone iTransor to you!
It is an iPhone data backup and restores tool that will do a great help. It allows you to quickly and selectively restore Contacts, Messages, WhatsApp, WeChat from iCloud without overwriting data on your device. In addition, it is also capable of backing up iOS devices running iOS 15/14 and exporting almost all data from the device or the backup files as HTML or CSV files.
1 Backup Data with iTransor
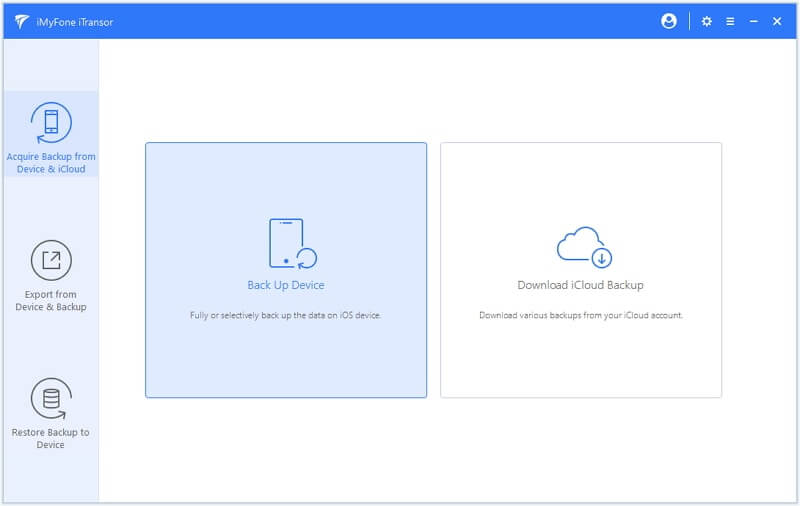
- Step 1. Download iTransor and install it on your PC. Then select "Acquire Backup from Device & iCloud" from the left panel, then click "Back Up Device".
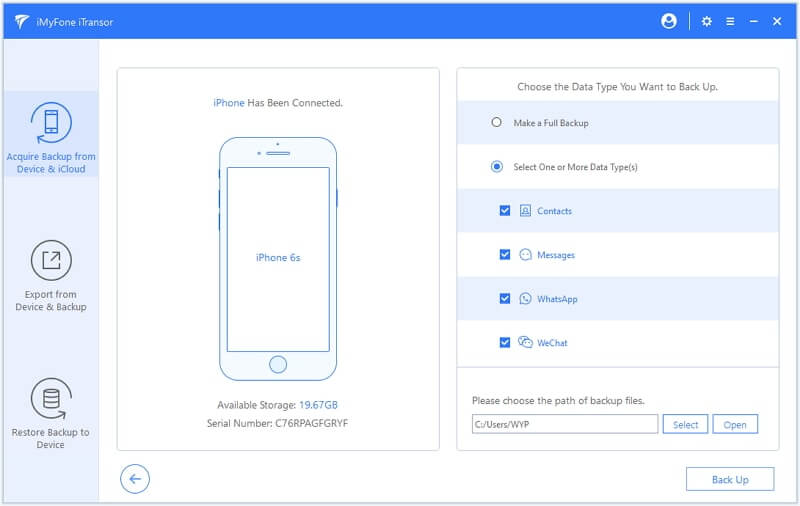
- Step 2. Then connect your iPhone to the computer, it will automatically recognize after you "Trust Computer". Then on the right column, you can choose the "Make a Full Backup" or the "Select One or More Data Type(s)" option.
- Step 3. Then click "Back Up" to start the backup process. You will get notification after backed up successfully.
Note
Don't disconnect your iPhone when in the process.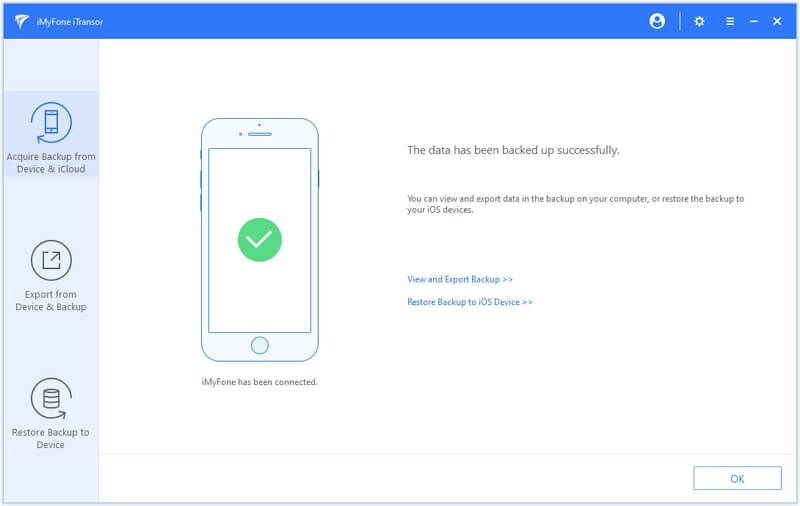
2 Restore iCloud Backup with iTransor
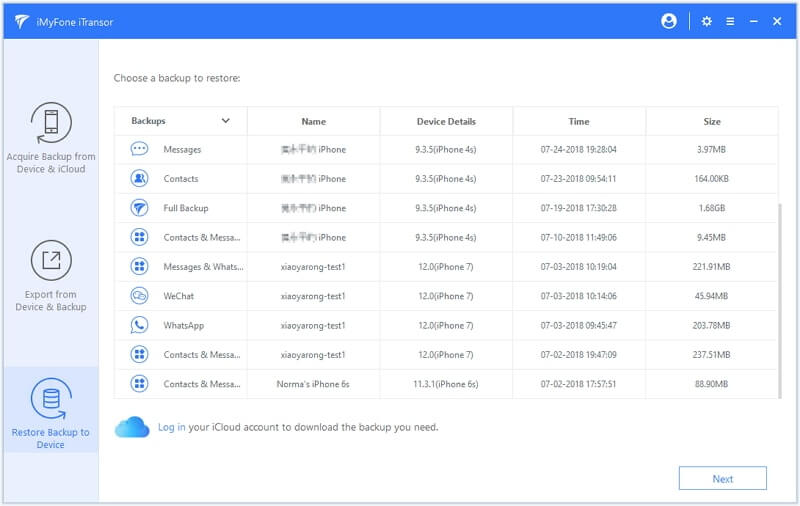
- Step 1. Choose one or other certain type(s) of iCloud backup data, then click "Next".
- Step 2. Select the data you want to restore and connect your device. Click " Preview & Restore" or "Directly Restore" to continue the process.
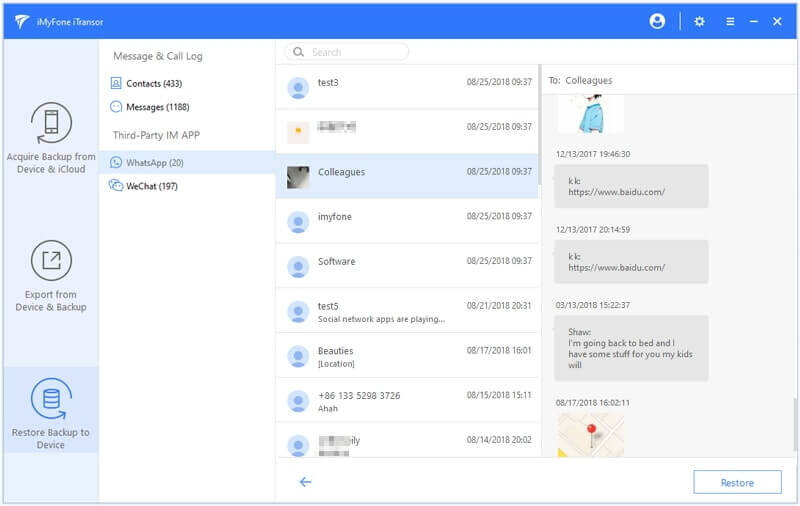
- Step 3. You can preview the data after scanning, you can click "Restore" if you're sure you want to restore the data.
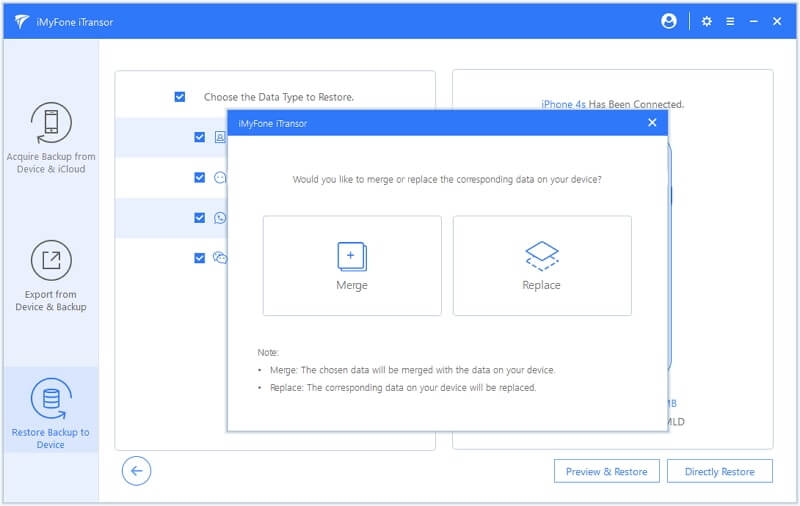
- Step 4. iTransor offers two options in the pop-up: Merge or Replace. The merge option will combine the displayed data with the data on your device. Replace means the corresponding data on your device will be replaced by the data in the backup.
- Step 5. The restoration process will start. The time it will take depends on how much data you need to restore. You can check the data on your device after the process is done.

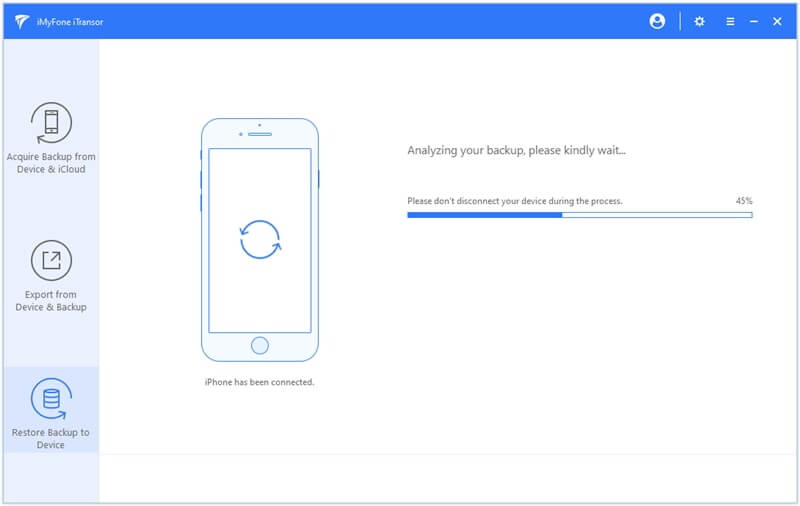
Note
Please don't disconnect your device during the process and keep stably.Conclusion
If you wish to avoid hurdles during the restoration of your iPhone, we suggest iMyFone iTransor to be your first choice! It will give you greater control and ability in transferring data from backup files.


 September 21, 2022