


[Full Guide] How to Transfer Photos from iPhone to Computer?
Category: iPhone Transfer

8 mins read
In today's digital age, capturing and storing photos on our smartphones has become a common practice. However, due to limited storage space on our devices, it's essential to transfer photos from our iPhones to a computer for backup, editing, or sharing purposes. This article will guide you through various methods and step-by-step instructions on how to transfer photos from your iPhone to a computer with/without USB cable, and with/without backups.

In this article:
- How to Transfer Photos from iPhone to Computer with USB?
- How to Transfer Photos from iPhone to Computer without USB?
- How to Transfer Photos from iPhone to Mac Computer?
- How to Transfer Photos from iPhone to Windows Computer?
- How to transfer photos from iPhone to computer using iTunes?
- Bonus: How Do I Transfer Photos from Computer to iPhone?

How to Transfer Photos from iPhone to Computer with USB?
To transfer photos from your iPhone to your computer using a USB cable, follow these steps:
- Connect your iPhone to your computer using the provided USB cable. Ensure that your computer is powered on and unlocked.
Step 1. On your iPhone, you may receive a prompt requesting permission to trust the computer. Tap on "Trust" to establish a connection between your iPhone and computer.
Step 2. On your computer, if you are using a Windows operating system, open File Explorer. If you are using a Mac, the Photos app should automatically launch. If it doesn't, you can manually open it.
Step 3. In File Explorer (Windows) or the Photos app (Mac), locate your iPhone listed as a device. Click on it to access its contents.
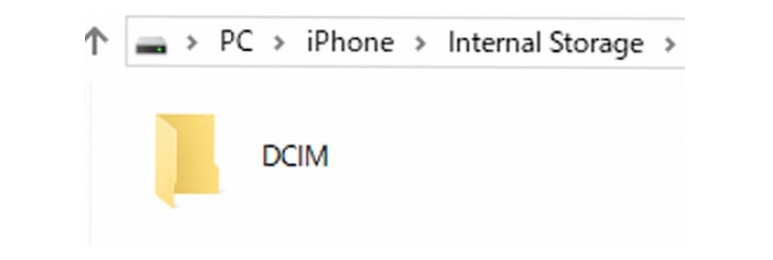
Step 4. Inside your iPhone's folder, you will find various folders, including the "DCIM" folder, which stands for Digital Camera Images. Click on the "DCIM" folder to open it.
Step 5. Inside the "DCIM" folder, you'll find sub-folders named with numbers or dates. These folders contain your iPhone's photos. Open the most recent folder or the folder containing the photos you want to transfer.
Step 6. Select the photos you want to transfer. You can either select individual photos by holding the Ctrl key (Windows) or the Command key (Mac) and clicking on the photos, or you can select all photos by pressing Ctrl+A (Windows) or Command+A (Mac).
Step 7. After selecting the photos, right-click on one of the selected photos and choose the "Copy" option.
Step 8. Navigate to the location on your computer where you want to save the photos. For example, you can create a new folder on your desktop or choose an existing folder.
Step 9. Right-click in the destination folder and choose the "Paste" option. Alternatively, you can use the keyboard shortcut Ctrl+V (Windows) or Command+V (Mac) to paste the photos.
Step 10. Wait for the photos to finish copying from your iPhone to your computer. The transfer speed may vary depending on the number and size of the photos.
Once the copying process is complete, you should find the transferred photos in the destination folder on your computer. You can then access and manage them as you would with any other files on your computer.
Remember to safely disconnect your iPhone from your computer by clicking on the "Eject" button next to your iPhone's name in the File Explorer (Windows) or by dragging the iPhone icon to the trash in the Dock (Mac). This ensures that the connection is properly closed before disconnecting the USB cable.
How to Transfer Photos from iPhone to Computer without USB?
To transfer photos from your iPhone to your computer wirelessly without using a USB cable, you can use various methods such as iCloud, AirDrop, or . Here are a few options:
1 Via iCloud (requires iCloud and internet connection):
Step 1. On your iPhone, navigate to the "Settings" app and tap on your name at the top of the screen.
Step 2. Select "iCloud" and then "Photos".
Step 3. Enable "iCloud Photos" by toggling the switch.
Step 4. On your computer, open a web browser and visit the iCloud website (icloud.com).
Step 5. Sign in to your computer using the same Apple ID that you have used on your iPhone.
Step 6. Click on "Photos" and select the photos you want to download.
Step 7. Click on the download icon (cloud with an arrow pointing downward) to save the photos to your computer.
2 Via AirDrop (requires a Mac computer and Bluetooth/Wi-Fi):
- Make sure AirDrop is enabled on both your iPhone and Mac.
Step 1. On your iPhone, swipe up from the bottom of the screen to access the Control Center and tap on the AirDrop icon to set it to "Contacts Only" or "Everyone".
Step 2. On your Mac, launch a Finder window and locate the sidebar. Click on "AirDrop" in the sidebar.
Step 3. Select the desired photos in the Photos app on your iPhone.
Step 4. Tap on the share button (square with an arrow pointing upward).
Step 5. From the AirDrop section, select your Mac computer's name. Accept the transfer request on your Mac.
Step 6. The photos will be transferred wirelessly to your Mac and saved in the Downloads folder or the location you specified.
3 Use Third-party Applications:
- Install a third-party application like Google Photos, Dropbox, or Microsoft OneDrive on both your iPhone and computer.
- Sign in to the app using the same account on both devices.
- On your iPhone, open the app and upload the photos to the cloud storage.
- On your computer, open the respective app and download the photos to your computer.
Each method has its unique advantages and may necessitate additional setup or storage space. It is important to consider your specific requirements and preferences in order to select the method that aligns best with your needs.

Key Features:
- Backup & Restore phone data easily.
- Selectively Restore from iTunes & iCloud
- View Data before Restoration
- Restore across iOS versions (support iOS16)
How to Transfer Photos from iPhone to Mac Computer?
To transfer photos from your iPhone to a Mac computer, you can use the built-in Photos app. Here's how:
Step 1. Connect your iPhone to your Mac using the USB cable that came with your device. Make sure your iPhone is unlocked.
Step 2. On your Mac, the Photos app should automatically open. If it doesn't, you can open it manually by clicking on the Photos icon in the dock or by searching for "Photos" in Spotlight.
Step 3. Within the Photos app, navigate to the sidebar located on the left-hand side. Under the "Devices" section, you will find your iPhone listed. Click on the name of your iPhone to select it.
Step 4. You will see a screen with options for importing photos and videos. You can choose to import all new items or select specific photos by clicking the checkboxes next to them. You can also choose to import photos to your Mac's Photos library or to a specific folder.
Step 5. After selecting your import options, click on the "Import" button to begin the transfer. The Photos app will start importing the selected photos from your iPhone to your Mac.
Step 6. Once the import process is complete, you can choose to delete the imported photos from your iPhone or keep them. You will be prompted to make this choice.
Step 7. The imported photos will be available in the Photos app on your Mac. You can organize them into albums, edit them, or view them as desired.
Step 8.After the transfer is complete, safely disconnect your iPhone from your Mac by clicking on the "Eject" button next to your iPhone's name in the sidebar of the Finder or by dragging the iPhone icon from the desktop or Finder window to the trash.
By following these steps, you can transfer your photos from your iPhone to your Mac computer using the Photos app.
How to Transfer Photos from iPhone to Windows Computer?
To transfer photos from your iPhone to a Windows computer, you can use the File Explorer. Here's how:
Step 1. Connect your iPhone to your Windows computer using the USB cable that came with your device. Make sure your iPhone is unlocked.
Step 2. On your Windows computer, open the File Explorer by pressing the Windows key + E on your keyboard or by clicking on the folder icon in the taskbar.
Step 3. In the File Explorer, you should see your iPhone listed under the "This PC" or "Devices and drives" section. It may appear with a name like "Apple iPhone" or "Internal Storage." Double-click on your iPhone's name to open it.
Step 4. Within your iPhone's folder, you should see various folders. Open the "DCIM" folder (which stands for Digital Camera Images) by double-clicking on it.
Step 5. Inside the "DCIM" folder, you'll find sub-folders named with numbers or dates. These folders contain your iPhone's photos. Open the most recent folder or the folder containing the photos you want to transfer.
Step 6. Select the photos you want to transfer to your Windows computer. You can either select individual photos by holding the Ctrl key on your keyboard and clicking on the photos, or you can select all photos by pressing Ctrl+A.
Step 7. After selecting the photos, right-click on one of the selected photos and choose the "Copy" option.
Step 8. Navigate to the location on your Windows computer where you want to save the photos. For example, you can create a new folder on your desktop or choose an existing folder.
Step 9. Right-click in the destination folder and choose the "Paste" option. Alternatively, you can use the keyboard shortcut Ctrl+V to paste the photos.
Step 10. Wait for the photos to finish copying from your iPhone to your Windows computer. The transfer speed may vary depending on the number and size of the photos.
Step 11. Once the copying process is complete, you should find the transferred photos in the destination folder on your Windows computer. You can then access and manage them as you would with any other files on your computer.
Remember to safely disconnect your iPhone from your Windows computer by clicking on the "Safely Remove Hardware and Eject Media" icon in the system tray (typically located in the bottom-right corner of the screen) and selecting your iPhone from the list of devices before unplugging the USB cable. This ensures that the connection is properly closed before disconnecting the device.
How to Transfer Photos from iPhone to Computer Using iTunes?
Starting with macOS Catalina (10.15), Apple has removed iTunes and split its functionality into separate apps. Therefore, iTunes is no longer used for syncing photos. However, if you are using an older version of macOS or a Windows computer, you can follow these steps to transfer photos from your iPhone to your computer using iTunes:
Step 1. Install the latest version of iTunes on your computer if you haven't already. You can download it from the Apple website.
Step 2. Connecting your iPhone to your computer using the USB cable that was provided with your device. Ensure that your iPhone is unlocked before proceeding.
Step 3. On your computer, open iTunes. If prompted, allow your computer to access your iPhone by clicking "Allow" on your iPhone's screen.
Step 4. In iTunes, locate and click on the device icon positioned in the upper-left corner of the window. This action will open the summary page specifically dedicated to your iPhone.
Step 5. From the left-hand sidebar, click on "Photos" under the "Settings" section.
Step 6. Enable the checkbox next to "Sync Photos."
Step 7. Select the application or software you want to sync your photos from. You have the option to sync photos from apps like Photos, iPhoto, or a specific folder.
Step 8. Choose the specific albums, folders, or events you want to sync with your computer. You can also select the option to sync all photos.
Step 9. Once you have selected your desired options, click on the "Apply" or "Sync" button at the bottom-right corner of the iTunes window. This will initiate the sync process and transfer the selected photos from your iPhone to your computer.
Step 10. Wait for the sync process to complete. The duration will depend on the number and size of the photos being transferred.
After the sync process is finished, you should find the transferred photos in the designated folder on your computer, whether it's the Photos app, iPhoto, or a specific folder you selected. You can then access and manage them as you would with any other photos on your computer.
Remember to safely disconnect your iPhone from your computer by ejecting it in iTunes or using the "Safely Remove Hardware and Eject Media" function in Windows.
Bonus: how Do I Transfer Photos from Computer to iPhone?
To transfer photos from your computer to your iPhone using iTransor Pro, you can follow these steps:
Step 1. To begin, download and install iTransor Pro on your computer. You can easily find the software on the official website of iTransor.
Step 2. Launch iTransor on your computer and connect your iPhone to the computer using a USB cable. Make sure your iPhone is unlocked.
Step 3. In iTransor, click on the "Restore Backup to Device" option.
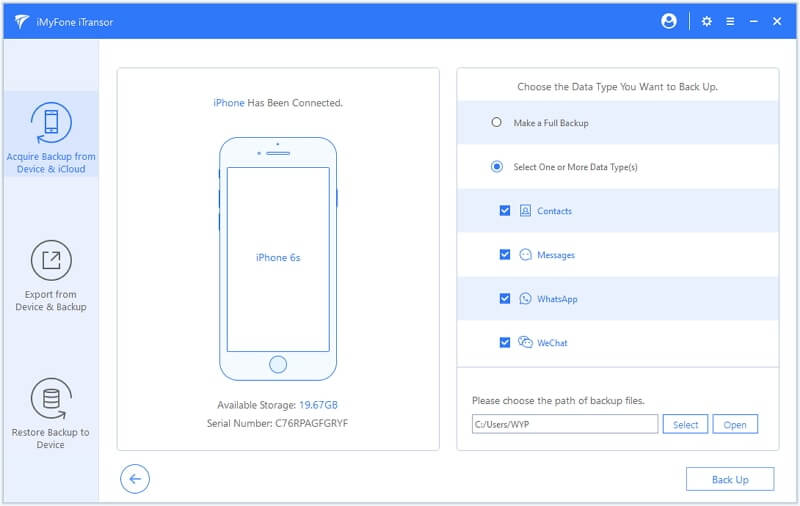
Step 4. On the subsequent screen, you will be presented with various backup options. As you intend to transfer photos from your computer to your iPhone, it is necessary to generate a backup file initially. Click on the "Back Up Device" button.
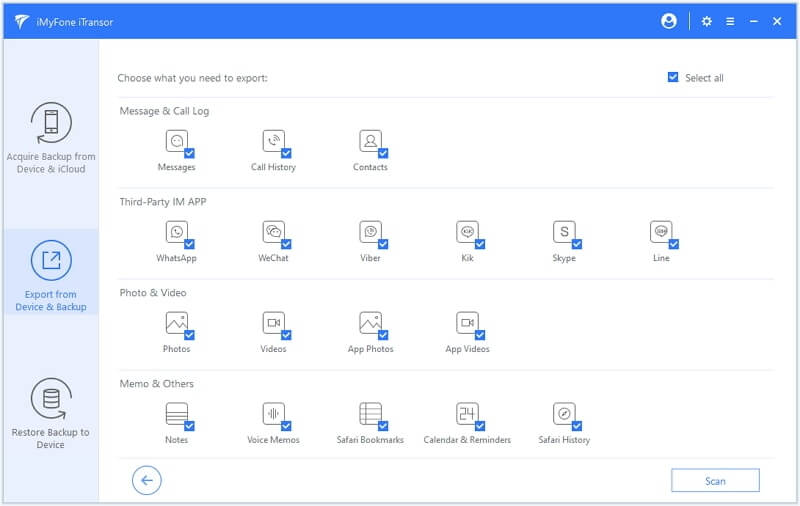
Step 5. Choose the types of data you want to include in the backup. In this case, select the "Photos" option and any other data you wish to backup.
Step 6. Wait for the transfer process to complete. The duration will depend on the size of the photos and the speed of your computer and iPhone.
Once the transfer is finished, you should find the photos on your iPhone's Photos app or in the designated album, depending on how you organized the photos during the transfer.
Conclusion
Transferring photos from your iPhone to a computer is a simple yet essential task that ensures your memories are safely backed up and easily accessible. With the methods and step-by-step instructions outlined in this article, you can confidently transfer your photos while optimizing the process for efficiency. Remember to keep your devices updated, organize your photos, and consider cloud storage for added security. Now you can enjoy editing, sharing, and preserving your precious moments with ease.
(Click to rate this post)
Generally rated 4.7 (256 participated)
Rated successfully!
You have already rated this article, please do not repeat scoring!