


How to Fix External Hard Drive Not Showing Up on Mac
Category: PC Data Recovery

9 mins read
External hard drives are common storage devices used for backing up files to save space on computers. However, when you encounter issues where your Mac cannot read the external hard drive, how can you effectively solve this problem?
We have compiled detailed troubleshooting steps to help you quickly resolve the issue of the external hard drive not showing up on Mac.
If you accidentally lose data during the process of fixing the issue, we also recommend a highly practical data recovery software. So, keep reading if you need it!
In this article:

Part 1. Why is The External Hard Drive Not Readable on Mac
Basically, the main reasons why a Mac cannot read an external hard drive are as follows:
- Damaged data cable: If the data cable connecting your Mac to the external hard drive is damaged or faulty, it can prevent proper data transmission, resulting in the Mac being unable to read the drive.
- Power transmission issues: Insufficient power supply to the external hard drive can lead to reading errors and make it inaccessible to the Mac.
- The external hard drive is physically damaged: Physical damage to the external hard drive, such as a broken disk or faulty components, can render it unreadable by the Mac.
- MacOS cannot read the file format of the external hard drive: If the external hard drive is formatted in a file system that macOS does not support, it won't be able to read the drive's data.
- NTFS read-only issue: Mac computers do not have native write support for NTFS file systems, so an NTFS-formatted external hard drive might be read-only on a Mac, preventing any modifications or data transfer.
- Partition or file system corruption: Corruption in the partition or file system structure of the external hard drive can lead to data inaccessibility and prevent the Mac from reading the drive.
- The hard drive is infected with a virus: A virus or malware infection on the external hard drive can cause data corruption or unauthorized changes, making it difficult for the Mac to read the drive properly.
Depending on the specific cause, you can choose the most appropriate solution in this article.
Part 2. How to Fix External Hard Drive Not Showing Up on Mac – 10 Ways
You can use the following 10 different methods to resolve the issue of the external hard drive not being recognized/read by Mac.
iMyFone D-Back
Recover Lost Data from Hard Drive After Formatted/Corrupted
10 Methods to Fix External Hard Drive Not Showing Up on Mac:
- 1: Enable External Hard Drive Visibility
- 2: Check the Cable
- 3. Restart Mac Computer
- 4. Use Disk Utility to Access the Storage Device
- 5. Change the Drive Format
- 6. Run "Apple Diagnostics" to Test Hardware Issues
- 6. Run "Apple Diagnostics" to Test Hardware Issues
- 7. Reset Mac's NVRAM or PRAM
- 8. Reset Mac SMC
- 9. Use Terminal
- 10. Format the External Hard Drive
1 Enable External Hard Drive Visibility
To ensure your hard drive appears on the desktop, follow these simple steps:
Step 1: Open Finder.
Step 2: Click on "Finder" in the top menu.
Step 3: Select "Preferences" > "General" and ensure there is a checkmark next to "External Drives."

2 Check the Cable
To resolve issues with your hard drive not mounting, consider the following:
Step 1: Ensure the drive is properly plugged in. Verify that the USB-A cable is delivering sufficient power to the drive. Some older Macs may require a USB power cable with two connectors to provide enough power.
Step 2: Confirm the drive isn't using an external power supply if it shouldn't be. Double-check the cables and connections for any issues. Test the drive with a different cable to rule out cable problems.
Step 3: If using a USB port via a hub, check if the hub is causing the problem. Try connecting the drive directly to a different USB port on your Mac or test another device on the same port to isolate the issue.
3 Restart Mac Computer
System issues in macOS can also cause external hard drives not to be recognized. Fortunately, you have the option to resolve this situation by restarting your computer.
You can click on the Apple logo and then select "Restart." Alternatively, you can long-press the "Power" button on your keyboard, and when the dialog box appears, click on "Restart."

4 Use Disk Utility to Access the Storage Device
If you suspect that the disk may be faulty, you can use Apple's Disk Utility program to access the disk and potentially resolve the issue. Here's what you need to do:
Step 1: Find Disk Utility by opening Spotlight (cmd+Space-bar) and start typing "Disk Utility," then press enter to open the program.
Step 2: Look in the left column to see if the hard drive appears there.
Step 3: If you can see the hard drive in Disk Utility, check for a volume underneath it. If present, click on it and select "Mount." If the drive is already mounted, the option "Unmount" will be displayed instead. (If there is no volume listed, your Mac cannot access the drive, and the Mount option will be greyed out.)

Step 4: Your options are "First Aid," "Erase," and "Restore." Choose "First Aid," as it will check the disk for errors and repair them if necessary. (Note: "Restore" erases the contents of the drive and replaces them with data from somewhere else, while "Erase" deletes all data on the drive. If you need the data on the drive, make sure not to choose the "Erase" or "Restore" options!

Step 5: Click the "First Aid" tab and select "Run." If any errors are found and can be fixed, you may see the option to "Repair Disk." If so, proceed with running the repairs.
5 Change the Drive Format
If your Mac is unable to repair the disk, it may be due to the drive being formatted with a file system that the Mac cannot read, or the drive may be physically damaged. In the latter case, we recommend following a tutorial on how to recover data from a damaged disk.
However, if the drive is likely fine but has the wrong format, here's some background on file formats:
- Windows PCs use NTFS file format.
- Mac computers, prior to Sierra, used the HFS+ file format.
- In High Sierra, Apple introduced a new file system known as Apple File System (APFS).
- exFAT or the older FAT32 are formats that can be read by both Windows and Mac computers.
To ensure that your drive can be read by both Macs and PCs, you need to format it using exFAT or the older FAT32. Here's how you can do that:
Step 1: If your hard drive is formatted with a different file system (e.g., on a Windows PC), and you need to access the data on the drive, connect it to a Windows PC that recognizes it and copy the data before proceeding to the next step.
Step 2: Once you've retrieved the data from the drive via a PC, you can reformat the drive so that you can add the data again. Follow these steps:
- Open Disk Utility (as described in the previous steps).
- If you don't need the data on the hard drive, select the disk and click "Erase."
Tips
Before Disk Utility starts to erase the disk, it will pick a format for you. You can change this by clicking on the "Formatting options." Choose your desired format, probably exFAT if you want compatibility with both PC and Mac, or Mac OS Extended (Journaled) if you prefer the best option for Mac. Give the drive a name.
- Click on "Erase" and wait for your Mac to erase and reformat the drive.
6 Run "Apple Diagnostics" to Test Hardware Issues
Mac computers come with a built-in diagnostic tool called "Apple Diagnostics," which helps you identify hardware problems. Fixing any damaged hardware could potentially resolve the issue of your Mac not recognizing the external hard drive.
Step 1: Disconnect all external devices, except for essential peripherals like the keyboard and mouse.
Step 2: Restart your Mac and hold down the "D" key on your keyboard until you see the language selection window, then release the key.
Step 3: The system will initiate the diagnostic process, and you will see a progress bar on the interface.

Step 4: After the diagnostic is complete, you will be presented with the hardware issues that your computer is facing, along with their respective solutions.

7 Reset Mac's NVRAM or PRAM
NVRAM and PRAM are parts of the temporary memory in Mac computers that store specific data even when the computer is powered off or restarted.
If your Mac is unable to recognize the external hard drive due to possible hardware issues, you can try using this method to resolve it.
Step 1: Restart your Mac and simultaneously hold down the "control + option + P + R" keys during the startup process.
Step 2: Keep holding these keys for about 20 seconds until you hear the sound of your Mac restarting or see the Apple logo appear and disappear, then release the keys.
8 Reset Mac SMC
The SMC (System Management Controller) is responsible for managing low-level functions on a Mac. If resetting NVRAM or PRAM didn't resolve the issue of the external hard drive not showing up on your Mac, you can try resetting the SMC.
Step 1: Shut down your computer and connect it to the charger.
Step 2: Press and hold the "power button + shift + control + option" keys simultaneously for approximately 10 seconds.
Step 3: Release all the keys, and then power on your Mac again to check if the issue has been resolved.
9 Use Terminal
In addition to Disk Utility, Terminal can also be used to effectively troubleshoot computer issues. Therefore, we recommend trying the following steps:
Step 1: To access the Terminal on your Mac, click on "Finder" > "Go" > "Utilities" > "Terminal."
Step 2: Type "diskutil list" and press the "return" key, then note down the serial number (disk#) of the external hard drive.
Step 3: Type "diskutil mountDisk /dev/disk#" and press the "return" key.
Step 4: Type "diskutil repairVolume /dev/disk#" and press the "return" key.
Step 5: Once the repair process is completed, close the Terminal.
10 Format the External Hard Drive
When none of the above methods work to resolve the issue of Mac not reading the external hard drive, you will need to format the hard drive.
Step 1: Open "Disk Utility" and select the external hard drive you want to format from the left sidebar.
Step 2: Click on the "Erase" button at the top.
Step 3: When the window pops up, you can rename the drive and set the format to "ExFAT". Once done, click "Erase".

【Bonus】How to Rescue Data When Your External Hard Drive Encounters Issues
If you find yourself in a situation where you need to format the hard drive, leading to the complete erasure of files, there's no need to worry. We have discovered a powerful data recovery tool, iMyFone D-Back, which can easily restore all your lost data.
1,000,000+ Downloads
Key Features:
Let's rescue the lost data from the external hard drive together by downloading for free and following the tutorial!
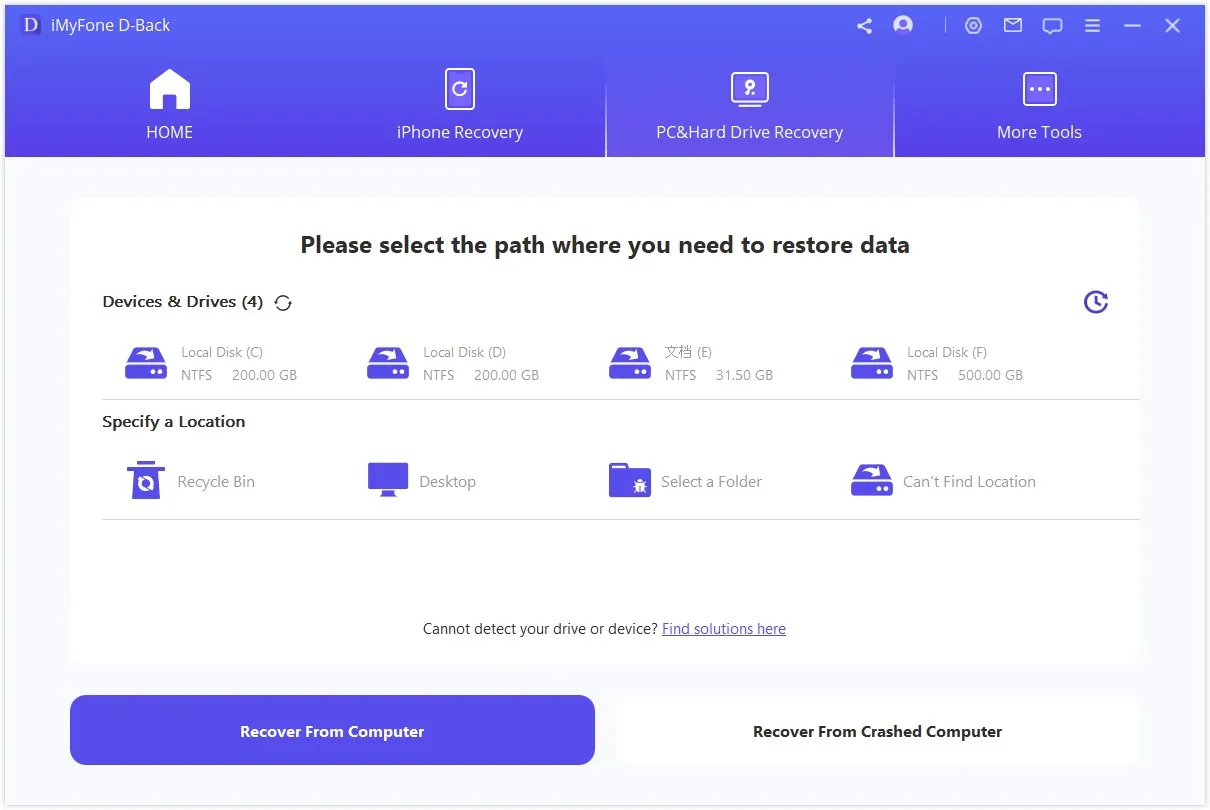
Step 1: Download and install iMyFone D-Back, then activate the software. Check "Recycle Bin" and click "Start."
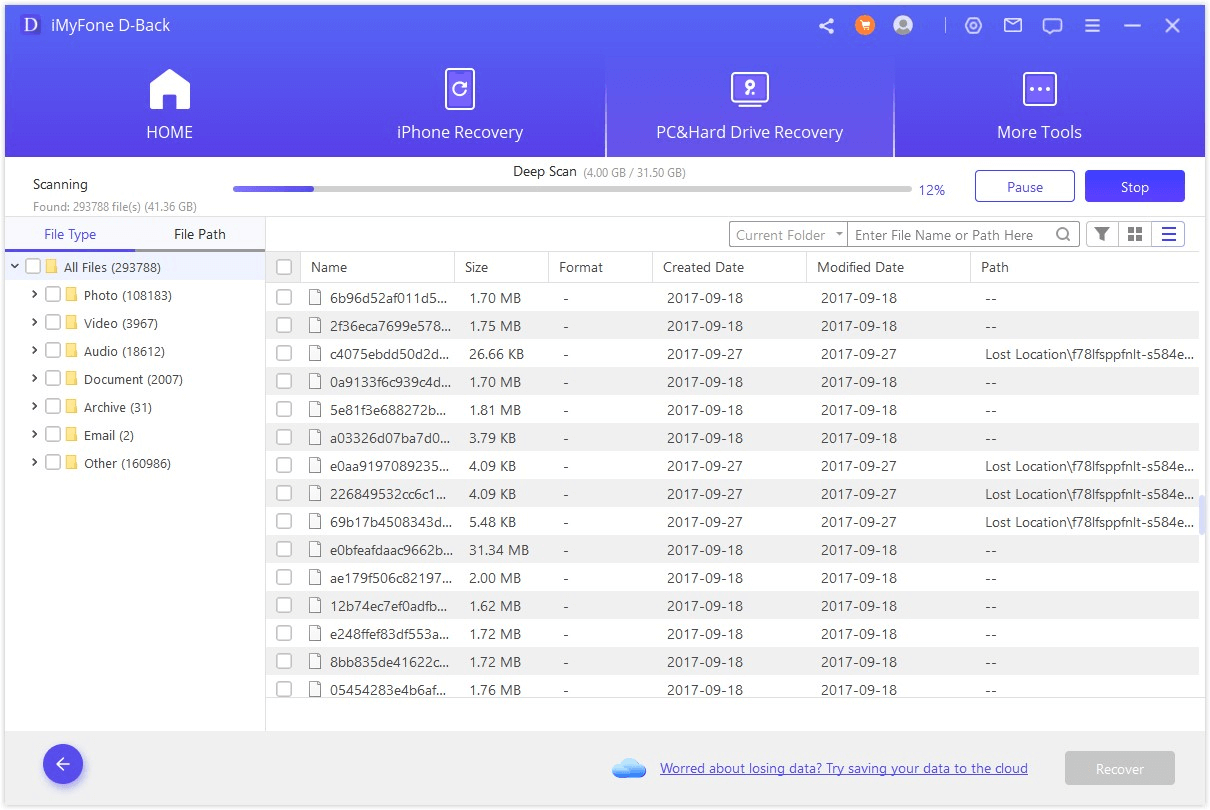
Step 2: Wait for the software to complete the deep scan. During the process, you can press "Pause" or "Resume" anytime.
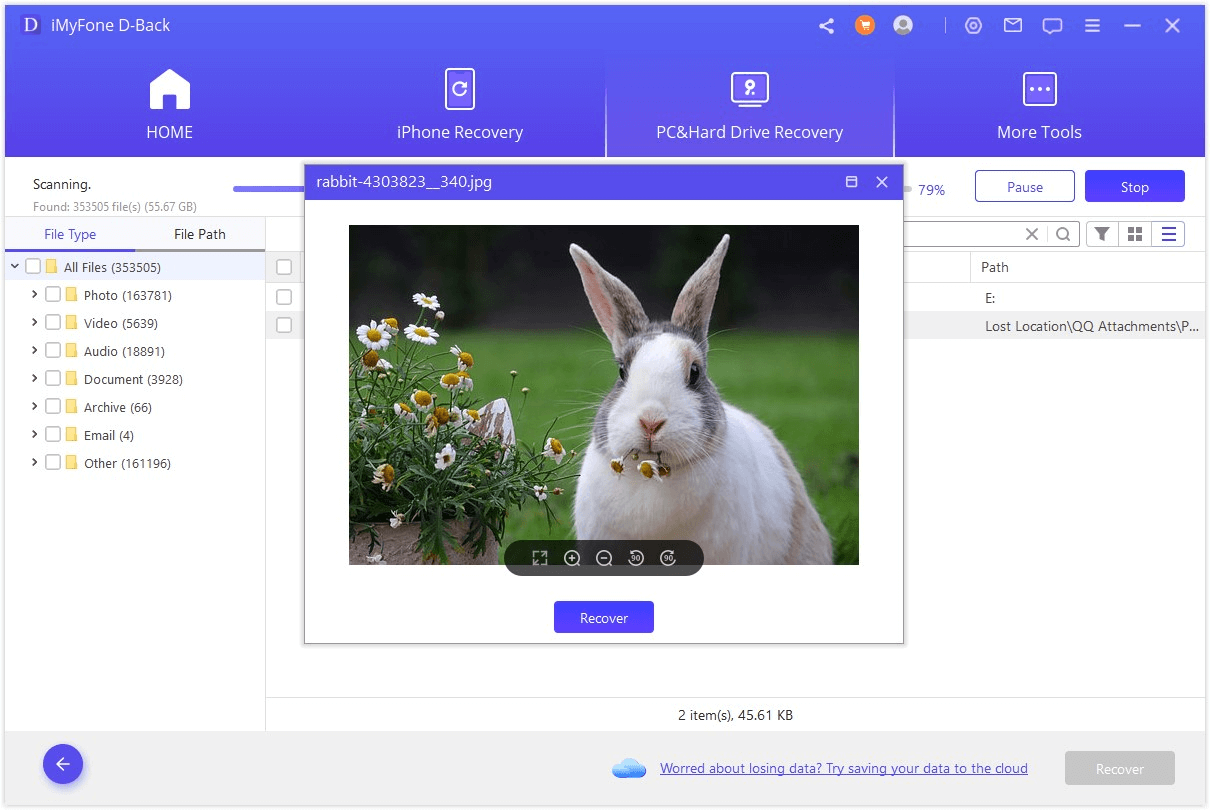
Step 3: Once done, you will see all the files originally stored on the external hard drive in the interface. Click individual files to preview or directly select the data you want to recover, then click "Recover" to complete the operation.
Summary
Properly maintaining your Mac external hard drive is essential to protect your data and avoid data loss. Here are a few simple maintenance steps to follow:
Step 1: Backup your files using multiple external hard drives.
Step 2: Use the original data cable to connect the hard drive to your computer.
Step 3: If needed, use Disk Utility to format the hard drive and use reliable and secure software like iMyFone D-Back to recover data.
By following these steps, you can ensure the safety of your data and minimize the risk of data loss.
iMyFone D-Back
Recover Data from Windows/Mac/iOS
168,282 people have downloaded it.
- Supports a wide range of data types such as messages, photos, videos
- 100% Work with a variety of data loss scenarios.
- Retrieve lost data from different types of devices
- AI repair corrupted photos, videos, files.
- Compatible with All iOS & Android versions.
(Click to rate this post)
Generally rated 5 (256 participated)
Rated successfully!
You have already rated this article, please do not repeat scoring!