


[2023 Solved] How To Restore Photo Library On Mac
Category: PC Data Recovery

3 mins read
The photo library crashes, or the accidental deletion of the photos will flash away all the memories you have captured. It is hard for a user to lose such a long memory, but don’t worry; we will not let it go away.
In this article, we will discuss how to restore a photo library with and without the software. You will get all the necessary guidelines about each step to find your problem and resolve it easily.
In this article:

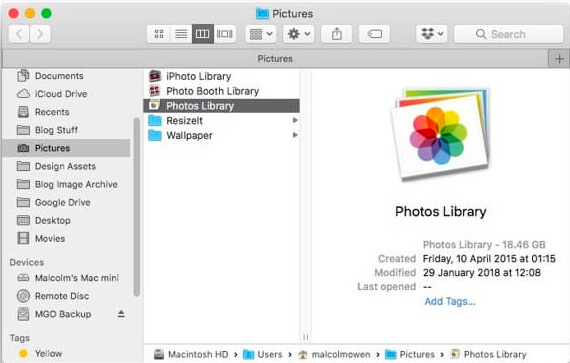
Part 1. Where Is Photos Library on Mac
A photo library is just like a normal photo album where all your photos are gathered folder by folder. It is a well-organized library in which photos are aligned with the latest to the newest. It gives you a dynamic look to feel the memories and enjoy them.
All photos you take on Mac, iPhone, iPad, and other apple devices will be stored in the photo library. You can save them as a backup on iCloud to avoid any crashing or malfunctioning issues due to which you lose files.
Part 2. How Do I Restore My Photo Library On Mac
In this part, we will discuss all methods to restore the photo library on Mac with and without the software. If you find that the photo library is not working properly, you can try these methods to fix it fluently.
1 How Do I Restore Photo Library with Software
Professional recovery software is the best way to deal with data recovery. It is an effortless way to recover the photo library within minutes. We will guide you with a brief introduction and step-by-step guidelines for using the software.
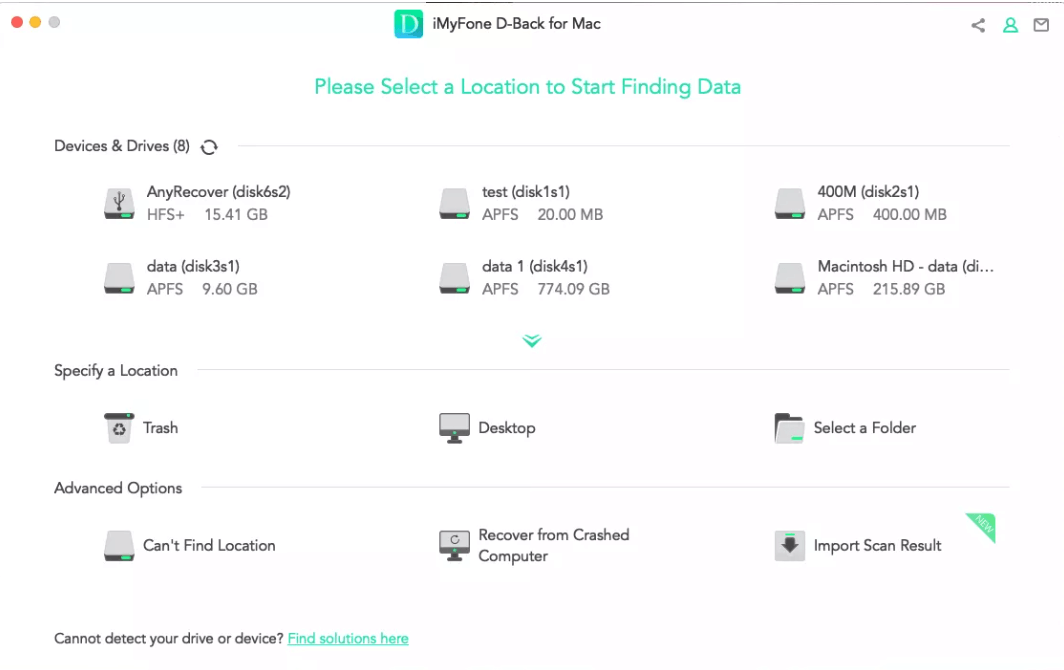
iMyFone D-Back Hard Drive Recovery is a software specially designed to deal with the problems not only photos library in your Mac. It will allow you to preview the recoverable data before the export. You are not only restricted to Mac hard drives, but you can also recover data from USB flash drives, SD cards, cameras, and other storage devices.
Step to Use
- Step 1: Download and install iMyFone D-Back and open it.
- Step 2: Launch the software and select the drive from which your photo library data is saved. Click the drive and wait until the scanning is completed.
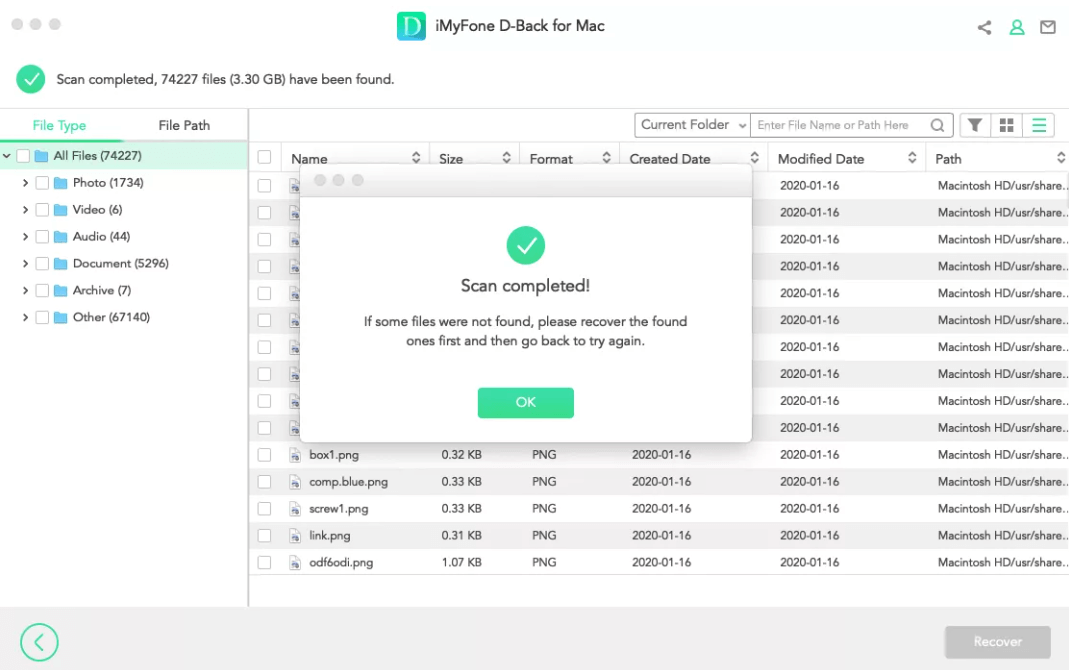
- Step 3: After the scanning, it will preview all the lost files. You can also filter the files if you are having difficulty finding it.
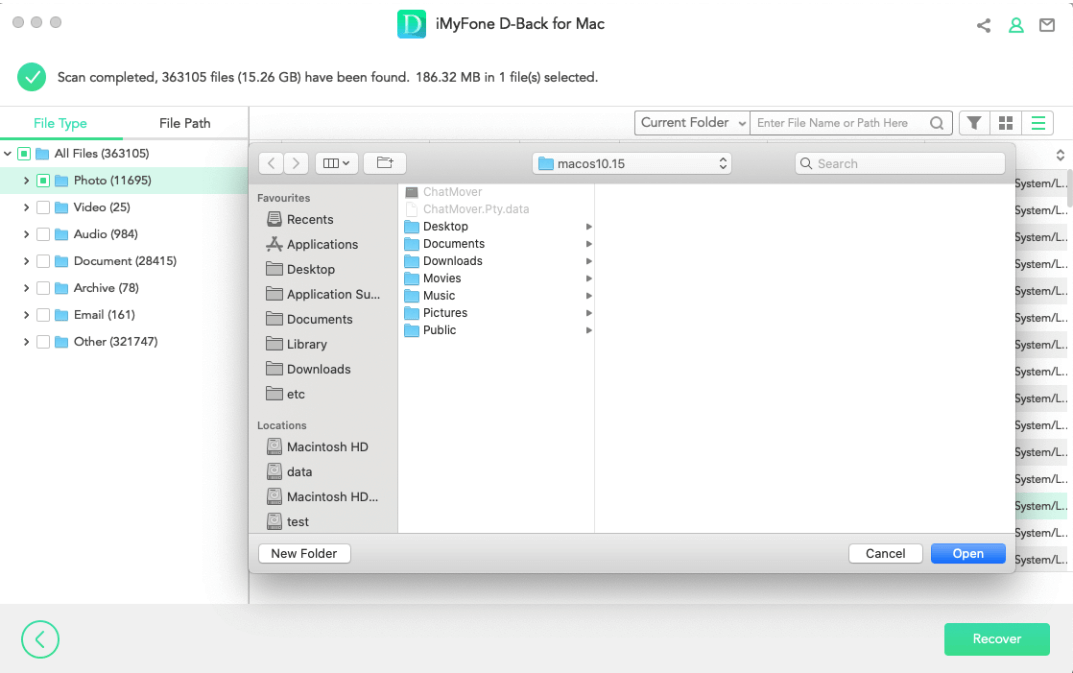
- Step 4: Select the photos and hit Recoverat the bottom. It will open a new window to select a destination to save the photos.
2 How Do I Restore Photo Library without Software
We will teach you the top 4 ways to restore a photo library without software. You can find the relevant solution and apply it to your Mac. If you have already tried any of the following solutions, head toward the next one.
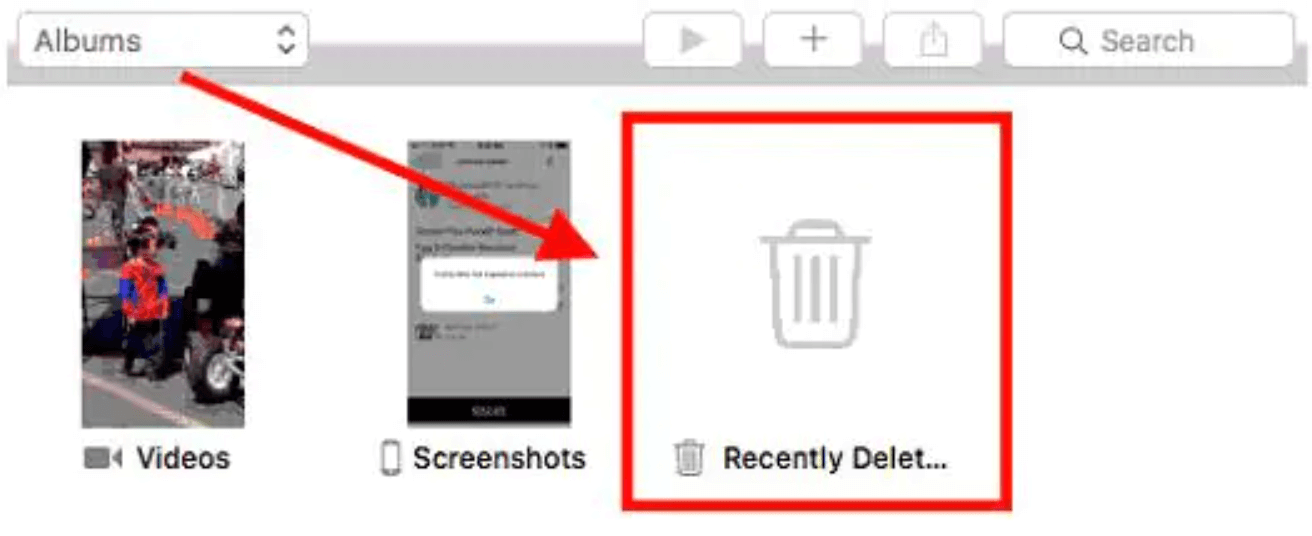
Method 1: Go To The Recently Deleted Folder
The photos don’t get deleted directly on Mac; instead, they will go into the recently deleted folder for 30 days. After 30 days, it will be automatically deleted from there. If your pictures are accidentally deleted and 30 days have not passed, then you can use this way to restore them easily.
- Step 1: Open the Photos app on the Mac.
- Step 2: Click Album on the left-hand side. You will see a recently deleted folder; select the photos you want to recover.
- Step 3: Hit Restore to get all the photos back.
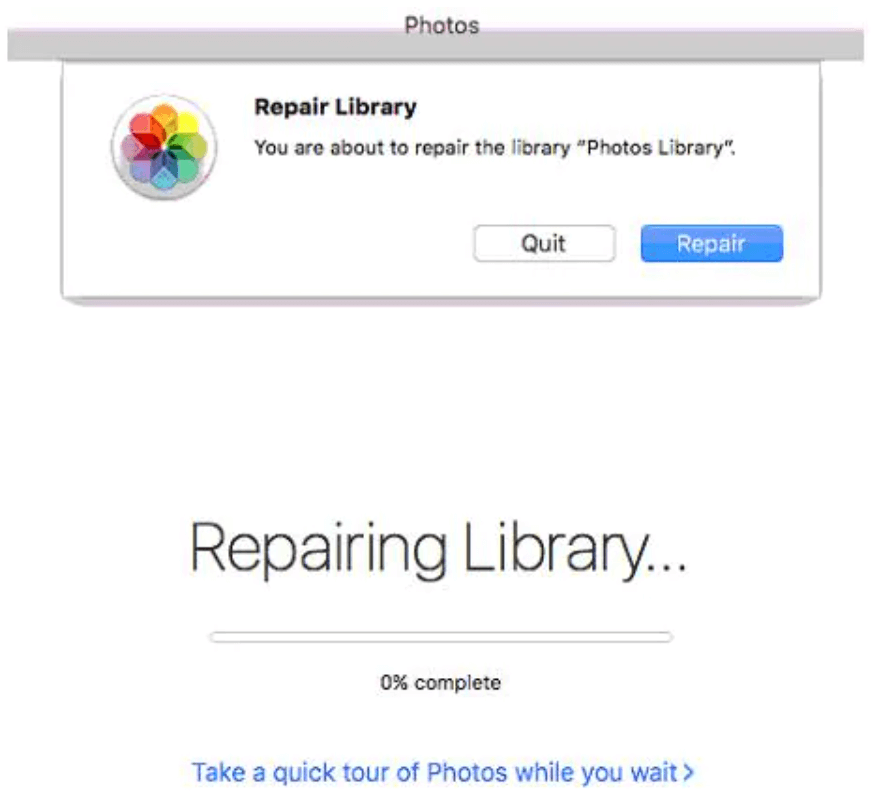
Method 2: Repair Photos Library
If your photo library gets corrupted or malfunctions while using it, you must repair it to resolve the issue. Before this, you must ensure you have updated the OS to the latest version to tackle the issue smoothly. Let’s see how it works.
- Step 1: Go to the Applications and open Photos.
- Step 2: Press Cmd + Option keys and double-click on the Photos icon in the dock panel.
- Step 3: It will open a new window; click Repairand wait a few minutes until it gets completed. Reopen the Photo library, and your issue will be resolved.
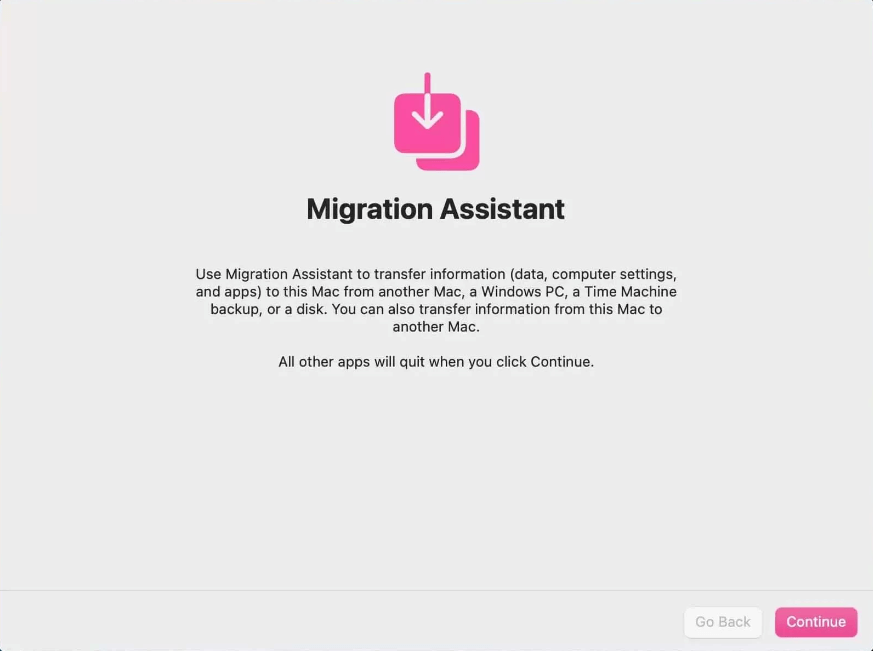
Method 3: Use Migration Assistant
If you have created a backup, the time machine will keep syncing it daily. You can restore photos from a time machine through migration assistance. Migration assistant is a built-in feature in MacOS that restores the data to the earlier date and provides you with all the data on which you had lost it.
- Step 1: Open Migration Assistant from the Utilities folder.
- Step 2: It will open a window, click Continueat the bottom.
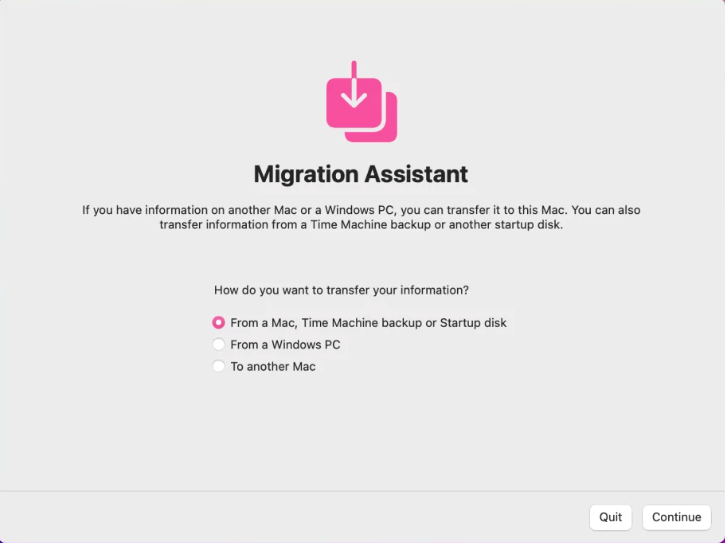
- Step 3: It will show you multiple backup options, so select Time Machine and hit Continue. Connect an external hard drive to collect all the lost data safely.
Method 4: Use iCloud
You must have an existing iCloud photo library backup for this method to restore it directly. Let’s see how this works.
- Step 1: Open the iCloud webpage and enter the login information.
- Step 2: Go to the Account setting and scroll down to Advanced. Click Restore files from the tab.
- Step 3: It will open a new window where it will start searching for the backup. Select the lost photos and hit Restore Files. Click Done when it finishes the restoration.
Part 3. FAQs
1 Why did my photos disappear on Mac?
The photos may be accidentally deleted, or the photos library sometimes misbehaves, costing you photo loss.
2 Can I merge two photo libraries on Mac?
You can merge two libraries, but you must ensure enough storage in your cloud account.
3 How do I check my photo library?
You can check the photo library by accessing it through the photos in the dock panel.
Conclusion
All the mentioned methods are enough to restore or repair the photo library. Still, professional software like iMyFone D-Back Hard Drive Recovery for Mac efficiently deals with recovery issues. It is one of the most accurate and quick recovery software.
(Click to rate this post)
Generally rated 4.5 (256 participated)
Rated successfully!
You have already rated this article, please do not repeat scoring!