


 March 29, 2023
Photo Booth is a picture-taking app that has gained a lot of popularity amongst MAC and iPad users. It comes preloaded on all MACs with a bundle of thrilling features. Plenty of users who frequently use Photo Booths store extensive data of their memorable moments captured in the form of images and videos.
While browsing through their Photo Booth files, users may unintentionally hit the delete button, or their MAC might get a virus attack; in both scenarios, they may lose some or most of their files. In this article, we have answered their question, "can you recover deleted photo booth files” and provided them with solutions.

Part 1. How to Recover Deleted Photo Booth Files on Mac
MAC users who use Photo Booths make sure they have first-hand information on how to recover photo booth pictures on MAC. Because they carry a lot of Photo Booth data, they are always concerned about the safety of their Photo Booth files. Users of Photo Booths must, at the same time, also possess knowledge on how to recover deleted video from a photo booth.
1.1. Recover Deleted Photo Booth Files with the Advanced Program
There are plenty of advanced data recovery programs available online and in the market. However, one must choose such a program that provides an easy-to-use interface and, at the same time, is compatible with many popular file extensions.
iMyFone D-back Hard Drive Recovery Expert is the perfect data recovery program for recovering lost files, images, documents, and more from formatting, deleting, partition loss, disc damage, virus attack, and other causes.
With this software, you may recover erased data from nearly any form of storage media. Internal hard drives, external USB drives, SD and CF cards, other memory cards, digital cameras, solid-state drives (SSD), flash drives, and other devices are also supported.
Features of iMyFone D-back Hard Drive Recovery Expert:
- An easy-to-use, user-friendly interface that makes recovery easier for novice users.
- Give you an option to preview files before recovery.
- The higher recovery success rate.
- Supports all most popular file types as well as recovering data from formatted and lost drives.
Following are the steps that will guide you on how the iMyFone D-back Hard Drive Recovery Expert works to recover lost or deleted Photo Booth files.
Step 1: Download and install iMyFone D-back Hard Drive Recovery Expert on your MAC.
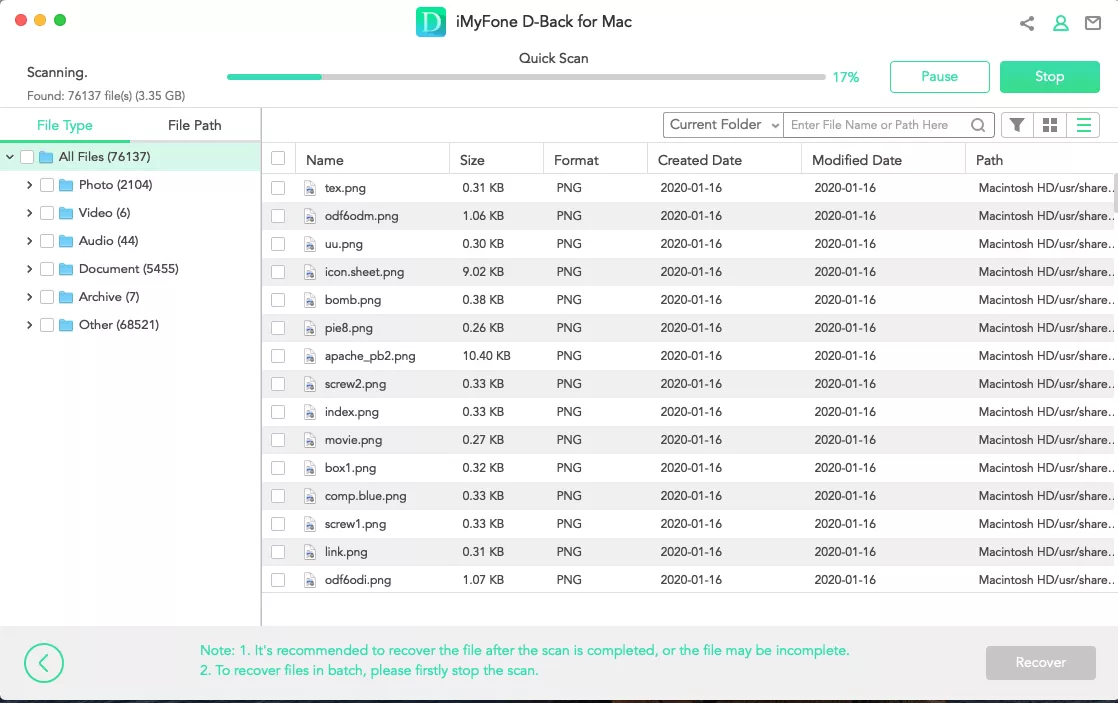
Step 2: Carefully select the location you want to recover from, and click on the scan button to start the scanning process.
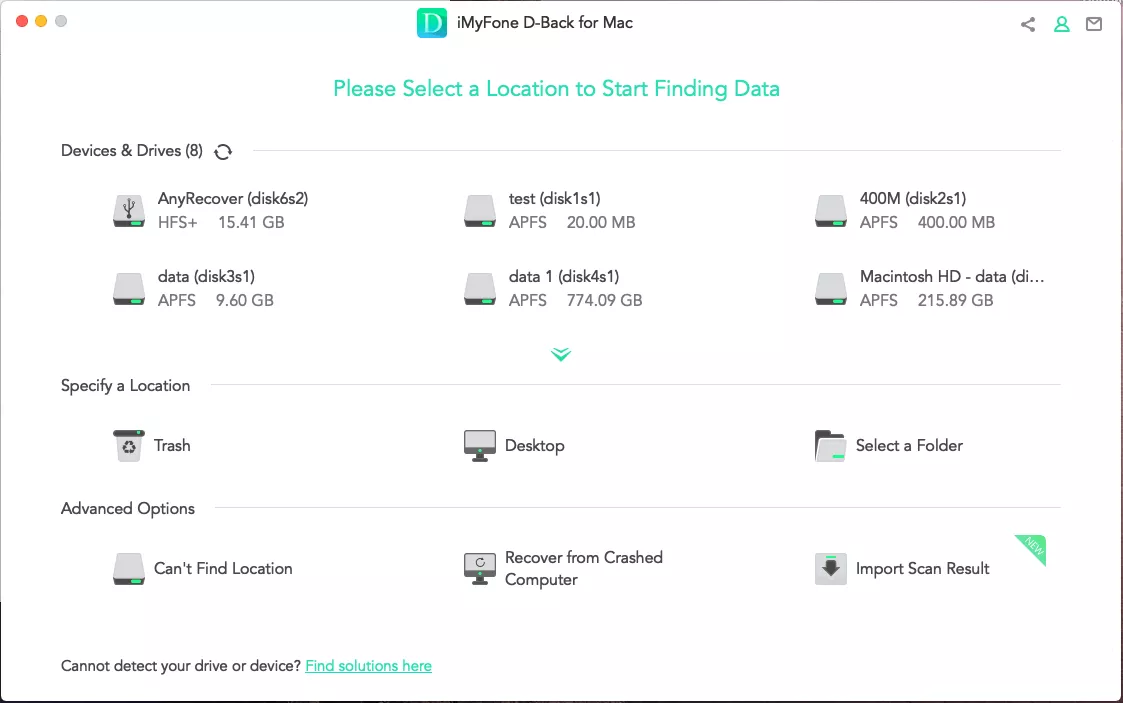
Step 3: Once the scanning process is completed, it will display a list of deleted or existing files.Preview the files and select those you wish to recover. Click on the Recover button to process, and then you are all done.
1.2. Recover Deleted Photo Booth Files with the Built-in Mac Tool
Accidental deletion, hard drive corruption, virus infection, or OS malfunction can all result in the loss of Facebook images. Your pictures are still on your Macbook, whether they are lost or wiped. They occupied a location that is now advertised as available for storage.
This means you can get deleted photos back on your MAC before new data overwrites them. We will show you how to recover Photo Booth pictures on Mac using a built-in mac tool in the following steps.
Using Time Machine:
The Time machine option can restore your images from Photo Booth without any hassle. Normally, backups are available in the time machine and can easily be restored.
Follow the below steps to do the backup:
- Connect your iPad with the MAC.
- Open the Photo Booth Folder.
- Open the Time Machine option from the menu.
- It will show all the images and backups that can be restored. Select the files and click on the Recover button to recover the files.
Part 2. How to Recover Deleted Photo Booth Files on iPad
You can use the below ways to recover your deleted Photo Booth files:
2.1. Using Photo Album
If you’re not willing to do recovery using any software, you can use the below methods to recover your photos:
- Open the Photos app from your menu and click Albums. Below, you’ll see the Recently Deleted Album option. Click on that.
- You’ll see all the photos that can be restored. Simply click each file and select the Recover button.
2.2. Using iMyFone D-Back
However, amongst the free software available, the most reliable iPad photo booth files recovery program is the iMyfone D-Back for iOS, which has the highest recovery success rate. Using this program, users may quickly recover data directly from the iPad. Data may include files which are:
- Deleted by accident.
- Files that are lost due to a factory reset.
- Files were lost because of an iOS upgrade.
- Files that have been lost due to iPad breakdown.
Features of iMyFone D-Back:
- Deep scan results are quicker and more accurate.
- Provides a user-friendly interface with a step-by-step wizard.
- Allows a free preview of the files.
- Ability to recover even the oldest files, which other recovery tools might fail.
Steps to recover Photo Booth files on iPad:
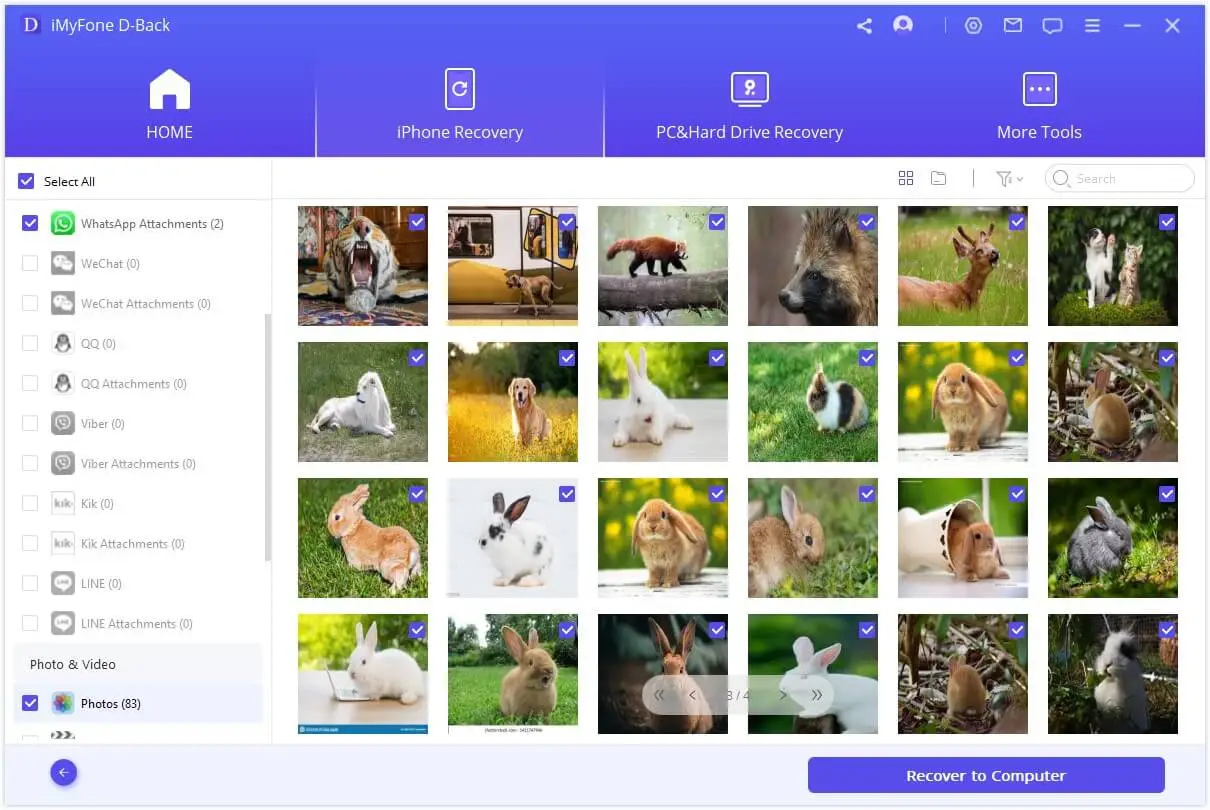
Step 1: To start the process, download and install the iMyFone D-back for iOS. Click on the Recover from the iOS device. Connect your iPad with your device. Click on the Next button.

Step 2: Once the device is connected, it will share the list of locations that can be scanned. Select your required location and click the Scan button.

Step 3: Once the process is completed, it will share the list of files that can be restored. To recover, select the files and click the Recover button.
Pro tip: Why My Photo Booth Files Lost? How to Avoid It?
Following is the list of reasons why the Photo Booth files are deleted. We’ve also mentioned the ways to avoid them. Let’s discuss them below:
1. Virus attack is one of the common reasons. When there’s a virus on your device, it will hide or delete the photos. You won’t be able to access them. You must install antivirus and avoid transferring data from unknown devices to avoid this situation.
2. Sometimes, files are accidentally deleted or overwritten. For e.g., if you’re using any tool to edit your images and save the edited file on the same original file, you’ll lose access to the original file. Always create a copy of the original file and then use it to avoid it.
3. If you’re transferring your data to any other device, and the device is shut down, you may also lose your data. So, it’s always preferred to charge your device and then transfer the files to avoid losing access.
Part 4. FAQs about Photo Booth Files
01 Can I recover permanently deleted photos from Photo Booth?
Yes, you can use the iMyFone D-back for iOS to recover permanently deleted photos. You can also recover the files that were deleted a long time ago.
02 Where do Photo Booth photos go on Mac?
There's a folder with the name Photo Booth Library File. It is found inside the Pictures folder. All the images that are captured in the Photo Booth are saved in this folder.
03 How to get a photo booth on Mac?
The Photo Booth program comes pre-installed on iOS devices. It doesn’t require any installation. However, if you can’t open it, you can follow the below steps:
Step 1: Select Applications from the Go menu on the desktop. Photo Booth can be found in the Applications folder.
Step 2: Press Return after clicking the Search icon in your menu bar and typing picture booth.
Conclusion
Photo Booth is a terrific way to keep lovely memories together because it has a way of making pictures look great, thanks to the built-in iSight camera shots. As a result, deleting Photo Booth pictures, whether on purpose or by accident, may be a terrible experience, especially if the images are valuable and you can't find them in your MAC trash.
iMyFone D-Back has helped many users quickly recover their data through easy steps and has a higher success ratio than other software. The software can help you restore your data in 3 simple steps.