When it comes to QuickBooks, no one wants to lose their financial and accounting files; in fact, losing one is undoubtedly a nightmare. If you accidentally deleted part of your data, you're probably looking for the best ways to recover QuickBooks data from the hard drive. As a result, we've compiled a list of the best and quick methods to recover a QuickBooks file from a hard drive.
Part 1. How to Recover Deleted QuickBooks License/Files/Data from Hard Drive
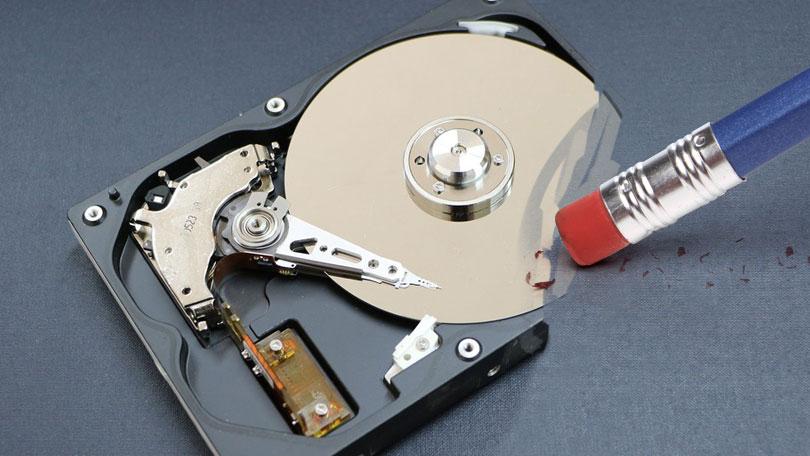
If you need to save data, a hard drive can be a lifesaver, but it also comes with risks that could cause you to lose all of your data. However, things will be easier if you know how to recover QuickBooks data from your hard drive.
If you're having trouble retrieving your data, you can contact QuickBooks' technical support team by phoning the QuickBooks data recovery service number. But if you wish to resolve this issue without consulting a technical specialist, D-Back Hard Disk Recovery Expert is here to put your mind at ease.
You may recover any data type with iMyFone D-Back, whether QuickBooks lost data or gaming data saved on your Xbox console. This excellent software has often been regarded as the simplest method of recovering all your data in minutes.
To learn more about the software, let's go through its features:
Main Features about D-Back Hard Drive Data Recovery Expert:
If you're looking for a way to recover data from QuickBooks, iMyFone could be the most acceptable option. You can recover your data since the software includes several features to help you recover the QuickBooks license from your hard drive or other important files from your hard disk. First, let's have a look at its excellent features:
- It offers the most user-friendly interface so that you may get the best data recovery experience without any problems.
- With its fastest scanning speed, you can get your data scanned in less than seconds.
- If you recover any data from iMyFone, you'll get the preview and data scan for free.
- It comes with infinite recovery for various files and folders, allowing you to recover thousands of files.
Let's see how to put various data recovery methods with or without iMyFone:
1Using QuickBooks Recovery Tool-iMyFone D-Back (Best Way)
You've just gotten an idea of how this software encourages the best solution to your problem of QuickBooks recovery with the mind-blowing features we've mentioned above.
When you remove a file, it remains hidden on the hard drive, where D-Back Hard Drive Data Recovery can scan for it and recover it using its powerful algorithms. Only 3 actions are required: Select > Scan > Preview & Recover. Let's look at how to get it!
Step 1. Software download and installation
Installing the software is the first and foremost step you should take to continue your data recovery with the software.
Because the software is compatible with a wide range of Windows and Mac operating systems, you can download the required version of the software on any device.

Step 2. Scan up your file
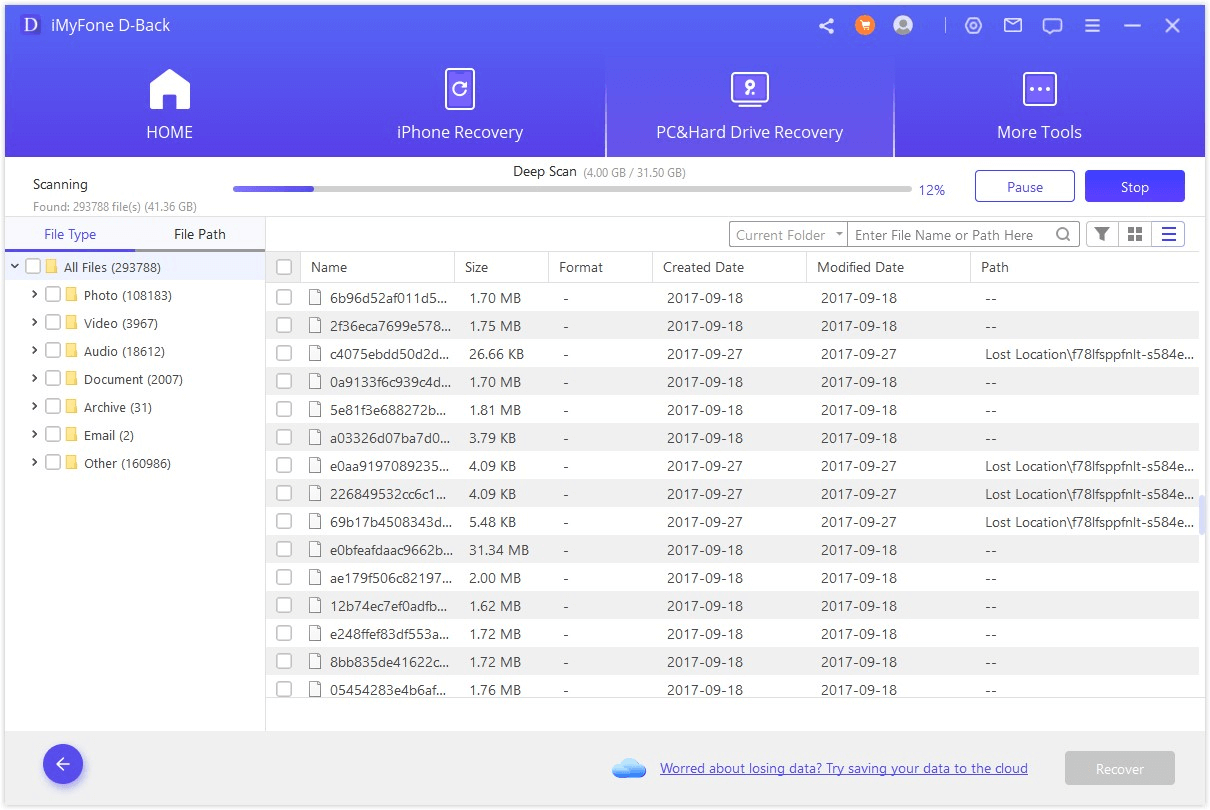
Now that you've installed the software, it's time to open it and choose the location you need to recover, then click scan to continue the scanning process.
Step 3. Preview your file to check the data to recover
After a deep scan of your files, you can preview and restore your preferred files directly. Select the file you wish to recover and click on the recover button. After that, select the location where you want to restore the file.
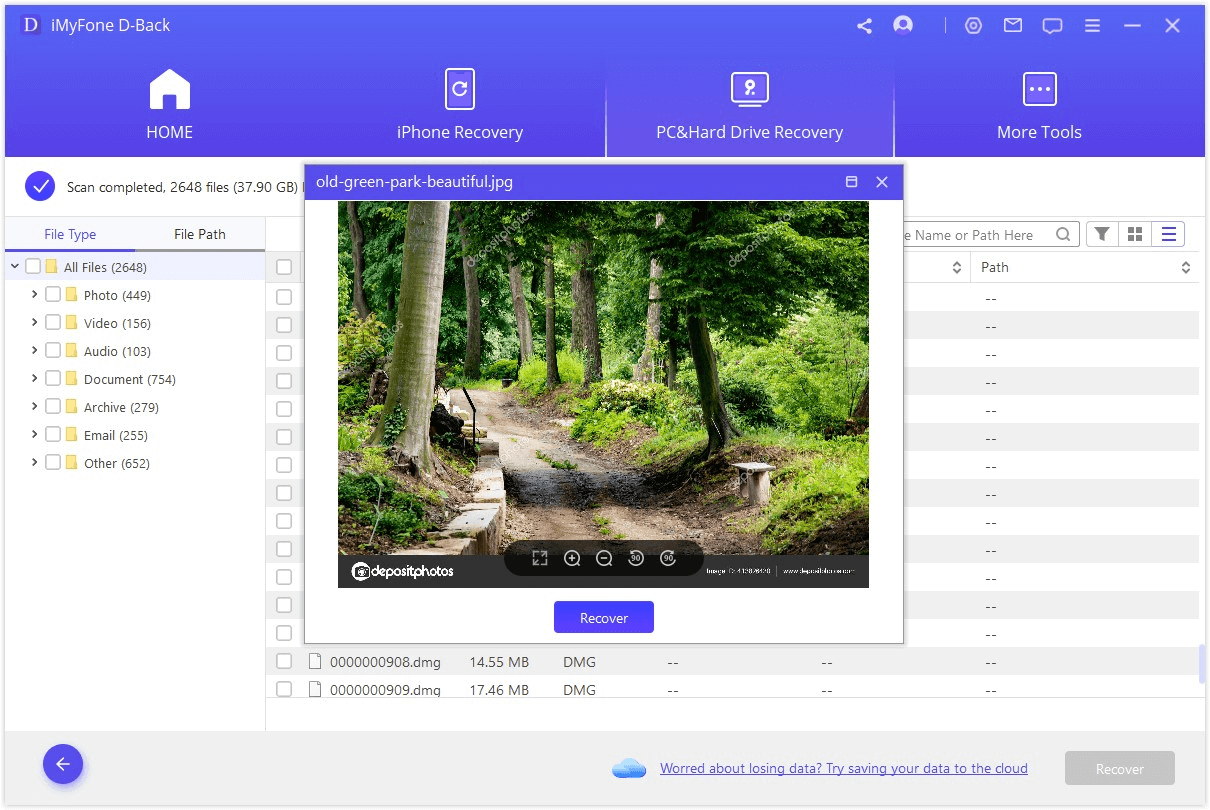
You're done with your file recovery; that's how you can recover any of your QuickBooks license/files from the D-Back Hard Drive Recovery Expert. You can directly get the losing QuickBooks data from a hard drive by downloading this software free.
2Using Company Files
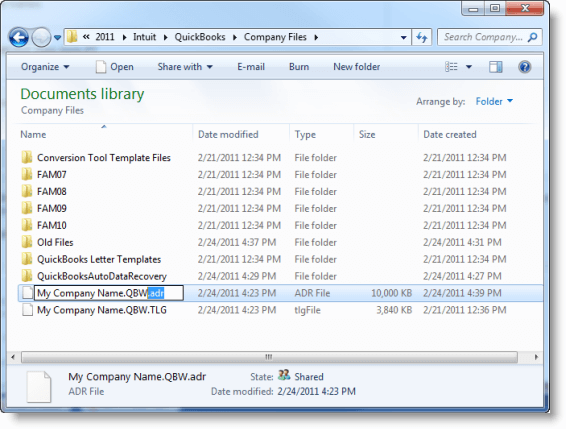
You can recover the lost transaction using the current Transaction Log file (.TLG) and a copy of your company log file (.QBW.adr).
First, you've to copy a few files into a new folder. To do so, follow the below steps:
Step 1. Copying your TLG. and .QBW.adr. file into a new folder
1. Create a mew folder named QBTest on your desktop.
2. After that, you have to find out the company's location saved on your computer. You may find the company file on the number of company screens and the product information screen.
3. After that, copy and paste the TLG. File into the QBtest folder you've created.
4. After you've finished copying your TLG.file, you'll need to find the QBW.adr folder. You can find the QBW.adr. File at the exact location as the company file
5. Please copy and paste the QuickBook Auto Data Recovery File into your QBtest folder once you've found it. Don't forget to rename the QBw.adr. File as QBW file.
Step 2. Recovery through QuickBooks
1. As you're done with copying your TLG. mad QBW files, now you have to open up the QuickBooks.
2. After opening the QuickBooks, go to the QBtest folder and open the TLG. file
3. Use the account register to double-check that all transactions have been recorded.
4. Verify the integrity of the company file with the verify utility option.
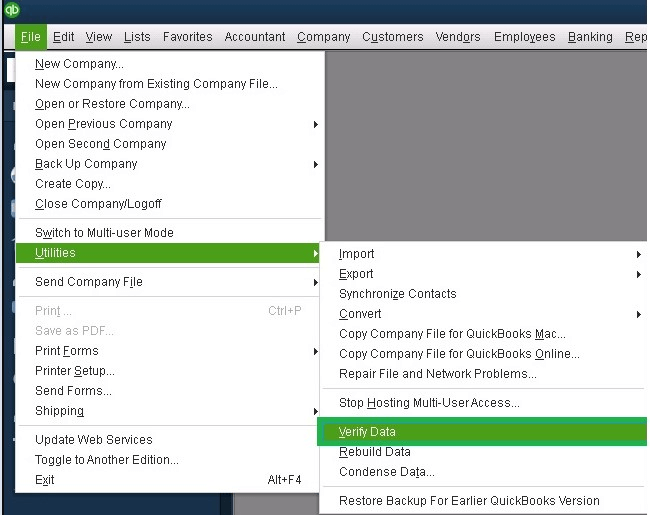
5. After a check, if the company file is in good condition, move the damaged file to any other location.
6. Move the company file copy from the QBtest folder to the original location.
3Using QB Data Recovery File
You can also recover your data using the QB data recovery file, but you have to utilize both now .TLG and .QBW. Files.
1. To proceed further, you need to create a new folder named QBtest.
2. Locate the QuickBooks Auto Data Recovery file on your computer and Copy both the .TLG and .QBW.adr. Extension files.
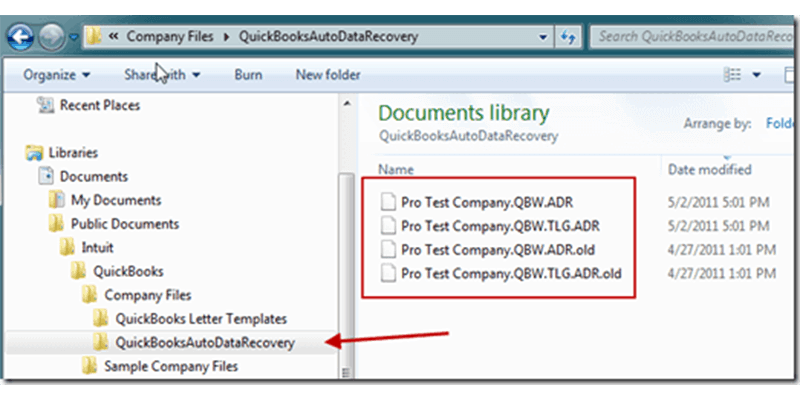
3. Now, embed them in the QBtest folder.
Part 2. What Causes QuickBooks to Lose Data
QuickBooks lost data could have a variety of causes. The following are some of the reasons for data loss from accounting software:
- You may lose your data while updating your QuickBooks version, so it's recommended to have a backup.
- The issue might have crept because of the virus or malware attacks.
- Disruption of certain critical functions can result in data corruption.
- Data loss can also be caused by improper storage and access to multiple company files in the same system.
- Files get corrupted due to power outages or system breakdowns.
- Unintentional deletion of data.
If you have suffered from data loss on QuickBooks and wondering about the fastest way to recover the lost QuickBooks data, we best recommend you free download D-Back Hard Drive Recovery Expert to help you! Most importantly, it can help you recover the lost QuickBooks data in a 100% safe way.
Part 3. Tips to Backup and Restore a QuickBooks Files/Data Desktop
Following are the tips which you can use to backup and restore QuickBooks files:
1 Backup QuickBooks Data Desktop
You should ensure that your QuickBooks company file gets a regular backup if you want to secure your data. QuickBooks' automatic backup can help you keep pace with your data and ensure that you won't lose a single file due to specific errors. You can follow the steps below to get the automatic backup QuickBooks desktop.
1. Backup your files on QuickBooks
2. Open up the QuickBooks dashboard.
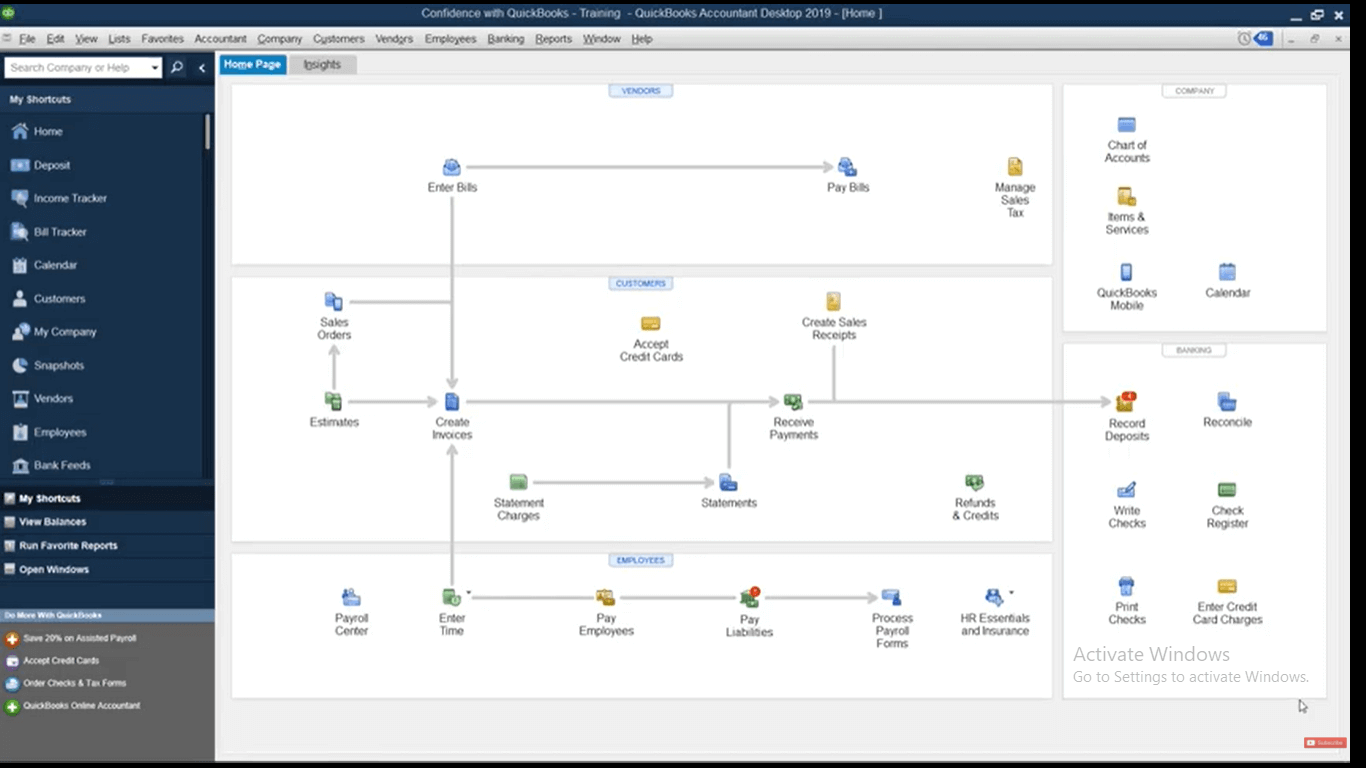
3. Go to the File option on the upper left side. Select the backup company from the dropdown menu and Click on create Local Backup.
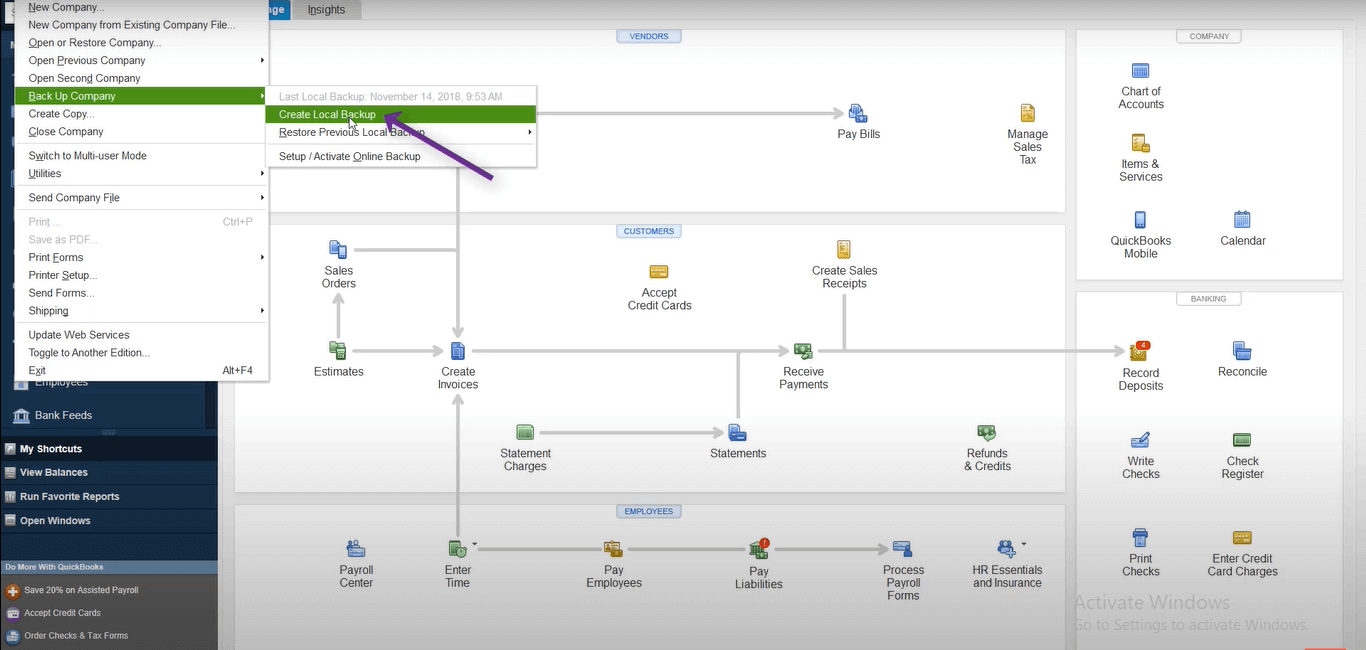
4. Now click next.

5. Choose a folder or location you want to locate, and then navigate to it.
6. Configure your preference
A. Select the option to include the backup file's date and time.
B. Set a limit on how many backups you want to keep at any given moment (recommended 4-8)
C. Set a reminder for backing up a company file at a specific time.
D. When you save, choose an option to confirm that the company data is correct.
It's best to double-check everything.
7. Select yes and move on when it asks whether you're sure you want to save the file to your local machine.
When do you want the file to be saved? "Now" or "Now with future backups scheduled." Selecting the second option, "now and plan future backups," is advised.
2 Restore QuickBooks Data Desktop
To restore your quick book data desktop, you can follow the simple steps below:
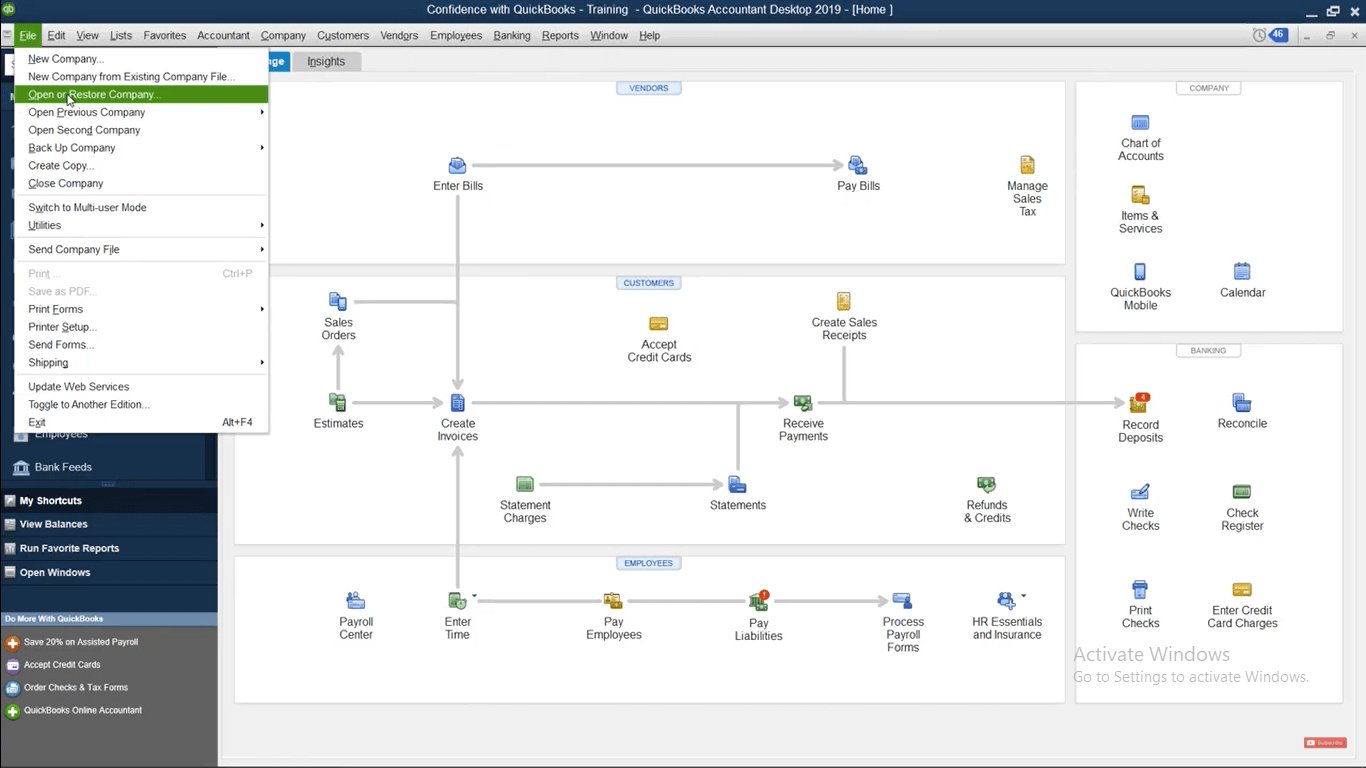
1. Open the file menu in QuickBooks and click on the open or restore company.
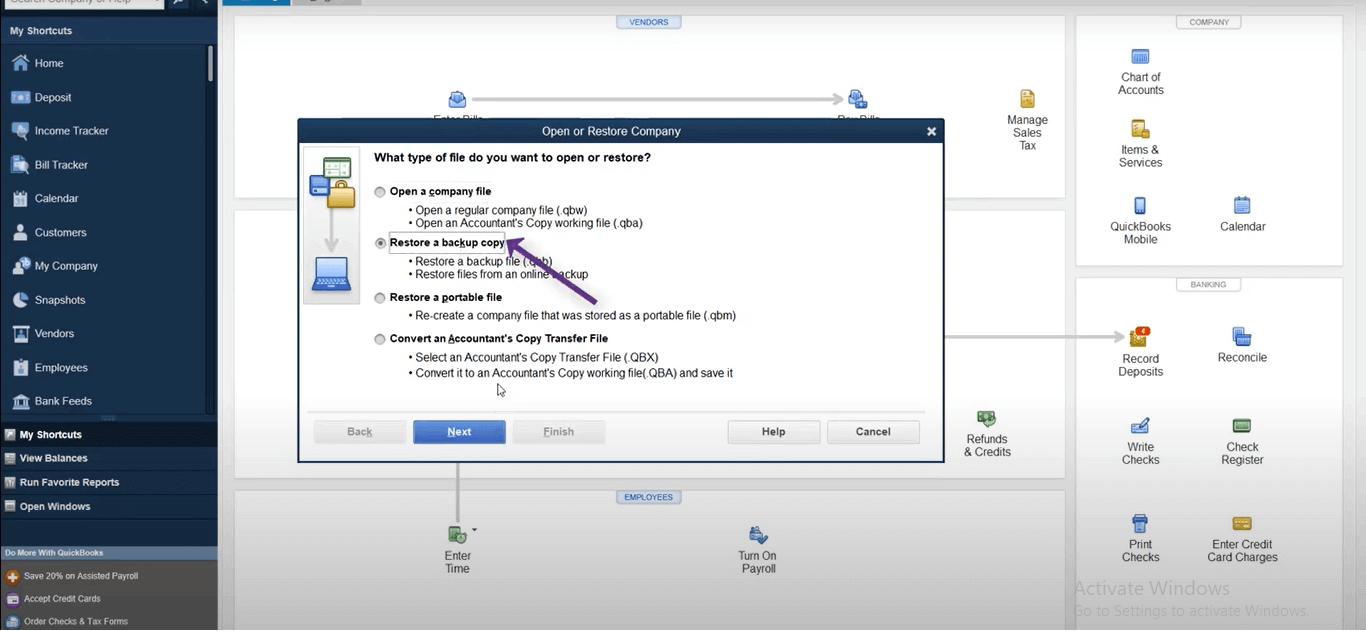
2. After selecting the restore backup copy, click next.
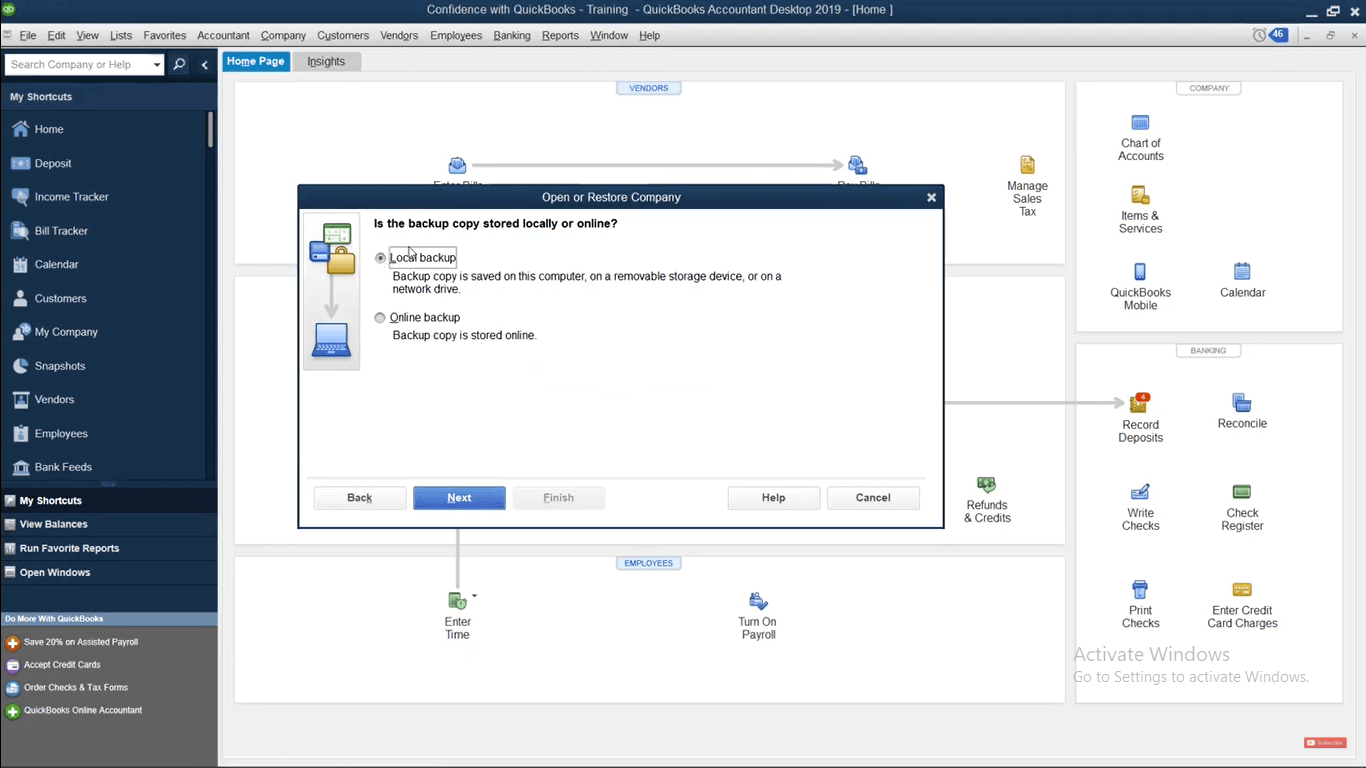
3. Click on local backup and then Next.
4. Look for your backup business file on your PC. Here is how it should look: [Your company name]. qbb.
5. Choose a location for your restored company file by selecting a folder. Then choose Open.
6. Select Save when you're finished. If you receive any warnings regarding the possibility of your data being overwritten, choose the option that best suits your needs.
Part 4. FAQs about QuickBooks Data Recovery
4.1 How to Recover QuickBooks File from Hard Drive
You can recover QuickBooks files from the hard drive using the methods we've already mentioned above. One of the easy and best methods is to use the iMyFone D-Back.
4.2 How Do I Backup QuickBooks to an External Hard Drive
If you want to backup your data to an external hard drive, transfer your data to a hard drive by copying the QuickBook AutoData Recovery folder directly to the hard drive by creating a new QB Test folder.
4.3 How Can I Find the QuickBooks License Number on the Hard Drive
1. Go to the Company tab.
2. From the dropdown option, choose My Company.
3. On the right side, under "Manage your account." Along with the product key, you'll find your license number.
Conclusion
After overviewing the different methods to recover QuickBooks data, we found that regardless of the reason for data loss or deletion, the iMyFone D-Back Hard Drive Data Recovery Expert can help you restore your data without any extra effort within just a few simple steps. But if you want to try any other direct methods, we've also mentioned all of them in this guide.


 March 29, 2023
