iMyFone Fixppo
If your iOS system causes your photos unable to back up to iCloud, you can ask me for help.
It is always a good idea to back up your data on your iPhone or iPad to keep it safe and protected. When you regularly backup your device you are assured that your apps, photos, messages, videos, phone settings and data will not be lost if your device gets damaged. You can set your device on automatic backup to iCloud to avoid having to keep updating it yourself. However, there are times when your photos not backing up to iCloud.
Don't worry, this article here will help you better fix this problem with 5 solutions! Stick to it and let's get started.
iCloud Features You Need to Know
- https://www.imyfone.com/iphone-tips/how-to-access-icloud-from-iphone/
- iCloud will not back up photos manually after accessing to iCloud and backing up photos to it automatically.
- iCloud only helps you to save the last 1000 photos in iCloud server for 30 days.
- You cannot back up photo stream, photo library or my album to iCloud backup. You can only backup camera rolls to iCloud automatically.
- There are two ways you can back up on iCloud. One is by backing up your entire device’s content manually; the other is by backing up your iOS content that is your calendar, contacts, bookmarks etc. to iCloud automatically when connected to a Wi-Fi network.
- The photos uploaded on iCloud can be viewed automatically but the photos in iCloud backup cannot be accessed unless you restore your device with iCloud backup.
How To Fix iPhone Not Backing Up Photos to iCloud?
1 Check iCloud Settings
If your iCloud settings is changed, you may receive an error message indicating that there is something wrong with your iPhone backup. To solve this photos not backing up to iCloud problem, please follow these steps:
Step 1: Tap on Settings on your iPhone.
Step 2: Click on your name at the top of the page.
Step 3: Scroll down and click on iCloud.
Step 4: Check your iCloud Backup under Device Backups.
Step 5: If Back Up This iPhone is not on, turn it on if you want to do that immediately.
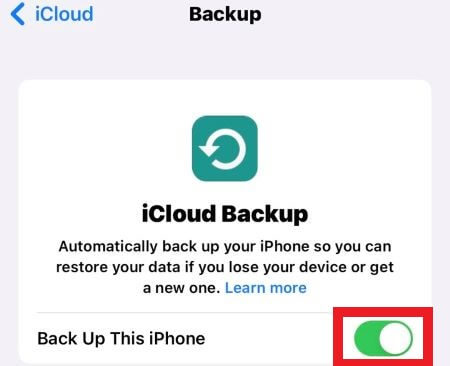
Note
If you notice your iCloud backup option greyed out, there are several reasons can explain this problem: Your network connection is unstable; Your iPhone service is outdated; There are iOS-related glitches on your iPhone. In such cases, you can either connect to a more stable network or try to fix your system problems.2 Ensure Enough Storage for iCloud Backup
iCloud taking up too much space without leaving enough storage is one of the most common reasons why iCloud backup fails to do its job, since your iPhone will not automatically backup to the iCloud if there is not enough space for the entire backup. Every iCloud account holder is given a 5 GB free storage space which is certainly not enough. If iCloud is not backing up properly you need to check if the storage is the culprit of the problem:
Step 1: Go to your iPhone Settings and click on your name.
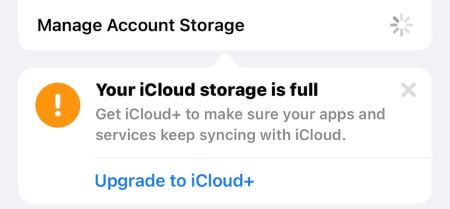
Step 2: Click on the iCloud option, you will see the capacity of your iCloud storage. If it is full, you need to upgrade to iCloud+ before you can back up photos to iCloud.
3 Sign Out of iCloud and Log In
It is possible that your iCloud gets stuck when you want to back up tons of photos at the same time. In this occasion, the suitable way for you to resolve the problem is to sign out your account then log in again. Similar to other 'force close your app' solution, this way can help to fix the minor bug that shows up when the device has not enough time to process too many things at once.
Go to Settings>Tap on your information>Scroll down to sign out your account.
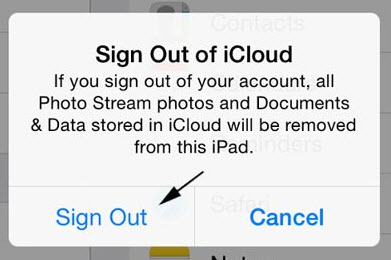
A warning sign will be displayed before you sign out but do not worry once you log in to your iCloud account all your photos, documents and data will be restored.
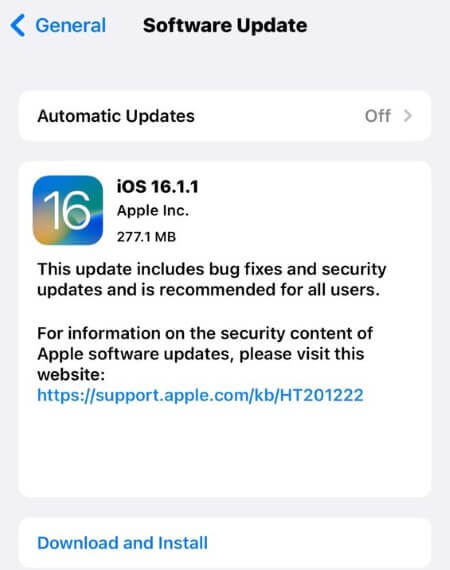
4 Update iOS Version
Since this is a problem with your iCloud, keeping your iOS system up to date is also important. If the system version is outdated for a long period, some features in your iPhone will certainly not run smoothly since the older version will become oblolete gradually.
Go to Settings>Click on General>Tap Software Update>Check if you're accessible to the latest iOS version.
5 Repair iOS System with iMyFone Fixppo
What if you already knew how to back up photos to iCloud on iPhone and upgraded to iCloud+ but still can't back up photos to iCloud? This is a problem that can be explained by only one reason: iOS glitch of your iPhone. If none of the solutions can help you make the backup, try iMyFone Fixppo to fix the problem first, then you can back up normally with the purchased plan. Steps below are about how to use Fixppo, check them one by one.

- ·Help to solve system problems that cause photos not backing up to iCloud in 4 steps.
- ·Easily fix problems like iPhone won't turn on since storage is full, iPhone stuck on restore screen, etc.
- ·Fix iOS-related problems without jailbreaking your system.
- ·iPhone bugs can be fixed without any data loss.
- ·Support all iPhone devices and iOS versions.
Step 1: Download and install Fixppo to your computer, choose Standard Mode.
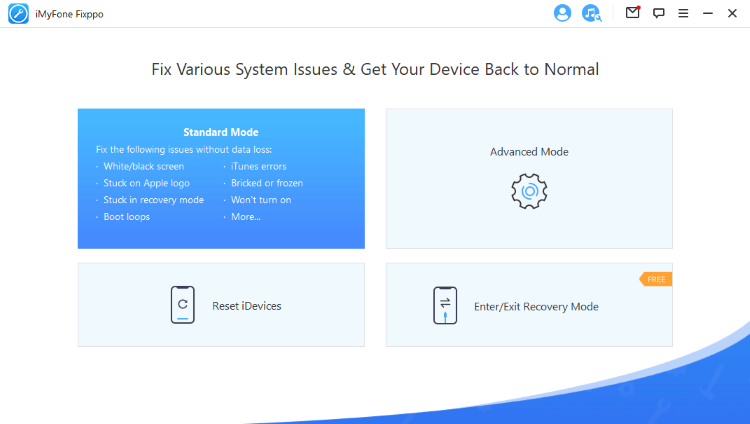
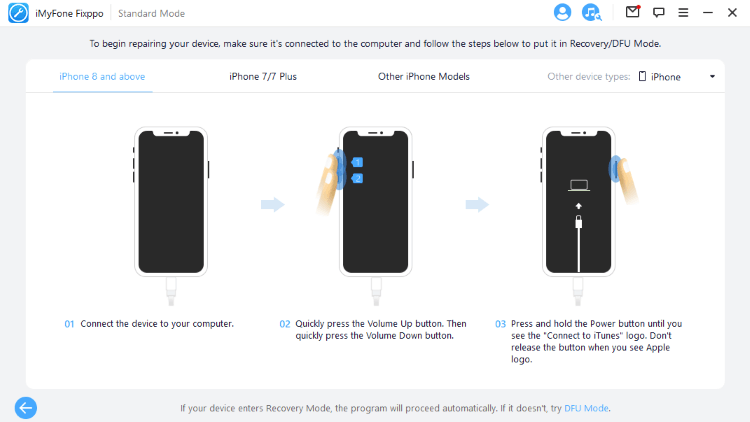
Step 2: Connect your device to computer(don't disconnect your iPhone during the whole process). Then follow steps to enter Recovery Mode.
Step 3: Make sure your device model and the firmware are detected, click on the Download button.
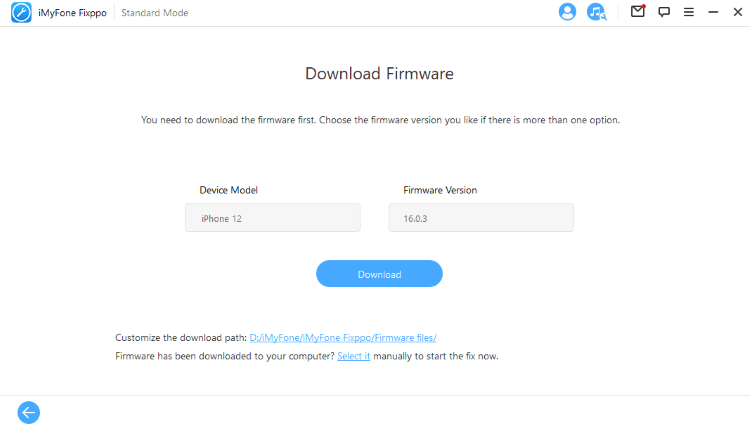
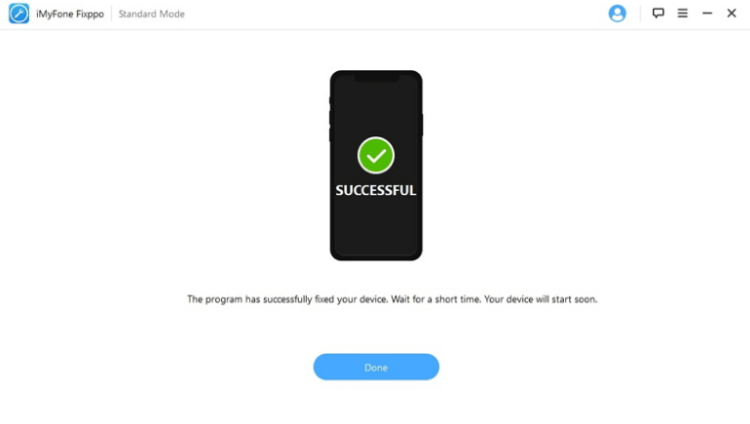
Step 4: Wait patiently for the firmware to be downloaded, once it's done, click Fix to start the process. You iPhone will be started within a few minutes and you should be able to back up iCloud photos.
Conclusion
iCloud is a safe and easy way to make sure all your data is well protected in case your device should get damaged. However, problems like photos not backing up to iCloud may occur from time to time. Besides making sure that you have enough space for the backup, preventing the iOS system from hindering the proper functioning of the backup is also important. In this case, iMyFone Fixppo can be your good choice. Whenever you run into iOS-related problems, Fixppo will be your first and best fix.


 March 27, 2025
