


User Guide of iMyFone TunesMate
Transferring media files between iOS devices and iTunes/computer is extremely easy with iMyFone TunesMate. TunesMate lets you to transfer files conveniently with two-way transfer, and you can even rebuild the iTunes library. It supports music, playlists, movies, camera roll images, photo libraries, podcasts, and more. To correctly use the function you want, click on one of these navigation in the Content bar on the left to read the full guide!
Part 1: Transfer Music from iPhone/iPad/iPod to Computer
Want to back up some specific or all of your iPhone music to computer? iMyFone TunesMate has you covered. Also, back-up of different music files from your iPhone, iPad or iPod to computer includes the transfer of Music, iTunes U, Audiobooks and Podcasts. You can drag and drop or select audio files with the touch of few buttons.
Step 1: Connect Your iPhone/iPad/iPod
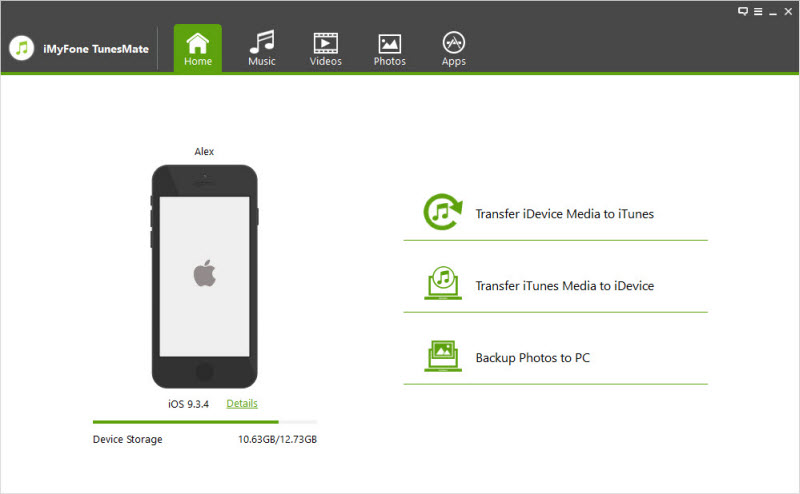
Launch iMyFone TunesMate on your computer and connect your iPhone, iPod or iPad with a USB cable.
Step 2: Export music from iDevice to computer
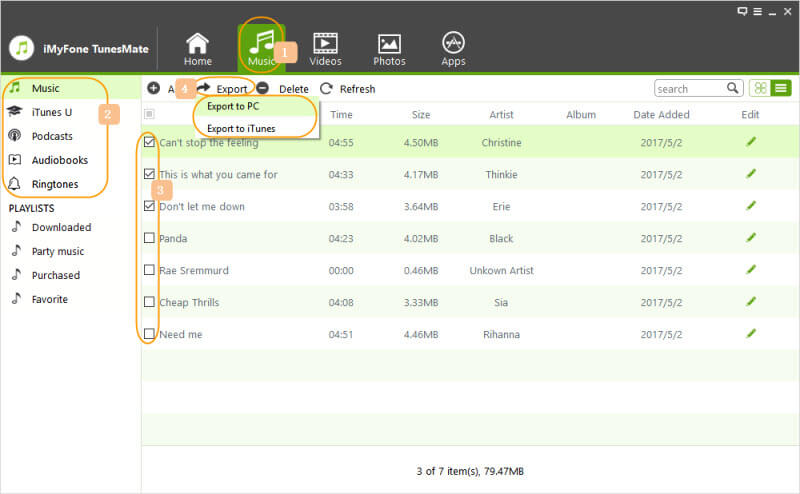
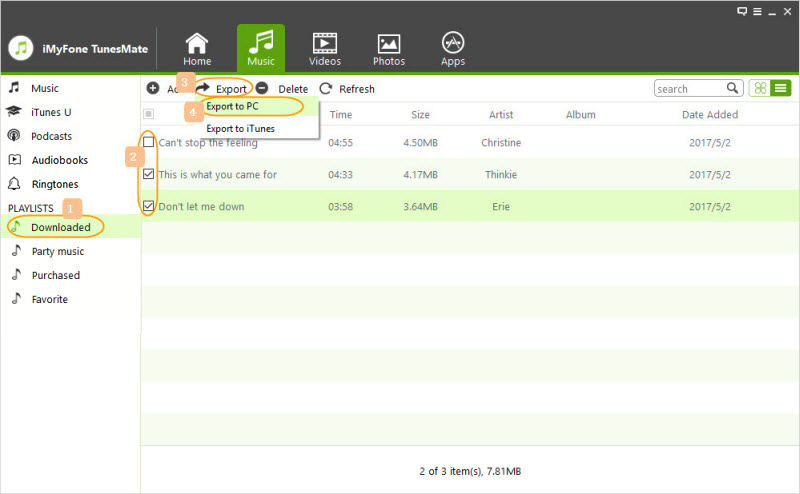
a. Click “Music” icon on the top bar and you will be in the “Music” window by default. Of course, you can also go to “iTunes U/Audiobooks/Podcasts” from the left sidebar. Tick the songs you want to export and click “Export > Export to PC” from the top menu.
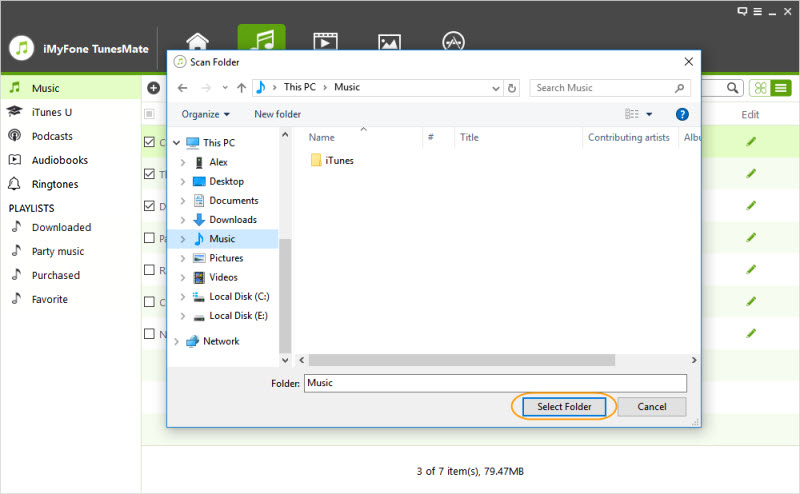
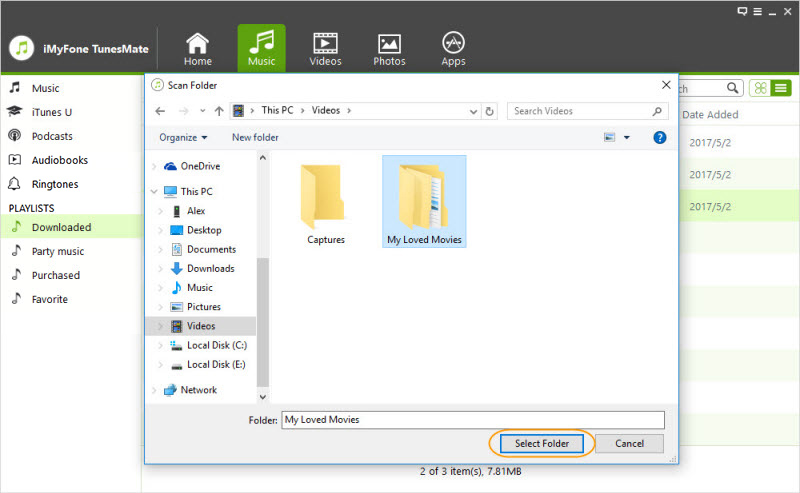
b. Browse and select the target folder on your computer to export. Then tap”OK” to begin the export process.
Step 3: Export successfully
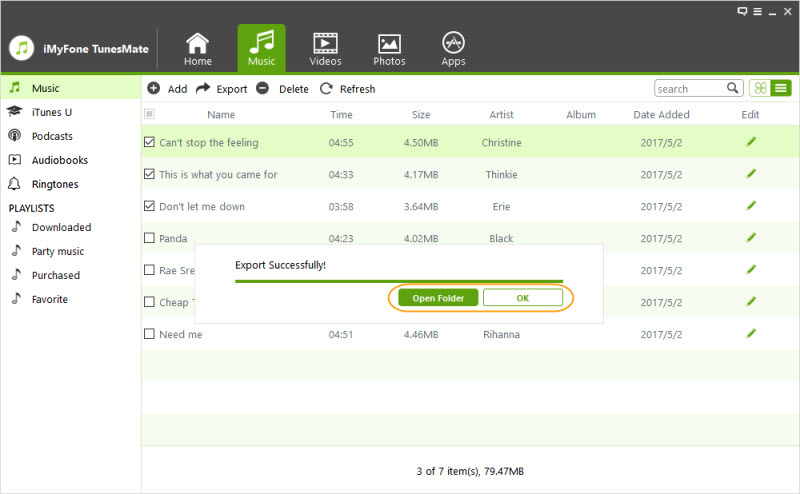
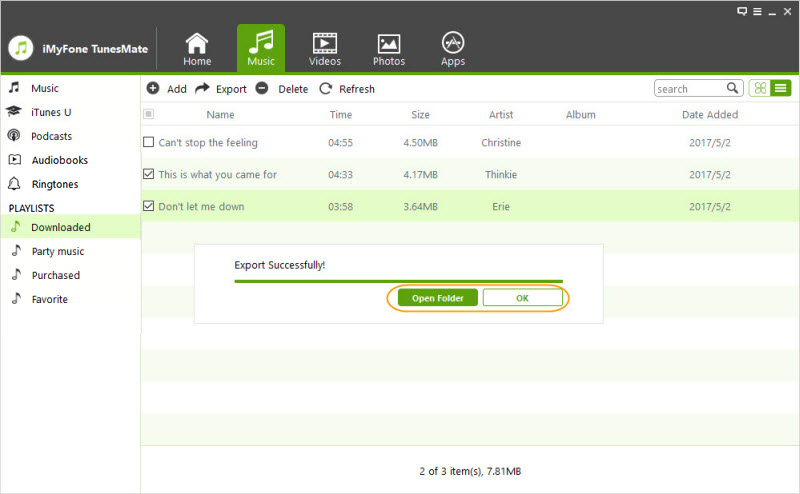
When the export process finishes, a window will pop up and show “Export Successfully”. Tap “Open Folder” to find the exported songs on computer. Or you can click “OK” to close the window.
Part 2: Transfer Music from Computer to iPhone/iPad/iPod
iMyFone TunesMate enables you to import music or different other audio files to iPhone/iPad/iPod from your computer, including Music, iTunes U, Audiobooks and Podcasts. You can drag and drop or select your files with a few clicks.
Method 1: Transfer Music with Single Click
Step 1: Launch iMyFone TunesMate on your computer, and connect your iPhone/iPad/iPod with a USB cable.
Step 2: Transfer music from computer to iPhone/iPad/iPod
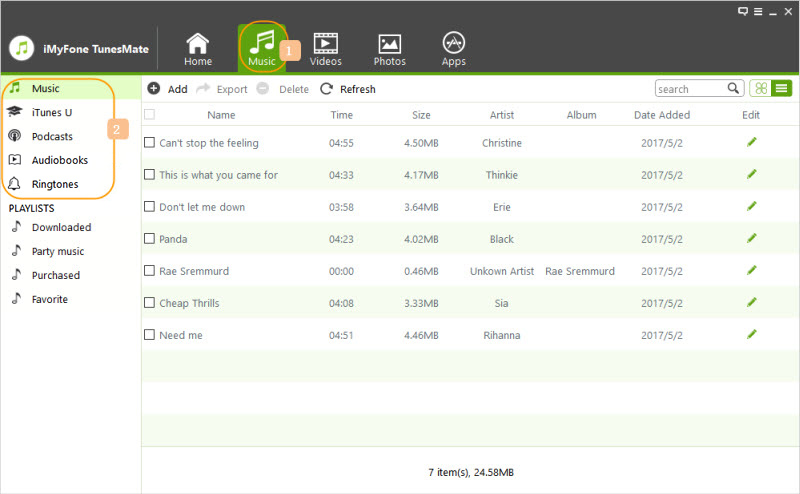
a. Click “Music” tab at the top bar and you will be in the “Music” windows by default. You can also select “iTunes U/Audiobooks/Podcasts” from the left sidebar.
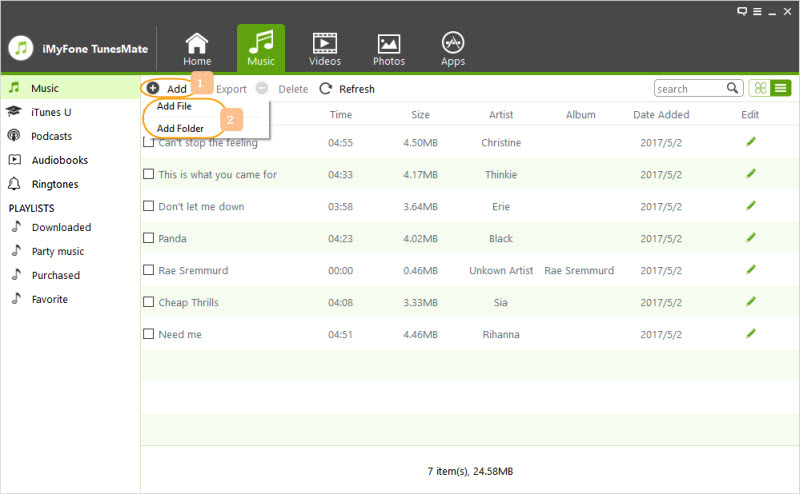
b. Tap “Add > Add File/Folder” to transfer music from your computer.
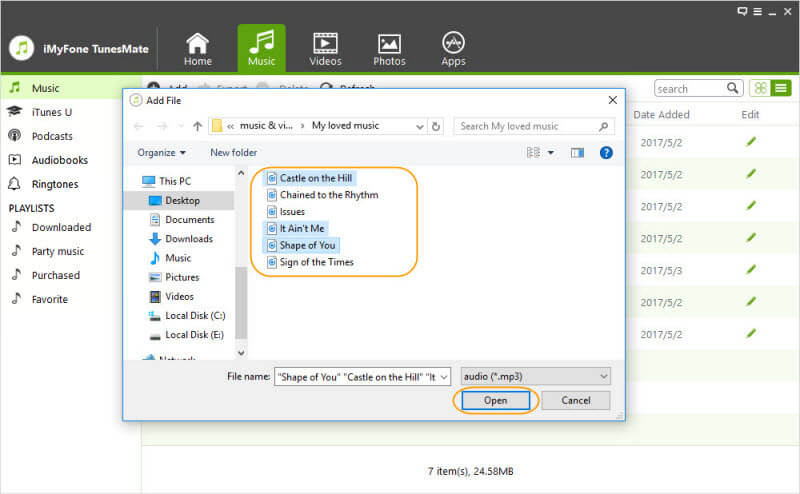
If you only want to transfer some specific songs, choose “Add File”. Then locate your computer music and press the “Shift” or “Ctrl” key while selecting music files to choose multiple songs.
If you want to transfer all the music in one folder, choose “Add Folder” and locate your music folder on computer.
c. Then click “Open” to transfer the selected songs from computer to iPhone/iPad/iPod.
Method 2: Transfer Music by Drag-and-Drop
Step 1: Launch iMyFone TunesMate on your computer, and connect your iPhone/iPad/iPod with a USB cable.
Step 2: Find music files on your computer
Find and open the music folder where you locate the songs on your computer.

Step 3: Drag and drop music to iDevice
a. Click “Music” icon at the top on iMyFone TunesMate and you will be in the “Music” window by default. You can also select “iTunes U/Audiobooks/Podcasts” from the left sidebar.
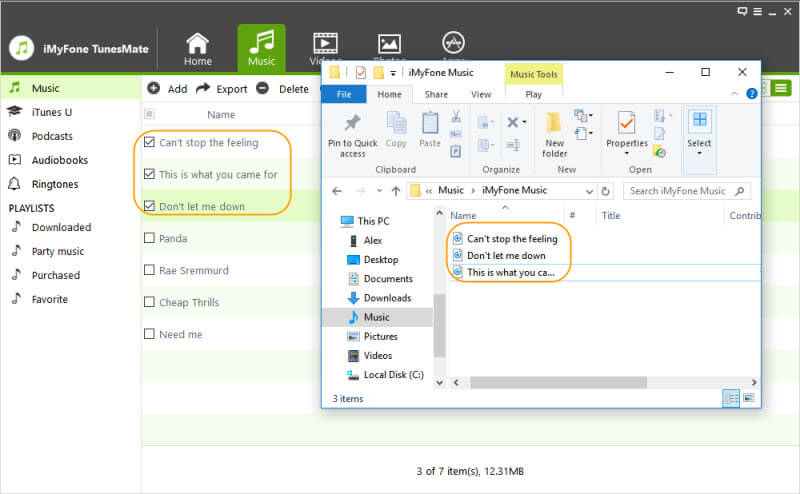
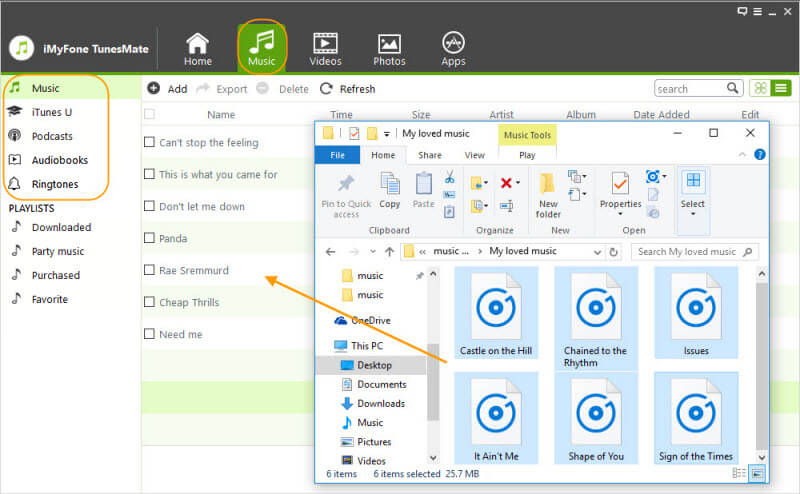
b. Select the music files from music folder.
c. Now drag and drop the selected music from the music folder to the “Music” window of iMyFone TunesMate.
Part 3: Transfer Music from iPhone/iPad/iPod to iTunes Library
iMyFone TunesMate empowers you to transfer different audio files from iPhone/iPad/iPod to your iTunes library, including Music, Playlists, iTunes U, Audiobooks, Podcasts. iMyFone TunesMate will detect all the iPhone/iPad/iPod audio files which are not existing in iTunes library and only transfer them for the avoidance of duplicates.
Method 1: Transfer All Music in One Click
With this method, you can transfer all the music in one time. Apart from music, other audio files including iTunes U, Audiobooks, Podcasts and Playlists are available as well. But you cannot selectively transfer the specific audio files from this method.
Please refer to the guide <1-Click Transfer iDevice Media to iTunes> for the detailed steps.
Method 2: Transfer Specific Music Files Selectively
Step 1: Launch iMyFone TunesMate and connect your iPhone/iPad/iPod to computer with a USB cable.
Step 2: Transfer music from iDevice to iTunes library
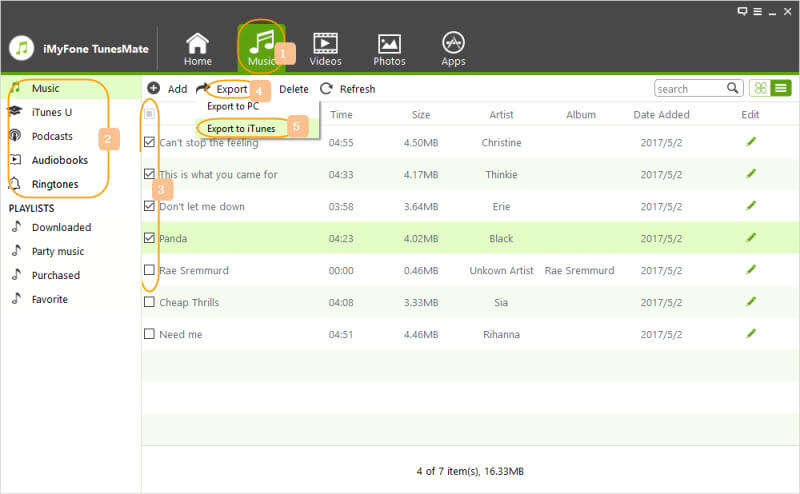
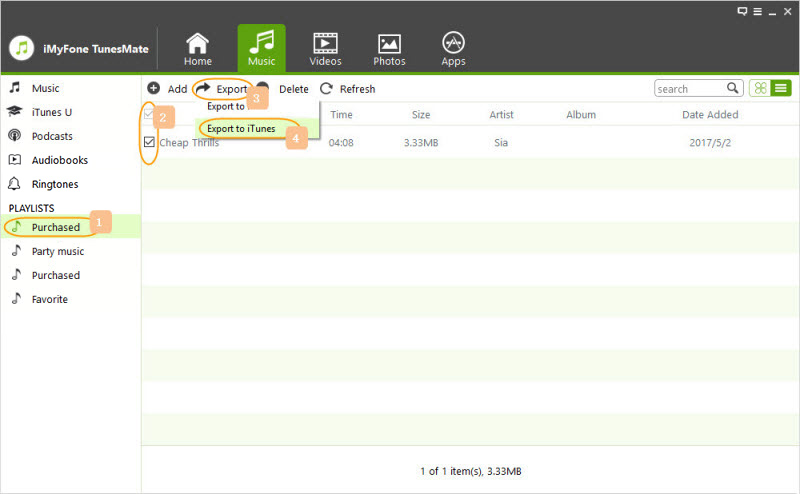
a. Click on "Music" tab at the top of interface and you will be in the "Music" window by default. You can also go to "iTunesU/Audiobooks/Podcasts" from the left sidebar.
b. Check the music files which you want to transfer to iTunes at the right panel, and then tap "Export > Export to iTunes" at the top bar.
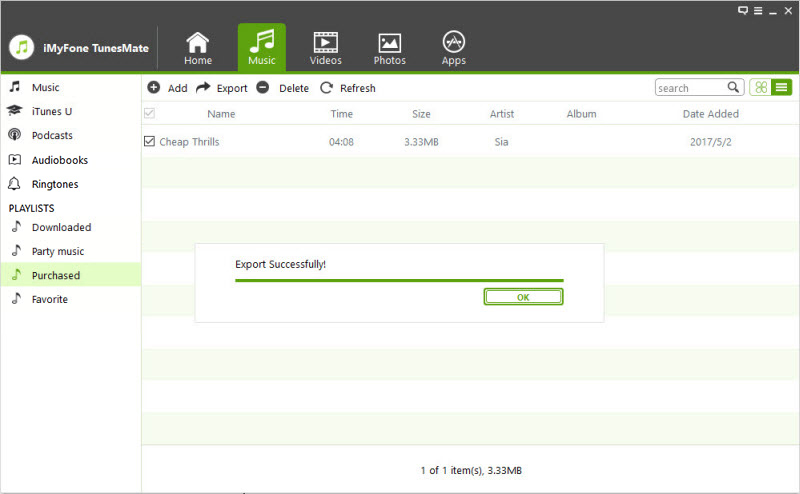
Step 3: Transfer successfully
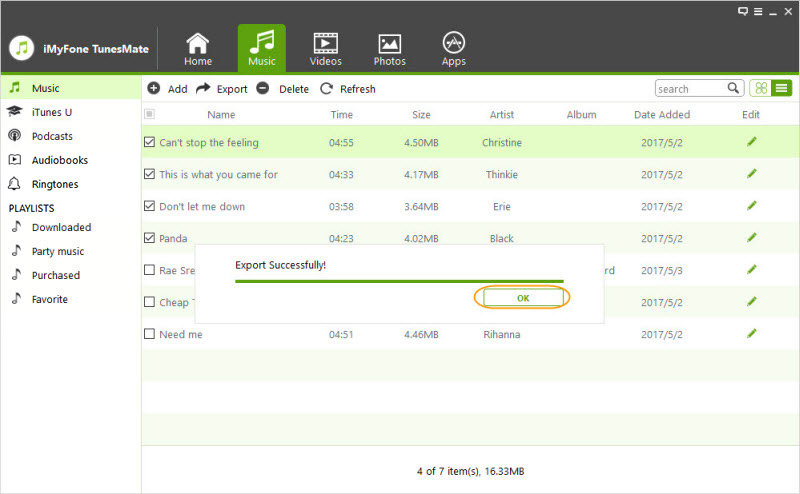
When the export process finishes, a window will pop up and show "Export Successfully". Click "OK" to close the window.
Part 4: Transfer Music from iTunes Library to iPhone/iPad/iPod
iMyFone TunesMate offers the quickest and easiest way to move or transfer all audio files, whether music or any other, from iTunes to different devices like iPhone, iPod or iPad.
Audio files consist of Music, iTunes U, Audiobooks, Podcasts and Playlists.
To transfer music from iTunes library to iPhone/iPad/iPod, it is suggested to use its “1-Click Transfer iTunes Media to iDevice” function to make it.
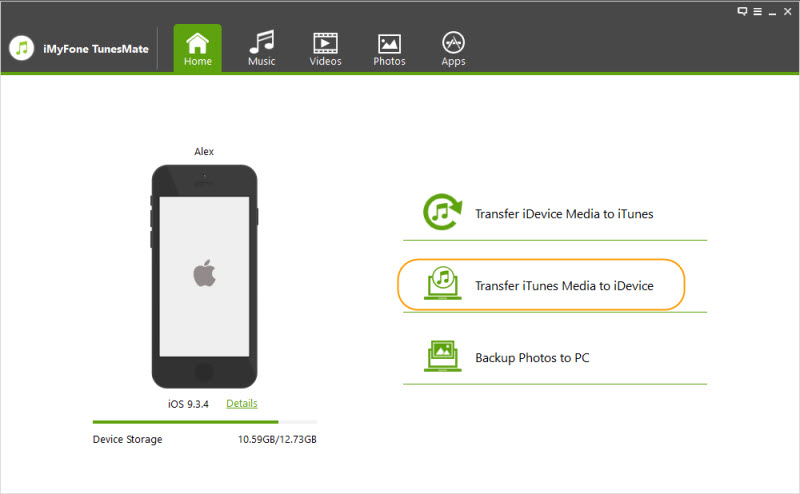
Step 1: Connect Your iPhone/ iPad/ iPod
Launch iMyFone TunesMate on your computer and connect your iPhone/ iPad/ iPod with a USB cable.
Step 2: Scan Your iPhone/ iPad/ iPod
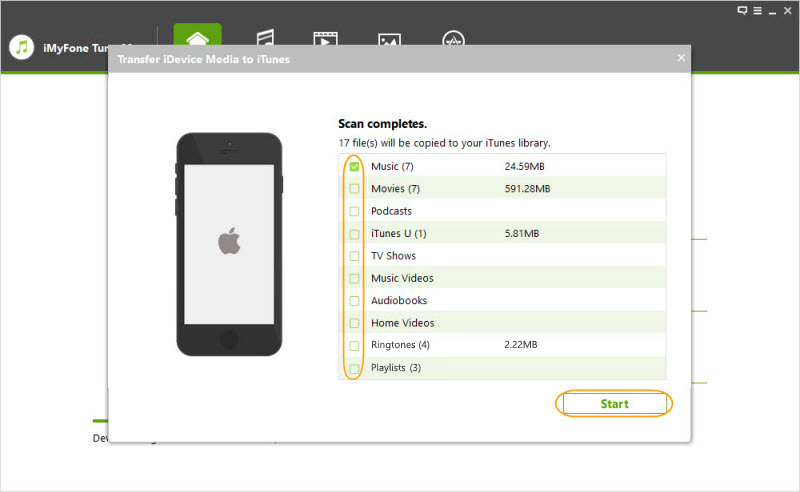
Click “Transfer iTunes Media to iDevice” from the Home interface of iMyFone TunesMate. It will automatically recognize all the media files in your iTunes library and display them by list on the pop-up window.
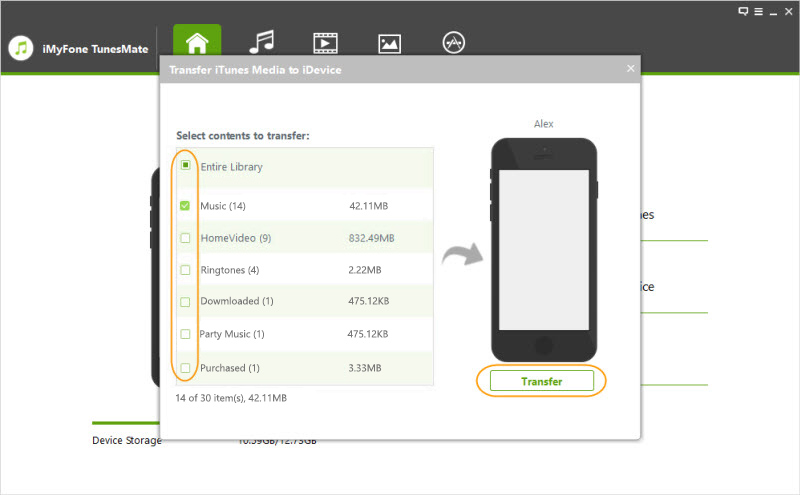
Step 3: Select Files to Transfer
By default, the “Entire Library” will be ticked. You also have the option to untick some files if you don't want to transfer to your iDevice. Click on “Transfer” to begin the transfer of selected files to your iDevice.
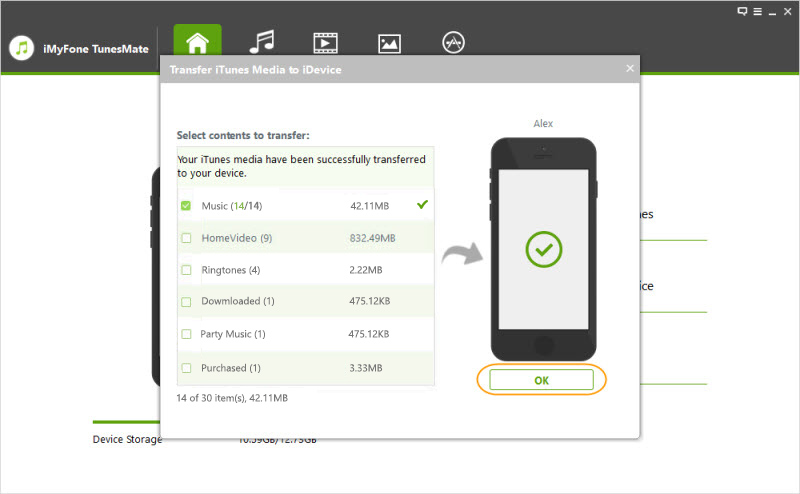
Step 4: Click “OK” to finish the process.
Part 5: Delete Music from iPhone/iPad/iPod
It’s boring and time-consuming to go through all the music files and delete music from your iPhone/iPad/iPod one by one, right? Well, iMyFone TunesMate is here to do all this task of deleting music files, iTunes U, audiobooks or podcasts in bulk with ease. All it takes is a few steps.
Step 1: Connect Your iPhone/ iPad/ iPod
Launch iMyFone TunesMate on your computer and connect your iPhone/iPad/iPod with a USB cable.
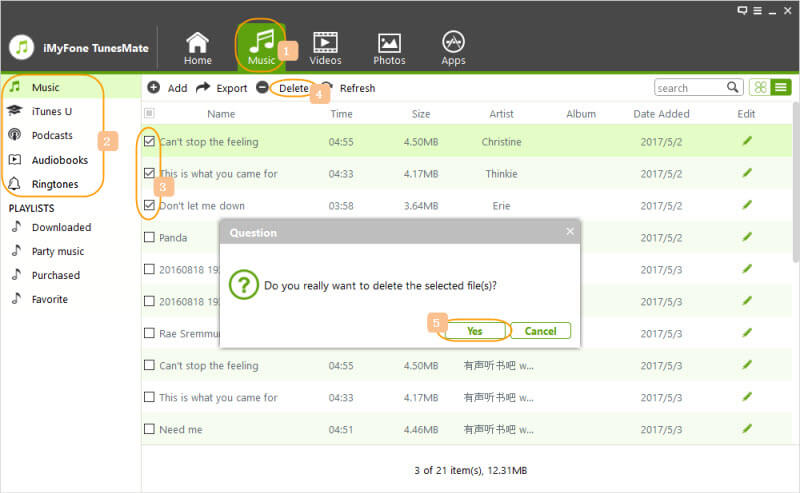
Step 2: Select and delete music from iDevice
a. Search for “Music” icon at the top of the Home interface and click on it. By default, you will be in the “Music” window. You can also choose “iTunes U/Audiobooks/Podcasts” here as well.
b. Now, check the songs or audios you want to delete and then click “Delete” button at the top bar. A confirmation window will pop up, click “Yes” to complete the deletion.
Part 6: Manage Music Playlists
Music playlists have a significant role in managing and overseeing the music files on iDevice, particularly for the users who have a large music collection on iPhone/iPad/iPod.
iMyFone TunesMate gives you one-stop solution to manage music playlists on iPhone/iPad/iPod.
Step 1: Launch iMyFone TunesMate and connect your iPhone/iPad/iPod to computer. Once connected, click on the “Music” at the top of Home interface to enter “Music” window.

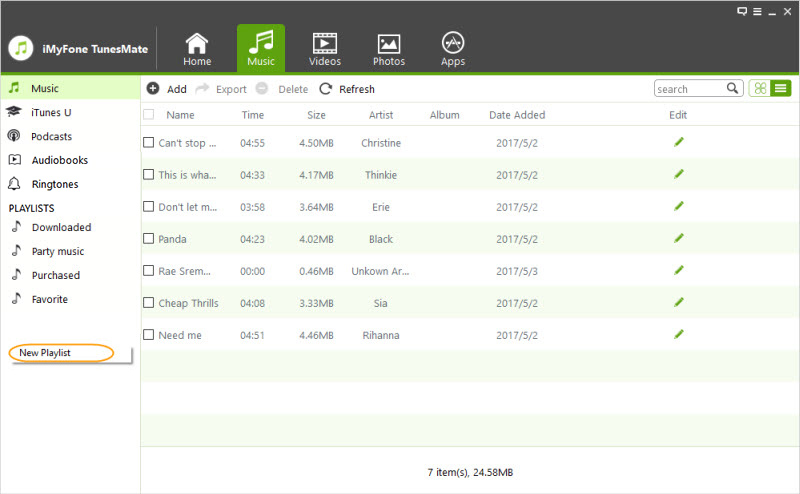
1. How to Create and Rename A New Playlist
Step 2: Create and rename a new playlist
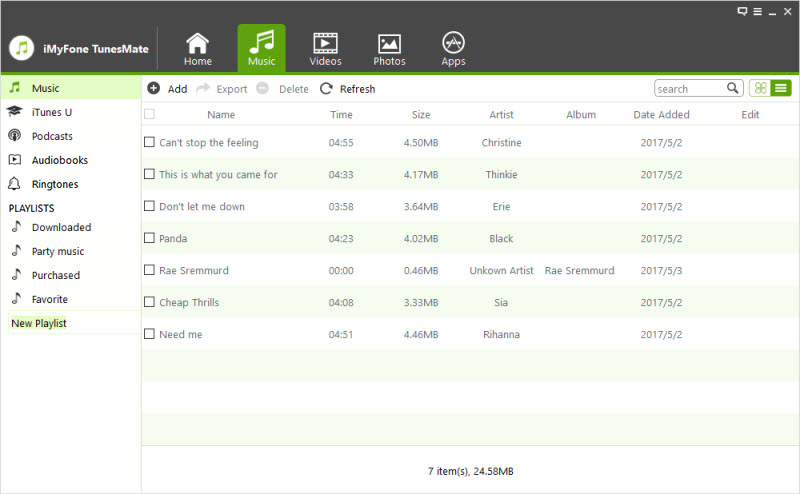
Right-click on the blank space from the left sidebar and the drop-down list shows “New Playlist”, click on it to create a new playlist. Then rename it or keep the default name as “New Playlist” and hit “Enter” key.
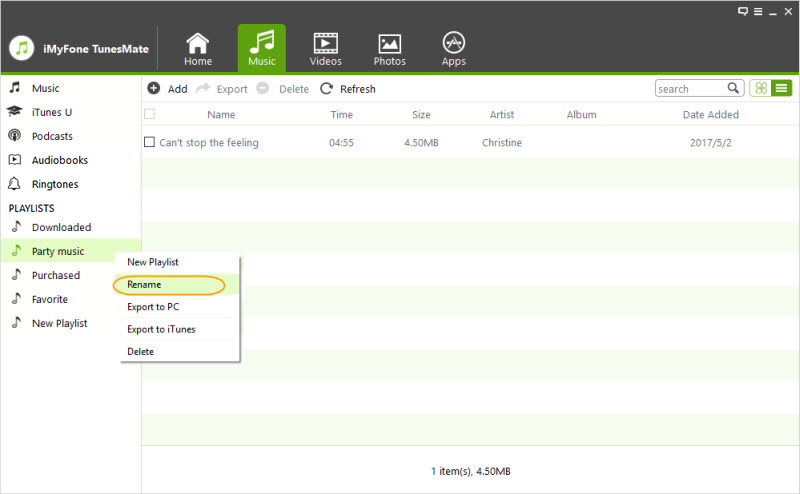
To rename an existing playlist, right-click on the specific playlist and select “Rename” from the drop-down list to make a new name.
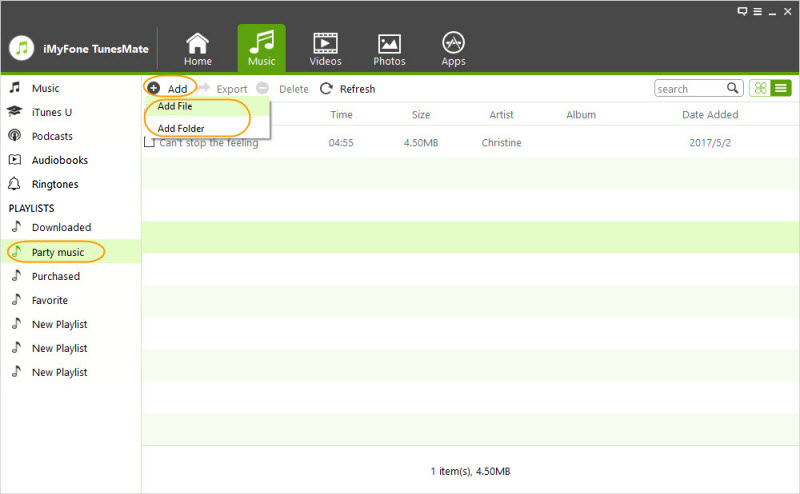
2. How to Add Music to A Playlist
Step 2: Add music to a playlist
Click on a playlist under “PLAYLIST” section from the left sidebar, the songs in the playlist will be displayed on the right panel.
Situation 1: Add music to a playlist from your computer
Click on “Add > Add File/Folder” at the top bar to add music from your computer.
Note: If you want to add some songs, then click choose “Add File” and go to where you locate the songs. Press “Shift” or “Ctrl” key while selecting the songs to choose multiple songs at once. If you want to add all the songs in one folder, then just click on “Add Folder” and open where you locate the music folder.
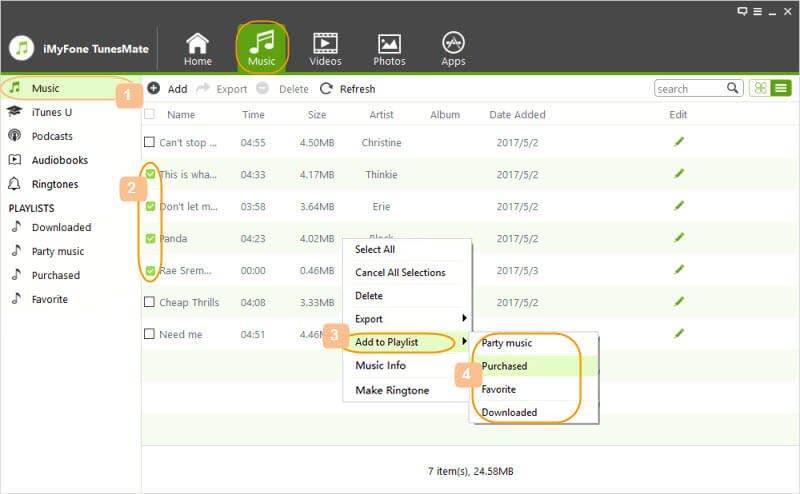
Situation 2: Add music to a playlist from your music library
Click on”Music” tab from the left sidebar and all your songs will be shown on the right panel. Tick the songs and right-click on the selected songs, and choose “Add to Playlist > Playlist Name”. You can find the added songs in the specific playlist.
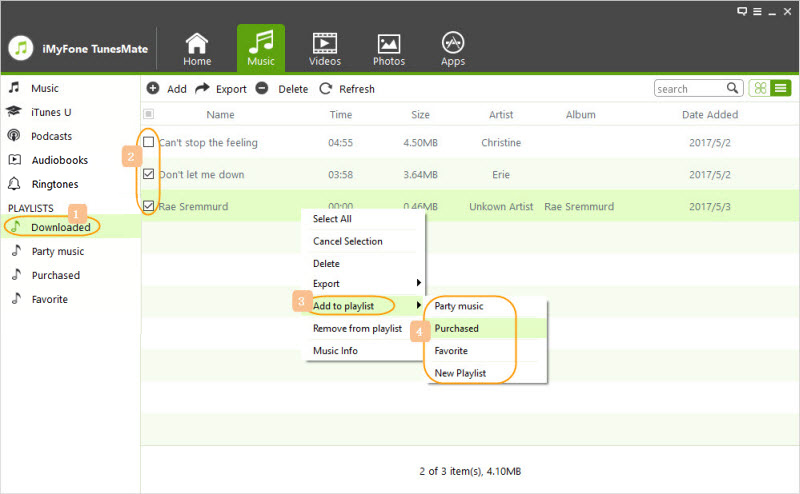
Situation 3: Add music from playlist A to playlist B
Click on the playlist B from which you want to add songs from the left sidebar, then select songs in playlist Bat the right panel. Right-click on the selected songs and choose “Add to Playlist > playlist A”. You can then find the added songs in the playlist A.
3. How to Remove A Playlist from iPhone/iPad/iPod
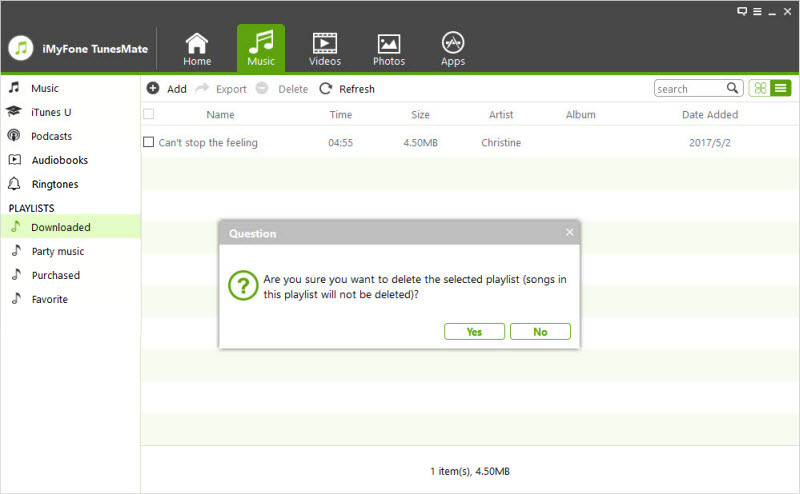
Step 2: Remove a playlist from iPhone/iPad/iPod
Pick the playlist you want to remove from the left sidebar and right-tap on it. Choose “Delete” from the drop-down list, and then tap “Yes” on the pop-up window to confirm.
Note: It just delete the playlist itself from your iDevice when removing a playlist. The songs in the playlist won’t be removed. To delete the songs as well, you need to find them from the “Music” library and delete them.

4. How to Transfer Playlists from iPhone/iPad/iPod to Computer
Step 2: Choose the specific playlist
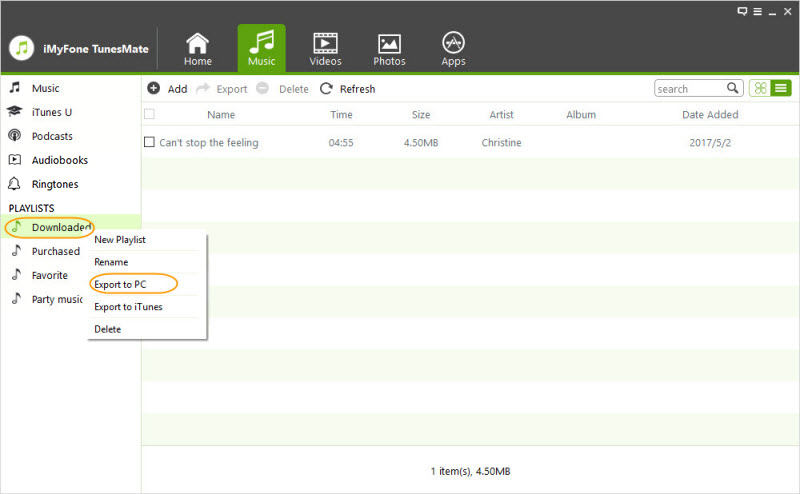
Situation 1: Transfer all the songs in one playlist
From the left sidebar, right-click on the specific playlist, and select “Export to PC” from the drop-down list.
Situation 2: Transfer part of the songs in one playlist
Click on the specific playlist from the left sidebar, check the songs which you want to transfer, and click on “Export > Export to PC” at the top bar.
Step 3: Find the target folder and export the playlist
Browse and choose the target folder on computer from the pop-up window. Click “Select Folder” to start the process.
Step 4: Export successfully
When the export process finishes, a window will pop up and tell you “Export Successfully”. You can click “Open Folder” to find the export playlist or click “OK” to close the window.
5. How to Transfer Playlists from iPhone/iPad/iPod to iTunes
Step 2: Select a specific playlist
Situation 1: Transfer all the songs in one playlist
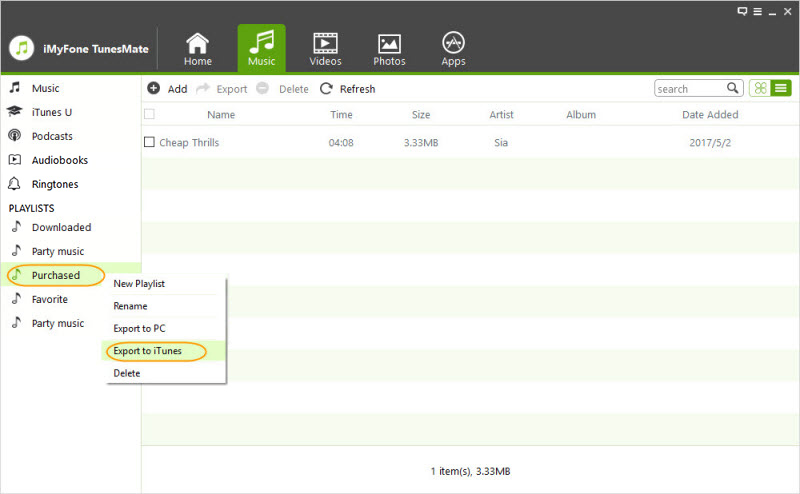
Right-click on the specific playlist from the left sidebar, and choose “Export to iTunes” from the drop-down list to start the process.
Situation 2: Transfer part of the songs in one playlist
Select the playlist on the left sidebar, and select the songs from the right panel. Then tap “Export > Export to iTunes” from the drop-down list to start the process.
Step 3: Once finished, a window will pop up to tell you “Export Successfully. Tap “OK” to close the window. You can find the transferred playlist and songs in your iTunes library.
Part 7: Edit Music ID3 Tags for iPhone/iPad/iPod touch
Music ID3 tags are the main features to precisely find your target songs from your large music collection on iPhone/iPad/iPod touch. iMyFone TunesMate offers you the ability to edit your music ID3 tags as you like.
Step 1: Connect Your iPhone/iPad/iPod
Launch iMyFone TunesMate on your computer and connect your iPhone/iPad/iPod touch with a USB cable.
Step 2: Edit music ID3 tags
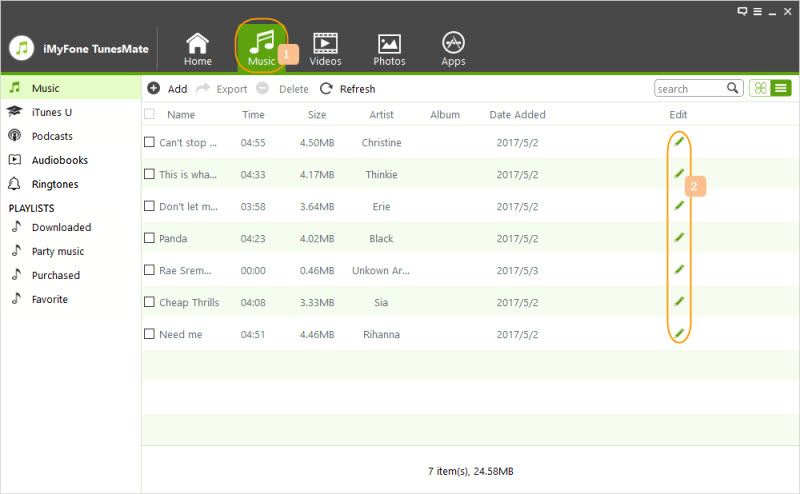
a. Click “Music” icon from the top interface and you will be in the “Music” windows by default. All the songs on your iDevice will be shown at the right panel.
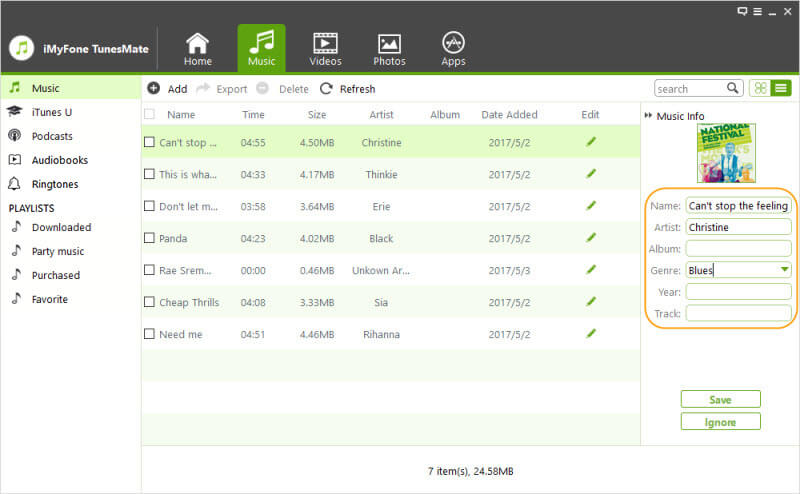
b. Check a specific song and click on the “Edit” icon at the right side of the song. The ID3 tabs of the specific song will be shown at the right side. You can directly edit the information, then click “Save” to finish the process.
Part 8: Customize Ringtone for iPhone
It’s quite easy to customize ringtone with iMyFone TunesMate. The entire process only contains three steps: connecting iPhone to computer, selecting a music file, and making the ringtone. It wouldn’t take more than a couple of minutes to customize your exclusive ringtone with TunesMate.
Following are the formats supported by TunesMate for customizing ringtones:
.MP3, .M4R, .WMA, .M4A, .OGG, .AAC
Step 1: Connect Your iPhone
First, connect your iPhone to your computer via USB cable and then launch iMyFone TunesMate.
Step 2: Select a Music File
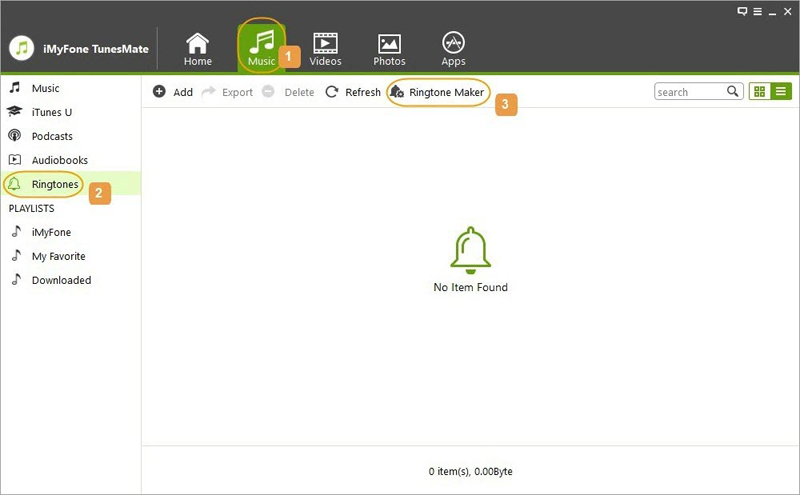
a. Open Ringtone Maker
Once connected, click on the “Music” tab and then select Ringtones > Ringtone Maker.
b. Select a Song
Now browse and select a music file from your iPhone/computer.
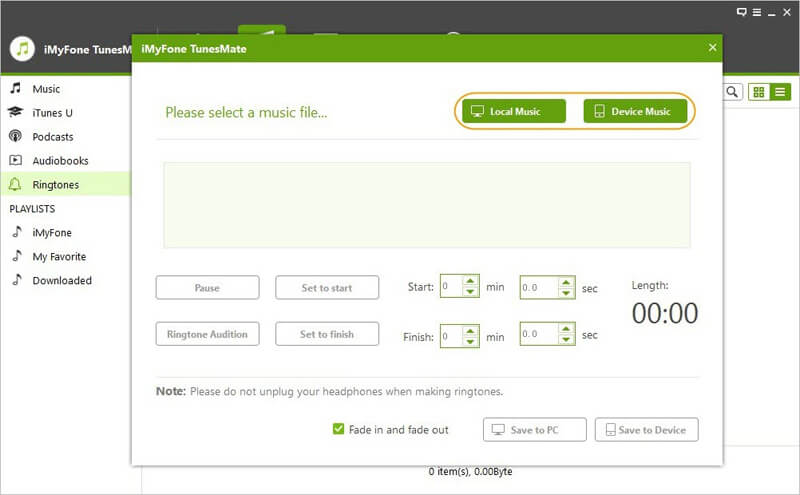
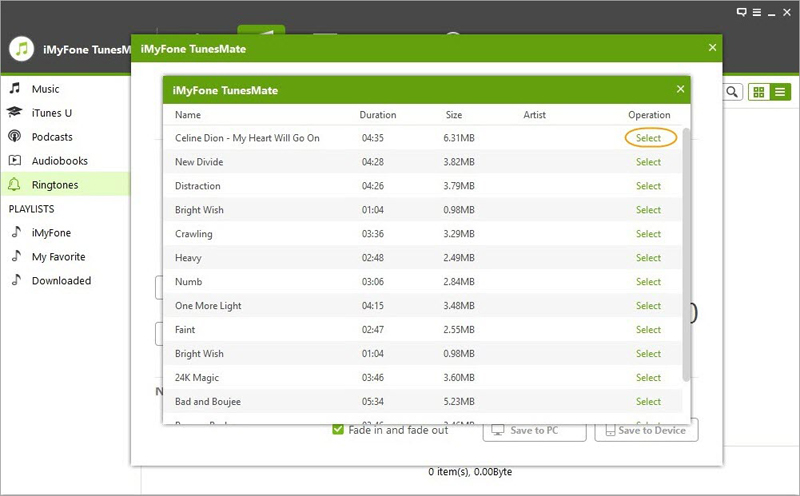
If you want to choose a music file from your connected iPhone, then click on “Device music”.
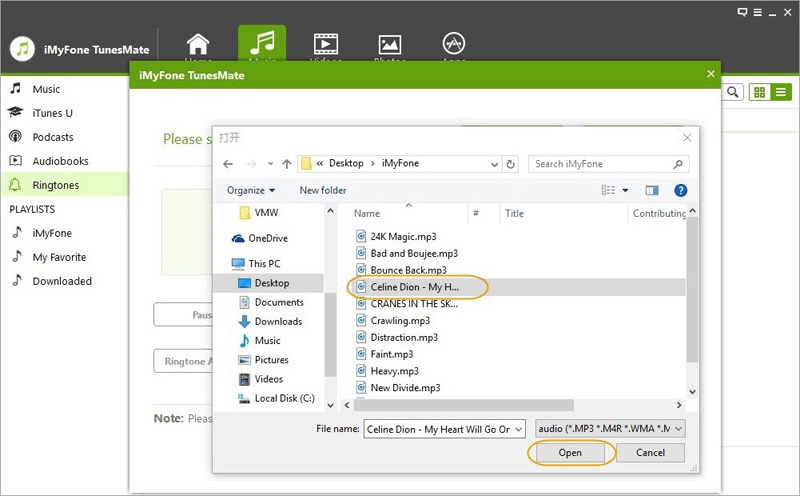
If you want to choose a music file from your computer, then click on “Local Music”.
Step 3: Make Ringtone
Once the music file is added to the Ringtone Maker, TunesMate will automatically start playing it. You can control the playback by clicking on the Pause/Play button.
a. Set Start and Finish Time
Method 1: You will need to use the light-grey area on the software’s interface if you want to manually pick your favorite part for the ringtone.
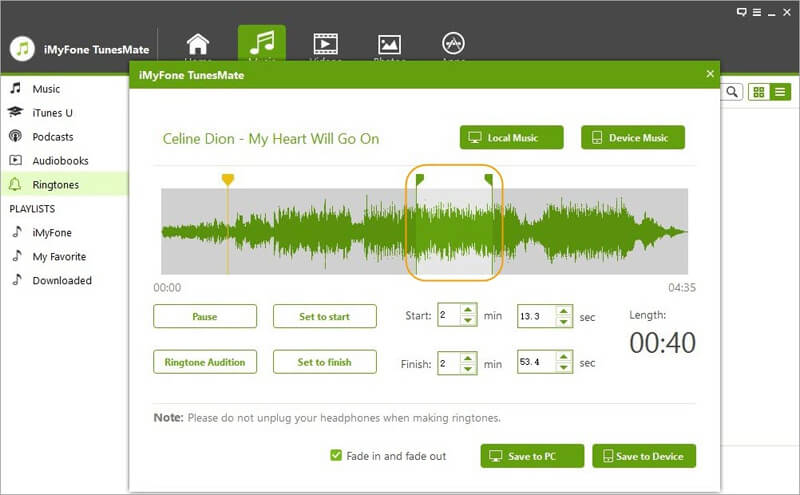
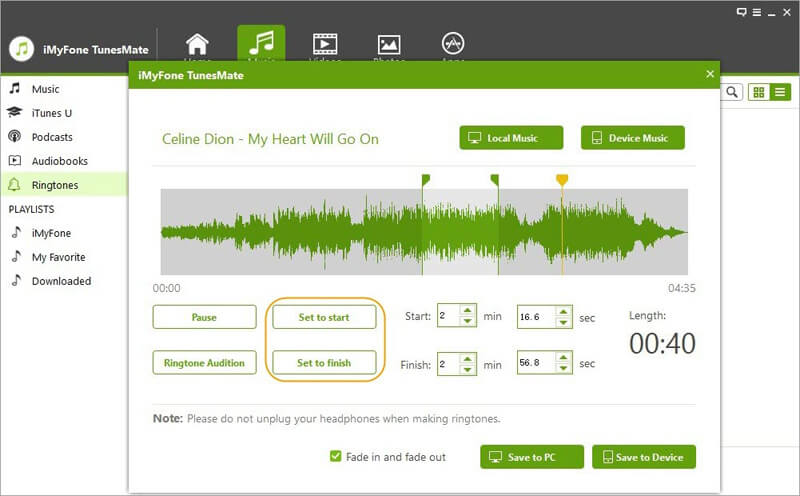
Method 2: You can also use the Set to start/Set to finish buttons to pick a specific part for the ringtone.
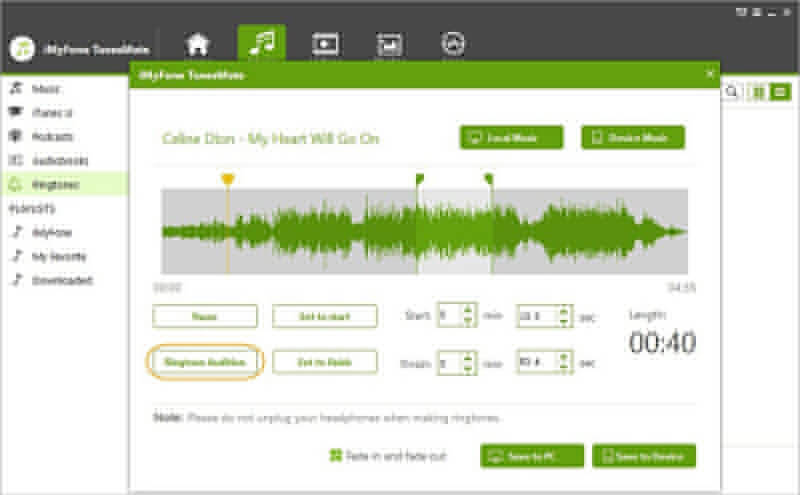
Once you have selected your desired start and finish time for the ringtone with the help of any of the above mentioned methods, you can use the Ringtone Audition button to check whether your selection is correct.
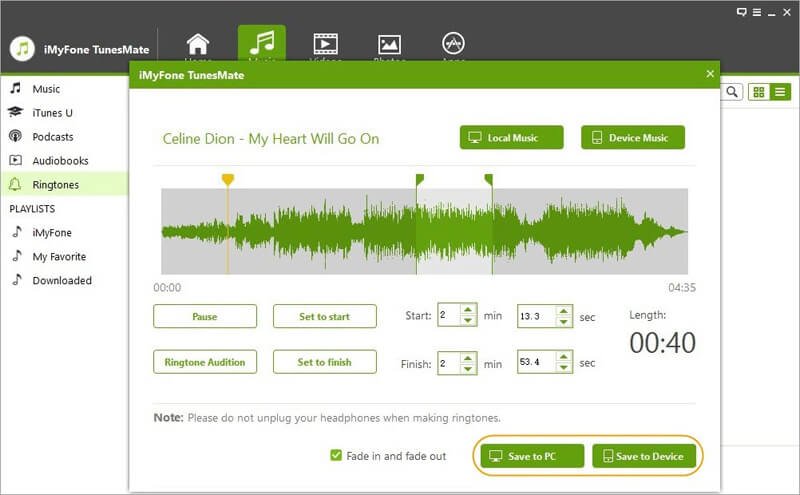
b. Save the Ringtone to Computer/iPhone
Once you have specified the start and finish part of your ringtone, you can then use “Save to PC” option to save the ringtone to your computer or “Save to Device” option if you want to save the created ringtone directly to your connected iPhone.
Note: Due to the encryption by Apple, TunesMate does not support making ringtones from Apple Music.
- Get Started
- 1-Click to Transfer Files
- Transfer & Manage Music
- Transfer from iDevice to Computer
- Transfer from Computer to iDevice
- Transfer from iDevice to iTunes Library
- Transfer from iTunes Library to iDevice
- Delete Music from iDevice
- Manage Music Playlists
- Edit Music ID3 Tags
- Ringtone Maker for iPhone
- Transfer & Manage Photos
- Transfer & Manage Videos
- Manage Apps
Still Need Help?
Go to Support Center >