


User Guide of iMyFone TunesMate
Transferring media files between iOS devices and iTunes/computer is extremely easy with iMyFone TunesMate. TunesMate lets you to transfer files conveniently with two-way transfer, and you can even rebuild the iTunes library. It supports music, playlists, movies, camera roll images, photo libraries, podcasts, and more. To correctly use the function you want, click on one of these navigation in the Content bar on the left to read the full guide!
Part 1: Introduction of Photos
The "Photos" module of iMyFone TunesMate includes Camera Roll and My Photo Stream.

1. Camera Roll
It includes all the photos that are created on iDevices:
- The photos and videos captured by iDevice's default camera and third-party camera apps;
- Photos or pictures saved from third-party apps on iDevice, like pictures from Facebook, Snapchat, etc.
Besides, all the albums on your iDevice can also be displayed on iMyFone TunesMate, such as Selfies, Panoramas, Screenshots, Videos, Slo-mo, etc., which allows to search the specific photos easily.

2. My Photo Stream
It stores your most recent 1000 photos or photos taken in the last 30 days from Camera Roll on different iDevices with the same iCloud ID. You can access your recent photos captured from your iPhone, iPad, or iPod touch on your PC/Mac or other iDevices signed in the same iCloud ID.
Part 2: Transfer Photos from iPhone/iPad/iPod touch to Computer
iMyFone TunesMate offers the quickest and easiest way to back up your photos from your iPhone, iPad or iPod touch to computer, including Camera Roll and My Photo Stream.
Method 1: Transfer All Photos in One Click
Please refer to the guide <1-Click Backup Photos to PC/Mac> for the detailed steps.
Method 2: Transfer Part of Photo Selectively Using Buttons
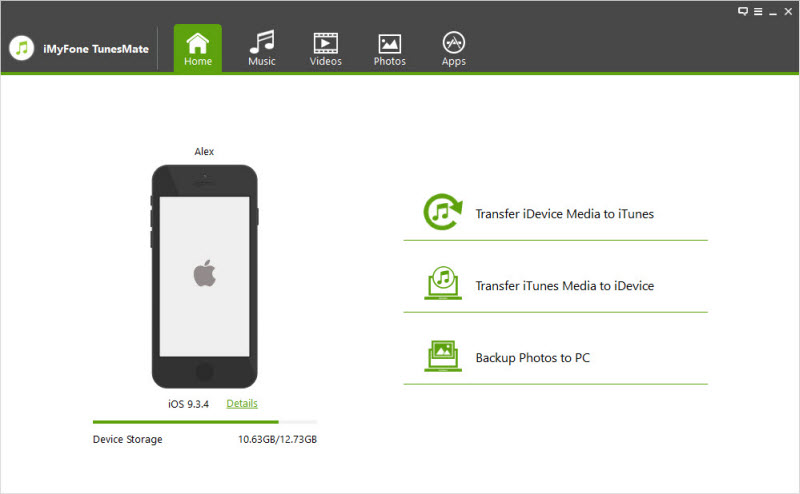
Step 1: Connect your iDevice and go to “Photo” module
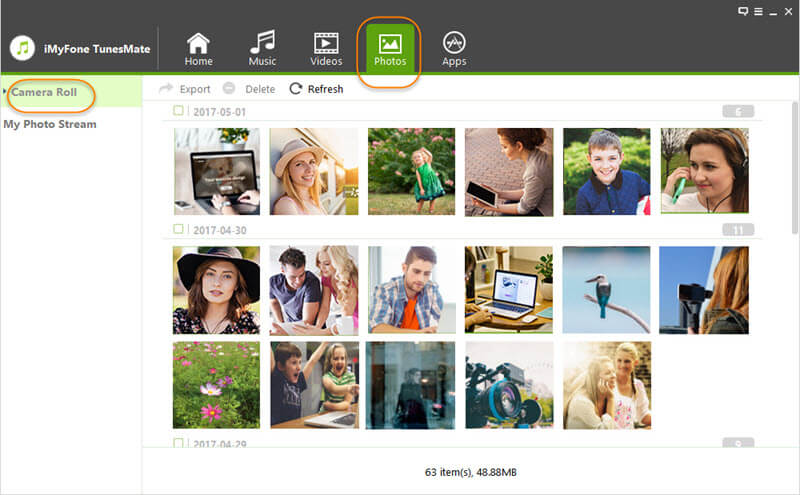
Launch iMyFone TunesMate on your computer, and connect your iPhone/iPad/iPod with a USB cable. Click “Photos” icon from the top of the interface on TunesMate. You will be in the “Camera Roll” window by default.
Situation 1: Transfer Photos from iDevice to Computer Selectively
Step 2: Export selected photos from iDevice to computer
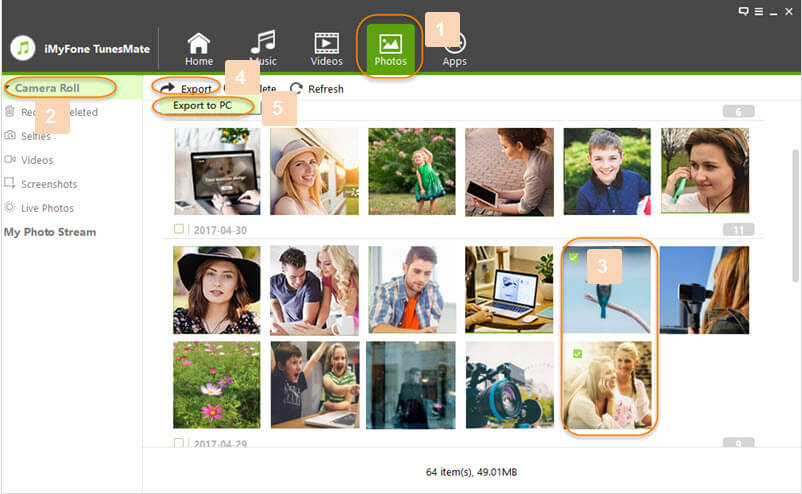
a. Select a specific photo category from the left sidebar: Camera Roll or My Photo Stream by clicking, and all the photos under this category will be displayed on the right panel according to added time.
Note: You can also select an album under “Camera Roll/My Photo Stream” from the left sidebar, then all the pictures in this album will be displayed according to added time on the right panel.
b. Check the photos you want to export to computer, and click “Export > Export to PC” at the top bar or right-click the selected photos and select “Export > Export to PC” from the drop-down list.
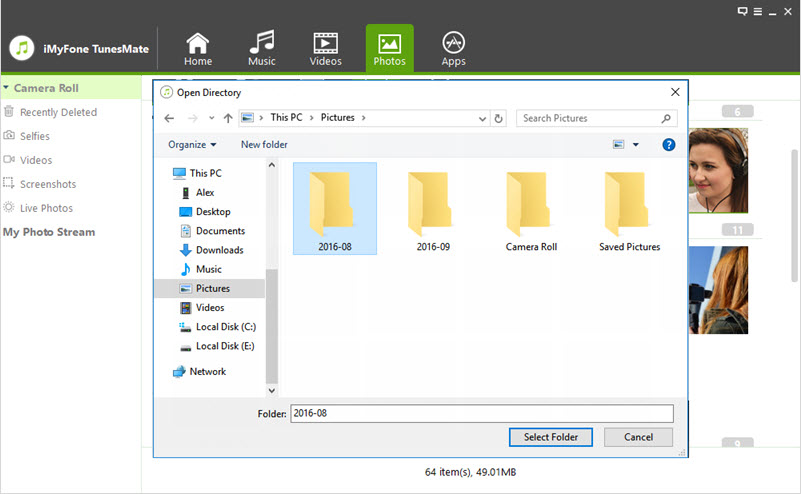
c. Browse and choose the target folder for the exported photos on computer from the pop-up window, tap “Select Folder” to begin the export process.
Situation 2: Transfer All Photos in One Photo Type from iDevice to Computer
Step 2: Export photos from iDevice to computer
a. Select a specific photo category: Camera Roll or My Photo Stream from the left sidebar, and right-click on it. Click “Export to PC” from the drop-down list.
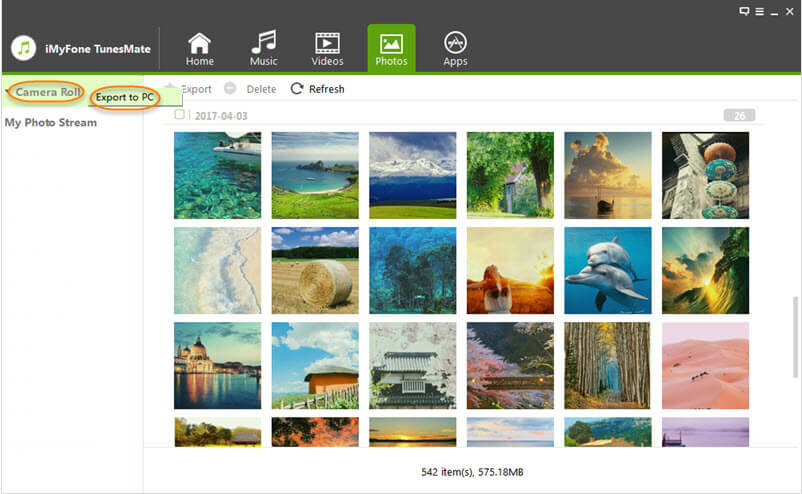
b. Browse and choose the target folder for the exported photos on computer from the pop-up window, tap “Select Folder” to begin the export process.
Situation 3: Transfer All Photos in One Photo Album from iDevice to Computer
Step 2: Export album with photos in it from iDevice to computer
a. Click a specific photo category: Camera Roll or My Photo Stream from the left sidebar, and all albums in it will be shown under it. Right-click on a specific album under the photo category, and click “Export to PC” from the drop-down list.

b. Browse and choose the target folder for the exported album and photos on computer from the pop-up window, tap “Select Folder” to begin the export process.
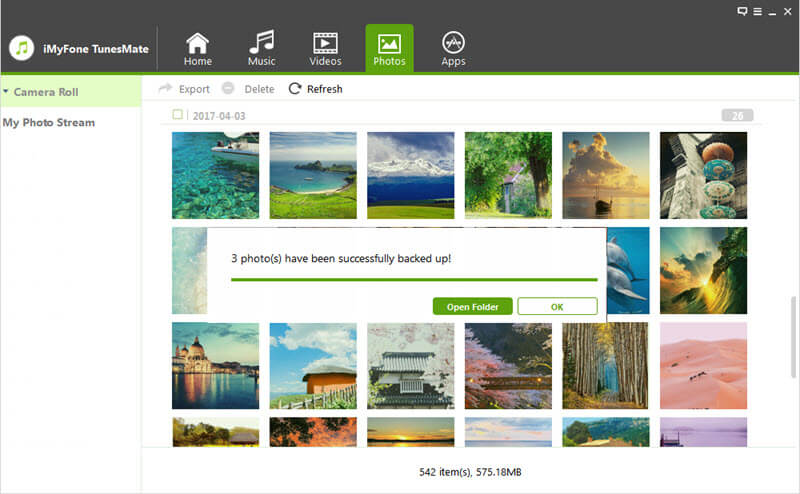
Step 3: Export successfully
A window will pop up and show “Export Successfully”. You can tap “Open Folder” to find the exported photos on computer or click “OK” to close the window.
Part 3: Delete Photos from iPhone/iPad/iPod touch
You would feel it very inconvenient to delete photos directly from iPhone/iPad/iPod one by one if you have a large photo collection. iMyFone TunesMate provides you with the best feature where you can delete pictures easily in one batch just by following the steps below:
Step 1: Launch iMyFone TunesMate on your computer, and connect your iPhone/iPad/iPod with a USB cable.
Step 2: Select and delete photos from your iDevice
a. Click on the “Photos” icon at the top of the main interface, and you will be in the “Camera Roll” window by default. All the photos in Camera Roll will be displayed according to added time on the right panel.
Note: You can also click the specific album under “Camera Roll” to enter its window, and all the photos in this album will be displayed according to added time on the right panel.
b. Check unwanted photos, and click “Delete” button from the top menu, or right-click on the checked photos and click “Delete” option from the drop-down list. Click “Yes” on the pop-up confirmation window.
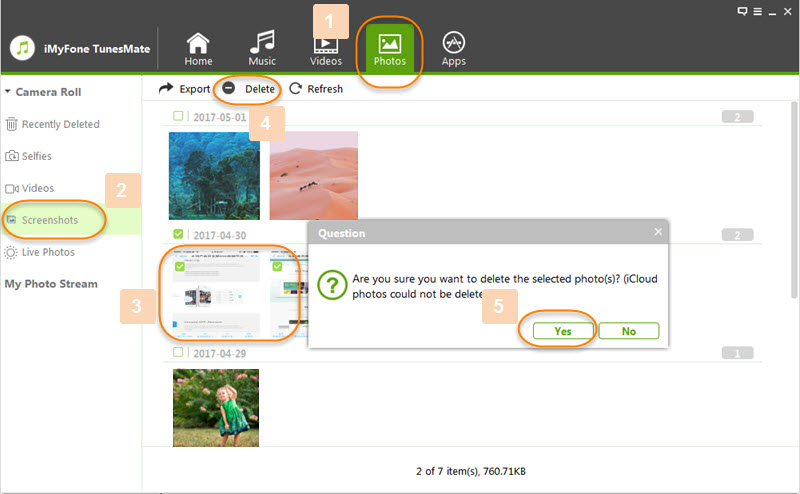
Note: iMyFone TunesMate doesn't allow to delete photos in My Photo Stream.