


User Guide of iMyFone TunesMate
Transferring media files between iOS devices and iTunes/computer is extremely easy with iMyFone TunesMate. TunesMate lets you to transfer files conveniently with two-way transfer, and you can even rebuild the iTunes library. It supports music, playlists, movies, camera roll images, photo libraries, podcasts, and more. To correctly use the function you want, click on one of these navigation in the Content bar on the left to read the full guide!
Part 1: 1-Click Transfer iDevice Media to iTunes
iTunes library, as a database which contains all kinds of audio and video files you add to iTunes, is used to store and manage media files in iTunes. However, if your computer suddenly crashes, you buy a new computer, your iTunes corrupts, or you mistakenly lose the entire iTunes library, iMyFone TunesMate will help you to restore your entire iTunes library from unlimited iPhone, iPad and iPod in a smart way, including Music, Playlists, Movies, Music Videos, Home Videos, iTunes U, Audiobooks, Podcasts and TV Shows.
Step 1: Connect Your iPhone/iPad/iPod
Launch iMyFone TunesMate on your computer and connect your iPhone/iPad/iPod with a USB cable.
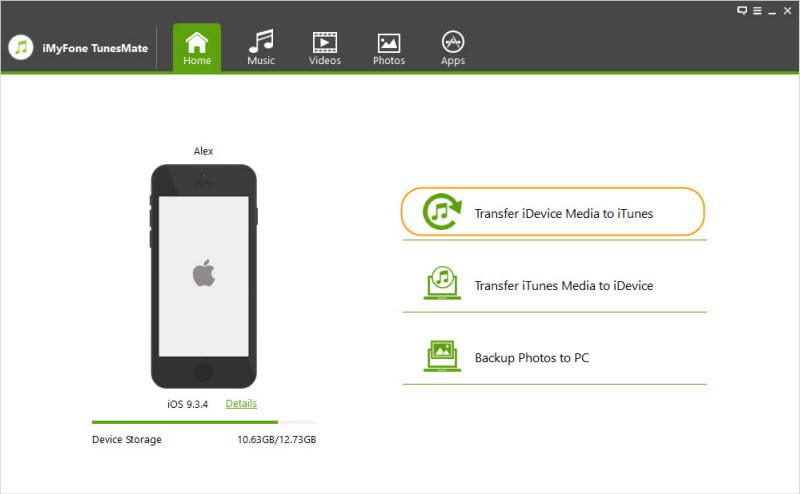
Step 2: Scan Your iPhone/iPad/iPod
Click "Transfer iDevice Media to iTunes" from the Home interface, and click “Start” button from the pop-up window to continue. It will scan all the media files on your device which are not in iTunes library, and show them by list.
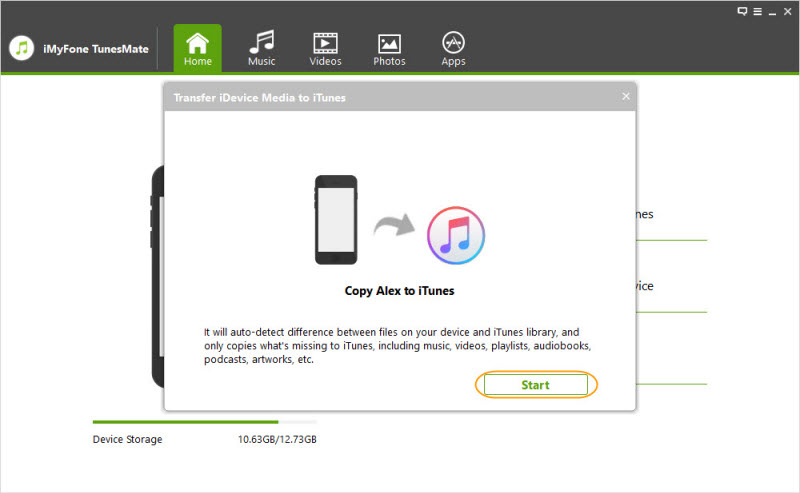
Step 3: Start to Transfer
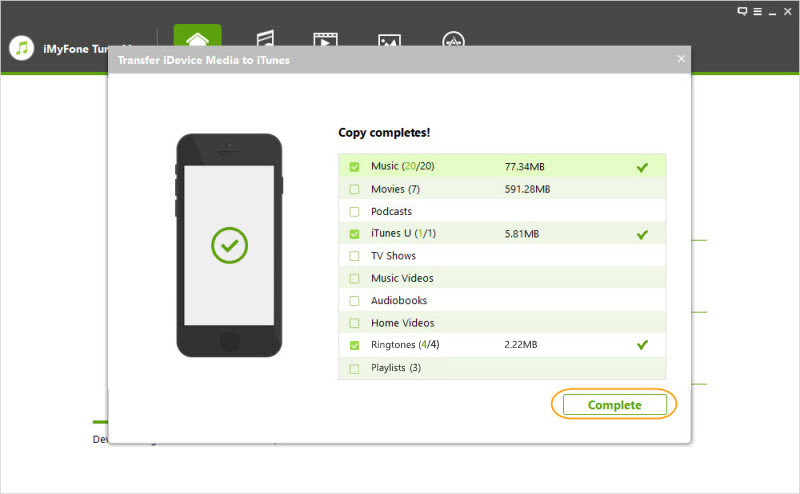
All the media types will be checked by default. You can uncheck the types which you do not want to transfer. Then click "Start" button to begin the transfer process. Click "Complete" button from the pop-up window of "completes" to finish it.

Part 2: 1-Click Transfer iTunes Media to iDevice
iTunes is the Apple's official tool to manage or store media files on your iPhone/iPad/iPod. But most Apple users do not dare to use the sync function on iTunes as it will cover the original data on iDevice. iMyFone TunesMate enables you to add various media files to your iDevice from iTunes library without erasing any original data. It also breaks iTunes limit to transfer iTunes media to different iDevices even with different Apple IDs.
Step 1: Connect Your iPhone/iPad/iPod
Launch iMyFone TunesMate on your computer and connect your iPhone/iPad/iPod with a USB cable.
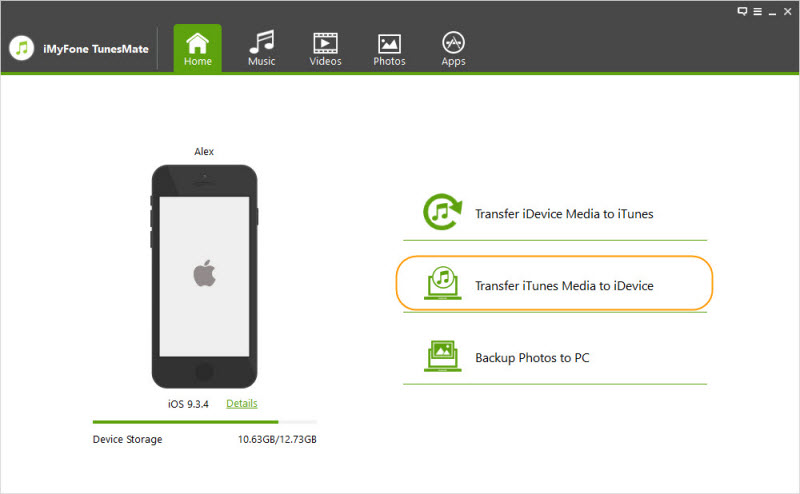
Step 2: Scan Your iPhone/iPad/iPod
Step 2: Click "Transfer iTunes Media to iDevice" from the Home interface of TunesMate. It will scan all the media files in your iTunes library and show them in list.
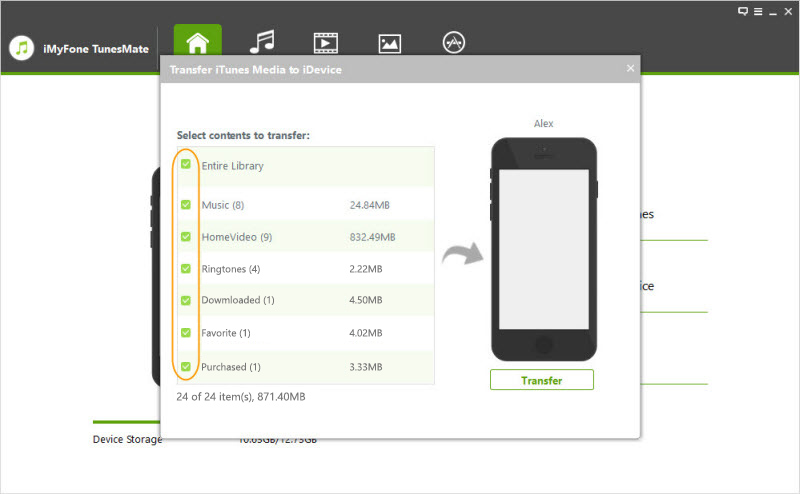
Step 3: Start to Transfer
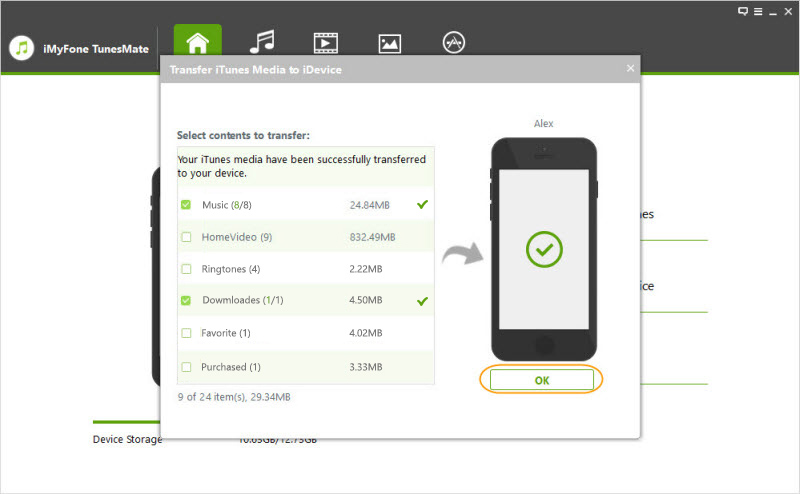
All the media types will be checked by default. You can uncheck the specific types you do not want to transfer to your device. Click "Transfer" button to begin the transfer process. Click "OK" button to finish it.

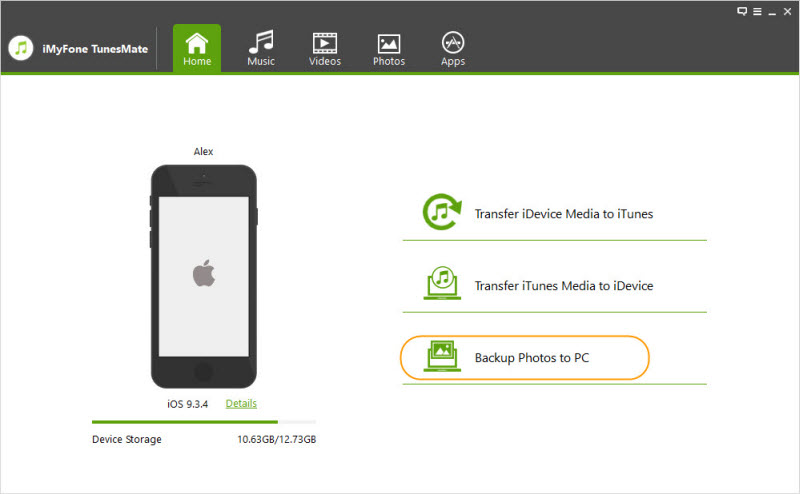
Part 3: 1-Click Back up Photos to PC/Mac
Most Apple users enjoy taking or saving photos with iPhone/iPad/iPod touch to record their life or precious memories. Photos means a lot for them. It is a good choice to back up photos to computer locally in case of any accidental loss. iMyFone TunesMate enables you to back up all your photos from iDevice to PC/Mac in 1-click.
Step 1: Connect Your iPhone/iPad/iPod
Launch iMyFone TunesMate on your computer and connect your iPhone/iPod/iPod touch with a USB cable.
Step 2: Back up photos to computer
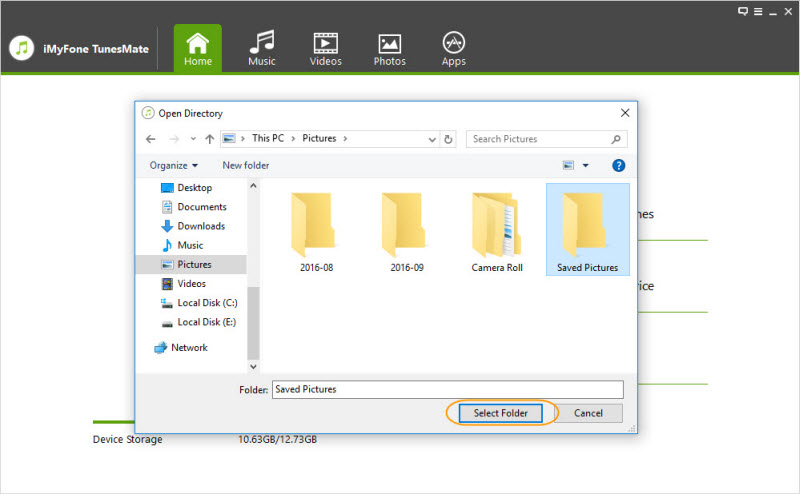
If you are using a Windows PC
Click "Backup Photos to PC" from Home interface of TunesMate. Browse and select a target folder to store the photos on computer from the pop-up window, and click "Select Folder" to start the backup process.
If you are using a Mac computer
Click "Backup Photos to Mac" from the Home interface of TunesMate. Browse and select a target folder for the photos, and click "Save" to start the backup process.
Step 3: Back up successfully
A window will pop up to show you "Back up successfully". Click "Open Folder" to find the photo backup, or click "OK" to close the window.
