WhatsApp is one of the most widely used methods to exchange photos because it is fast and easy. Also, unlike the traditional multimedia messaging service that you have to pay an extra fee when sending messages, WhatsApp is completely free when you have an internet connection, which is one of the reasons why it is so popular.
When someone sends you a photo on WhatsApp, you may need to save it to your Android gallery so that it can be viewed later on or stored when you want to clear your WhatsApp chats. Alternatively, you might want to transfer it to a PC to keep a backup.
This article will show you how you can do all the above needs.
Part 1. How to Save Photos from WhatsApp to Gallery on Android
When you first install WhatsApp, it will have the automatic downloading of photos feature enabled. However, you may have disabled it to save data or battery life.
1.1 Save Photos from WhatsApp to Android Gallery Automatically
If your WhatsApp images not showing in gallery, you can turn on the function to save photos to gallery automatically by:
- Open WhatsApp and tap on the three vertically stacked dots in the top right corner.
- On the popup, choose settings and then pick “Chats”.
- Make sure that “Media visibility” is enabled. This will allow your downloaded photos to be shown in your gallery application in a separate folder. They can be relocated manually within the gallery application.
- Then, go to “Data and storage usage” and configure your “Media auto-download” settings so that photos are automatically downloaded.
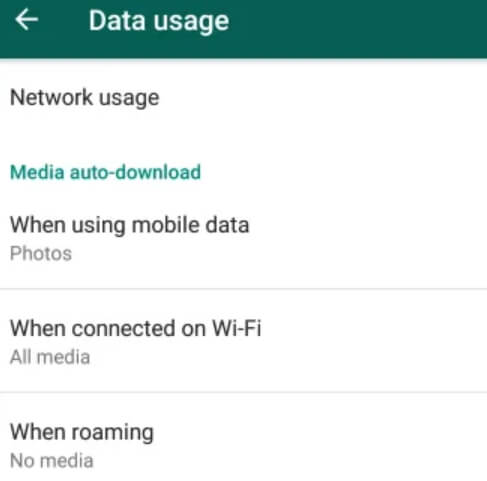
You can also opt to automatically download other media content when connected to Wi-Fi or mobile data.
Once these options are enabled, you will be able to launch your gallery application and find a folder called “WhatsApp Images”, which will contain all of your downloaded WhatsApp pictures. You will have complete control over these images, so you can edit them or move them to another location.
1.2 Save Photos from WhatsApp to Android Gallery Manually
Alternatively, you can manually export images to your gallery or another location if you do not want all of your WhatsApp photos being saved to your gallery.
To do this, you need to depend on a file explorer installed on your device if you do not have Google photos installed.
- Select the photo that you would like to save and pick the “share” option (which is located within the three vertically stacked dots).
- When you are presented with options on what to do with the image, either use your file explorer to save the image to the “pictures” location on your device or pick the upload to Google photos option,
- If you chose to upload to Google Photos, you can then go into this application, select the image and save it to your device. The image will now be saved in the “downloads” folder and can be relocated.
Another way of saving your WhatsApp photos to your other devices manually is by using emailing them to yourself. You can do this by:
- Select the image that you would like to save to the gallery.
- Pick the share option and you will see a popup of the various ways you can share the image.
- Tap on your email application (Gmail, Outlook, etc.) and send the email to your own email address.
- Open the email you have sent on your phone in your email application and locate the picture. You can now download it to your device and then relocate it to your camera roll.
Part 2. Free Up Space on Android by Saving WhatsApp Photos to PC
Saving every WhatsApp image can take up most of the space in your phone, sometimes these are just the photos we don't need in our WhatsApp again. One of the solutions is to make a photos backup to computer and delete the photos you don't need on your phone. So in this part we are going to introduce 3 ways to save the WhatsApp to pc and you can free up the space on your Android phone.
2.1 Save WhatsApp Chat from Android to PC with Media
Firstly, we are using the internal function of WhatsApp to export the photos as attachments to another app such as Google Drive or Mail, then open the photos by accessing these apps on the computer. The cons of this method are that you can only export the photos in one chat at a time. So if you hope to export all the WhatsApp photos, you need to export chats one by one, so it might take you hundreds of clicks. However, if you only need the photos with few chats such as your family members, it would be a great method. To export your WhatsApp photos using the internal function of WhatsApp,
Step 1 From the WhatsApp chat list, find the one with the photos you want to export. In the chat, tap on the three dots on the top right corner.
Step 2 There will be a pop-up listing all you can do with this chat. Click More > Export Chat, then you will be asked to choose the app to export the chat. You need to choose one that you can access on your computer or send it to your computer, such as Google Drive or Mail.
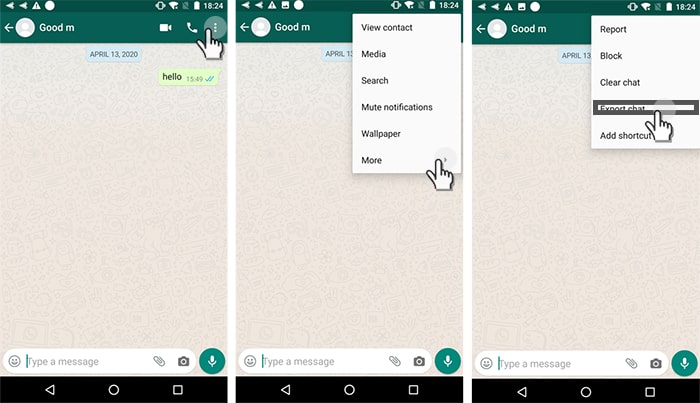
Step 3 Later, from the pop up asking if you want to attach media, choose Attach Media. And WhatsApp will start to process and export. Your WhatsApp chat will be exported with your photos as a zip file. Just unzip it and then you can see the photos in this chat.
2.2 Export All WhatsApp Photos from Android Directly
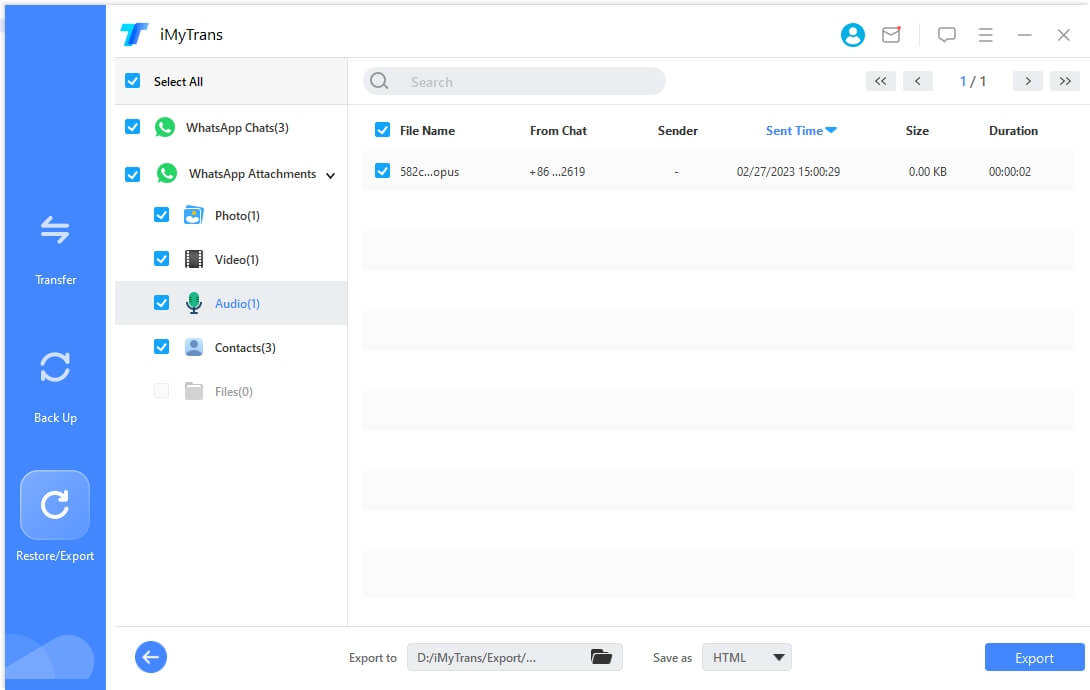
Although it is a good way to export the photos from WhatsApp itself, most of us hope to save all the photos in case that we miss something important, and this happens more frequently than we think. iMyTrans is a software that can help to manage WhatsApp data effectively. It supports all Android phones and tablets including Samsung, Oneplus, Huawei and etc, from Android version 2.0 to 10. Transfer, backup, restore and export WhatsApp data can be done in just a few simple clicks. With iMyTrans, you can
- Export all media files including photos, videos, and audios at once.
- Export only the WhatsApp photos without WhatsApp messages.
- Filter the exported WhatsApp photos by time on the computer.
- Save WhatsApp chats to the computer and read them as they appear on phone anytime.
Here is the step-by-step guide to export all WhatsApp photos using iMyTrans.
Step 1 Launch iMyTrans and connect your Android phone to the computer with a USB cable.
Step 2 Choose Back Up WhatsApp from Devices mode from the left panel. Make a backup first to save your WhatsApp chats on the computer. All you need is to click the Back Up button.
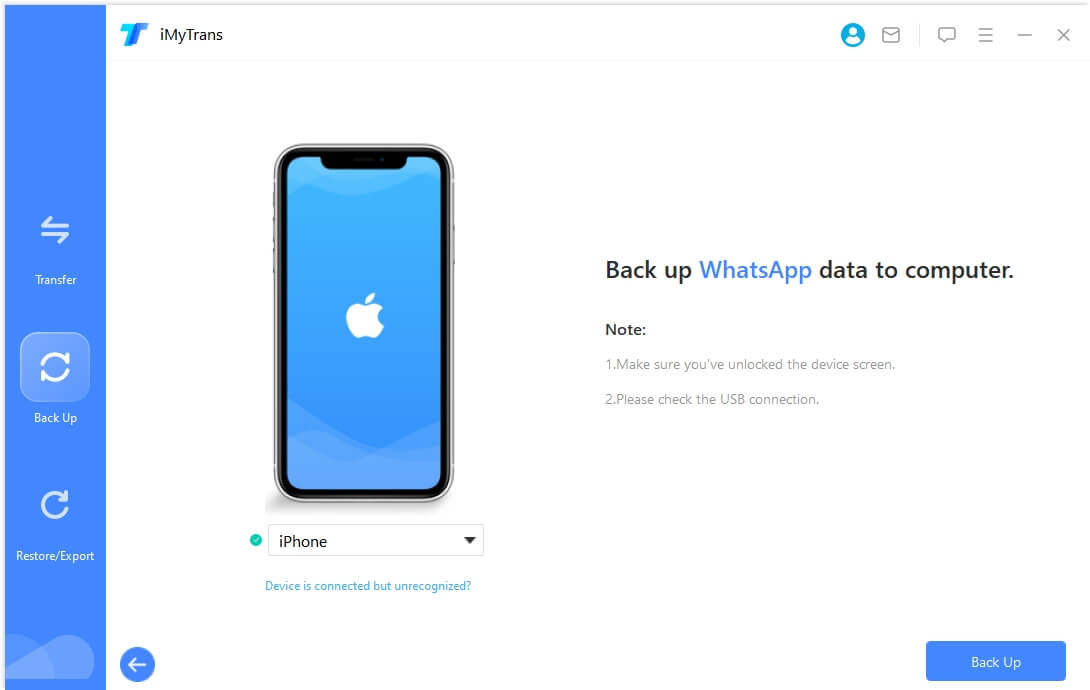
Step 3 Once the backup success, switch to the Export/Restore WhatsApp Backup part, choose the backup you just made and select the Export to Computer button.
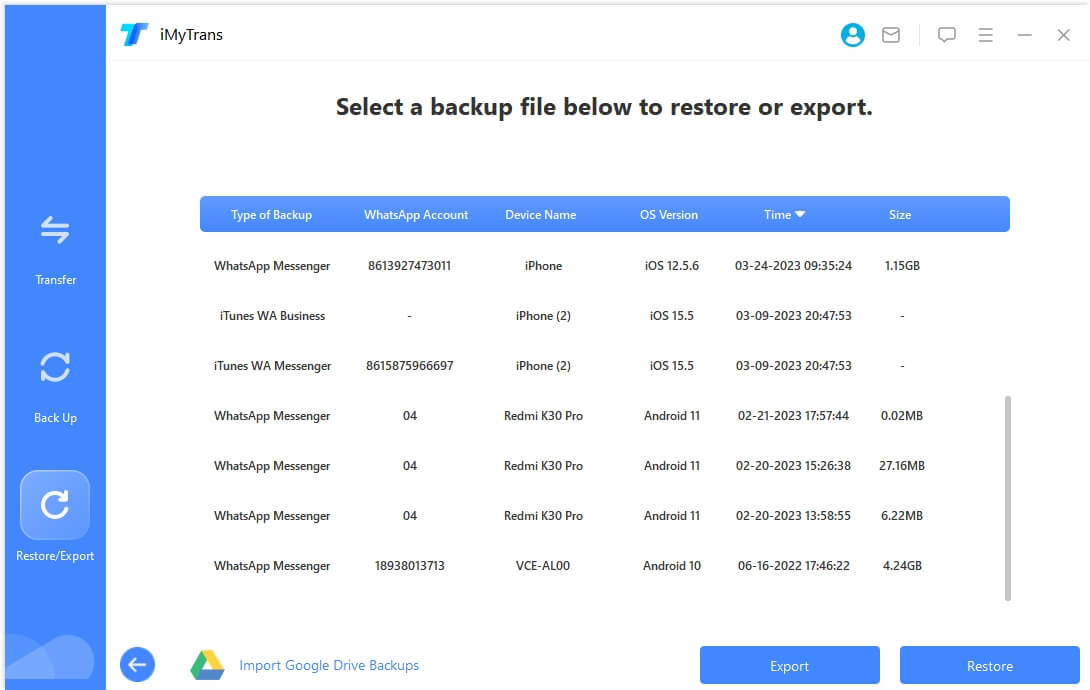
Step 4 The program will start to scan the messages and attachments in the backup, then show all the WhatsApp chats and attachments for you to choose to export. If you hope to export only the WhatsApp photos, just tick the Photos from the list to export. If you hope to view the photos as they appear on phone, choose the chats you hope to export, then export to HTML. All the media files in the chats will be exported together.
2.3 Copy WhatsApp Photos from Android to PC Manually
If you would like to move your WhatsApp photos from your Android to your PC (Windows or Mac) so that you can have a backup of them, or if you would like to free up some storage on your device, you can do this easily.
However, in order to make this work successfully, you need to have a USB data transfer cable for your device (most newer Androids use USB-C). Ensure that this cable is of high quality to avoid any errors when the data is being transferred.
You also need to make sure that your Android is unlocked during this process to avoid any interference.
2.3.1 Copy WhatsApp Photos from Android to Windows PC
If you are using Windows on your PC, then you need to follow these steps to transfer the WhatsApp photos from your Android:
- Connect your Android to your Windows PC using the transferring cable and enable “File transfer” under USB preferences. The preferences will be on your notifications and by default, your device will be set to charging mode.
- Open the file explorer in windows and locate your android phone on the right-hand side pane.
- Open the “Internal shared storage” folder and then the WhatsApp folder within this.
- Double click on “Media” and you will see a folder named “WhatsApp Images”. You can either copy and paste this entire folder to move all of your downloaded photos over to your PC or alternatively open it and then choose individual photos to copy.

2.3.2 Copy WhatsApp Photos from Android to Mac
- Connect your phone to your Mac and on your phone USB preferences, choose “Transfer Photos (PTP)”.
- Open the photos application on your Mac and locate your Android under the “Devices” section on the sidebar.
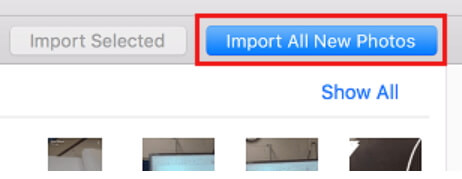
- You can either select your WhatsApp images from this point by locating them mentioned in the Windows section above and import those or you can import all of the (new) images on your phone.
Part 3. FAQs about WhatsApp Photos Saving on Android or PC
There are also some frequently asked questions here, so you can check them to solve your other related doubts.
Q1. Where are WhatsApp pictures stored on Android?
Just like other images on your device, WhatsApp photos are stored in a folder on your internal storage by default. In order to access them without using the gallery application, you can either use your PC or a file explorer.
However, it is important to understand that the pictures will only be saved on your Android if you have downloaded them. They are located at: Internal storage > WhatsApp > Media > WhatsApp image folder.
It is recommended that before making any changes to these pictures, they should be copied to another location. Then, you can make edits without affecting the originally downloaded images stored on your device.
Q2. Why can’t I save pictures from WhatsApp on Android?
There could be many reasons as to why you cannot save your WhatsApp pictures to your Android device. The main and probable reasons are listed below, with their solutions.
- The auto-download is disabled. If your photos are not being downloaded automatically even when you are connected to Wi-Fi, use the steps mentioned in part 1 to enable it so your photos are saved to your phone.
- The photo has been deleted. You may have selected an image on WhatsApp and accidentally deleted it. If this is the case, you can often redownload the photo. Once that has been done, you will be able to see the image.
- Enable the “media visibility” option (this method is listed in part 1).
Q3. How to stop WhatsApp saving photos on Android?
You may want to disable the auto-download feature because you may be running low on storage or don’t like WhatsApp photos clogging up your camera roll. To do this, you can:
- Go into WhatsApp settings within the application.
- Open “Data and storage usage” and turn off all the options under “Media auto-download” options for both Wi-Fi and mobile data.
- You can also turn off “Media visibility” in “Chats” settings to prevent your downloaded media files from being visible in your gallery.
Once this is done, you can manually download an image by clicking on the download button in your chats. You can also delete the image by selecting it.
Tip. The Best Method to Back up Android WhatsApp Data including All Images
It is always well known that there’s a backup of your data, just in case your data is deleted from your device. The best way to back up your WhatsApp data (including images) to your PC is by using the iMyTrans tool by iMyFone.

When you use the built-in Google Drive backup feature on WhatsApp for Androids, your data is being stored on a cloud storage system. This exposes your data to the risk of it being stolen if it is accessed by an unauthorized person.
Moreover, your data may be deleted accidentally or overwritten, but the iMyTrans stores your backup locally, making your data 100% safe.
Another benefit of using this tool other than other services is that you will be able to keep every version of a backup you make. This means that you can restore the backup that may not be the latest one you have created to retrieve important data.
As you are storing the data locally and not on a cloud service, you also will not be prompted to purchase more storage space, which may be the case if you are using other services.
If you would like to find out more about this incredible tool, make sure you go to the official website to check out the software.


 December 9, 2022