


 March 12, 2024
Face ID is one of the most interesting aspects of iPhone X. This innovative feature uses the TrueDepth camera of iPhone X to analyze and project over 30,000 invisible dots in order to create a depth map of a user’s face. That created face map is then read by an infrared camera on the device to unlock the phone with that specific user’s face.
- Part 1: iPhone X Unlocked by Friend's Face
- Part 2: Other iPhone X Face Unlock Issues
- Part 3: Famous Privacy Leak Issue
- Part 4: How to Avoid Privacy Leak on iPhone X
- Part 5: How to Unlock iPhone X without Passcode
c
While Face ID is easy, quick, and awesome, it is not as seamless as Apple promises. A woman from Nanjing named Yan recently found out that the Face ID on her newly purchased iPhone X does not work as expected because no matter how she configured it, her iPhone X got unlocked by her lookalike coworker’s face.

Yan called Apple’s hotline for help but they denied the reduced accuracy of Face ID. However, she purchased a new iPhone X the very next day and faced the same problem again. Her coworker was able to unlock the new device with her face as well. Apple Store offered to fully refund Yan, providing she was unsatisfied with it.
Other iPhone X Face Unlock Issues
1 iPhone X Unlocked by Twins
Recently, Mashable carried out an iPhone X face recognition unlock test to see whether it can identify twins or not. They got in touch with two sets twins, both of the twin sets are brothers. The process of this test is to let one brother register his face on iPhone X, and then give it to his twin brother to try to unlock it.

IMAGE: LILI SAMS/MASHABLE
However, the results were disappointed: with both sets of twins, the other twin unlocked the iPhone X easily. Face ID failed to tell the difference.
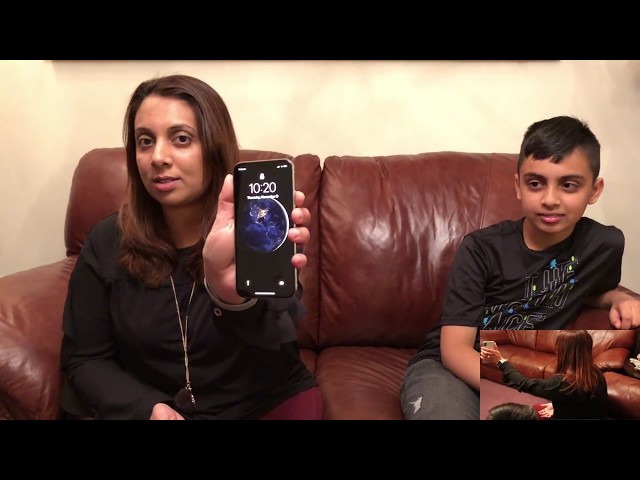
2 iPhone X Unlocked by Son
Yes, twins can unlock each other's iPhone X. But kids accessing their parents' devices raises different concerns. A new video has surfaced of an iPhone X Face ID being unlocked by a 10-year old kid. The owner of this iPhone X is his mom.
While Apple is still denying the accuracy of Face ID, it is evident from the above scenario that this newly introduced feature is far from perfect and makes private data on iPhone X vulnerable to hacks and leaks.
Privacy Leak Issue - iCloud Leaks of Celebrity Photos
On August 31, 2014, hundreds of revealing, semi-nude, and nude photos of female celebrities were stolen from their private collections and leaked overnight. Jennifer Lawrence, Ariana Grande, Kristen Dunst, and Kate Upton were among many of the celebrities shown in the photos. Hacked photos were posted on notorious web forum 4chan.

The method to obtain the photos is somewhat unclear. According to anonymous 4chan users, the images were stolen from iCloud accounts of celebrities however Apple stated that it was caused by a breach in one of Apple’s online services such as Find My iPhone or iCloud. iCloud is an Apple’s service that allows iPhone, iPad, and Mac users to synchronize photos, settings, calendar data, as well as other information between devices. After this leak, these services of Apple have been criticized for being confusing and unreliable.

First, it was thought that the hackers may have gained access to iCloud accounts via a security hole in “Find My iPhone” online service of Apple, allowing them to conduct brute-force attacks. Along with the brute-force attacks, hackers used a script to automatically attempt numerous different username and password combinations in quick succession until the right combination was guessed.
Later, the hacker who posted the photos on 4chan confirmed that the pictures were indeed obtained through celebrities’ iCloud accounts. A group of over 100 actresses, artists, and athletes were embroiled in the massive leak after some time. This leak is now considered to be one of the biggest celebrity leaks in history.
How to Avoid Privacy Leak on iPhone X
Protecting your private data is extremely important. No matter how advanced the cloud technology may get, you can never have the assurance that your private data will be 100% safe. Only by manually erasing your data permanently you can get that satisfaction. And when it comes it permanently erasing data on iDevice, there is no better alternative than iMyFone Umate Pro. This is the ultimate iPhone data eraser available on the market. It offers tons of useful features.

![]()
1,000,000+ Downloads
- Erase your iPhone data completely and eliminate any chances of it getting recovered.
- You can permanently erase all media files, documents, private/sensitive information, as well as third-party app data with this tool.
- Conveniently erase all the data on your iPhone with Erase All Data mode of the software. It is very useful when you are about to sell your device.
- Erase any fragments/traces of your previously deleted files via Erase Deleted Files mode and make them 100% unrecoverable.
- Permanently erase all your private data such as messages, call history, notes, etc. with Erase Private Data mode.
- iMyFone Umate Pro is fully compatible with iOS 14 and receive lots of positive reviews from MacWorld, iPhoneinCanada, APPKED, etc.
How to Avoid Privacy Leak on iPhone X
Step 1: First download and install Umate Pro on your computer and then launch it. Then connect your iPhonx X to your computer. It will be automatically detected by Umate Pro.

Step 2: Now click on Erase Private Data tab on the software and click on the Scan button to scan your connected iDevice. All your private data will be listed by the software once the scan is finished.

Step 3: Select the files you wish to permanently erase, then click Erase Now button.

Step 4: On the next page, you will be able to select security level of deletion. Make your preferred selection and then type ‘delete’ in the provided textbox.

Step 5: Click the Erase Now button to start the data deletion process. All your private iPhone data will be permanently deleted after these steps.

Tips: How to Unlock iPhone X without Passcode
Apple has never ceased to surprise us with latest and innovative technologies. In the latest iPhone X, they have introduced the Face ID option. This is an amazing feature that provides the highest level of security for your phone. It is a technology that uses infrared visible light to scan your face and unlock your phone.
However, your phone will not be scanning your face all the time. For unlocking your phone using this features, you should activate the feature. If you fail to unlock your phone using Face ID, you will have to enter a passcode. In case, you entered the wrong passcode too many times, it will lock your phone. In order to unlock your iPhone X, you can use iMyFone LockWiper.
![]()
1,000,000+ Downloads
LockWiper Unlock iPhone X without Passcode
- This tool will help you unlock your iPhone X without using a passcode.
- The software is able to work well with iOS 14, iPad, iPhone X, and iPhone 8 (plus).
- It can help you unlock if the screen is broken, locked, or disabled.
- It will help you unlock Touch ID, Face ID, 4-digit, and 6-digit passcode.
- The success rate for unlocking your iPhone X is high.
Steps to Unlock iPhone X without Passcode
Step 1: First, you need to install and launch iMyFone LockWiper on your PC and choose “Start”.

Step 2: The second step you need to follow is to connect your iPhone X to your PC.

Step 3: Once your phone is connected to iMyFone LockWiper, follow the steps on the interface to enter in the DFU mode.

Step 4: When you are in the DFU mode, all the information related to your phone will be mentioned. If there is any incorrect information, change it. In case there are no wrong details, click on the “Download” button.

Step 5: After that, you can click on “Start to Verify” to verify the firmware package.

Step 6: Then, just click on “Start Unlock”.

Step 7: Enter “000000” to double confirm unlocking, then click “Unlock”.

Step 8: Within few minutes, your iPhone will be unlocked.
