Privacy control in iPhone ensures that you get full control over which application on your mobile has access to information that is stored on your device. A great example of this having the privilege to grant a social media app on your device to access the camera feature on your device, which allows you to do a picture upload. Or better still.
Some app also uses information of current location, granting them the permission to in the privacy settings; you allow the app on your device to use information from Cellular, Wi-Fi, Global Positioning System (GPS) networks amongst other features to determine your current location. All of these are related to our personal information, so how can we manage and reset location and privacy on our iPhone?
Part 1. How to Reset Location and Privacy on iPhone
Before we start to reset location and privacy on iPhone, we should know more about what does location & privacy settings do on iPhone. With the Privacy settings, you are able to control the app that has access to information on your device. In the Privacy settings, select the type of data desired from the list to see which app needs or I've asked for permission to used your data saved on your mobile device. So, an app can never use any data on your device unless it's given permission to.
It is important to note that if you grant any app on your phone to have access to the data present on your iPhone, you are subjected to their terms and conditions, it's better to read their term and condition before granting access to any of the apps.
Here are the steps on how to reset location and privacy on iPhone:
Step 1: First, open the Settings icon found on your device.
Step 2: The next thing you should do is to look for the “General” section in the Settings.
Step 3: After going to the General section, scroll down to the bottom of your screen and tap the “Reset” button on your device.
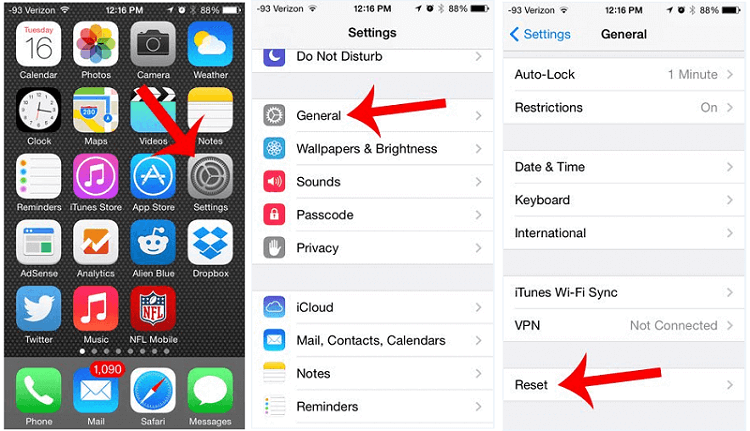
Step 4: Look for the “Reset Location & Privacy”.
Step 5: When you click on the “Reset Location & Privacy” setting, your device would ask for your passcode, just input your passcode.
Step 6: Click on "Reset Settings" to confirm.
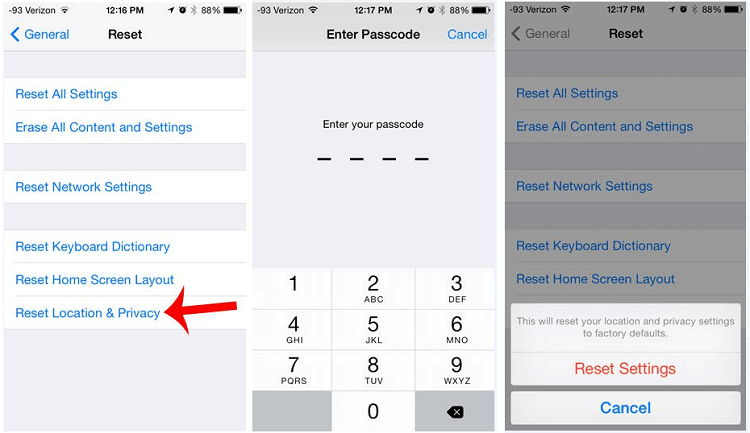
Note: A prompt page asking to choose between Reset Settings and cancel will be displayed, click on the Reset Settings, once you modify these settings, you will need to re-enable location services for apps that you choose to allow to have access to your location data.
Part 2. How to Reset All Settings When iPhone Not Resetting the Location and Privacy
Sometimes, users prefer to reset all their iPhone settings rather than just a simple section. And here comes a handy tool that works to reset your iPhone and erase everything to get you an iPhone as a new one by seconds.
If you do feel the same, check out this iMyFone Fixppo here.
Features of iMyFone Fixppo:
- You can reset your iPhone to factory settings with or without password.
- The Standard Reset and Hard Reset can both get you a whole new iPhone without any data after resetting.
- Also fix iPhone stuck in boot loop, Reset Location and Privacy not working and more.
- 99% success rate and easy to use for anyone without technical skills.
How to erase all data from iPhone by factory reset:
Step 1: Download and install iMyFone Fixppo, then connect your iPhone to your computer and launch the software.
Step 2: Under the Reset iDevices, choose Standard Reset when remember the passcode or the Hard Reset when don't know the passcode.
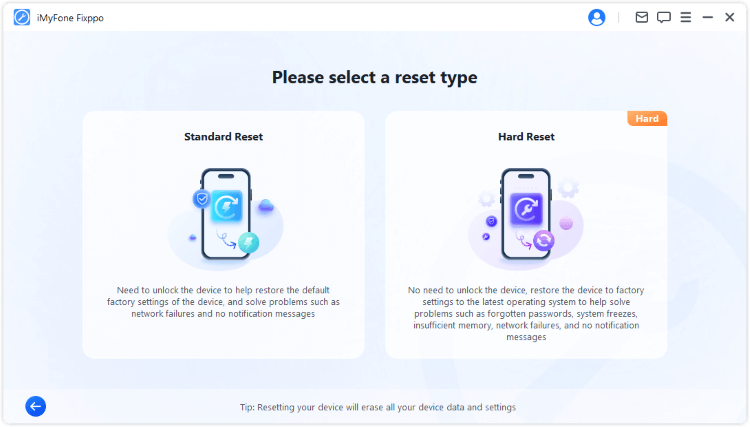
Step 3: When your device is detected, click Start Standard Reset. In a few seconds, your iPhone will be reset and restarted successfully.
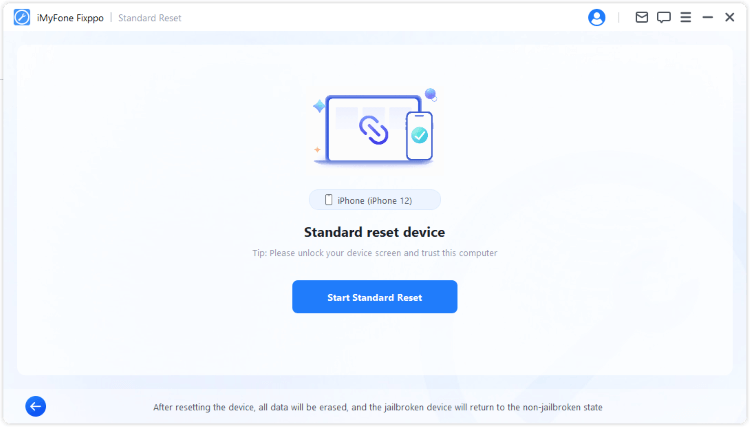
See? That's how you can reset your iPhone to factory settings with Fixppo. Download to have a try now!
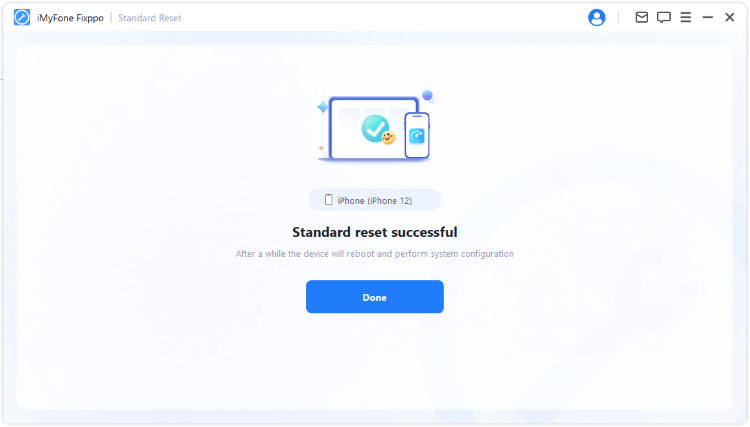
After the program finished, your iPhone data will be cleared and you can set it up as with the new information!
At the end of it all, when it comes to reset Location and Privacy on iPhone, the major thing I advise the people I've spoken to is to make sure they turn off location on their iPhone. You don't want an app revealing your locations to people out there.


 May 1, 2024
