Have you ever handed over your iPhone (iPad) to another person or to your child and wished you could have restricted a certain app or apps before handing it over? You can actually restrict apps on iPhone or iPad and prevent your kids from accessing those apps.
We have those apps that we would rather not have other people seeing them, and the best way to ensure that no one uses or gains access to them is by restricting them. There are various ways to restrict those apps on your iPhone. In this article, we are going to look at some of the various ways on how to restrict apps on iPhone (iPad).
The Parental Controls also known as Restrictions on your iPhone allowing you to manage which apps, features, and content can and cannot be accessed on your iPhone. In other words, Restrictions give you the power to choose the apps other people can access or cannot access using your device. This feature also lets you set the Screen Time for particular apps.
Part 1. Restrict Apps on iPhone with iOS 13/14/15
Restricting apps in iOS 13/14/15 is not similar to iOS 12. In fact, Restrictions are now under Screen Time in the Settings app. Here are the steps:
Step 1: Open Settings on your home screen and tap on Screen Time.
Step 2: Click on Set up as Parent. There will be a App Limits interface.
Step 3: Check the apps you want to restrict and tap on Set App Limit.
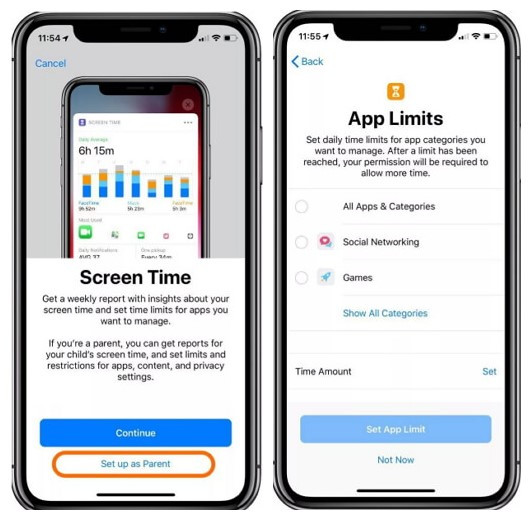
By doing so, you will have restricted the apps and they will not be visible on your Home Screen. You can re-enable them by going through the same process.
Part 2. Restrict Apps on iPhone with iOS 12 and Below
If you own an iOS 11 device or below, you can restrict apps and prevent your kids from spending the whole day playing or chatting on your iPhone device. Here are the steps on how to restrict apps on iOS 11 and below:
Step 1: Open the Settings -> General -> Restrictions.
Step 2: Click on Enable Restrictions. You will have to enter a passcode that you will use to either enable or disable the apps.
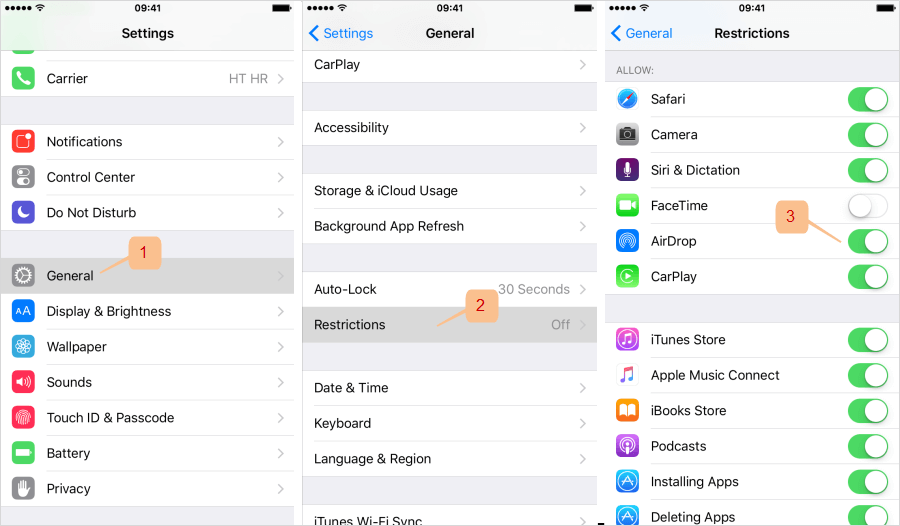
Step 3: Toggle the Switch next to the specific app you would like to turn off.
Part 3. Permanently Erase Your Private Files To Avoid Privacy Leak[iOS 15]
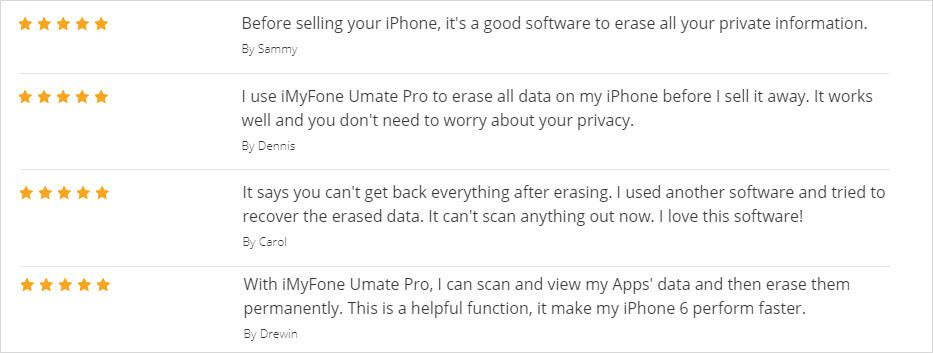
If you are worried that your private files and chats can get into the wrong hands, or someone might gain access to your applications and view your files, you can permanently erase your files using iMyFone Umate Pro. It is a software program that lets you protect your private files by permanently deleting them from your device.
Key Features of iMyFone Umate Pro:
- Secure your privacy by deleting some sensitive data and making them permanently unrecoverable
- Preview and erase your deleted files and make them 100% erased without any chance of recovery.
- Helps you protect your personal data including messages, contacts, call history, photos & videos, browsing data, and more.
- Erase all messages and attachments of third-party apps like WeChat, Kik, WhatsApp, Viber, and over 10 other apps.
It's recommended by lots of noted media arround the world: MacWorld, iPhoneinCanada, APPKED, etc.

Steps on How to Erase Your Files to Avoid Privacy Leak:
Step 1: Launch Umate Pro on your computer and connect iPhone to the computer. Then, click on the Erase Private Data. You will be required to scan the device. Click on Scan to commence the scanning process. This might take a few minutes to complete.
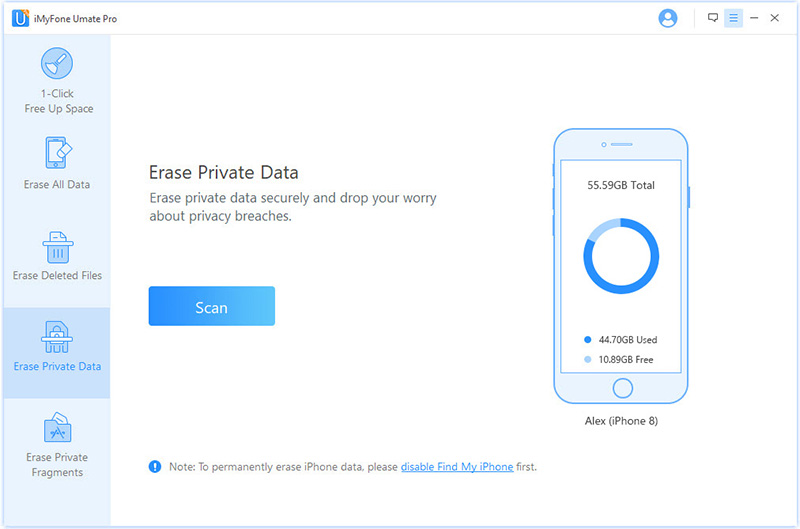
Step 2: Once the scanning process is complete, the Umate Pro will display all the private data including social media accounts, call history, messages, photos, videos and so on. You can open the files to preview the data. You can select the files you want to erase. Click on the Erase Now.
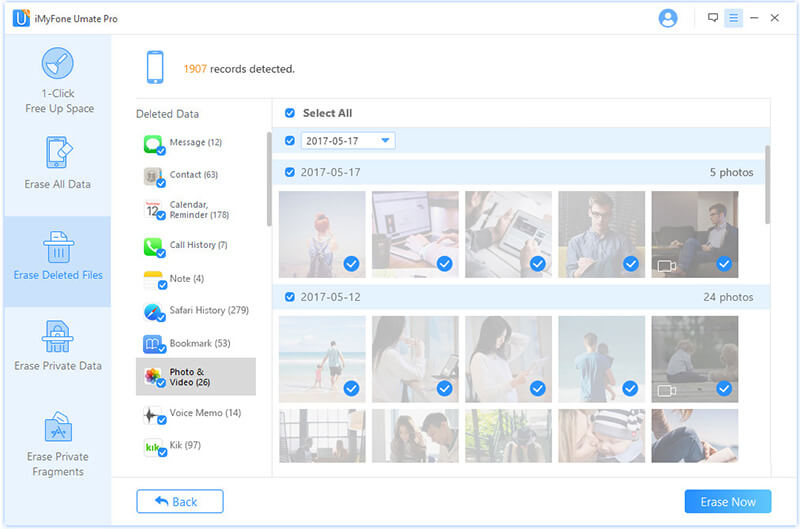
Step 3: Select the security level and confirm. You will be required to type Delete in the box provided to confirm the deletion. Read the security level settings before selecting a particular level. High security level is recommended here.
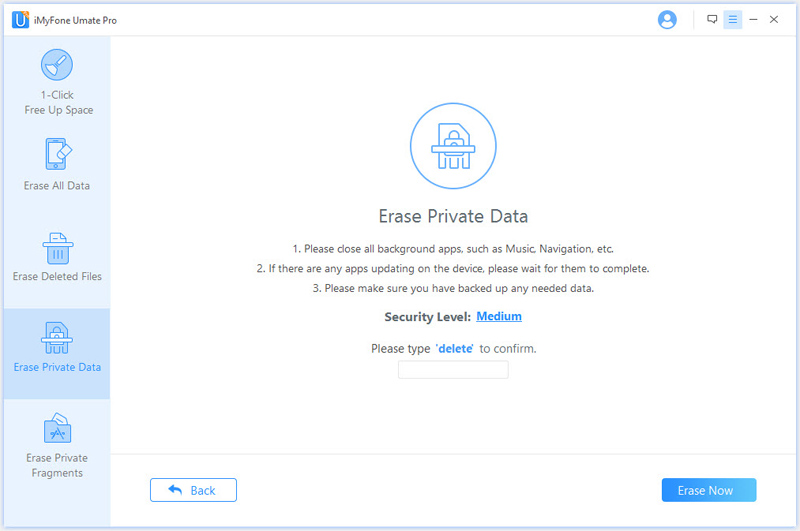
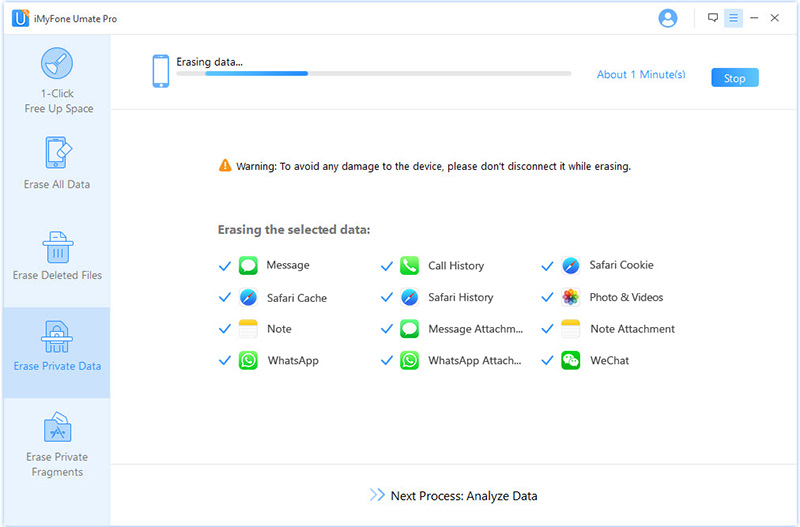
Step 3: After typing delete in the box provided to confirm that you want to erase your private data, you will have to click on the Erase Now to completely erase the private data. Wait for the process to finish and you will have erased all private data on your device.
Conclusion
iMyFone Umate Pro must be the best choice for you, if you want to erase your private files to avoid privacy leak. This tool supports different iOS versions, including iOS 15. And it will also compatible with iOS 16 when it comes out!


 March 12, 2024

