


User Guide of iMyFone Fixppo
Is your iPhone/iPad/iPod touch/Apple TV inexplicably stuck on common Apple problems? If you're experiencing iOS/iPadOS/tvOS issues, iMyFone Fixppo is here to help.
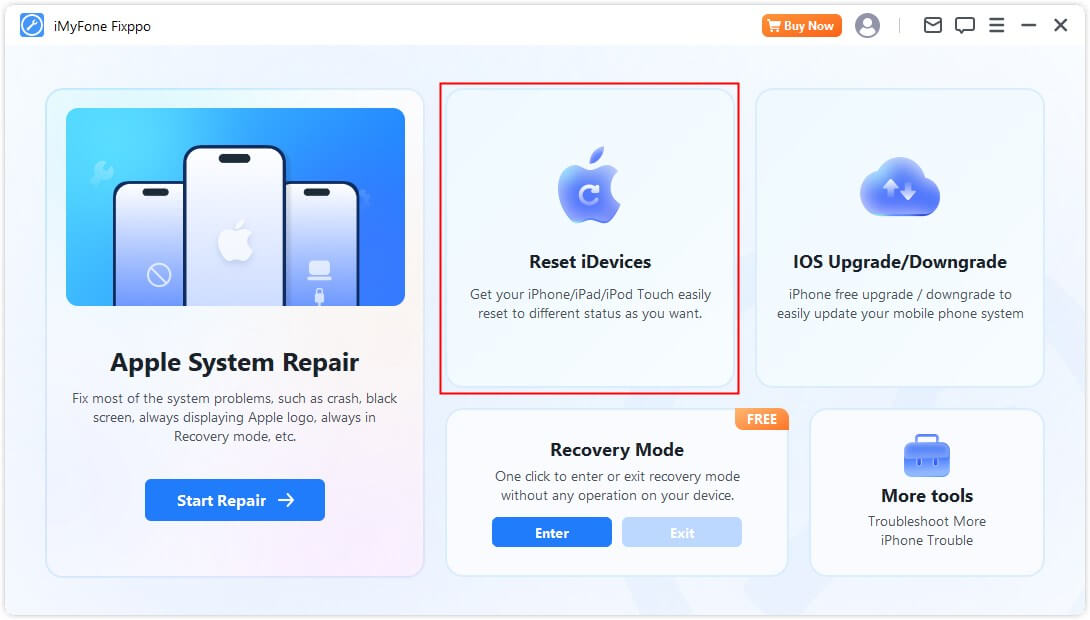
iMyFone Fixppo is desktop software that provides three core functions: Apple System Repair, iDevices Reset, and iOS Upgrade/Downgrade. Additionally, it offers a free feature to enter/exit Recovery Mode.

Follow the simple, yet detailed steps listed below to learn how to operate each mode and maximize the potential of this program.
Part 1: Apple System Repair
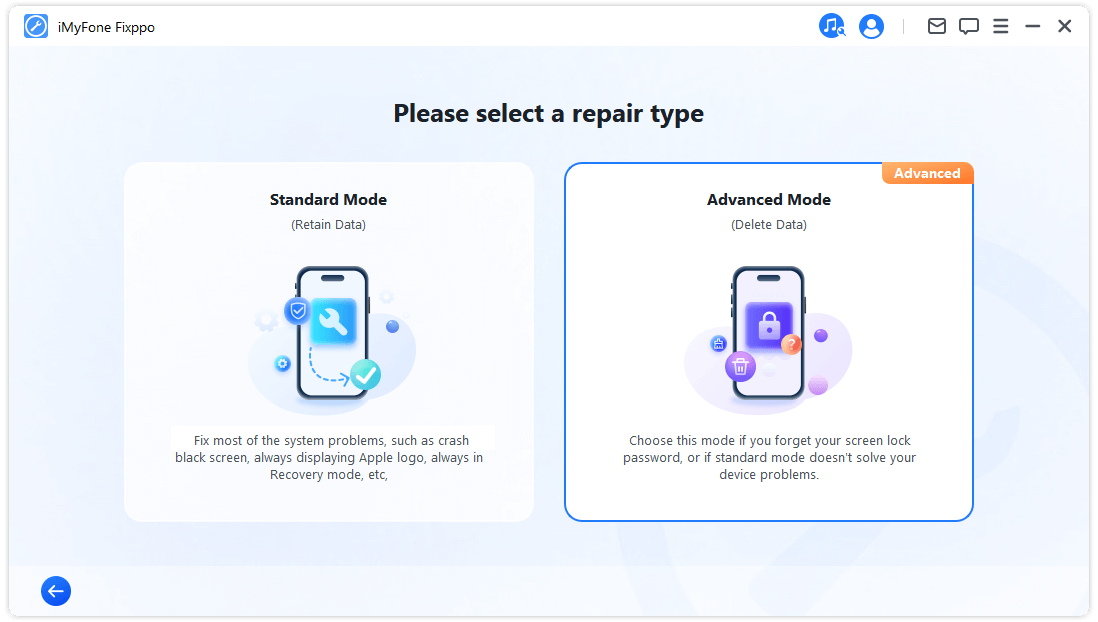
This section provides two primary features: Standard Mode and Advanced Mode. Standard Mode is suitable for users seeking to resolve a wide range of issues with their iDevices. It effectively addresses most problems. However, if you encounter difficulties using Standard Mode, Advanced Mode is available to help you troubleshoot iOS problems and repair your system.

Select Standard Mode for Data-Safe Repair without causing any data loss
Step 1. Launch iMyFone Fixppo and choose Standard Mode
If you wish to retain your data while repairing your device, select the Standard Mode of Apple System Repair on the Home page. This mode effectively resolves common iOS/iPad issues.

Step 2. Connect your device to computer
After selecting Standard Mode, please connect your iOS device to the computer. If your device is not detected, Fixppo will assist in entering Recovery Mode. Follow the on-screen instructions to manually enter Recovery Mode or DFU Mode.
- To ensure successful iOS repair, it is highly recommended that you use Apple's original Lightning USB cable to connect your iOS device to the computer.

If your device does not appear in Recovery Mode, click 'Try DFU Mode' at the bottom.

Step 3. Download the firmware
Now, you need to download the firmware to fix your device. The program will automatically detect your device model and display all available firmware versions. Choose your preferred version and click.‘Download'.

When you're ready, click Download to begin downloading the latest firmware package. Please note that it may take some time due to the large size of approximately 5GB.

- If you failed to download the firmware package, you can download it through your browser by ' download via browser'.
- If you have already downloaded the firmware package on your computer, simply click 'Select it' to manually import the firmware.

Step 4. Fix iOS/iPadOS/tvOS issues
Once you have the firmware, click ‘Start Standard Repair' to initiate the device-fixing process.

The program will now begin fixing your device. It is recommended not to touch the cable or your device during the process.

The repair process will be completed shortly, and your iPhone will restart automatically.
If the process fails, you have the option to either retry or switch to Advanced Mode.
If you have forgotten the screen lock password or are unable to use Standard Mode to resolve the problem, Advanced Mode is available to assist you. Please note that using this mode will result in the permanent erasure of all your data.
Select Advanced Mode to Fix Severe iOS Issues
Step 1. Launch iMyFone Fixppo and choose Advanced Mode
Step 2. Connect your device to the computer
After selecting Advanced Mode, please connect your iOS device to the computer. If your device is not detected, Fixppo will assist in entering Recovery Mode. Please follow the on-screen prompts to manually enter Recovery Mode or DFU Mode.

If your device does not appear even in Recovery Mode, click Try DFU Mode at the bottom.

Step 3. Download the firmware
Now, you need to download the firmware to fix your device. The program will automatically detect your device's model and display all available firmware versions. Choose the version you prefer, then click Download

If you're ready, click Download to initiate the download of the latest firmware package. Please note that it may take some time due to the large size of the approximately 5GB firmware package.

- If you are unable to download the firmware package, you can download it through your browser by clicking ' download via browser'.
- If you have already downloaded the firmware package on your computer, simply click 'Select it' to manually import the firmware.

Step 4. Fix iOS/iPadOS/tvOS issues
With the firmware downloaded, click Start Advanced Mode to initiate the device-fixing process.

The program will now begin fixing your device. Please avoid touching the cable and your device during the process.

The process will be completed shortly, and your iPhone will restart automatically once the program finishes its task.

Part 2: iOS Upgrade/Downgrade
If you are unable to upgrade your iOS system through the normal procedure, you can choose iOS Upgrade to smoothly update your system without data loss. On the other hand, if you simply want to revert to a previous version, you can select iOS Downgrade.

iOS Upgrade
Step 1. Select Upgrade iOS
Choose this option to upgrade the iOS system while retaining the device's data.

Step 2. Connect your device to the computer
Connect your device to the computer using a USB cable and follow the on-screen instructions.

Step 3. Download firmware
The program will detect your device and display the available firmware package version for an upgrade. You can customize the download path for the firmware package file. Click Download to begin downloading the firmware package.

After that, Fixppo will start extracting the downloaded firmware and use it to begin the upgrade process.

Step 4. Start upgrading iOS
Your device is now fully prepared for the iOS upgrade. Click Start Upgrade iOS to initiate the process of upgrading your device.

Then, please wait for the program to complete its task. It is important to keep the device connected to the computer without using it during the entire process. Finally, you will see a Done message that shows the process is completed.

iOS Downgrade
Step 1. Select Downgrade iOS
Choose to downgrade the iOS system, but your device's data will not be preserved.

Step 2. Connect device to the computer
Use a lightning cable to connect the device to the computer, then click Next to move forward.

Step 3. Download firmware
The program will detect your device and display the available firmware package version for downgrade. You can customize the download path for the firmware package file. Click Download to begin downloading the firmware package.

After that, Fixppo will start extracting the downloaded firmware and use it to begin the upgrade process.
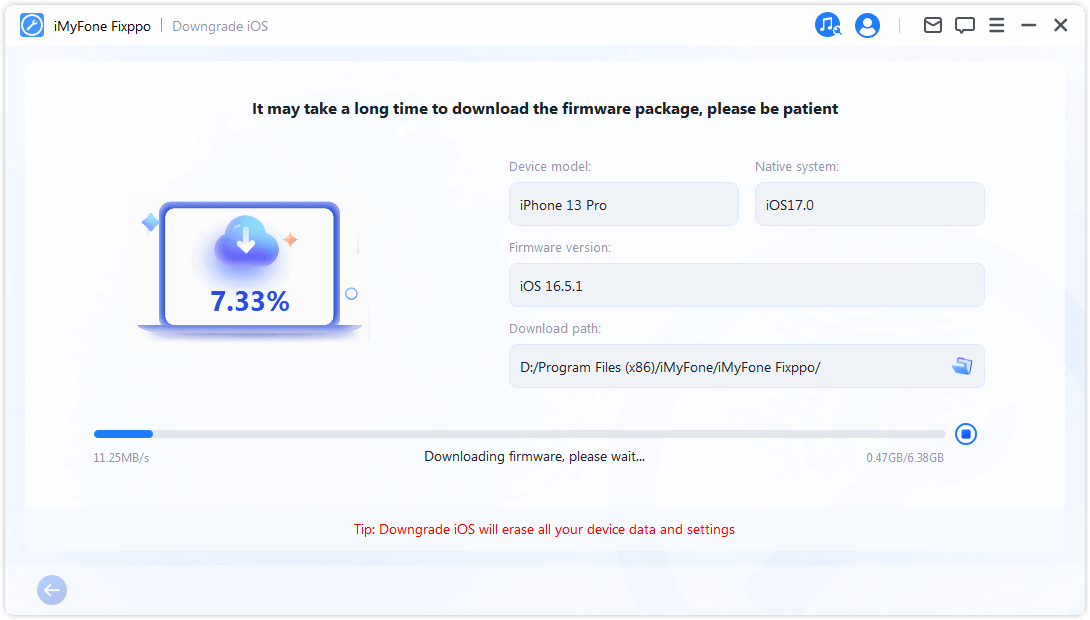
Step 4. Start downgrading iOS
Now, the firmware can be used to downgrade your iOS system. Click 'Start Downgrade iOS' to initiate the process.

Please wait patiently for the process to finish and avoid using or moving your device during this time. Once completed, you will see a pop-up message indicating Done, confirming that you have successfully downgraded your iOS system to the previous version.

Part 3: Reset iPhone/iPad/iPod touch Easily
This feature provides two modes for you. The first one is Standard Reset, allowing you to reset your iDevice with just one click. However, if you have forgotten the password for your device, the highly recommended option is Hard Reset. After performing a factory reset, you will regain access to your device with the latest iOS version.
Select Standard Reset
Step 1. Select Standard reset
Choose the mode that best suits your situation. This mode is recommended when you can unlock your device.

Step 2. Connect your device to the computer
After selecting Standard Reset, connect your device to the computer. Enter your iDevice's password and trust the computer. Then, click the Start button to initiate the standard reset process for your device.
Note: The Standard Reset will erase all data and settings on your device.

Step 3. Reset device
Your iDevice will automatically reset by iMyFone Fixppo.

Congratulations! Your device has been successfully reset. Click 'Done' to complete the process.

Hard Reset
Choose this mode when you are unable to unlock your iDevice's screen lock.

Step 2.Connect your device to the computer
Connect your device to the computer using a USB cable and follow the on-screen instructions.

Step 3. Download firmware
iMyFone Fixppo will automatically detect the latest firmware version and reset your device with it.

The program will take some time (mainly depending on your internet speed) to download the firmware. After that, it will automatically proceed to verify and extract the firmware, which will be relatively fast.

Step 4. Start Hard Reset
Now, the firmware can be used to perform a Hard Reset on your device. Click Start Hard Reset to initiate the reset process.

Please wait for the program to complete its task. It is important to keep the device connected to the computer without using it during the entire process. Finally, you will see a Done message indicating that the process is completed.

Part 4: Enter or Exit Recovery Mode with One Click
The process is very simple. With just one click, your iPhone/iPad/iPod touch/Apple TV can enter or exit recovery mode in a few seconds. This feature is especially helpful when the home button or other buttons on the device are broken.
Enter Recovery Mode
Step 1. Connect your device to the computer
Please connect your iOS device to your computer.
- To ensure successful iOS repair, it is highly recommended that you connect your iOS device to your computer using Apple's original Lightning USB cable.
Step 2. Click to enter Recovery Mode
Once your device is connected to the computer, as shown below, the "Enter" button will be clickable. Click on it.

In a short while, you will see a message confirming that you have entered recovery mode successfully.

Exit Recovery Mode
Step 1. Connect your device to the computer
Please connect your iOS device to your computer.
- To ensure successful iOS repair, it is highly recommended that you connect your iOS device to your computer using Apple's original Lightning USB cable.
Step 2. Click to exit Recovery Mode
Once your device is connected to the computer, as shown below, the "Quit" button will be clickable. Click on it.

In a short while, you will see a message confirming that you have successfully exited recovery mode.

If the process is complete but your device doesn't restart, you can try again or use the Standard Mode in the Apple System Repair section to fix your device. Your data won't be affected when using the Standard Mode.
Part 5: Troubleshooting
Issue: Device connected but not recognized
Step 1. Unlock the device screen lock
Ensure that your device is turned on and unlocked. After unlocking, select "Trust" on the device so that the data cable can function properly.
Step 2. Check the USB port and reconnect the device
The USB port on your computer equipment might have poor contact. Try using a different USB port to reconnect the device.
Step 3. Replace the USB cable
If the data cable is damaged or can only be used for charging, consider replacing it with a new one. We recommend using Apple's original data cable for the best compatibility and performance.
