


User Guide of iMyFone D-Back
Is your iPhone damaged or locked by a forgotten passcode? Lost iPhone data due to accidental deletion? With four recovery modes, iMyFone D-Back is specially designed to recover your lost files from iOS device or iTunes/iCloud backup no matter how you lost them.
Mode 1: iPhone Recovery
Step 1: Select iPhone Recovery Mode
Launch the iMyFone D-Back after downloading it. Select the "iPhone Recovery" mode.

Step 2: Choose What Situation You Are In
Select what situation you are in, click on one of them according to your problem. The instructions will lead you to "Recover from Device", "Recover from iTunes", "Recover from iCloud" and "Fix System" module.

Mode 2: Recover Data from iOS Device
Step 1: Connect and Scan Your iOS Device
After launching the data recovery software for iPhone, choose the "Recover from iOS Device" module.

Connect your device to your computer. As soon as the program successfully detects your iDevice, click "Next" to proceed.
Now, select the types of files that you would like recover. After that, click "Scan". The program will start to look for the deleted data from your device.

Step 2: Preview and Recover Data from iPhone/iPad/iPod touch
After the scan is finished, all recoverable data will be clearly organized as the picture below shows. Click each tab to check all files. To find data that you would like to recover accurately and quickly, click on the funnel icon in the upper right corner to select the file status and dates.
Recover to Computer
If you want to recover to your computer, select the files which you want to recover, and then click "Recover to Computer" at the bottom right corner.
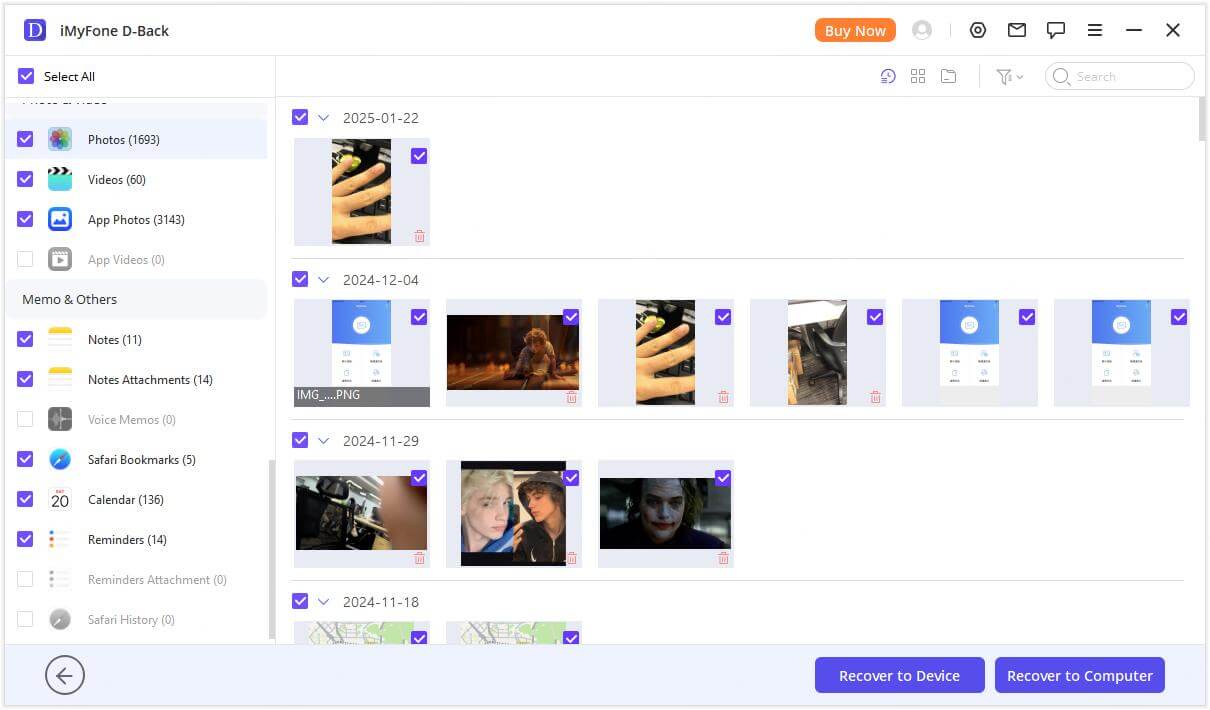
A pop-up window will display to let you choose the location to store the recovered files and it will take only a few minutes to finish the recovery.
Recover to Device
If you select "Recover to Device", you need to make sure your iPhone is detected by the computer. Then click "Next" button.
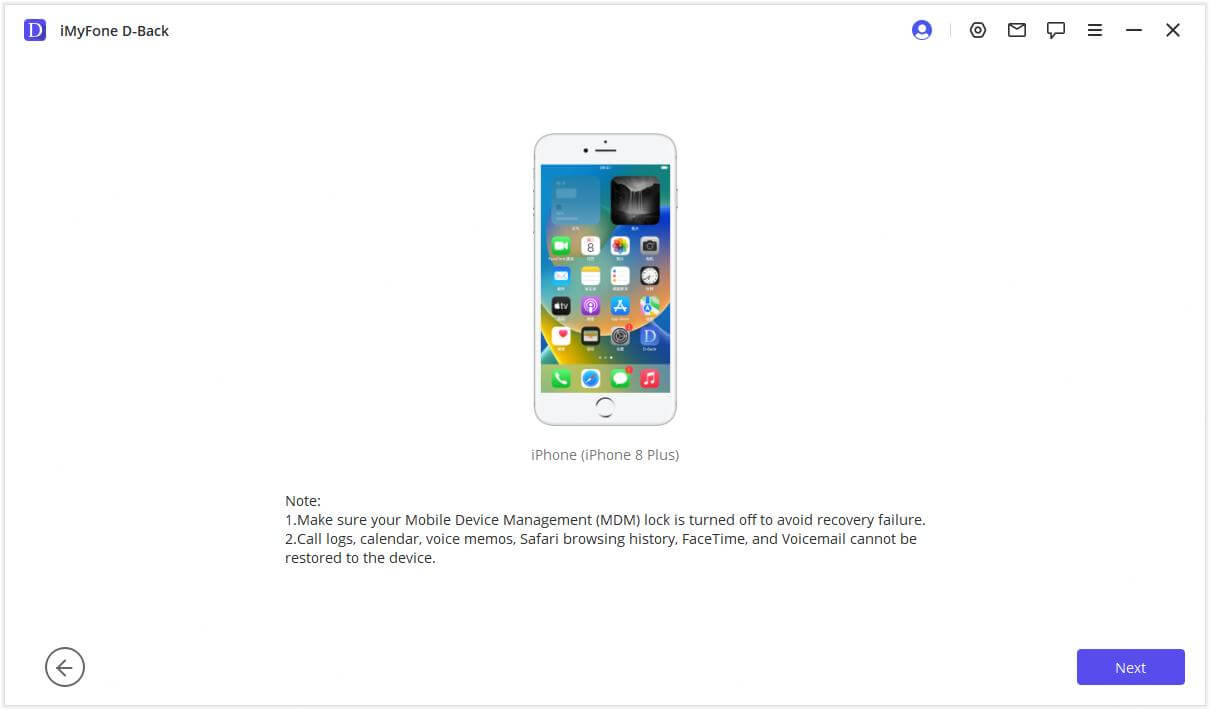
Now the program will start the recovery process, but bear in mind, "The program only supports to restore backup to a device running same or newer iOS versions. You can upgrade the device to the latest iOS version and try again."
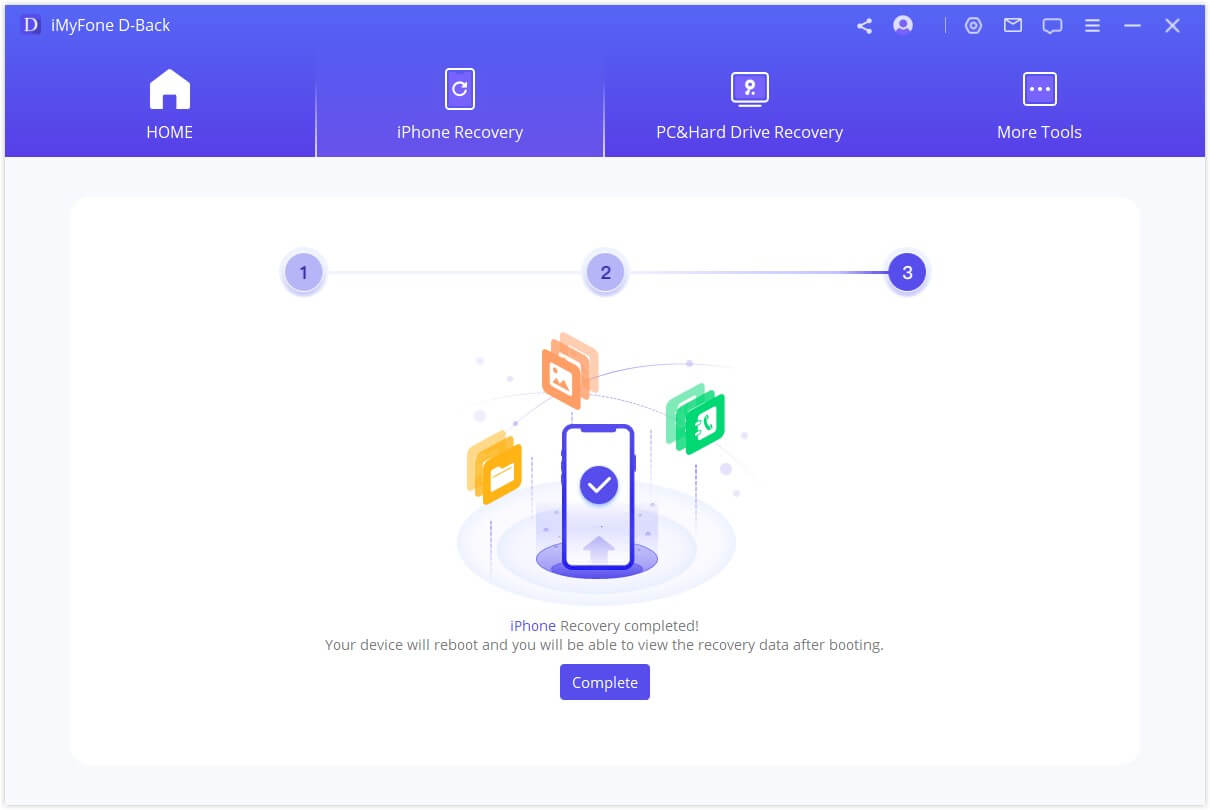
Shortly, your data will be recovered to your iPhone.
Mode 3: Recover Data from iTunes Backup
Step 1: Choose and Scan from iTunes Backup
Choose "Recover from iTunes Backup" module then choose the exact iTunes backup from which you want to recover data and click "Next". If you choose an encrypted iTunes backup, you will need to enter the password for iTunes encryption.
Notes: D-Back supports scanning out the iTunes backups that you've made through other programs on your current computer, and these types of data can also be recovered.

Select the file types you need and click "Scan" button. Please wait a moment while it scans.

Step 2: Preview and Recover Data from iTunes Backup
The search results will be showed on the interface clearly. To find data that you would like to recover accurately and quickly, you can click on the funnel icon in the upper right corner to select the file status and dates.
Recover to Computer
If you want to recover your data to your pc, select the files which you want to recover, and then click "Recover to Computer" at the bottom right corner.

You need to select or create a folder as the recovery path. Then iMyFone D-Back will recover the data to the folder and you can check it after finishing the recovery process.
Recover to Device
If you select "Recover to Device", you need to connect your target device. Then tap on the "Next" button.

Now, the program begins recover your data, please note that the original data in the device will be overwritten.

After a few minutes, your data will be recovered to your device successfully.

Mode 4: Recover Data from iCloud
There are two options to recover data from iCloud. One is to recover from iCloud account while the other is from iCloud backup. If you have enabled iCloud and signed in iCloud account on iOS devices, your data will be automatically synced to iCloud Kit. Or you may have manually backed up your data to iCloud. Choose the suitable option below to get your data back from iCloud.
Option 1. Recover from iCloud Account
Step 1: Log in iCloud Account and Scan Data
Choose "iCloud" from "Recover from iCloud" module.

Fill in your iCloud account details. Please be assured that iMyFone will never keep a record of your iCloud account info or content.

For this part choose to recover one or more categories from iCloud account including contacts, photos, notes, iCloud Drive and iWork files. And then tap "Scan" on the lower right corner.

The scan will be in process, it might take some time depending on the file size. Please kindly wait.
Step 2: Preview and Recover Data from iCloud
After the scan is completed, the search results will be clearly organized on the interface. You can preview files which you want. and choose the files which you want, and then click "Recover".

Last, choose a location on your computer to store the recovered data. Please wait while iMyFone D-Back is recovering your lost data.
Option 2. Recover from iCloud Backup
Step 1: Choose iDevice Status
Choose "iCloud Backup" from "Recover from iCloud" module.

Choose the instruction according to your iDevice status.
Notes: Please make a full backup of your current iDevice and follow the steps to reset it, then wait for the device to reboot.

Step 2: Choose iCloud backup to Restore
Select 'Restore from iCloud Backup' in 'Apps & Data', then enter the Apple ID and password from which you want to restore the backup.
Choose the certain iCloud backup that you want to restore and wait for a reboot.

Then connect your iDevice to D-back for viewing recovered iCloud backup on computer.

Step 3: Preview and Recover Data from iCloud Backup
Recover to Computer
Click "Recover to Computer", then D-Back will export your files to the computer.

Choose file format and a location to save.

Congratulations! Your files have been successfully recovered.
Mode 5: Fix Various iOS Issues
The "Fix iOS System" solution is tailor made for someone whose device is stuck on various iOS issues. This program offers three modes to fix various iOS issues.
1. You can choose the Standard Mode to fix common iOS issues like device being stuck on white screen/black screen/Apple logo/DFU mode, restarting loops, bricked iOS devices, freezing screen, not turning on and more.
2. And you can repair iOS devices stuck on Recovery Mode with only one click by choosing the second mode--Enter/Exit Recovery Mode.
3. Moreover, you can use Advanced Mode if the Standard Mode cannot fix the iOS issues or you forget your device passcode.
Just follow below simple steps and have a first-hand experience of what it is capable of.
Note:
- Your device will be updated to the latest iOS version after using this function;
- Any Jailbroken device will be restored to the default mode after using this function;
- If your device is locked, it will be unlocked after using this function;
Launch the iMyFone D-Back on your computer and click on "Fix iOS System" from the main window. Before you choose any mode, connect your device to the program using a USB cable. And then you will see the three modes iMyFone D-Back iPhone data recovery offers.
Choose any mode that suits your situation and when it prompts you to install/update the latest iTunes version, please follow suit.
1. Use Standard Mode to Fix iOS Issues without Data Loss

Step 1. Connect your device to a computer
Connect your device to the computer with a USB cable and then click Next.
After the Next button is clicked,
1. iMyFone D-Back will proceed to Step 2 if it detects your device.
2. Otherwise, you will be prompted to put your device in DFU or Recovery Mode first. Please follow the instructions.
1.1 Put your device into DFU mode
Please follow the instructions shown in the main window.

If your device can’t enter DFU Mode, you can put it into Recovery Mode instead.
1.2 Put your device into Recovery mode.
Please follow the instructions shown in the main window.
Step 2. Download the Corresponding Firmware
Once you have entered DFU Mode or Recovery Mode successfully, you will need to download the new firmware for your device. The cool thing with D-Back is that it will detect your device automatically and let you download the latest iOS version suited for it. You just need to click on "Download" and you are good to go!

Step 3. Fix System with Downloaded and Verified Firmware
After downloading the firmware, just click "Start to Fix" to verify the firmware and the program will start to fix your iOS automatically after that.
If your device is out of DFU/recovery mode in this step, you have to repeat step 1 and put your device in DFU/recovery mode again.

This process might take 10 minutes. Please kindly wait.

Once the fixing process is finished, please check whether your device can start. If the device cannot start, please try again.

If the fixing failed, you can retry the Standard Mode or use Advanced Mode to fix the iOS issues.
2. One Click to Enter/Exit Recovery Mode
From the main window, connect your device first if you haven’t done this and then choose Enter/Exit Recovery Mode.

Enter Recovery Mode
Step 1. Connect your device and click Next.
Step 2. Click Enter Recovery Mode to put your device into recovery mode.

Exit Recovery Mode
Step 1. Plug in your device and click Next to continue.

Step 2. Click Exit Recovery Mode to get your device out of recovery mode.

D-Back will take several seconds to exit Recovery Mode. After that, you device will start successfully.
Note: if the exiting process finishes but your device cannot start, please try again or use the Standard Mode to exit Recovery mode.
3. Use Advanced Mode to Reinstall Your iOS Completely
If the Standard Mode cannot fix the iOS issues you encounter, you can also use Advanced Mode. Just click Advanced Mode from the main window and the process is same with Standard Mode. But please notice that the Advanced Mode will reinstall iOS completely and all the data on your device will be erased.

Step 1. Connect your device to a computer
Step 2. Download the Corresponding Firmware
Step 3. Fix System with Downloaded and Verified Firmware


Tips:
- For Mac users, please duplicate and install iMyFone D-Back in your Applications folder instead of double clicking the software after saving it on your Mac.
- iMyFone D-Back will only scan the file types you've chosen instead of all the file types to save your valuable time.
Special Guide: How to Recover Instagram and Messenger Messages and Files
Worried about losing your Instagram or Messenger chats and photos? Now D-Back can help you recover Instagram and Messenger files! Since this data is encrypted by the apps, you’ll need to follow some steps to let D-Back access them. Don’t worry, we guarantee it’s 100% safe.

Preparation Before Recovering Instagram Data
To recover Instagram data, you need to follow the instructions below before scanning your device to recover the data. The steps are as follows:


Preparation Before Recovering Messenger Data
To recover Messenger data, you need to follow the instructions below before scanning your device to recover the data. The steps are as follows:


