Although the Auto-Correction feature on iOS devices has long been criticized for causing you to write "brain" when you meant "Brian", it is a very useful iOS feature. Because it makes it easier for you to input your sentences and increases the chances that you will get the words correct.
"When I write the text messages, a red line often appears below any misspelled words. But I don't see it. I am also not seeing any correction options. Do you know how to fix it?"
Here we will take a look at exactly why your iPhone Auto-Correction is not working and some of the solutions to fix the problem.
Why iPhone Auto-Correction is Not Working?
Like most other iOS feature issues, this problem is mostly caused by a glitch in the iOS system. It is also worth pointing out, however, that the problem can also come about if the Auto-Correction settings and other settings governing the device's keyboard are not set correctly.
Based on the most common causes of this problem, here are just some of the most effective solutions.
Solution 1. Check Auto-Correction Settings
The first thing you want to do is to make sure that Auto-Correction is set up correctly in the settings. Follow these simple steps to do it.
Step 1: Open the Settings on your device.
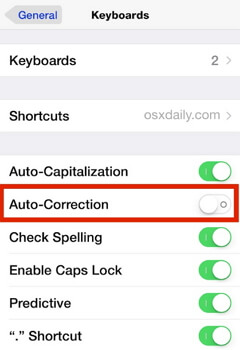
Step 2: Tap on General > Keyboard and scroll down to make sure "Auto-Correction" is enabled.
Solution 2. Check Spelling and Predictive Settings
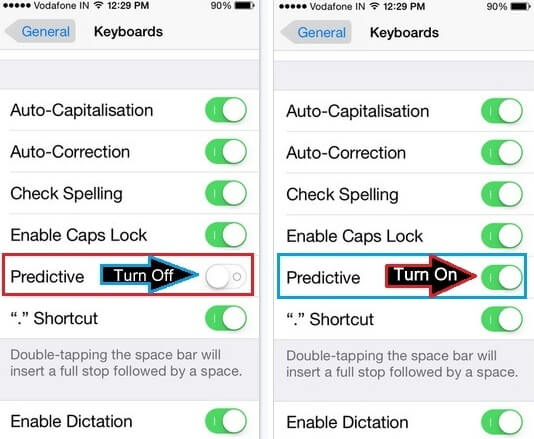
You should also check whether the "Predictive" and "Spelling" setting your device are enabled. While spelling ensures that the auto-correction will work and predictive settings enable the iPhone to learn your vocabulary and suggest words as you type.
Go to Settings > General > Keyboard and scroll down to find the Predictive Settings.
Solution 3. Reset the Keyboard Dictionary
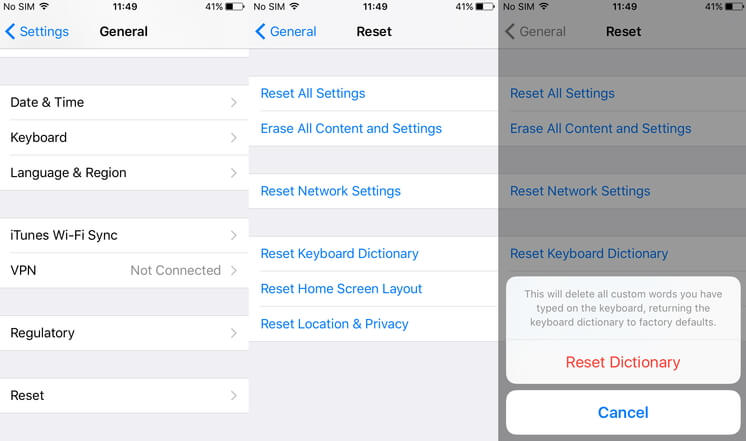
If all the settings are correct but Auto-Correction is still not working, you may need to reset the keyboard dictionary. This action will also erase all the misspelled words, allowing you to begin afresh.
Step 1: Open the settings on your device.
Step 2: Tap "General > Reset".
Step 3: Select "Reset Keyboard Dictionary".
Solution 4. Force Restart Your iPhone
If a reset of the keyboard dictionary doesn't work, you can force restart the iPhone. This will remove some conflicting settings, glitches and corrupt data that could be causing the auto-correction issue.
iPhone 6 and earlier: Press and hold the power button as we all as the home button together until the Apple logo appears on the screen.
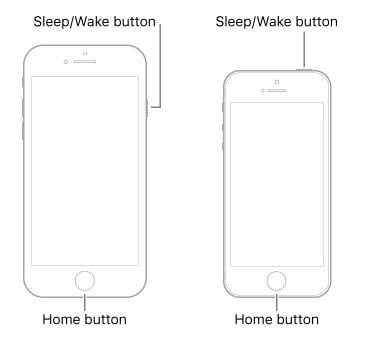
iPhone 7 and 7 Plus: Press and hold the power button and the volume down button until the Apple logo appears.
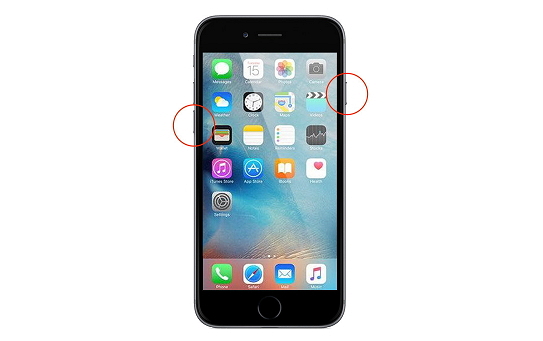
iPhone 8 and later: Press and then quickly release the volume up button and do the same with the volume down button. Now press the power (side) button until the Apple logo appears and the device restarts.
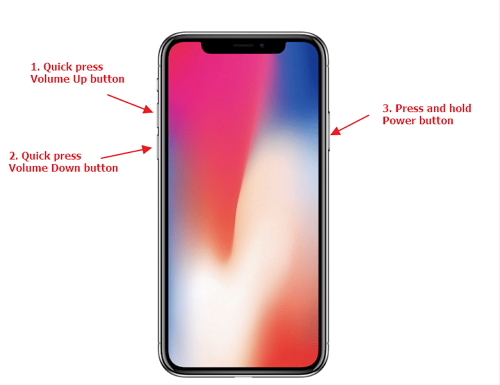
Force-restarting your iPhone manually or restart from computer can oth work to fix this auto-correction not responding issue.
Solution 5. Fix Auto-Correction Not Working on iPhone without Data Loss
If all the solutions above don't work to fix the problem, it is very likely that the iOS system itself could be the reason and an iOS system repair tool is necessary to get the device working normally again.
We recommend using iMyFone Fixppo to repair this problem. This iOS system repair tool is ideal because it offers a simple and easy solution for iOS repair, making it ideal even for the beginner user.
- Fixppo can fix iOS issues without data loss.
- It supports all iPhone models including iPhone 13/14/15/16 and all iOS versions including iOS 16/17/18.
- Fix iPhone problems including iPhone stuck on Apple logo, iPhone battery percentage stuck, etc.
- It has been recommended by many professional websites around the world.

To use Fixppo to repair the program, download and install the program on to your computer and then follow these simple steps.
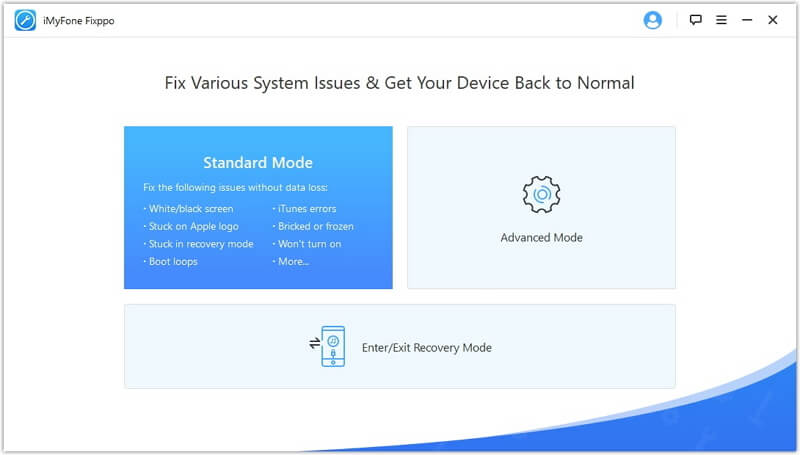
Step 1: Open Fixppo after successful installation and you should see three options. Click on "Standard Mode" which we will use to try and fix this Auto-Correction issue without risking the data on the device.
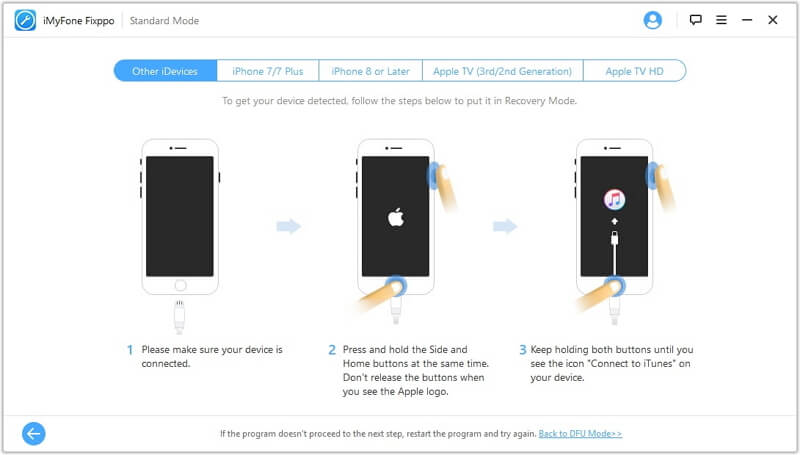
Step 2: Now connect the iPhone to the computer and unlock it. Sometimes, the program may fail to detect the connected device. If this happens, you may be required to put the device in recovery or DFU mode. Just follow the on-screen instructions to put the device in DFU or recovery mode.
Step 3: Once the device is detected, the program will present you with various firmware options to choose from. Select one and then click "Download".
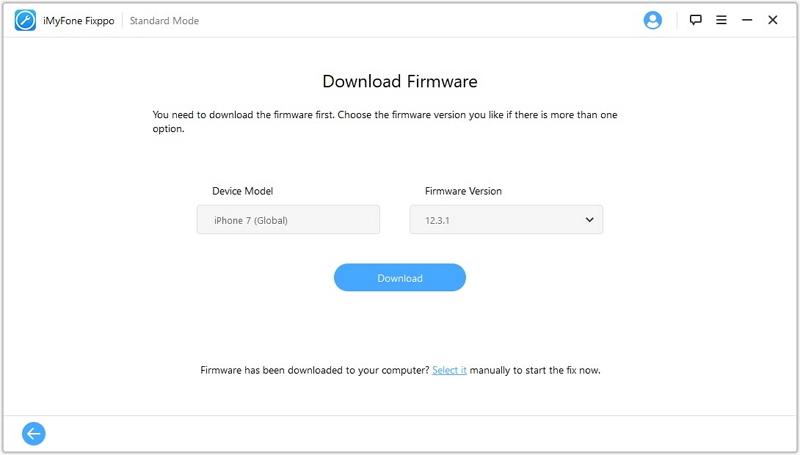
Step 4: As soon as the download is complete, click "Start" and the program will begin repairing the device immediately.
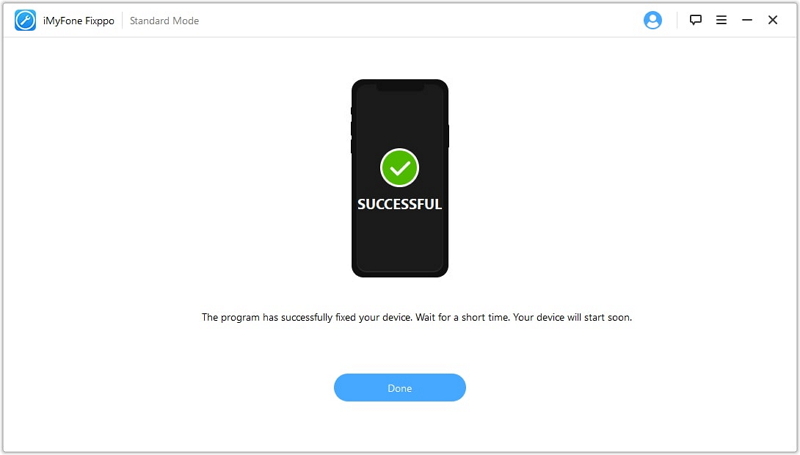
Once the repair process is complete, the device will restart and the Auto-Correction problem will be fixed. Download a free trial version of this program from one of the links on this page to find out its usefulness for yourself.
Solution 6. Train Auto-Correction
Auto-Correction usually works by detecting a wrong word before you fully type it in and offering you the right word. But it follows your own patterns and may therefore recognize wrong words as correct ones if you type them in too often.
To re-train Auto-Correction to remember the correct word, begin typing the word and when Auto-Correction guesses the wrong one, tap the "X" in the Auto-Correction bubble to remove the suggestion. Doing this for all the words will take some time, but iOS will learn the correct words in no time, fixing the issue.
Conclusion
The solutions above can all be effective in helping you fix the Auto-Correction issue not working. Select the solution based on your situation and then follow the instructions to implement it fully. Let us know if you are able to fix the problem in the comments section below. Any questions on this topic or any other iOS-related issue are also welcome.


 September 12, 2024
