Looking for a easy way to backup the data on your iPad? You can create a backup of iPad using iTunes after establishing a connection with a computer. Or you can choose to back up iPad using iCloud service. If you want to backup some important iPad data and access them on the computer at the same time, you can easily achieve it with the help of a profesional 3rd-party tool. We will explain details of the 3 ways to backup an iPad in the following text.
1 Backup iPad using iTunes
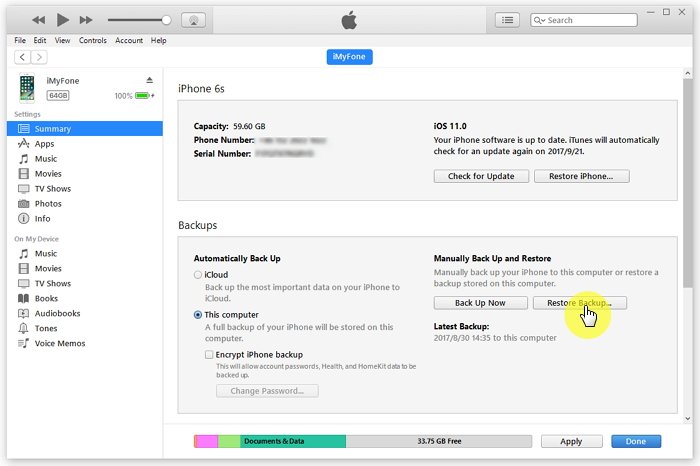
Step 1: Launch the iTunes application on your computer. You can select your device by clicking the device icon from the top right corner of the interface. Make sure that you have selected the device.
Step 2: It is preferable to synchronize the iPad with only one computer. So make sure that you are using the original computer where you first created your backup. If you are building the connection to a different computer, you will see the following message.
Step 3: If you are connecting to the original computer, you will notice a message that the iOS is out of date and will ask you to download and upgrade to the newest version. However, it is preferable to cancel the process.
Step 4: Make sure you have highlighted your iPad under the Devices column. You can then press the sync button, which will begin the backup of the system. To initiate the backup manually, you can right-click on the device icon, and press the backup option from the drop-down menu.
2 Backup iPad using iCloud
Step 1: You can create a backup of your iPad using iCloud. To do this, begin the process by connecting the device to your local Wi-Fi network.
Step 2: Choose the Settings app, scroll down the menu, and select iCloud.
Step 3: After the features open within the iCloud menu, go down the menu and press “Backup”. Ensure that iCloud Backup is in “On” status.
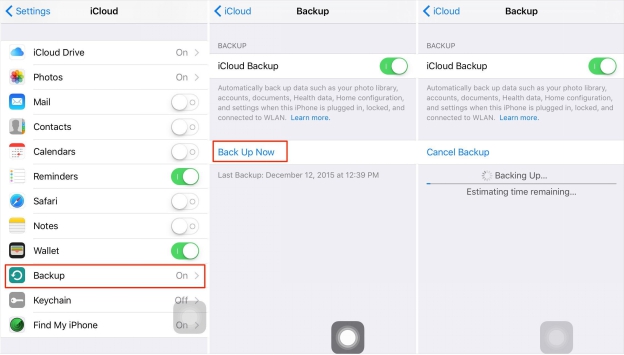
Step 4: You can now click the backup now button to begin the process. Ensure that you remain connected to your local Wi-Fi network until the process is complete. You can check for the created backup under Settings>iCloud>Storage>Manage Storage, and then choose your iPad. You will notice the details of the created backup along with the size, time and date.
3 Selectively Backup Important Data from iPad to Computer
The above procedures allow a user to backup the entire content from the iPad. If you wish to pick up the valuable content selectively from iPad and move it to the computer, you can then use iMyfone D-Back iPad Data Extractor. iMyfone D-Back is a straightforward and simple to use extractor tool, which is capable of moving selective files from the device to the computer. An advantage of using the application is its ability to dwell deep into the system and retrieve even deleted files. As it recognizes over 22 different file formats, users have the benefit of recovering almost anything from their iPad.
Steps to Backup Data from iPad to Computer Using iMyfone D-Back
Step 1: Choose Extraction Mode
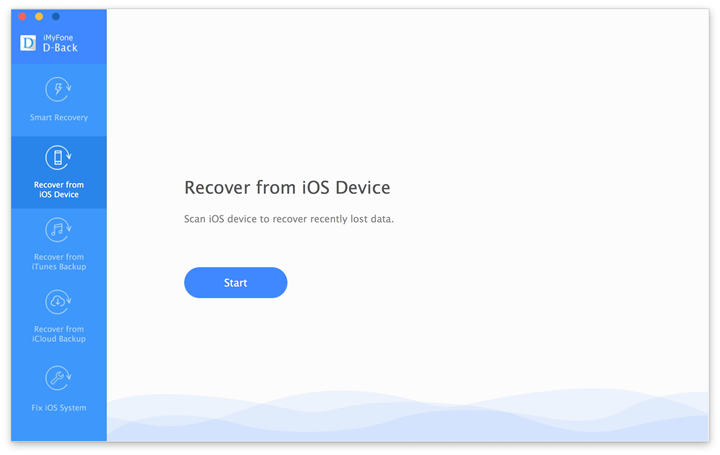
Download the trial version of the application from the official website. After installation, launch the program, and from the main interface, choose "Recover from iOS Device" feature.
Step 2: Pick the File Format
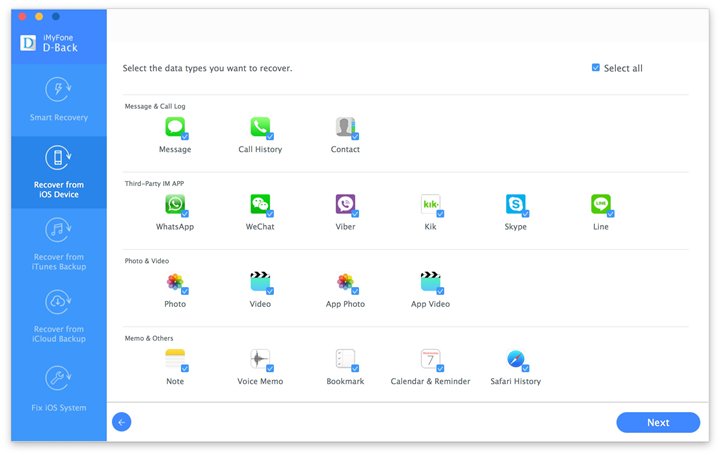
Press the “Start” button. The software will ask you to pick the file format that you wish to retrieve from the iPad. You can mark all the file formats, including third party applications, and press the “Next” key at the bottom of the screen. Connect your iPad when the application prompts a message to connect the device.
Step 3: Connect iPad to the Computer
iMyfone D-Back will identify the connected iPad. Press the scan button to initiate the scanning procedure to identify the selected file formats.
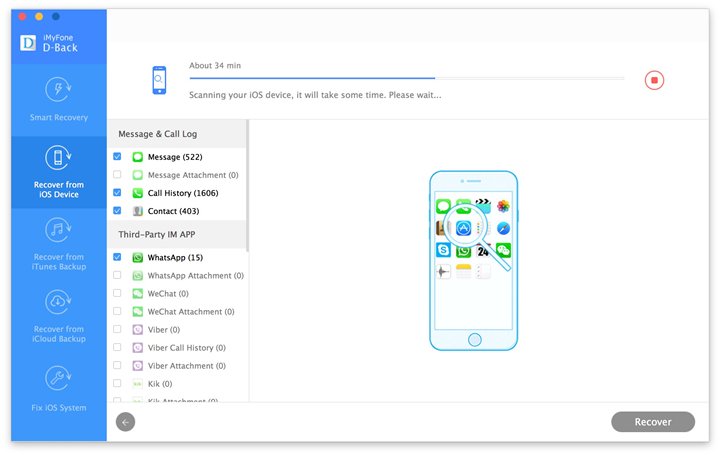
Step 4: Preview and Selectively Backup iPad Data
You will see the list of the recoverable files in the preview window. You can then mark all the files that you wish to recover and press the “Recover” button to begin saving the files.
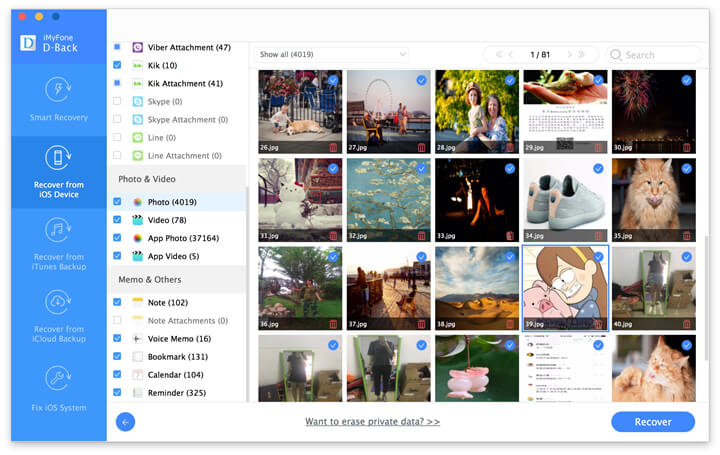
iMyfone D-Back iPad Data Extractor will ask you to choose the folder or path where you wish to save the files. Select a folder on your computer and wait for the program to complete the recovery of the data.


 January 12, 2023