- Try to locate your iPhone/iPad, maybe it is possible to get it back.
- If it is impossible to get it back, then all you need to do is retrieving your memorable photos from the lost/stolen iPhone/iPad.
Before diving into the solutions on how to retrieve photos from the stolen iPhone/iPad, we'll tell you how to locate your iPhone/iPad.
- Option #1 How to Recover Photos from Lost iPhone/iPad - from iCloud Without Restoring

- Option #2 Download iCloud Photos to Mac Computer
- Option #3 Download iCloud Photos to Windows Computer
- Option #4 Restore from an iCloud Backup
- Option #5 Use D-Back to Extract the Photos from iTunes without Restoring

- Option #6 Restore from an iTunes Backup
How to Locate Your Stolen or Lost iPhone/iPad
Once you've lost your iPhone/iPad or have found that your iPhone was stolen, try to locate it as soon as possible:
- Access your iCloud via a web browser, if you can only see the Settings, Keynote, Numbers and Pages, that means your stolen iPhone is not associated with your iCloud account. You can do nothing to recover the photos unless you've enabled iCloud on your iPhone. On the contrast, if you've enabled iCloud on your lost iPhone, you can go to the next step.
- Click "All Devices" in your iCloud account, a list with all your devices associated with that iCloud account will be displayed as two types of devices: online and offline. If the offline devices have been activated in the last 24 hours, you'll see the last known location.
- Choose the device you want to locate. If the device is still online, you'll see it on the map. If it fails to locate your device, then you can see the last known location.
- Tick "Notify me when found", you'll receive an email when your lost iPhone is started or online.
If you fail to locate your iPhone, then we'll show you several methods you could attempt to get the photos back. We are going to share with you these ways one after the other in this article.
Assuming You Have Enabled iCloud Photos
It is absolutely possible to get the photos back on to your device if you had enabled iCloud photos. This is because iCloud Photos allow you to sync photos on all devices that use the same Apple ID. If you had enabled iCloud Photos or had an iCloud backup of your photos, you can try one of the following solutions to find how to retrieve photos from lost or stolen iPhone.
Option #1 How to Recover Photos from Lost iPhone/iPad - from iCloud Without Restoring
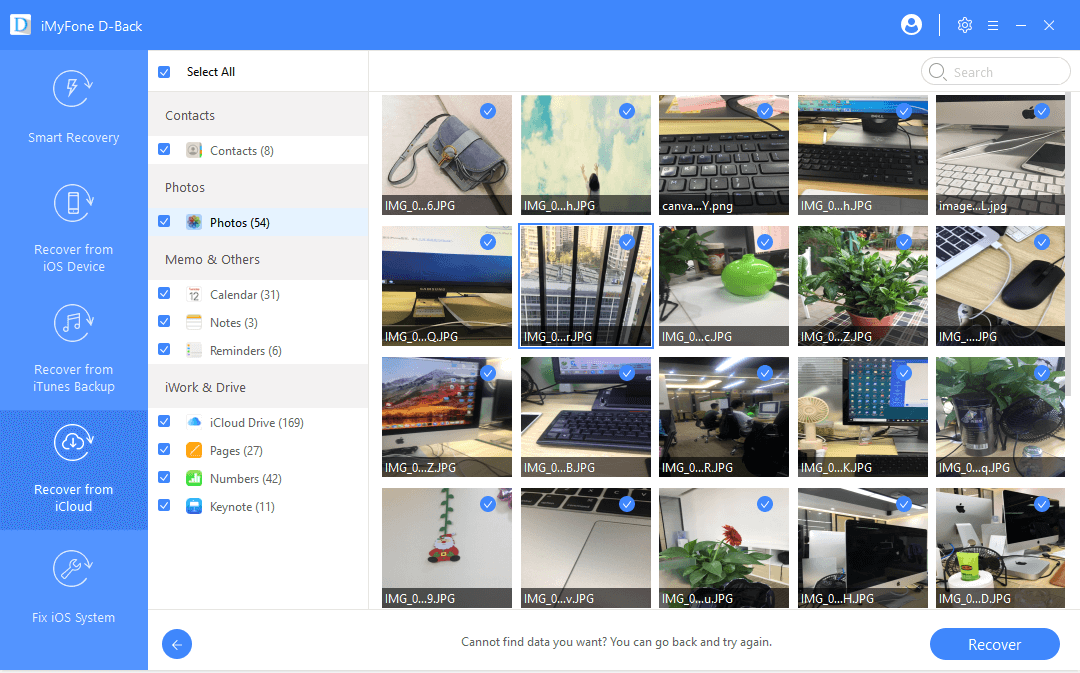
One of the easiest ways to recover your photos is to use iMyFone D-Back. This data recovery tool is instrumental in helping you selectively retrieve data from lost iPhone with iCloud. It essentially allows you to easily gain access to your iCloud account and then select the photos you would like to recover.
Key Features:
- Helps you easily recover phtos from lost or stolen iPhone/iPad.
- You are freely to choose recovery modes per your needs: recover from iTunes backup or recover from iCloud, none of them will affect the current data on your present iDevice, and it also supports to retrieve photos directly from your device without backup.
- Offers free preview function, allow you to check the recoverable photos before purchasing.
- Compatible with the latest iPhone/iPad models, supports running on iOS 13/12/11 and earlier OS versions.
To use D-Back download and install the program to your computer and then follow these very simple steps;
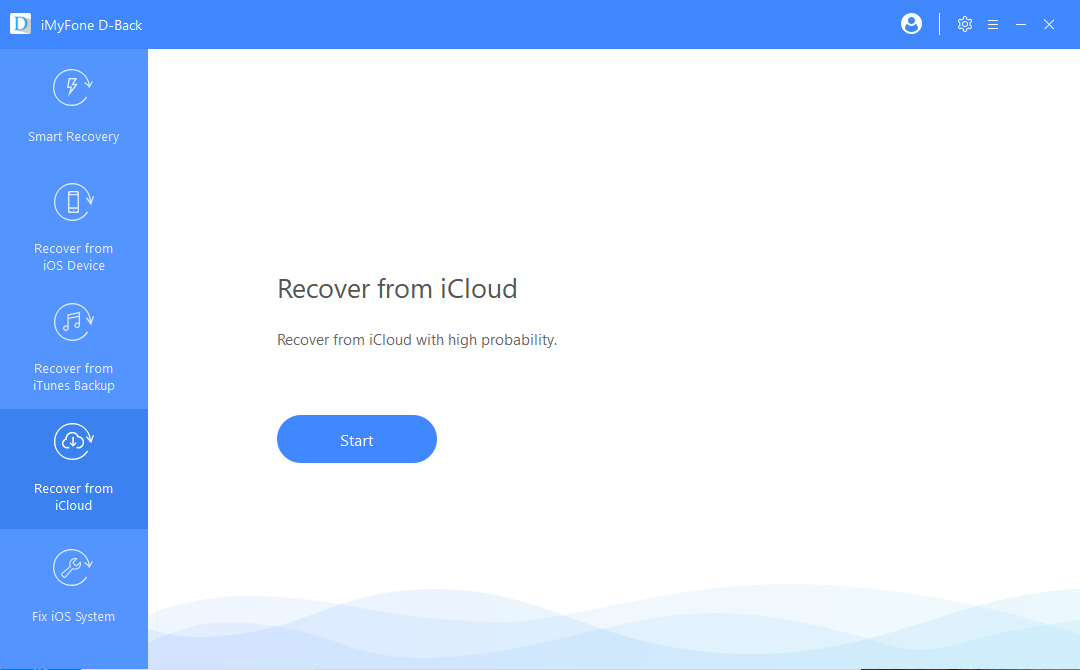
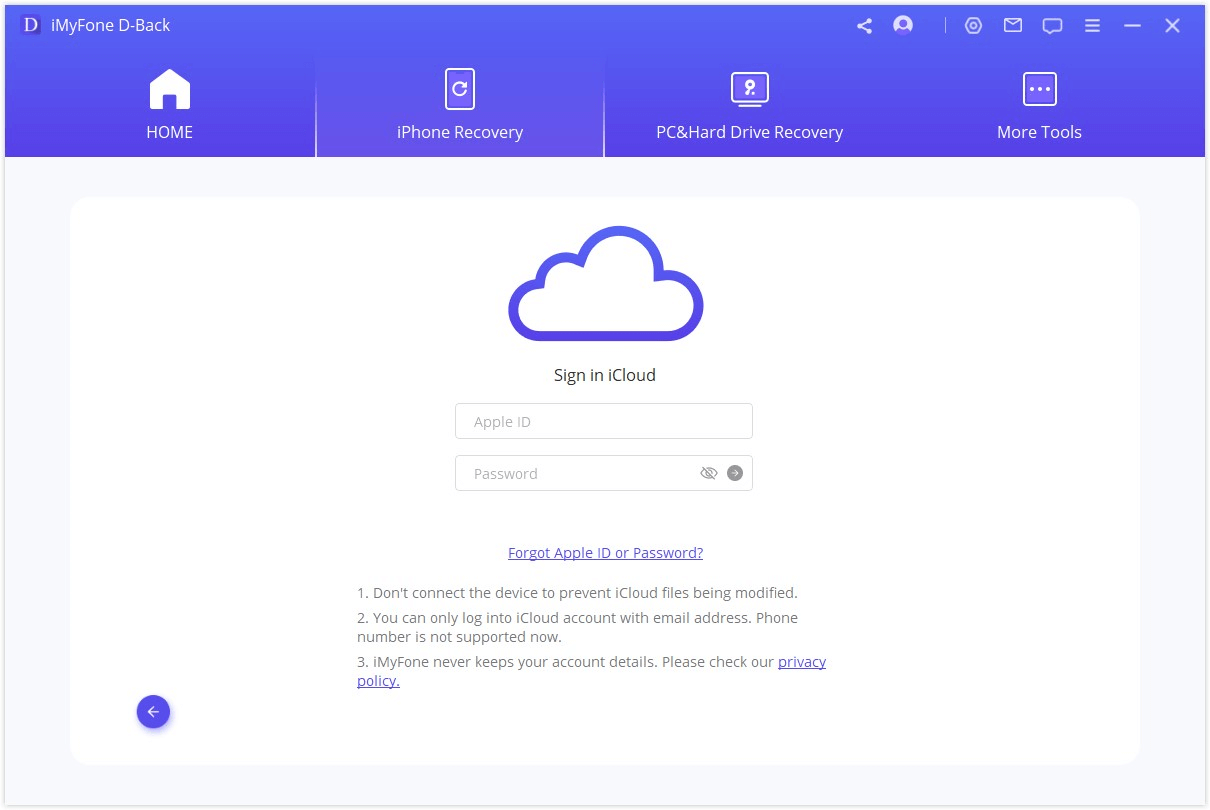
Step 1: Launch D-back and from the main window, select “Recover from iCloud” and then click “Start” to begin. You will be prompted to sign in to your iCloud account to gain access to the backup files.
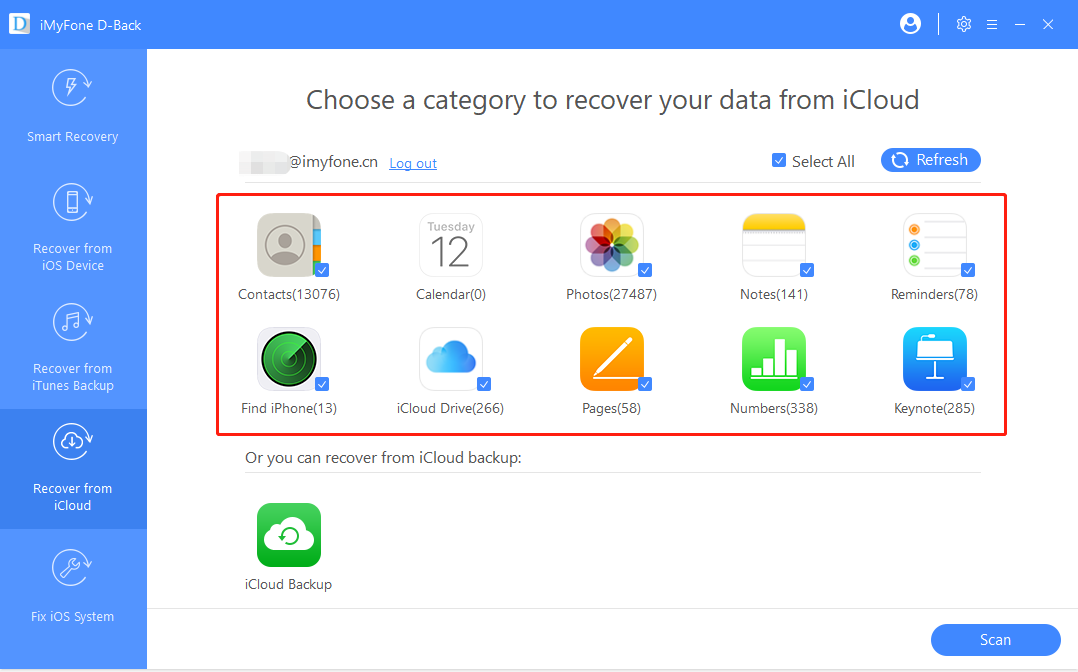
Step 2: Select “photos” as the type of data to recover in the next window.
Step 3: The program will analyze the selected backup for the missing photos and display them in the next window. Select the photos you wish to retrieve from the list and then click “Recover” to save them to your computer. You'll need to purchase a license to recover the photos to your computer.
Option #2 Download iCloud Photos to Mac Computer
You can also download your iCloud photos on your Mac. Here’s how to do it;
Step 1: Open Photos on your Mac `and then click “Photos” from the top menu.
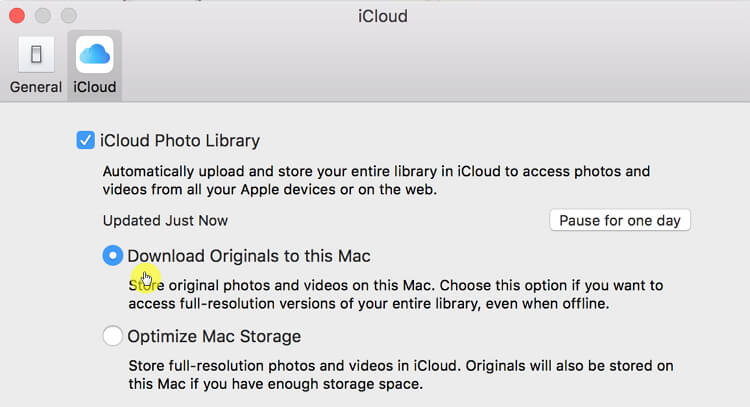
Step 2: Click on “Preferences” and then click on “iCloud” in the next window. If you have never used Photos on your Mac, you need to sign in to continue.
Step 3: Enable “Download Originals to this Mac.” Close “Preferences” once the update is complete.
Step 4: Now select “Photos” and then select the photos you want to download to the Mac. You can select multiple photos by holding Command can clicking on each image you want to download.
Step 5: Click "File > Export >Export Unmodified Originals" if you want to download the original photos you shot or “Export Items” if you edit the images and you want the current photos.
Step 6: Click “Export” and you’ve recovered your photos from iCloud which you can now transfer to your computer if you need to.
Option #3 Download iCloud Photos to Windows Computer
You may also download the iCloud photos to your Windows computer. In this instance, you will need to download iCloud for Windows if you don’t already have it. Go to https://support.apple.com/en-us/HT204283 and click “Download” to install it on your computer and then follow these simple steps to download iCloud Photos to your PC;
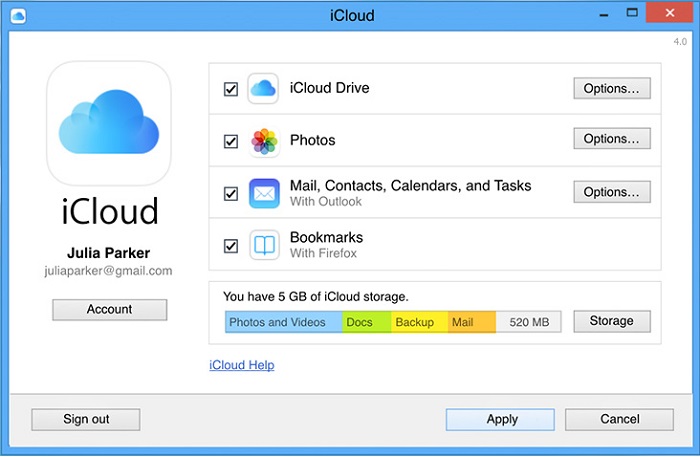
Step 1: Launch iCloud for Windows and then sign in using your Apple ID and Password.
Step 2: Click on the “Options” button next to Photos.
Step 3: Make sure that iCloud Photo Library is enabled and then click “Done.”
Step 4: Click “Apply.”
Step 5: Now from the “Start” menu select “iCloud Photos” and then click “Download Photos and Videos.”
Step 6: Check the box next to the year whose photos you want to download or select “All.” Click on “Download and iCloud will begin downloading the photos to your computer.
Option #4 Restore from an iCloud Backup
And of course you could also restore your iCloud backup to your device if you want to get your photos back. But restoring the device from iCloud may mean that you lose all of the new data on the device. The following is how to restore data from an iCloud backup file;
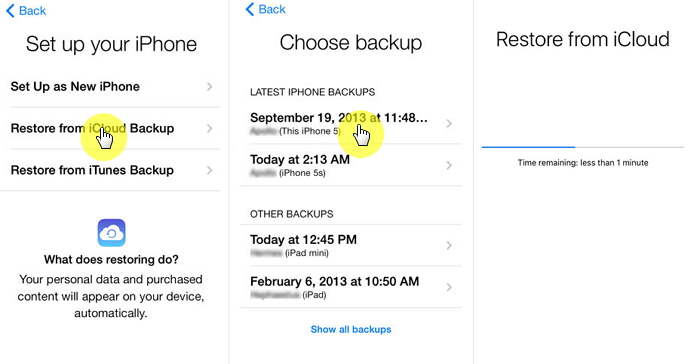
Step 1: If you had already set up the device, you will need to erase all contents and settings first. To do this go to Settings > General > Reset > Erase All Content and Settings. This should take you to the setup screen.
Step 2: Follow the setup assistant prompts until you get to the Apps & Data Screen and then choose “Restore from iCloud Backup.”
Step 3: Sign in to iCloud and select the most relevant backup. Stay connected to the Wi-Fi network until the process is complete.
Assuming that You Have Backed Up Your Device in iTunes
If you had a backup of the photos on iTunes before you lost the phone, there are two ways you can get the photos back.
Option #5 Use D-Back to Extract the Photos from iTunes without Restoring
The best way to get photos from stolen/lost iphone via an iTunes backup is to use iMyFone D-Back, a data recovery tool that can be used to extract data from an iTunes backup file without having to restore the device. The following is a simple step-by-step tutorial to help you use D-Back to extract the photos you need.
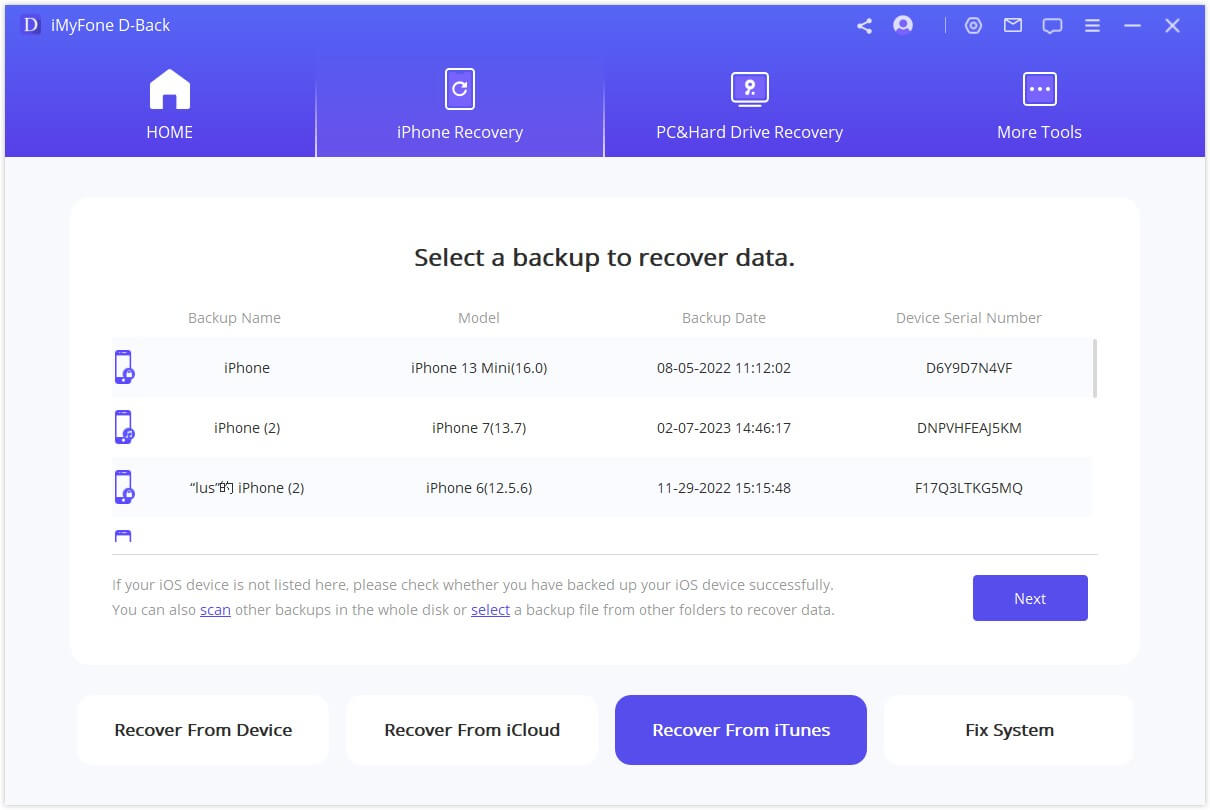
Step 1: Download and install the program to your computer and then open it. From the main window, select “Recover from iTunes Backup” and then click “Start.” You should see a list of iTunes backup files on that computer listed in the next window. Select the most relevant one and then click “Scan.”
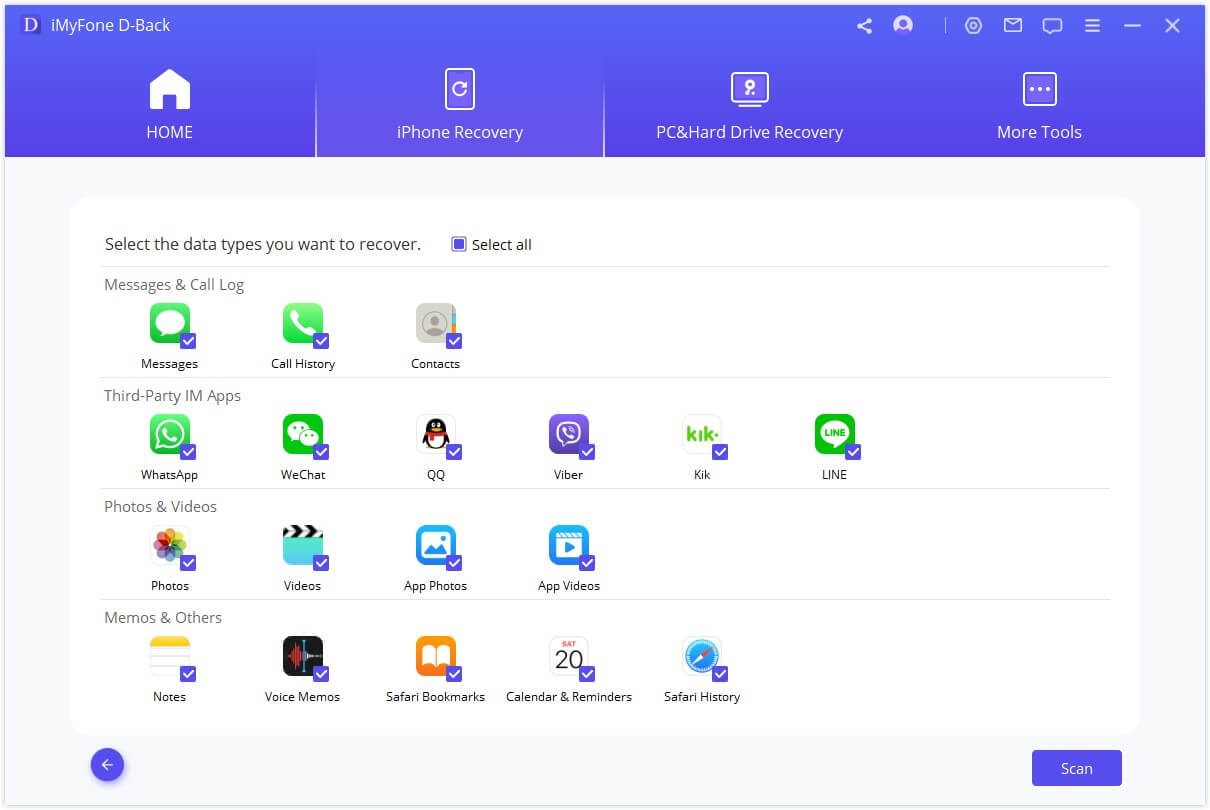
Step 2: Select “Photo” in the next widow and then click “Next” to continue.
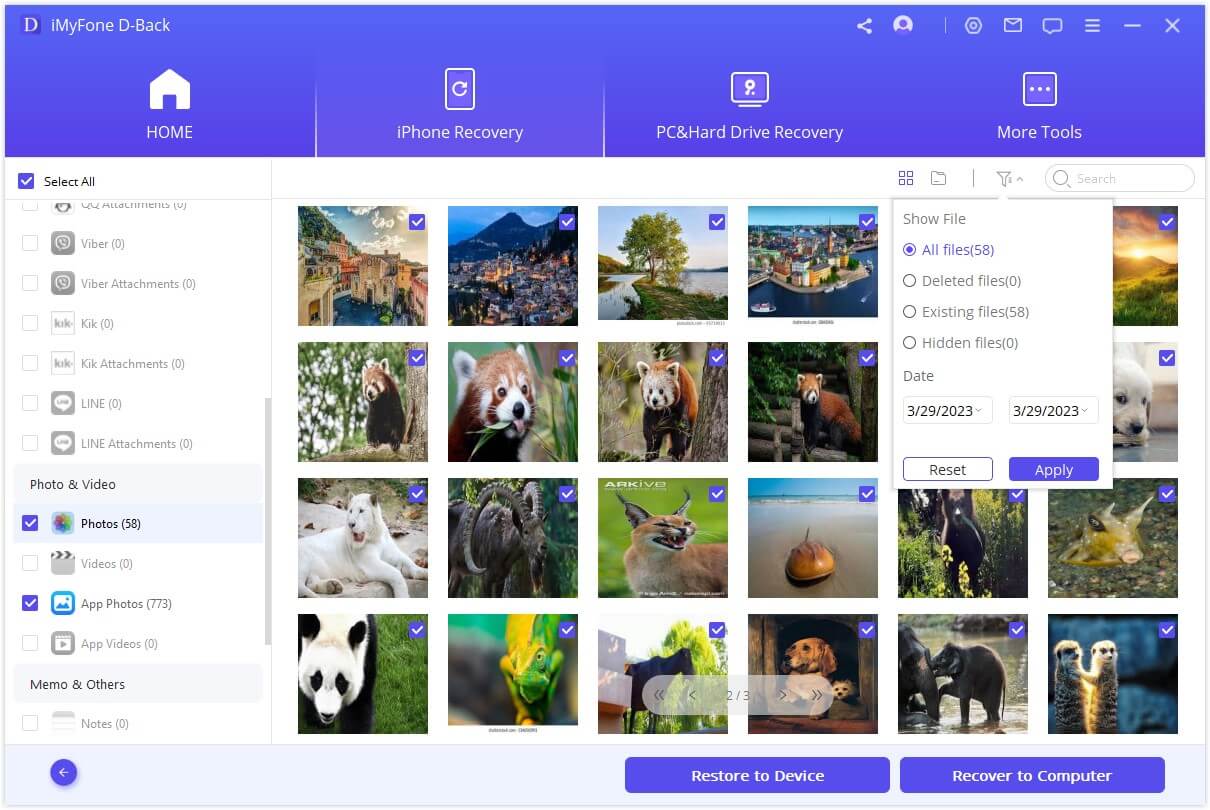
Step 3: From the results page, select the photos you would like to recover and then click “Recover” to save them to your computer.
Option #6 Restore from an iTunes Backup
Of course you could simply restore the iTunes backup. Although, it is important to note that you may lose all the new data on the device after a restore. Here’s how to do it;
Step 1: Launch iTunes on your computer and connect the iPhone to the device using USB cables.
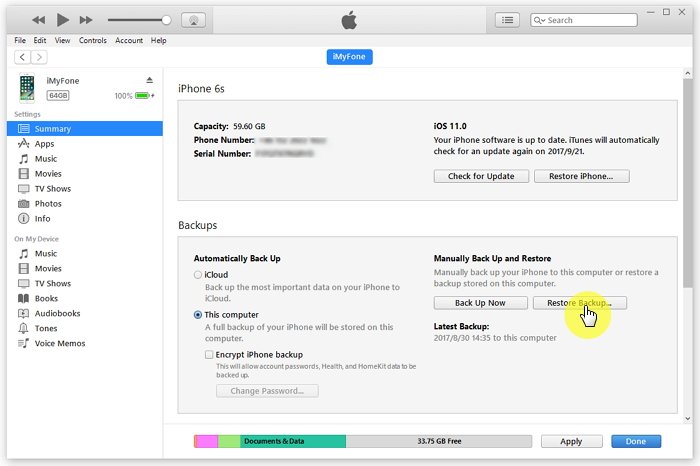
Step 2: Select the iPhone when it appears in iTunes and then click on “Restore Backup.”
Step 3: Select the most relevant backup and then click “Restore.” You may be required to enter your password if the backup you selected was encrypted.
It is important that you keep the device connected to the computer until the process is complete. Once the backup is restored, you should have the photos back on your device.
Bottom Line
Above are the options on "how to recover photos from lost iPhone". Got iPhone stolen can be annoying, a professional data recovery tool can do great help while it's impossible to get the stolen iPhone back at this time.


 January 12, 2023
