Most of us love the camera of our iPhone and we buy this advanced device to save many great pictures on it. Even though the iPhone users are careful about PNG or JPEG and JPG pictures in their Photos app, there are chances of losing some images accidentally.
You might also lose the images if you interrupt the data transfer or you deliberately delete the pictures and then realize that you need them. When this happens, you will immediately think about JPEG recovery from iPhone.
Basic Knowledge of JPEG
Before we show the top 7 ways for JPEG recovery from iPhone, get to know what exactly JPEG is. JPEG, short form for Joint Photographic Experts Group, is one of the most popular methods for compressing the images.
For its great image quality and compatibility, it is used for storing and transferring images. Images with JPEG compression are known as JPEG photos. The pictures that are taken by digital cameras and mobile devices are saved in this format.
Top 7 Ways for JPEG Recovery on iPhone
With the widespread use of JPEG pictures, it is common to encounter the problem of losing pictures on iPhone. But JPEG recovery is possible using the top ways that are given below.
1 Go to Local Data Recovery Store near You
If you find that you have lost the photos on your iPhone and don’t know what to do next, you can go to a local data recovery store near you. The technicians will try various methods and recover your lost photos easily. If it is inconvenient for you to go out, you can check the following methods then.
2 JPEG Recovery on iPhone from Recently Deleted Album
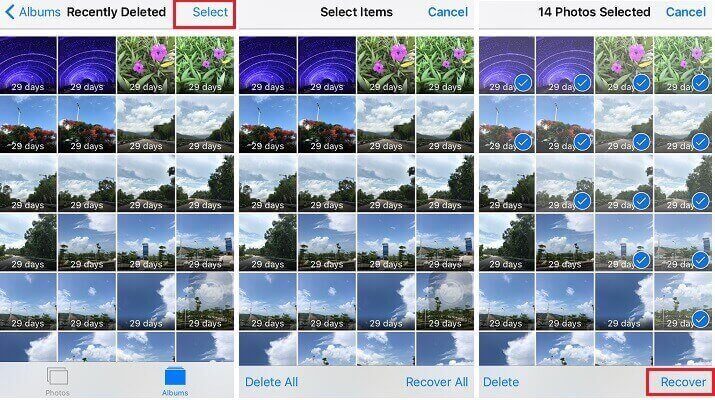
When you delete the photos and videos on your iPhone, they get saved in the Recently Deleted album on your device. You can recover those photos that are deleted within the last 30 days from that album.
Step 1: Go to the Photos app. Scroll down to find the Recently Deleted album.
Step 2: When you tap on it, you can find all the photos that are deleted within the last 30 days.
Step 3: Select the photos you want to recover and then tap “Recover”.
3 JPEG Recovery on iPhone from iTunes Fully Restore
This is an official way, but it will overwrite all the current data on your device. So remember to make a backup in advance.
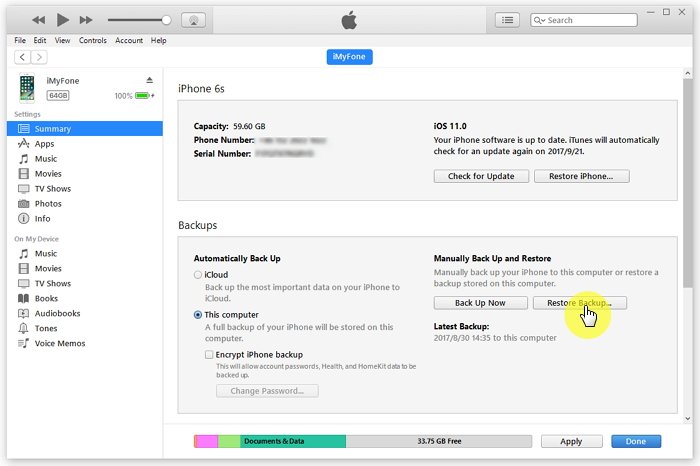
Step 1: Open iTunes on computer and connect your iPhone to it. Enter password if asked.
Step 2: Your device will appear in iTunes when it gets successfully connected. Select your iPhone.
Step 3: Choose “Restore Backup” under Backups. Update your iPhone if see a message saying the iOS version is very old.
Step 4: Select the latest backup and click Restore.
Step 5: When the Restore process is completed, the entire data including the lost JPEG photos will be recovered successfully.
4 JPEG Recovery on iPhone from iCloud Fully Restore
Before following the steps below, you must erase all content and settings on your device, which will cause data loss. Make sure you have already made a backup of your device.
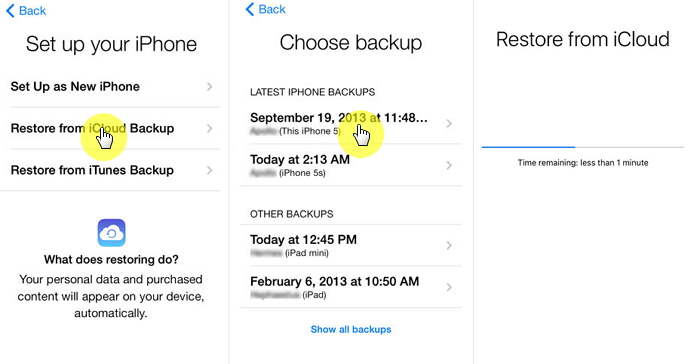
Step 1: Go to Settings -> Apps & Data on your device. Tap on “Restore from iCloud Backup”.
Step 2: Sign in to your iCloud account using Apple ID and password. Make sure you are connected to a Wi-Fi network.
Step 3: Choose the most relevant backup and wait for the process to get over.
Step 4: Sign in to your Apple account again to restore the apps and purchases, if any.
Step 5: The entire data of your iPhone, including JPEG photos will get recovered once the process gets completed.
5 JPEG Recovery on iPhone without Backup & without Restore
You can also recover the lost JPEG photos without restoring the entire backup via an advanced data recovery tool. iMyFone D-Back is a popular program for recovering the data even if there is no backup available(iPhone 13/12/11 supported).
This powerful software supports all the iOS versions and can be used to recover the data from any iPhone model. It has been recommended by CNET, techradar, PCWorld and other professional websites.

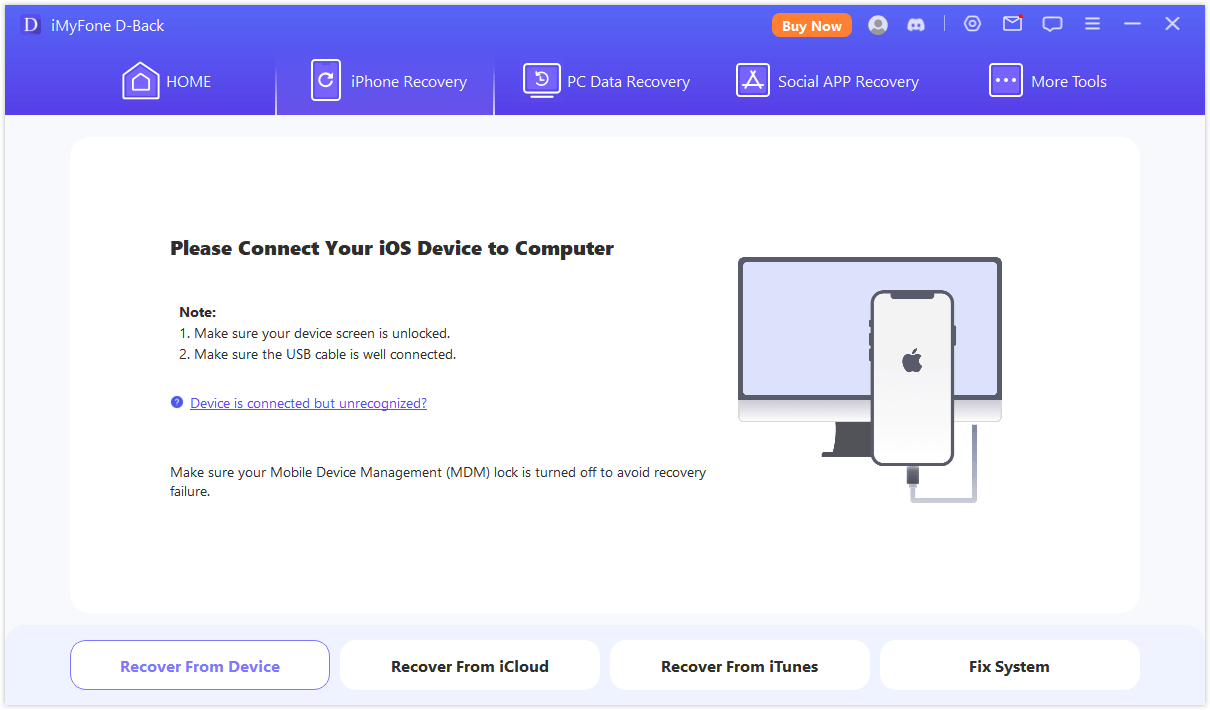
Step 1.Launch D-Back on computer and select “Recover from iOS Device”. Press Start. Connect your device to the computer. Click “Next” when the program detects your device.
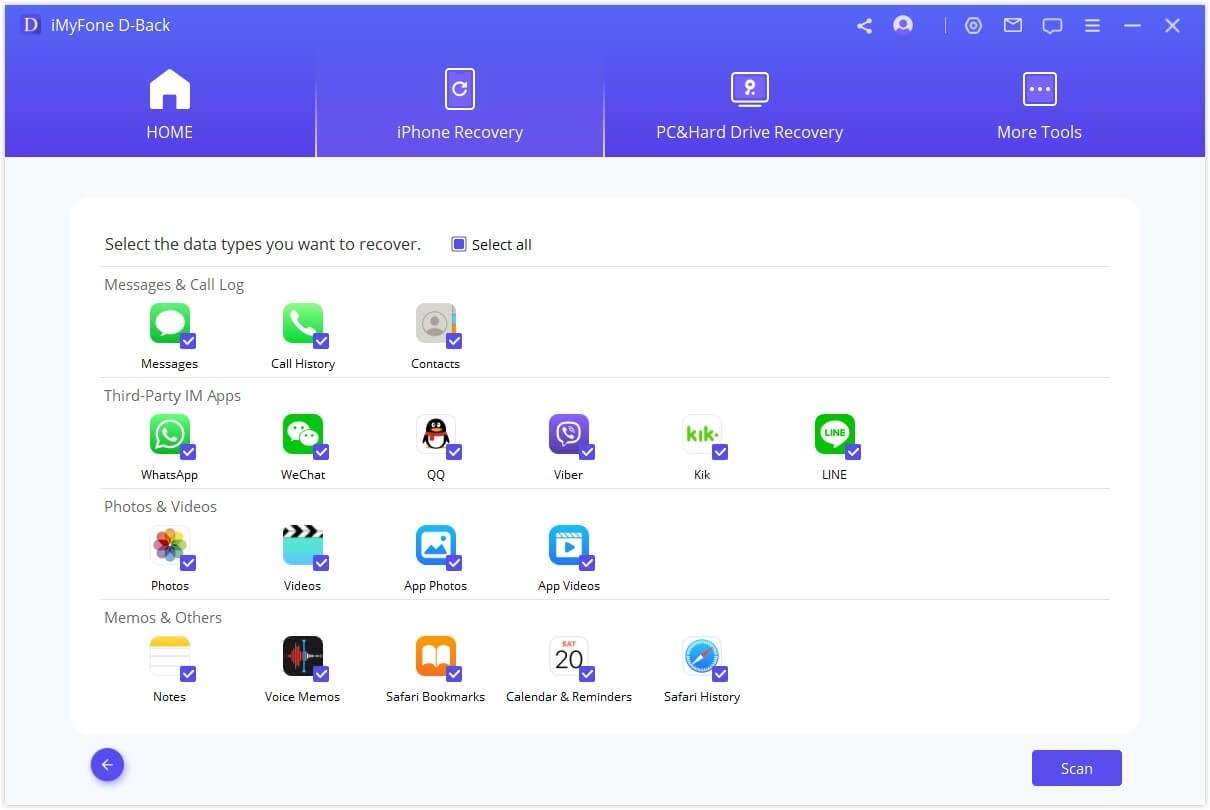
Step 2.Select “Photo” under “Photo & Video” from the options shown and click “Scan”.
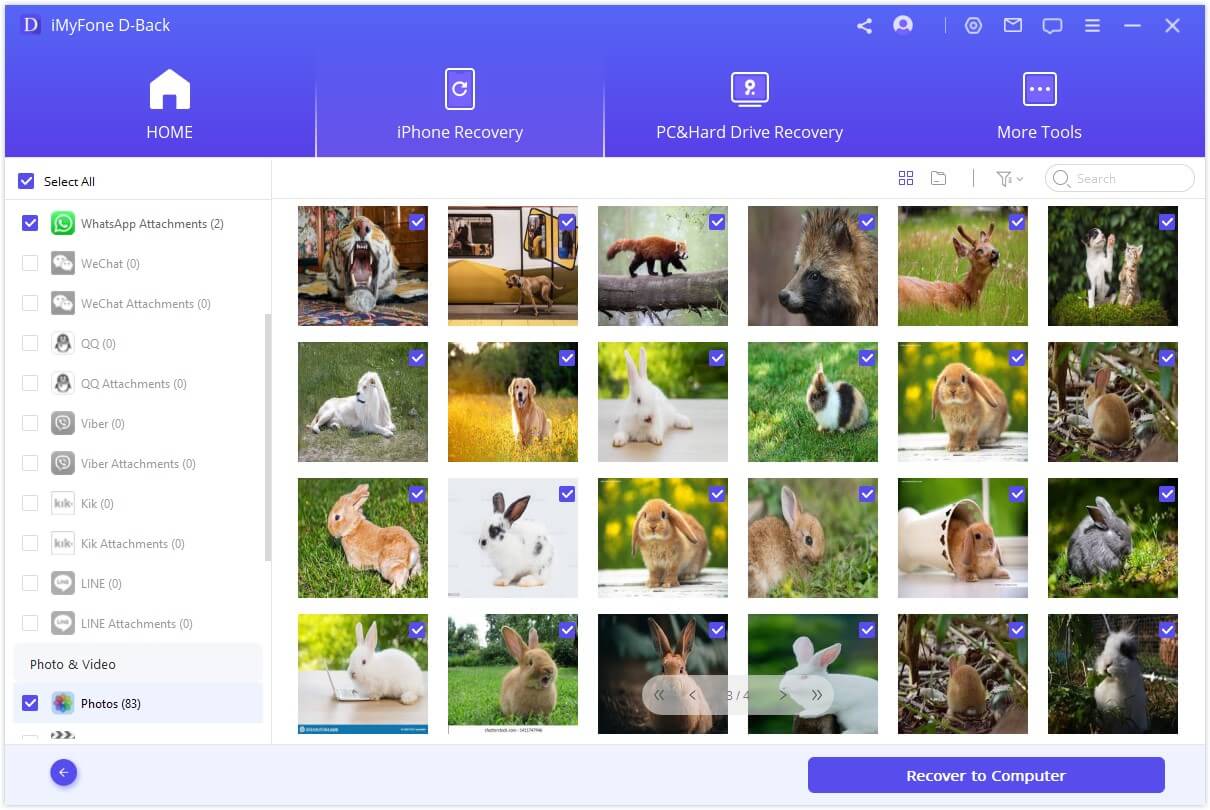
Step 3.All the recoverable photos will be displayed once the scan is over. You can preview and recover all the pictures or you can select the pictures you need. Click “Recover”. In a few minutes of time, all your JPEG photos will be recovered.
6 JPEG Recovery on iPhone Selectively from iTunes Backup
You can also recover the lost data from iTunes backup selectively using D-Back. You can select the individual files using D-Back unlike official iTunes Restore, where the previous data will get deleted after restoring the backup.
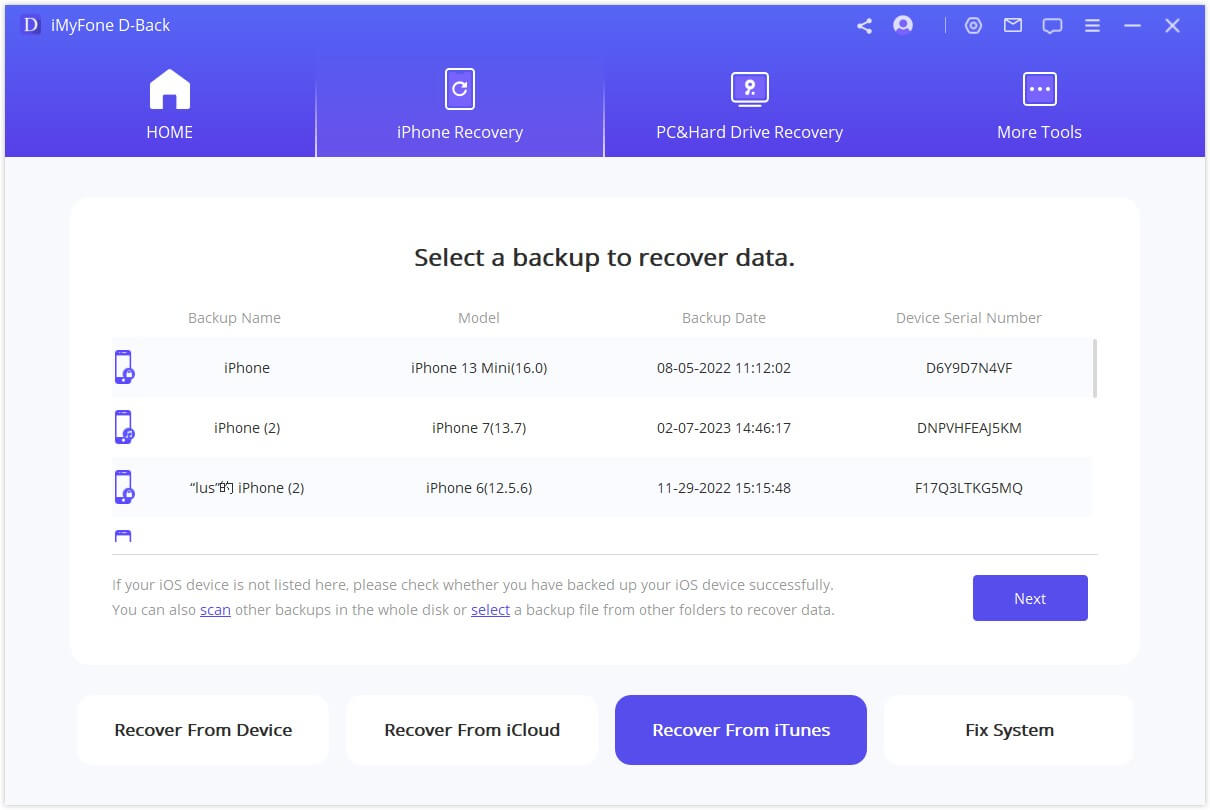
Step 1: Run D-Back on computer and select “Recover from iTunes Backup”. Press Start. Choose the most relevant iTunes backup from the options shown and click “Next”.
Step 2: Select “Photo” from the options shown and click “Scan”.
Step 3: After scanning, the recoverable photos will be displayed on screen. You can select the pictures you need to recover. Select the folder for storing the recovered JPEG photos.
7 JPEG Recovery on iPhone Selectively from iCloud Backup
iMyFone D-Back also allows the JPEG recovery from iCloud backup. When you restore the official iCloud backup, you will lose all the previous data on your iPhone.
With D-Back, you can only choose the files you need without losing any previous data.
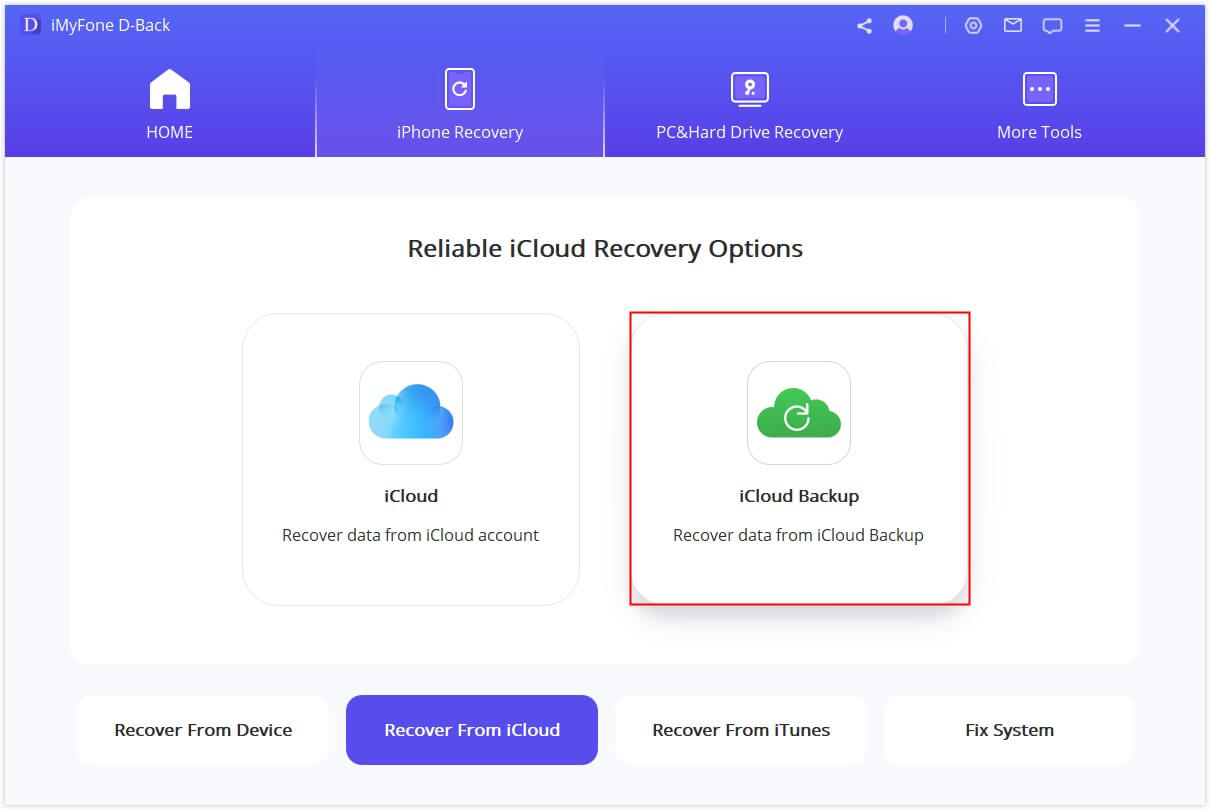
Step 1: Open D-Back on your computer and select “Recover from iCloud Backup”. Press Start. Sign in to your account using Apple ID and password. Choose the most relevant iCloud backup from the options shown and click “Next”.
Step 2: Select “Photo” under “Photo & Video” and click “Scan”.
Step 3: After scanning, you can preview and recover the pictures you need. Click “Recover”.
Reviews of the above Ways
Check which of the 7 ways is suitable for you in the table given below.
| Different Ways | Pros | Cons |
|---|---|---|
| go to local data recovery store | get a face-to-face communication with the shop assistant | privacy disclosure;inconvenient |
| from Recently Deleted Album | free | recover only the photos deleted within the last 30 days |
| from iTunes Fully Restore | free & official | restore only if you have made an available iTunes backup;replace all current data |
| from iCloud Fully Restore | free & official | previous data will be erased using iCloud backup restore;only 5GB free storage |
| via iMyFone D-Back | recover without any backup;recover selectively or fully from device;
iTunes/iCloud backups; free preview before recovery; no privacy disclosure |
need purchase the full version if you need |
Why Choose D-Back?
- Using D-Back you can recover up to 18 file types even if you do not back up your iPhone data.
- No matter how you lost the data, D-Back will help in recovering the data safely.
- When you recover via D-Back, you can select the files you need rather than the entire data.
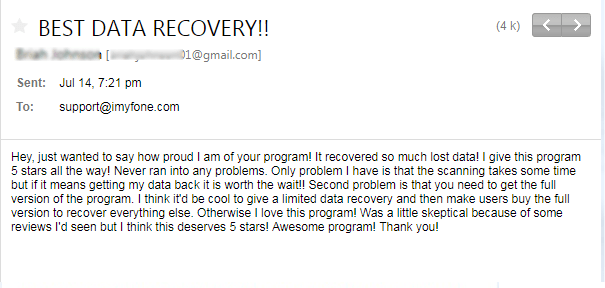
There are many good reviews of this tool. Here is one feedback from users.
Conclusion
For JPEG recovery from iPhone, we have listed all the possible methods above. Choose any of the methods you prefer to recover the lost JPEG photos on your iPhone. Leave your comments below for any queries related to iPhone data recovery.


 January 12, 2023