Being relying on the internet or WiFi these days, we must feel quite bothersome when the iPhone/iPad doesn't connect to WiFi. There are users who complain that their iPhone/iPad won't stay connected to WiFi after working smoothly for a short period.
The WiFi runs well when they connect it with their iPhone/iPad but after a few minutes, it gets disconnected on its own. For some people, their iPhone/iPad is unable to connect with the WiFi but their computer is able to do that. For others, one iPhone/iPad is working completely well while the other raises this issue.
Here are some common reasons why the iPhone/iPad won't stay connected to WiFi:
- There might be something wrong with the settings on your device.
- There is something wrong with the software or system on your iOS devices.
- Hardware on your device might be broken.
Therefore, let's check 6 efficient tips mentioned below to help you in such a situation and hopefully you'll be able to put an end to your problem after reading this post.
Note: All the tips below can be used to troubleshoot the WiFi won't stay connected issue on iPhone/iPad 6 to 15 in all iOS versions including iOS 16/17/18.
- Tip 1. Reset Network Settings If iPhone/iPad Doesn't Stay Connected to WiFi
- Tip 2. Turn off Bluetooth If iPhone/iPad Won't Stay on WiFi
- Tip 3. Disable WiFi & Restart Your iPhone/iPad
- Tip 4. Restore iPhone/iPad to Factory Settings If WiFi Won't Stay Connected
- Tip 5. Make WiFi Stay Connected on iPhone/iPad with a Professional Tool

- Tip 6. Try Another Device
If you are confused about which method to choose, you cannot miss this comparison table which will give you a brief introduction to each method. Do not hesitate to read on.
| When You Can Choose | Success Rate | Difficulty | Required Time | Data Loss | |
|---|---|---|---|---|---|
| Reset Network Settings | Only network setting issues | 30% | Easy | Short | No |
| Turn off Bluetooth | Only Bluetooth issues | 30% | Easy | Short | No |
| Restart Your iPhone/iPad | A few software issues | 50% | Easy | Short | No |
| iTunes Restore | Some software issues | 70% | Complex | Long | Yes |
| iMyFone Fixppo | All system/software issues | 100% | Easy | Short | No |
| Try Another Device | Hardware issues on your iPhone/iPad | 100% | Easy | Depends | Depends |
1. Reset Network Settings If iPhone/iPad Doesn't Stay Connected to WiFi
If your iPhone/iPad won't stay connected to WiFi for a long time for not accepting the Wi-Fi password, try resetting network settings now. As the name hints itself, it will take all your network settings to a fresh start.
Please note that this method will delete your entire networks and passwords. The steps are as goes:
- Begin with opening 'Settings' and then tap on 'General'.
- Go to 'Reset' and complete the process by hitting on the 'Reset Network Settings'.
- When you do this, you may be asked to enter the passcode. Do it and confirm resetting.

2. Turn off Bluetooth If iPhone/iPad Won't Stay on WiFi
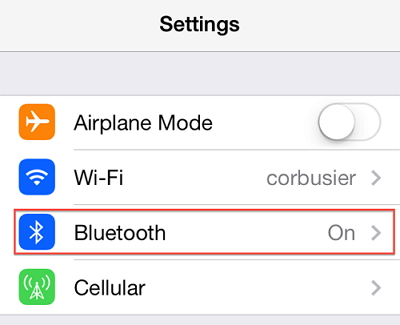
Another thing you need to try if your iPhone/iPad won't stay connected to WiFi is to disconnect the Bluetooth because the Bluetooth is able to cause some interference and inconvenience with the connection between your WiFi and device.
Therefore, to prevent this situation, go to 'Settings' and tap 'Bluetooth' and turn it off. Now use your WiFi and check if the device keeps connected to it or not.
3. Disable WiFi & Restart Your iPhone/iPad
You can, for no other reason, turn off the WiFi and give your iPhone/iPad a restart phase. Disabling the connection for a while and keeping the device stable will be likely to make the troubling functions settled and turn your device to act normal.
Also, when you restart your device, make sure to turn the WiFi back on. Now check if the problem of iPhone/iPad not connected to Wi-Fi still arises.

4. Restore iPhone/iPad to Factory Settings If WiFi Won't Stay Connected
Here is another fix to try when WiFi doesn't stay connected on your iPhone/iPad. There could be some unknown reasons with the other apps or data on your device that are causing iPhone/iPad not keeping connected to WiFi, so you need to restore your iPhone/iPad to factory settings.
This process will take the help of iTunes. All the data on your device will be erased. The steps are given just below.
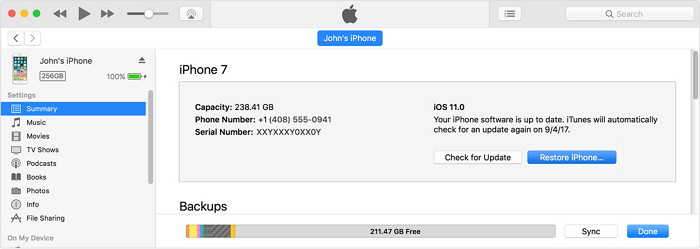
- As the first move, connect your device to the PC and open iTunes in it.
- Upon successful connection of iPhone/iPad and PC, you need to click on the device icon at the top followed by the 'Summary' tab.
- Now, choose the option 'Restore iPhone/iPad' and confirm the process.
5. Make WiFi Stay Connected on iPhone/iPad with a Professional Tool
The above methods are limited when there are some system or software issues on your iPhone/iPad. If everything above fails, do not hesitate to try to use iMyFone Fixppo to fix system issues on your iOS devices. This third-party tool is the best option when your iPhone/iPad won't stay connected to WiFi for some iOS problems. It helps no matter you have newest device like iPhone/iPad 15 running the latest iOS 16/17/18 or the older devices with other iOS version.
- The tool consists of three different modes helps the users in fixing the iOS-related issues with a 100% success rate.
- You can easily go through the repairing process by yourself since there are only 3 steps.
- You can fix the WiFi issues on your iPhone/iPad without any data loss.
Here is the easy tutorial for using the tool when the iPhone/iPad won't keep connected to WiFi.
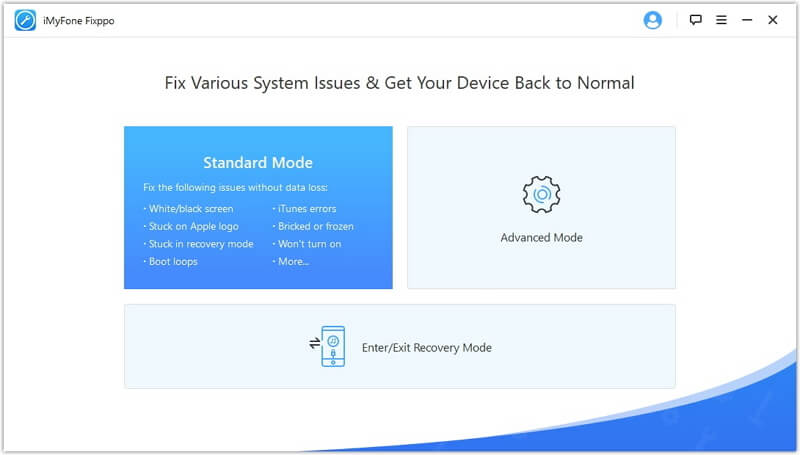
Step 1. Open the program after installing it. Make a connection between the iPhone/iPad and the PC using a lightning cable. Now, from the main screen, go for 'Standard Mode'.
Step 2. Click on the 'Download' button then. Since the program has the power to recognize your device, it will automatically give you the suitable firmware for it.
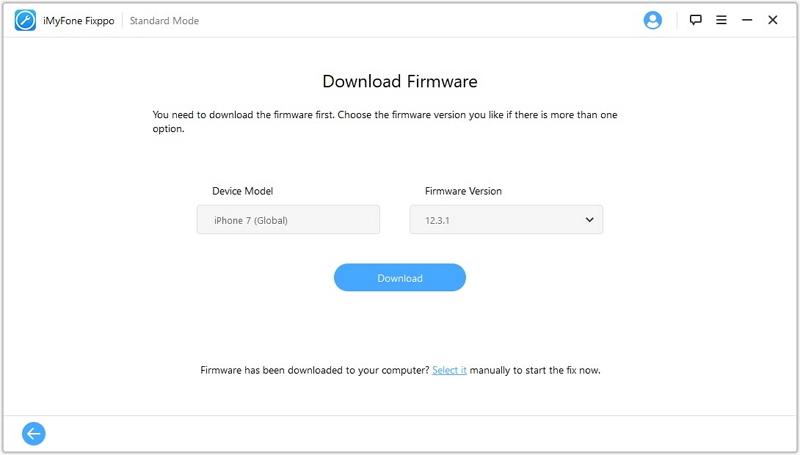
Step 3. When the download is complete, please click on the 'Start' button. By clicking on it, the repairing process will begin and your device will restart after the fixing. Your data will not be lost, and you can now check if your iPhone/iPad can keep connected to WiFi or not.
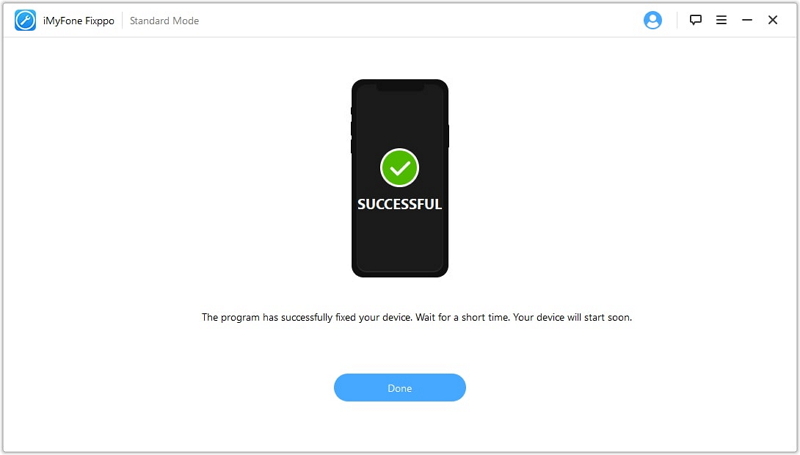
This tool can fix a large number of iOS problems such iPhone/iPad stuck on Apple logo, iPhone/iPad keeps freezing, white screen, iPhone/iPad keeps rebooting, black screen, and it will not affect the data in your device. Just try it now and it has been highly recommended by a lot of media sites around the world.

6. Try Another Device
Probably you've tried this as the beginning step when your iPhone/iPad won't stay connected to WiFi. But if you haven't, we recommend that you try connecting the WiFi with any other device because there might be something wrong with the hardware on your device.
If the other phone is also popping up the same trouble, then you should restart the router of your home. Alternatively, simply switch to another WiFi connection. In case, the other device shows no such problem and connecting successfully, then your iPhone/iPad has to go under the treatment. Look for the Apple support center to get the problem solved.
Conclusion
Now you will learn all the best methods on how to make WiFi stay connected on iPhone/iPad. If you have any other problems with WiFi on your device, feel free to leave them here and we will try our best to help you.


 August 15, 2024