


 March 29, 2023
FreeNAS/TrueNAS is an Open Storage that allows the user to store different types of applications. It provides suitable storage space for the purpose. However, data can corrupt or get deleted at any time, which can be frustrating. But you can still recover the lost data. In this article, we will discuss how you can recover FreeNAS/TrueNAS deleted files.


Part 1. Free Download the Data Recovery Software to Recover Deleted FreeNAS/TrueNAS
iMyFone D-Back Data Recovery Expert is a data recovery tool. It helps the user to get the previously lost or deleted data easily. It has a friendly and simple user interface that attracts the user to it. Unlike most complex recovery tools, iMyFone D-Back Data Recovery Expert supports numerous file types and has a very high success rate of recovery.
If you want to recover deleted FreeNAS/TrueNAS files, then you can follow the three simple steps below. It works in almost all cases and recovers your files safely. There is no data loss, and the recovered files are usable.
Here is a simple explanation of how iMyFone D-Back Data Recovery Expert works. You can then compare it to other complex and expensive recovery tools that have a low recovery success rate.
Step 1: The first thing is to download the iMyFone D-Back Data Recovery Expert from the website. It is compatible with both Windows and macOS, so download it according to your preference. Install the tool and open it.
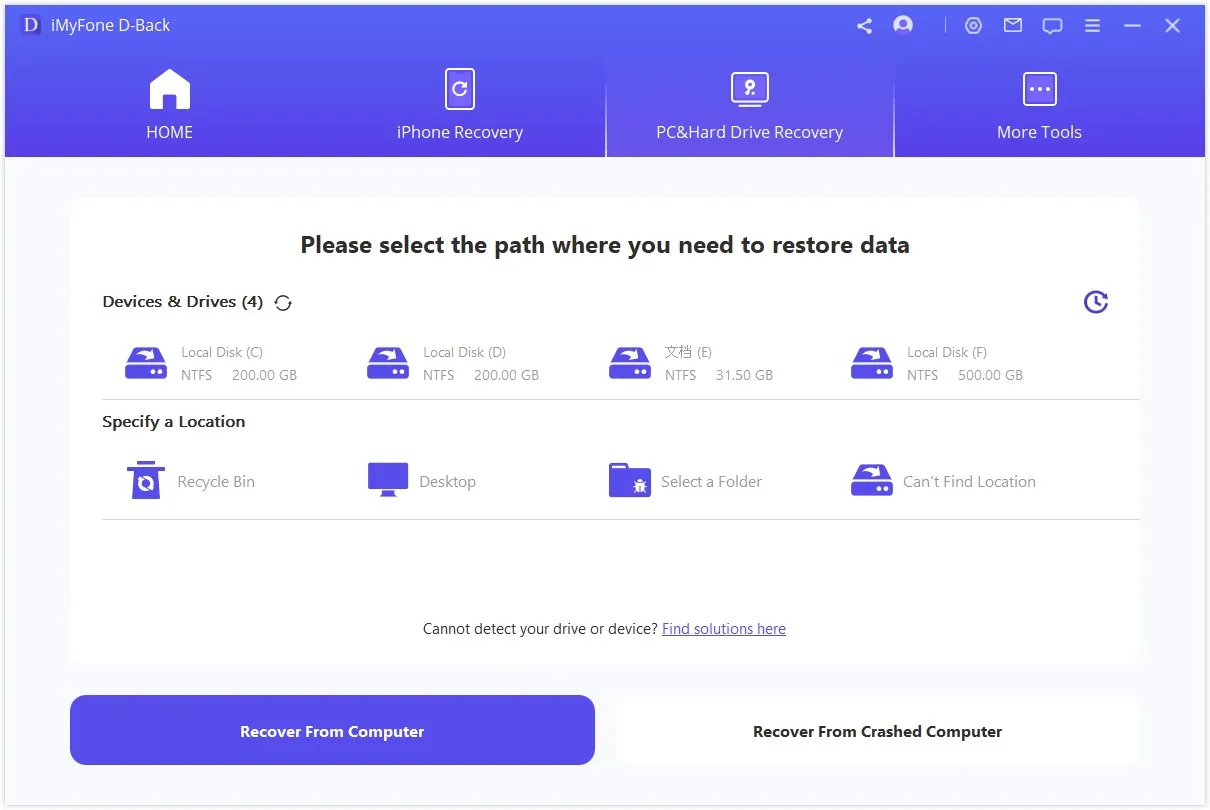
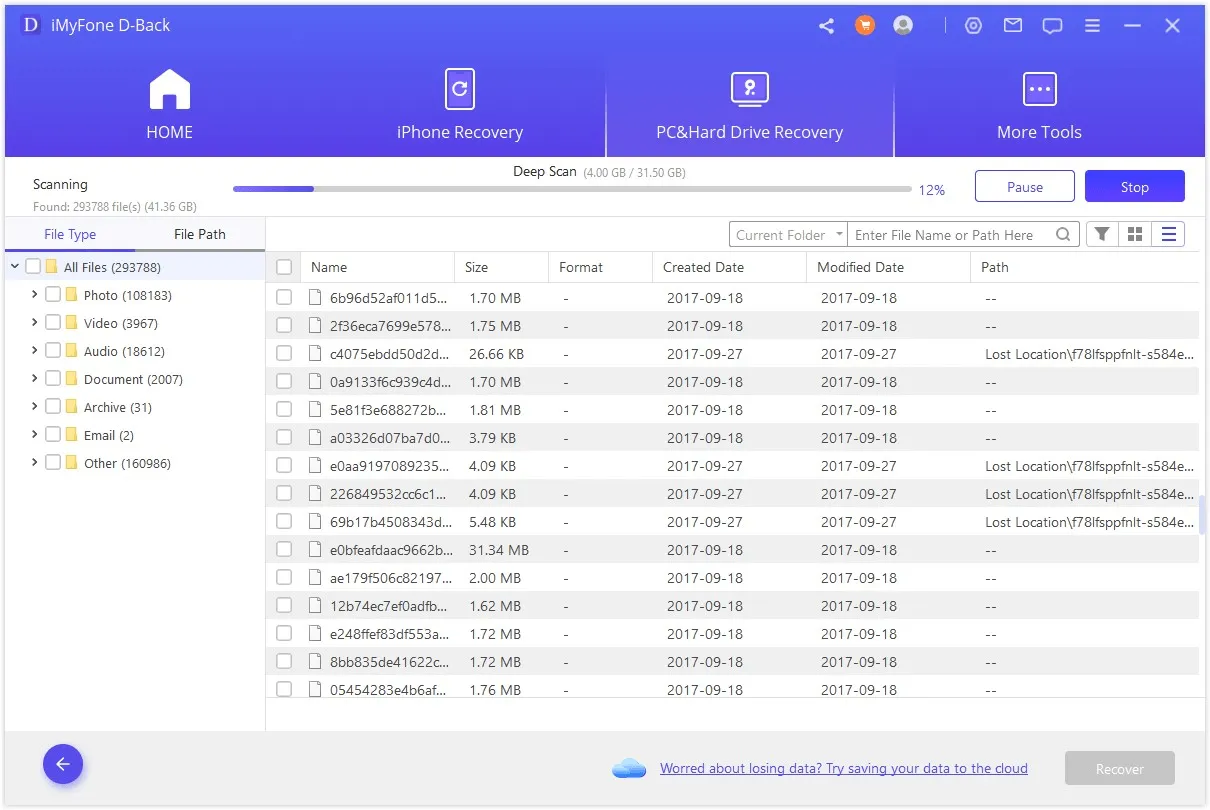
Step 2: The interface is quite interactive, and the user does not get confused with it. Choose the drive in which the files were present, the files that you lost. The software will start the scan. It will do a quick scan and then a deep scan.
Step 3: The deep scan takes time to finish, and it depends on the data. Then, you can preview the files. Select the files that you want to recover. Click on 'Recover' and choose the path where you want the files to be saved after recovery.
Part 2. Recover FreeNAS/TrueNAS Deleted Files from Snapshots
2.1. What Are Snapshots in FreeNAS/TrueNAS?
Snapshot is a unique feature of FreeNAS/TrueNAS. People say it is the most engaging feature as it provides a read-only copy of the file system. This snapshot or copy does not consume any extra space; it only records the difference whenever the data is changed or modified to storage block reference.
Snapshot is a history keeper. It records the history of the files. It allows the user to recover deleted files or even older versions of files. This is the reason it is recommended that people should take snapshots regularly so that their work is secure. In case of any accidental deletion, it can help in data recovery.

2.2. How to Restore FreeNAS/TrueNAS File from Snapshots?
Before restoring a FreeNAS/TrueNAS file, you must have previously stored a snapshot. To take a snapshot, go to 'Tasks' Periodic Snapshot Tasks' and click on 'ADD'. Here, you need to choose a dataset to schedule as a regular backup with snapshots, while another option is how long to store these snapshots. You can also customize these settings by going into the Advanced Scheduler section.

To restore FreeNAS/TrueNAS files from the snapshot, you need to clone the snapshot. After cloning, share the clone and copy the file from the shared clone. Now unshare the clone and delete the clone. But in Windows, when you export the snapshot, you can also get access to the previous version of the file. Here, you don't need to make a clone.
Part 3. FAQs about FreeNAS/TrueNAS File
1 Can I restore the permanently deleted FreeNAS/TrueNAS file?
If you don't have iMyFone D-Back Data Recovery Expert, then there is very little possibility of restoring permanently deleted data or files.
If you have permanently deleted FreeNAS/TrueNAS files, then they can be recovered from backup. But if you don't have a backup, then a snapshot can help you get the deleted data. But when there is no backup or snapshot, iMyFone D-Back Data Recovery Expert will help you to get the data back.
2 How to create Windows File share in TrueNAS?
After installing TrueNAS, it is important to have a Pool configured and an Active Directory. If you don't have Active Directory, go to the left menu panel and click on 'Sharing'. Under the option of Sharing, click on 'Windows Shares (SMB)'. Click on 'ADD' in the top right corner and create a pool. Now, Submit it. Share is now created.
Go to the left menu panel again, click on 'Services' and enable SMB. Now, go to 'Accounts' on the left-hand side and click on 'User'. Add a user, enter a user name and password and click on 'Submit'. The user is now created. You can now access the Windows share.
3 How to create a shared folder using FreeNAS?
If you are using Windows 10, you can follow these simple steps to create a shared folder using FreeNAS.
Open FreeNAS in the internet browser and sign in to your root account. Go to the left panel and click on 'Sharing,' and then click on 'Windows (SMB) Shares'. Click on the 'Add' button under the section of SAMBA. Now, the user needs to select the dataset previously created. Name the folder that you want to share and hit the 'Save' button. The shared folder will be created, and it is now accessible from any Windows platform.
Conclusion
We saw that it is possible to recover the deleted files from FreeNAS/TrueNAS. However, to back up the data, it is important to have a backup, or you have taken a snapshot. In either case, you don't need a third-party recovery tool.
But if neither of the tricks works, iMyFone D-Back Data Recovery Expert can help the user to recover the lost data. It is a professional data recovery tool that recovers lost, deleted, and corrupted data. It also helps the user to recover FreeNAS/TrueNAS data. It has a free version that allows the user to download and use it to recover data of different file types.