


 March 29, 2023
Word documents are important to everyone. But the documents can be lost, replaced, or deleted for various reasons. If you accidentally replaced the Word document, then read this article in full. We will discuss all the possible solutions to recover accidentally replaced Word documents on Windows and Mac.
- Part 1: Can I Recover a Replaced Word Document on Windows 10/8/7 Mac?
- Part 2: How to Recover Word Document that was Replaced on Windows /Mac
- 2.1. Recover Replaced Word Document in an Efficient Way (Win & Mac)

- 2.2. Recover Replaced Word Document with Temporary Files
- 2.3. Recover Replaced Word Document with AutoSave on Mac
- 2.4. Recover Replaced Word Document with AutoSave Option
- Part 3: FAQs

Part 1.Can I Recover a Replaced Word Document on Windows 10/8/7 Mac?
Yes. You can recover a replaced Word document on Windows and Mac in different ways. We will discuss default and built-in features as well as a third-party data recovery tool to perform this task. However, default methods may not work sometimes, but iMyFone D-Back will work every time. It is simple and secure, and no data is exploited with this tool.
Part 2. How to Recover Word Document that was Replaced on Windows /Mac
2.1. Recover Replaced Word Document in an Efficient Way
If you want one most efficient way to recover your replaced Word document, you can go for a third-party data recovery tool, such as iMyFone D-Back. It is a very powerful tool and can recover any data type without problem. You just need to specify the drive, and the tool will perform a deep scan, and all your files will be displayed.
iMyFone D-Back can recover data from SD Cards, cameras, USB flash drives, and also from external hard drives. It allows you to preview the data and then recover it. It is also capable of recovering raw partitions and formatted partitions. iMyFone D-Back works in almost all scenarios and provides ease to the user by restoring lost data.
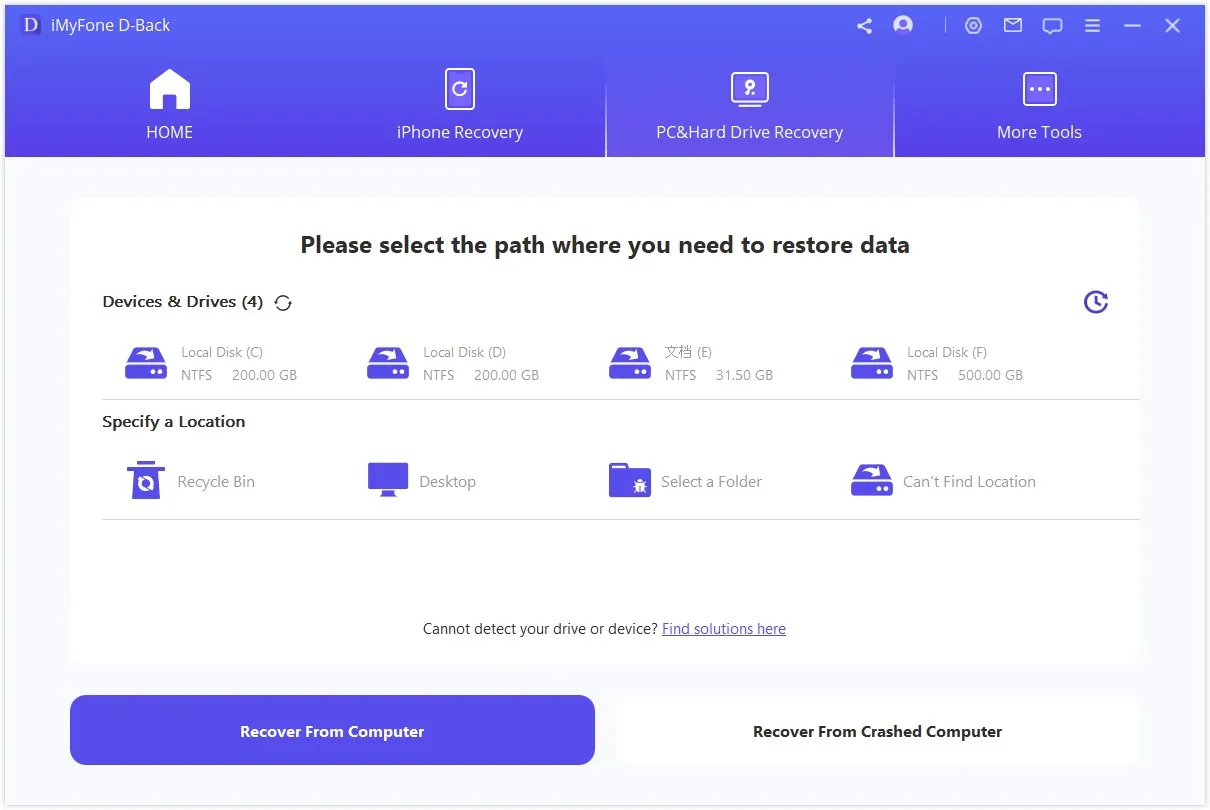
Step 1: Download and install iMyFone D-Back on your computer. Open the tool, and you will see all the drives connected to your computer. Choose the drive in which Microsoft Office is installed, and all its files are saved.
Step 2: Scan the selected drive and wait for the scanning to finish. You can also see the progress of the scan in real time. If you find your file during the scan, you can pause or stop the scanning and recover your file faster.

Step 3: When the scanning finishes or your file is found. Choose the file and click “Recover” to restore it to the computer. You can also apply a filter to narrow down the search for your required file. Choose a different location to save this file so that it doesn’t get mixed up.

2.2. Recover Replaced Word Document with Temporary Files
If you don’t want to use a third-party data recovery tool, then you can recover the replaced Word document with a built-in option of Microsoft Word. It is known as Temporary files. Word saves it as a temporary file on the computer when you don't save it manually. To recover replaced Word document with Temporary files, follow the steps below:
Step 1: You need to find the location of Temporary Files and where they are saved inside the directory of Microsoft Office. You can go to “C:\Users\UserName\AppData\Local\Microsoft\Office\UnsavedFiles”.
Step 2: In this folder, find the temporary file that you are looking for.
Step 3: Once you find the file, open it and click on “Save As” to recover the replaced Word document.
2.3. Recover Replaced Word Document with AutoSave on Mac
Microsoft has an option of AutoSave for Windows and macOS users. The document is saved automatically without any intervention. If your Word document is corrupted or replaced, then you can use this AutoSave feature of Microsoft Word to recover it.
Step 1: On your Mac, open Finder. Tap on “Go” and then on “Go to Folder”.
Step 2: Type “/Library/Containers/com.Microsoft.Excel/Data/Library/Preferences/AutoRecovery” in the Finder box and hit “Go”.

Step 3: Here, you will find all the files. Choose the files and click on “Save As” to recover them.
2.4. Recover Replaced Word Document with AutoSave Option
If you were editing your Word Document and didn’t manually save the changes, then it will be automatically saved in the temporary files if you have AutoSave enabled without overwriting. But if you have overwritten the Word Document, then you can restore it by using the AutoRecover feature of Microsoft Word.
Step 1: Open Microsoft Word. Go to “File > Info”. Here, you will see an option of “Manage Document”.
Step 2: Click on it to see drop-down options. Then click on “Recover unsaved documents”. It will open up a location where you can see temporary files.

Step 3: Choose the file that you want to recover and open it. Click on “Save As,” and it will be recovered.
Part 3. FAQs
1 How to Find and Replace in Multiple Word Documents?
If you want to find and replace multiple Word Documents, then there is a third-party tool named “MS Word Find and Replace in Multiple Documents Software”. Download this tool, open it and click on “Add Files”. Add all the files which you want to find and replace. Enter both the words and click on “Start Replacing”.
2 How Do I Undo a Replaced File?
You can undo or recover any replaced file by using any of the methods mentioned in the article. Once a file is replaced, there is nothing much anyone can do. You can recover it using iMyFone D-Back. It is an effective and reliable tool available on Windows and macOS.
Conclusion
The default AutoSave or AutoRecover features of Microsoft Word are not that effective. They may work sometime, but after time has passed, it won’t work. In such cases, you can use iMyFone D-Back. It is an advanced data recovery tool that can recover all types of data in Windows and Mac. It has a trial version that you can download and check the credibility of this tool.