


 March 6, 2024
Secure Erase removes the data from SSDs permanently. But if you still want to recover your data, you need to use a powerful data recovery tool.
In this article, we will share how to recover SSD after secure erase and recover the formatted drive. In addition, we will share how you can recover SSD data from a dead MacBook/laptop. Read the article, and you will be able to recover your lost data by the end of the article.
Table of Content [Hide]

Part 1. Recover Deleted Files from SSD after Secure Erase with Professional Tool
iMyFone D-Back can recover your deleted files from formatted SSD after secure erase. It is an excellent and efficient method because of its powerful algorithm. It recovers all your data quickly without any loss. Even if the images and video are corrupted, it can repair them on its own during the recovery process.
It works on almost all storage devices, including hard drives, SSDs, SD cards, cameras, USB flash drives, music players, and other digital devices. It is a versatile data recovery tool that works on all devices.
The algorithm works in different scenarios. You can use it to recover data in case of accidental deletion, virus attack, computer crash, accidental formatting, lost partition, or RAW partition. The algorithm is designed to work in all these cases and recover your precious data safely.
Main features of iMyFone D-back Hard Drive Recovery Expert:
- The powerful algorithm can recover almost all your files. It recovers files at a very fast pace and with a high success rate.
- The software repairs the corrupted videos and images. The recovered files are perfect, and there is no data loss.
- More than 1000+ formats and types of files can be recovered by iMyFone D-Back. It ensures all your files are recovered in one attempt.
- It is a very simple tool that everyone can use. Beginners can follow a few simple steps to recover data from any digital device.
- After scanning, the files are arranged according to their type and format. You can easily find the files you want to recover and select them.

- Steps to Use iMyFone D-Back:
Step 1: Download iMyFone D-Back from the website and install it on your computer. You can download the Mac or Windows version according to your computer.
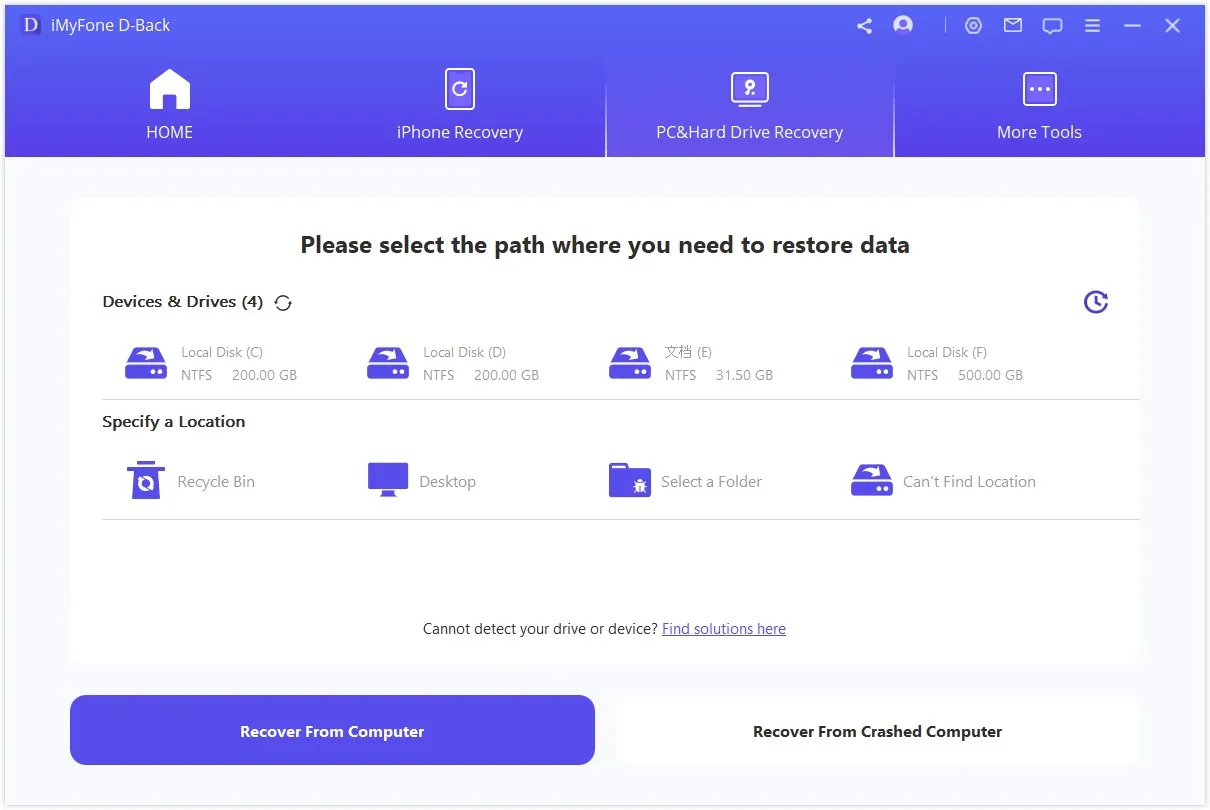
Step 2: Connect the SSD to the computer and launch the application. The application will detect the drive automatically. Click on the SSD to start the scan.
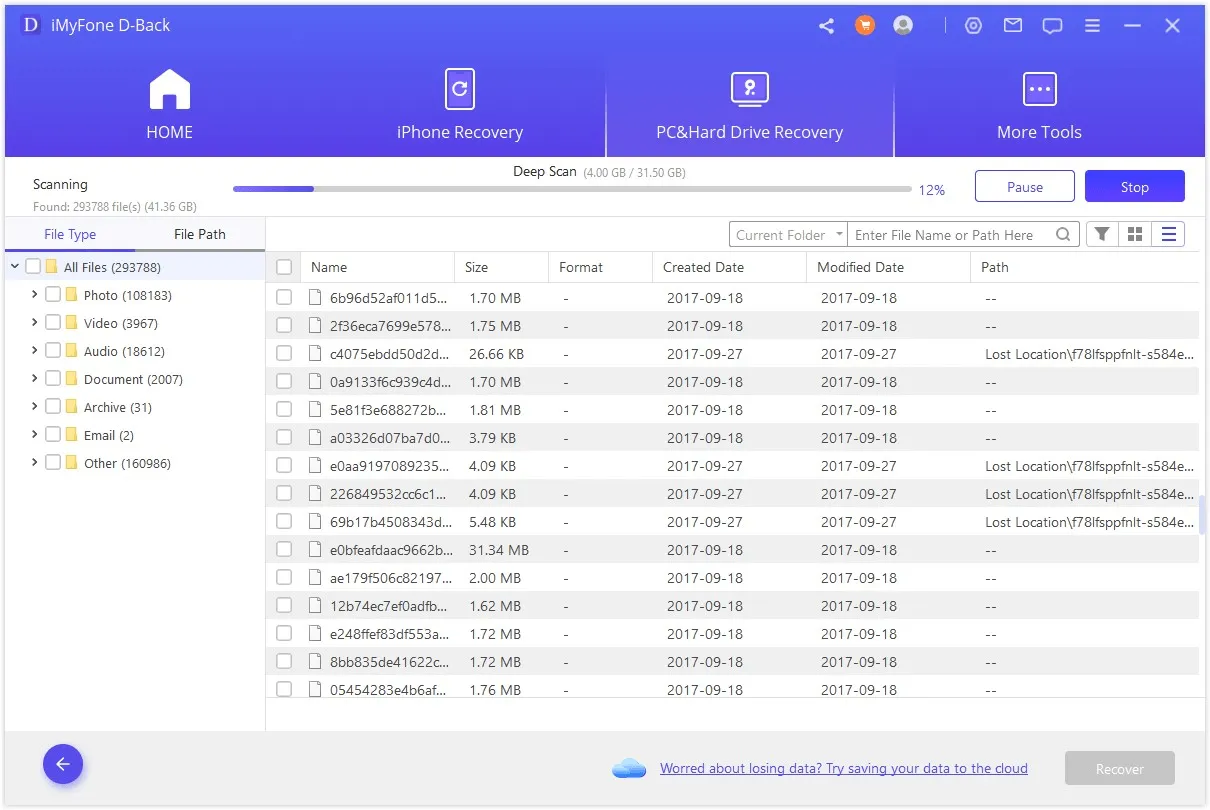
Step 3: The application will do a quick scan first to recover your files quickly. Then, it will do a deep scan to recover more files. If your files are already scanned, you can stop the process.
Step 4: Finally, select the files that you want to recover from the SSD. After selection, click on Recover. Select the destination for the recovery of files. The files will be recovered and saved to the desired location.

How to Recover Data from SSD Dead Laptop (MacBook SSD)
If your laptop is dead, it doesn't mean your SSD is also dead. The laptop can be dead because of battery failure, motherboard issues, charging problems, or any other reasons. But most of the time, when your laptop is dead, the SSD is safe and sound. You can recover all your data by connecting the SSD to another computer.
Connect SSD to Another Computer
You can do the method on your own, but you need to be very careful. If you can use a screwdriver and open your Mac, you are good to go. It is quite easy, but you need to handle the laptop with care. Otherwise, you might end up making the problem worse.
Step 1: Make sure the MacBook Air is not connected to the charger. Use the screwdrivers to remove the screws from the back of the MacBook. Remember where the screws need to go because they are in different shapes and sizes. Once you remove the screws, take out the back plate.
Step 2: You will see the hard drive on the computer. There will be a few Philips screws holding the hard drive. Open those screws. Keep in mind that you do not need to open the screws of the hard drive. Only open the screws attached to the bracket holding the hard drive.
Step 3: Take out the hard drive and attach the adapter or cable you have bought. Connect it to another computer. Your SSD will work as an external drive. Go to the SSD and find your data. Copy the data and paste it to a suitable location.
Using Time Machine Backup for Recovery
Time Machine creates a backup of your data in the Time Machine backup drive. It keeps your data safe so that you can restore it whenever you need it. This backup system is a built-in feature of Mac, so you don't need to use any third-party tool or worry about data loss.
Step 1: You should have the Time Machine backup drive. Connect the drive to another Mac, which is working.
Step 2: Go to the menu bar at the top and click on Enter Time Machine. If there is no such option, you need to add it. Click on the Apple icon and click on Preferences. Go to Time Machine and check the box of Show Time Machine. Now, you will see the option in the menu bar.
Step 3: You will see the Time Machine window. Look for the files and data you want to recover. Use the arrow keys and see the files. If you want to see the preview, press the SpaceBar. You can also use the search bar to look for certain files. Select the files you want to recover and click on Restore.

Part 3. FAQs About Recover Data from SSD after Secure Erase
1
What Is Secure Erase SSD?
Secure Erase is the standard method of removing data from an SSD or hard drive. It is the only method that ensures the data on the drive is completely removed, and there is no way it can be recovered.
Formatting and deleting files do not delete your data completely from the SSD. Instead, the data is still there, and its space is marked as available. But Secure Erase wipes off your data by overwriting it. It is commonly used when you want to sell your SSD or laptop.
2 Can I Recover Data from A Secure Erase SSD with Other Free Methods?
Yes, there are several ways to recover a secure erase SSD. You can try iMyFone D-Back. It will scan the drive for free and allow you to preview the files. You can also recover a few files without the license. Download it for free and try it on your hard drive.
3 Can I Secure Erase Damage An SSD?
SSDs store data in digital format. These use transistors that have a limited erase cycle. But again, this limit is not a few cycles, so you cannot damage your SSD with a few secure erases. However, it reduces the life of the SSD. If you are doing secure erase frequently, then you need to worry about it. Otherwise, there is nothing wrong with the secure erase.
4 Can An Encrypted SSD Be Recovered?
Yes, encrypted SSDs can be recovered, but you need to decrypt them first. There are many methods that can help you decrypt the drive. You can try those methods first before using a data recovery tool.
5 Can Data Be Recovered from SSD after Format?
Yes, data can easily be recovered from an SSD after format. Formatting does not remove the data; instead, it removes the file system and writes a new one. The data on the drive vanishes from the drive, but it is physically there until it is overwritten. The space of the data is made available for the next files to come. So, formatting does not remove your data completely, and you can recover it easily.
Conclusion
It is difficult to recover data after you secure erase an SSD. However, you can still recover your files and data if you know the right method.
You can use iMyFone D-Back to recover data from SSD. It is an excellent data recovery tool that works on all storage devices and in all scenarios. It makes sure your data is recovered without any loss. Download the software and recover your data. Even if your computer is dead, you can recover data from its SSD. We have shared the method to recover SSD data from a dead MacBook/laptop.