


 March 29, 2023
GarageBand is one of the best music creation studios built right into the Mac. Ranging from a full-range sound library to guitar presets and touch instruments, it’s a full-blown recording studio, empowering musicians to make music on the go. However, there are times when the Mac crashes, and you lose the music files and projects.
So, if you had deleted the GarageBand files or had them unsaved when the Mac crashed, we are here to share how to recover unsaved GarageBand files!
![]()
- Part 1. How to Recover Unsaved/Deleted/Lost GarageBand Files on Mac

- 1.1. Free Download Software To Recover Lost GarageBand Files
- 1.2. Restore Unsaved GarageBand Track from AutoSave
- Part 2. How to Recover GarageBand Files on iPhone/iPad
- Bonus Tip: How To Back Up GarageBand Files
- Part 4. FAQs about GarageBand Projects

Part 1. How to Recover Unsaved/Deleted/Lost GarageBand Files on Mac
The GarageBand files are native to macOS by leveraging the AIFF file format. These files are usually huge because they contain all the audio in raw and uncompressed form. For this reason, users usually end up deleting the files to free up some space, but since the audios are rich, they want them back. So, let’s see how to recover deleted files from GarageBand!
1.1. Free Download Software to Recover Lost GarageBand Files
If you are searching for recovering an unsaved GarageBand file, there is nothing better than the iMyFone D-Back. This is because it’s a leading recovery software with cutting-edge features and impressive functionality that makes it suitable for various devices and hard drives, including Windows and Mac devices.
It can be used for recovering emails, documents, pictures, videos, and audio, which means you can recover deleted GarageBand files from Mac with this software. Some of its features include;
- It helps restore the destroyed, lost, and inaccessible all kinds of files (including audio files) within a few seconds
- Leverages a proprietary algorithm that speeds up the scanning and recovery process. In addition, it allows the users to pause and resume the restoration process whenever they want
- This tool can help identify the missed GarageBand files
Honestly, the features are amazing, so let’s see how to recover lost GarageBand files!
Step 1: To begin with, you have to download iMyFone D-Back, and once it’s downloaded on Mac, install it.
Step 2: After installing iMyFone D-Back, open it and tap on the disk where you store the GarageBand files.
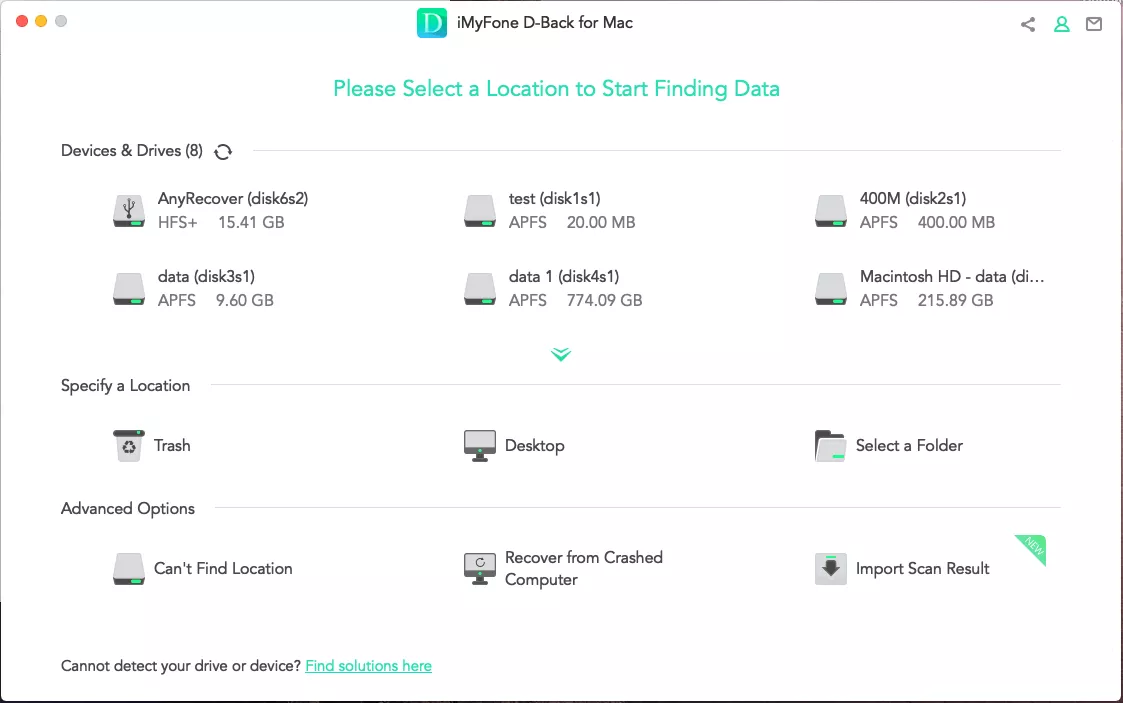
Step 3: When you select the location, the iMyFone D-Back will initiate the scan, and you can check the progress of scanning from the top of the screen.
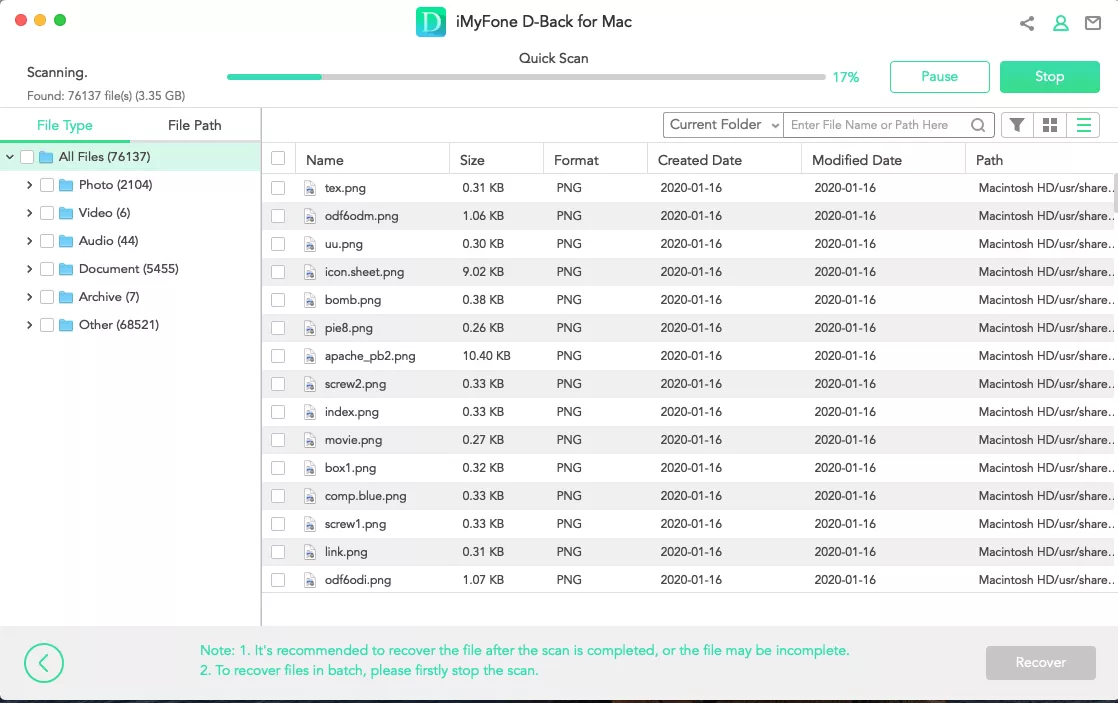
On the other hand, if you want to stop or pause the scanning process for any reason, tap on the pause option mentioned on the screen.
Step 4: Once the scan is fully completed, you will see all the GarageBand files iMyFone D-Back could find on the Mac system. You can now look for the specific files by their file type, file name, and date.
Lastly, all you have to do is tap on the recover button and store your files in a safer location!
1.2. Restore Unsaved GarageBand Track from AutoSave
The second method you can try is the AutoSave feature designed on GarageBand software. With this feature, the files are sometimes stored on the software, so let’s see how to restore unsaved garageband from autosave.
- To begin with, you need to right-click on the broken file and select the “show package contents” option.
- Then, click on the media folder to access the lost or unsaved files. You will be able to export all your .aif files out from the package content to a secure location.
- Once you are done exporting the files, you can import the .aif files’ copies into a new project on GarageBand.

Part 2. How to Recover GarageBand Files on iPhone/iPad
Now that we have shared how to recover the files on Mac, let’s see how to recover GarageBand files iPhone/iPad with the help of iMyFone D-Back. It’s one of the best recovery software, which can be used to restore iPhones and iPad data. Some of its features include;
- It can recover data from iCloud, iTunes, and third-party app, including GarageBand.
- It can recover more than 20 formats of data, so you can recover whichever files you want.
- You can recover the selected files to prevent overwriting of the data.
Now that you know the features, let’s check out the instructions, and you can follow the same steps to recover deleted GarageBand files iPad and on iPhone.
Step 1: Install the iMyFone D-Back on your PC and choose the “smart recovery” option.
Step 2: Now, choose the situation and tap on any of them according to the issue. Since you have to recover the files from the device, click on the “recover from iOS device.”

Once you have selected the “recover from iOS device” option, connect your iPhone or iPad to the computer. When the device is detected, tap on the Next button.

Step 3: In this step, you need to choose the location that you want to recover and press the scan button.
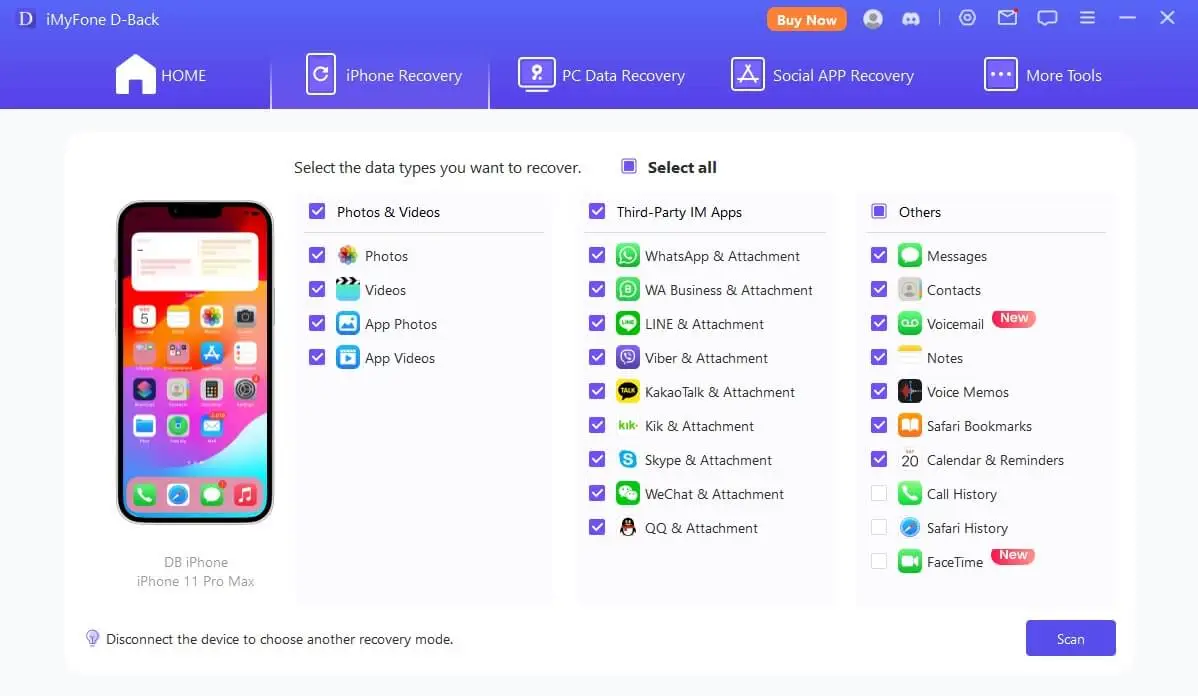
Step 4: When the scan is complete, the recoverable data will be shown on the screen to check the files. So, just choose the files that you want to recover and hit the recover button.

Then, just choose the location for storing the recovered files, and you will be ready!
Bonus Tip: How to Back up GarageBand Files
Creating a backup is always a good choice to ensure you have access to the files, even if you delete them accidentally. So, let’s see how to back up GarageBand files.
3.1. Backing up GarageBand Files to iCloud
When you upload the GarageBand files to iCloud, you will be able to access them from wherever you want and keep them updated. For this method, follow these instructions.
- The first step is to switch on iCloud for GarageBand. Once done, tap on the down arrow option from the control bar and click on the “my songs” option.
- In the second step, click on the select button, start selecting the songs you want to upload to the iCloud, and hit the cloud icon from the control bar.
- Lastly, choose the “upload songs to iCloud”, and you will be able to access the songs from the “my songs” folder in iCloud.

3.2. Backing up GarageBand Files with AirDrop
If you want to back up your GarageBand files to another iOS device, AirDrop is a promising option since it creates the song’s copy.
- First of all, you must switch on AirDrop on the iOS device as well as on the Mac. On your iOS device, click on the down arrow button and open the “my songs” folder.
- Tap on the select button and start selecting the songs. Once you have selected the songs, click on thebutton.
- Then, choose the Apple device or AirDrop that you want to send your files.
- Last but not least, click on the project option, and AirDrop will copy the songs to the specific locations. On the iOS device, the song will automatically open in GarageBand or select any other folder.
Part 4. FAQs about GarageBand Projects
1
How to Delete Files on GarageBand?
If you don’t know how to delete files on GarageBand, all you need to do is to select the project you want to delete, right-click, and click on the trash button.
2 How to Import Songs to GarageBand?
If you want to know how to import songs to GarageBand, follow the below steps:
- Open the Mac Dock and tap on the Finder.
- Now, look for the file that you want to import.
- Drag the file to the GarageBand track.
3 How to Transfer GarageBand Files from iPad to Mac?
To transfer GarageBand files from iPad to Mac, the process is simple.
- Open the My Songs folder and choose the song that you want to transfer.
- Click on the share button. Then, click on the “save to files” button and locate the GarageBand File Transfer folder.
- Now, click on the add button, connect the iPad to the Mac, and choose the iPad icon.
- Click on the files, move to the GarageBand folder, and drag the song from the folder to your Mac.
4 Does GarageBand Save Backups?
Yes, it can create backups with the AutoSave feature, but you must be signed in. In addition, you can connect the flash drive or hard drive for external backups.
5 Where Are My GarageBand Files Stored?
The files are stored in the GarageBand Music Folder’s subfolder.
Conclusion
GarageBand files are important for users who like to create their music because various audio editing features are available. However, if you end up deleting the GarageBand files, intentionally or unintentionally, then this article would definitely help you get them back!
There are certain ways to recover the deleted GarageBand files, but one of the best, safe and easy ways is to use the iMyFone D-Back Hard Drive Expert. This tool is easy to understand, and will recover all your important files within minutes.