


How to Remove the Write Protection from USB Drive in Windows 10/11
Category: PC Data Recovery

7 mins read
Have you encountered the "the disk is write protected" message when attempting to copy files to a USB flash drive or SD card on Windows 10? No need to worry! This post will guide you on how to remove write protection from USB drives, pen drives, or SD cards, as many users have faced this issue on social media platforms. This article provides a detailed explanation of the process to remove write protection on a USB drive in Windows 10/11
In this article:
- Part 1. What is The “Write Protection” Mean on USB
- Part 2. Why Has My USB Become Write-Protected
- Part 3. How to Remove the Write Protection from USB Drive in Windows 10/11
- Solution 1: Check the Lock Switch
- Solution 2: Use Diskpart Command
- Solution 3: Remove Disk Write Protection Using Registry Editor
- Solution 4: Turn Off BitLocker
- Solution 5: Format Write-Protected USB
- Part 4. How to Recover Data from a Write-Protected USB after Formatting

- Part 5. FAQs about Write-Protected
Part 1. What is The “Write Protection” Mean on USB
Write protection, whether physical or virtual (read-only), can prevent new data from being written or existing files from being modified on a USB device. This means you can only read the data already present on the USB but cannot erase or alter it. If you want to remove write protection and allow data to be rewritten or erased on the USB in Windows 10, don't worry! This post will guide you on how to remove write protection from USB/pen drives for free.
Part 2. Why Has My USB Become Write-Protected?
Whenever you encounter the write protection error, it is important to understand the potential causes. Here are a few reasons:
- Some SD cards and USB drives have a physical write protection switch. If this switch is engaged, move it to the open position.
- The USB drive or SD card may be infected with a virus. If you find a virus, remove it using your antivirus software.
- The USB drive or SD card may have run out of space.
If you are facing the write protection error due to the third case, it can be challenging to fix, as you won't be able to move or delete files on the USB drive or SD card. In such a situation, you can try the solutions presented in the next section.
Part 3. How to Remove the Write Protection from USB Drive in Windows 10/11 ?
Solution 1: Check the Lock Switch
Some USB flash drives have a physical switch that enables or disables write protection. The location of this switch may vary on different USB drives. Make sure the lock switch is pushed up to the unlock position. If the USB drive is write-protected, you won't be able to transfer data to it.
If the write protection switch on your USB drive is already in the unlock position and you still encounter the error message, or if your USB drive does not have a physical switch, proceed to the next fix.
Note
Note: If your USB flash drive does not have a physical switch or the system still indicates that your USB is write-protected, proceed to Solution 2 below to remove the write protection.
Solution 2: Use Diskpart Command
To remove write protection from USB drives, you can use Diskpart, a command-line program available in Windows. Follow the steps below:
Step 1: On your keyboard, press the "Windows" key and the "R" key simultaneously. In the Run dialogue box that appears, type "diskpart" and click "OK" to open the DiskPart Command Prompt.
Step 2: Type the following commands one by one, pressing Enter after each one:
- `list disk` - This command displays all connected disks, including internal hard drives.
- Identify the USB flash drive by its size and note its disk number "n."
- `select disk n` (replace "n" with the actual disk number of your USB).
- `attributes disk clear readonly` - This command modifies the properties of your USB to make it non-read-only.
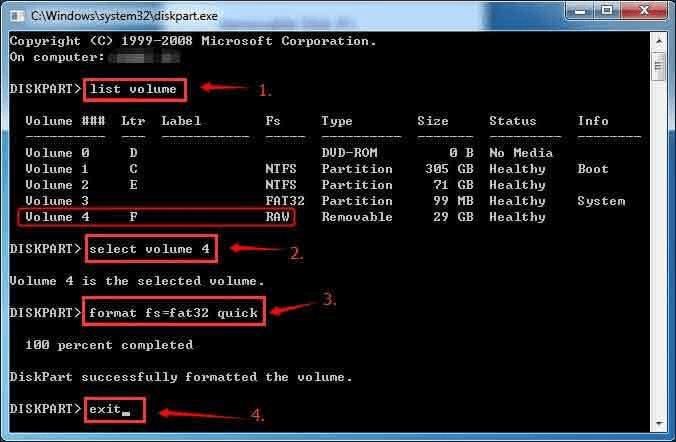
Step 3: Close the DiskPart Command Prompt and reconnect your USB flash drive to see if the write protection issue has been resolved. If not, proceed to the next step.
Solution 3: Remove Disk Write Protection Using Registry Editor
Note
Please note that using Registry Editor to fix write-protected errors on USB, SD, or internal/external HDD/SSD is an advanced-level procedure. If you are not familiar with the registry and its operations, it is advisable not to proceed with this method, as incorrect changes to the registry can lead to serious issues.
Exercise caution and follow these steps to remove write protection from your Windows 11/10/8/7/XP/Vista computer:
Step 1: Connect the write-protected removable device to your PC.
Step 2: Press the Windows + R keys, type "regedit" in the Run box, and press Enter to open the Registry Editor.
Step 3: Click on HKEY_LOCAL_MACHINE and expand the System folder.

Step 4: Navigate to CurrentControlSet and then click on Control.
Step 5: Look for Storage Device Policies and change the DWORD value to 0. Click OK after making the change.
Step 6: Exit the Registry Editor and then restart your PC.
Allow the computer to reboot, and then check if your device is now accessible.
Solution 4: Turn Off BitLocker
If your USB drive is write-protected due to BitLocker encryption, you need to disable BitLocker to make changes to the drive. Follow these steps to unlock your disk:
Step 1: Open File Explorer, right-click on your BitLocker partition or USB drive, and select "Manage BitLocker."
Step 2: Choose the locked device and click "Turn off BitLocker."
Step 3: Allow BitLocker to decrypt the drive automatically. Once the process is complete and BitLocker is turned off, you can manage data on your USB partition and save new files to it again.

Solution 5: Format Write-Protected USB
When dealing with the problem of USB/SD card write protection, formatting the USB drive, SD card, or other external storage devices is a common suggestion found on the internet.
Formatting can be an effective way to remove write protection from USB/pen drive/SD card if the file system has been corrupted, leaving your drive in an unusable state. However, it's important to be aware that formatting the USB will result in data loss. But don't worry, a professional USB data recovery tool can help you recover your lost data.
Part 4. How to Recover Data from a Write-Protected USB after Formatting?
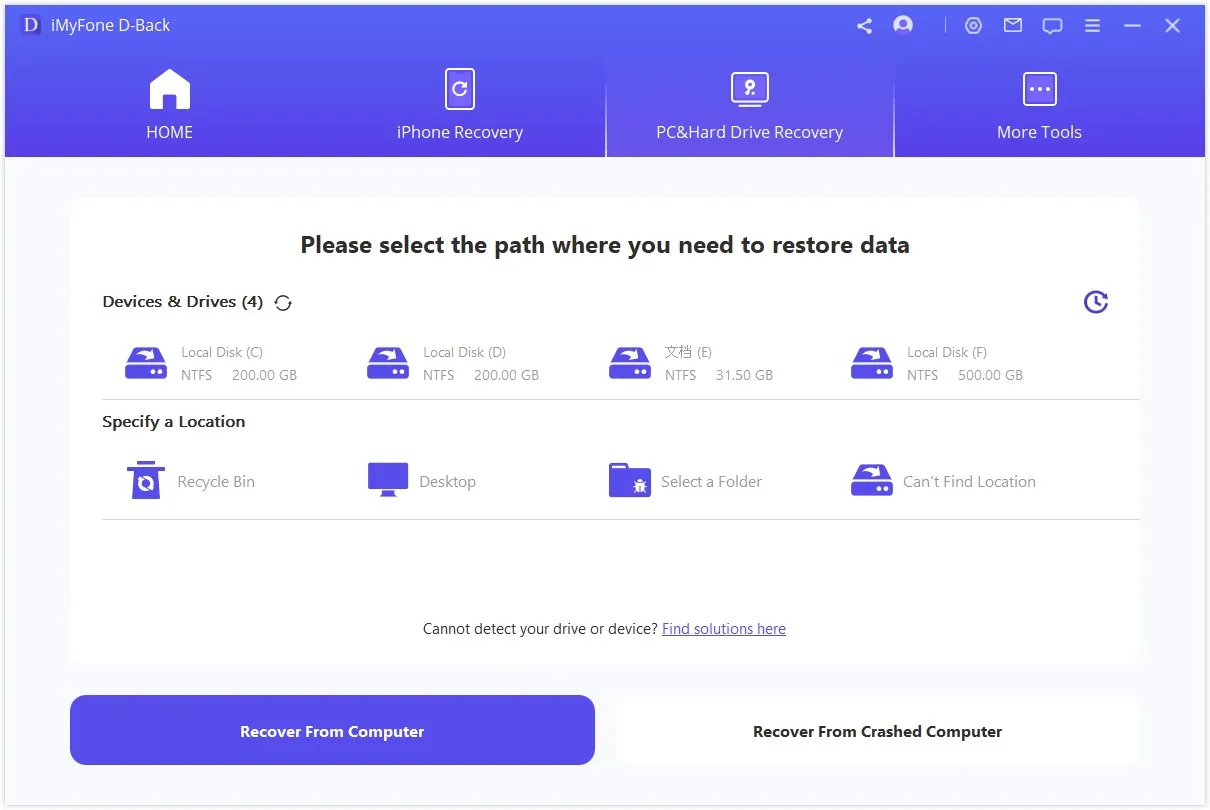
After formatting a write-protected USB drive, all the data on it will be lost. Fortunately, with iMyFone D-Back data recovery tool, you can effortlessly retrieve any lost or formatted data from both removable and local drives. With D-Back, you can easily recover any lost, deleted, or formatted data from USB drives, whether it's due to accidental deletion, formatting, virus attack, system crash, or other unexpected situations. Its powerful algorithms and user-friendly interface make data recovery a seamless and efficient process.
1,000,000+ Downloads
Key Features:
- Support data recovery from multiple devices, including Windows, Mac, and iOS devices
- Restore files from different storage devices, such as USB drives, SD cards, external hard drives, and external storage.
- Support a wide range of file types, including photos, videos, documents, messages, contacts, and more.
- Preview recoverable files before performing the actual recovery to ensure you get back the right data.
- User-friendly interface and step-by-step guides make data recovery easy for users of all technical levels.
Now, let's follow the simple 3-step process below to learn how to recover data from formatted USB drives using iMyFone D-Back.
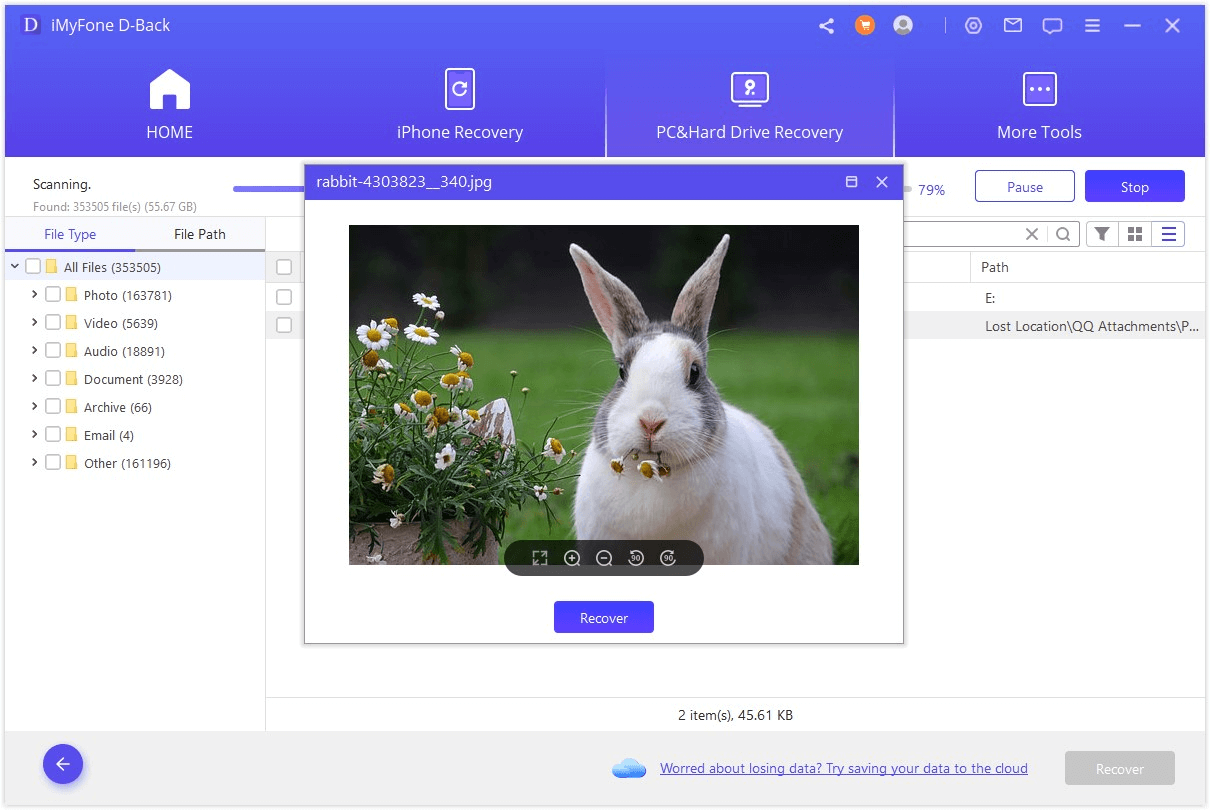
Step 1: Connect the formatted USB drive to your computer and open iMyFone D-Back data recovery software. Click "Scan" to initiate the scanning process, and you can select specific file types to recover before scanning.
Step 2: After the scan is complete and the lost files are found, you can preview them within the software. Take the time to review the files and ensure they are the ones you want to recover.
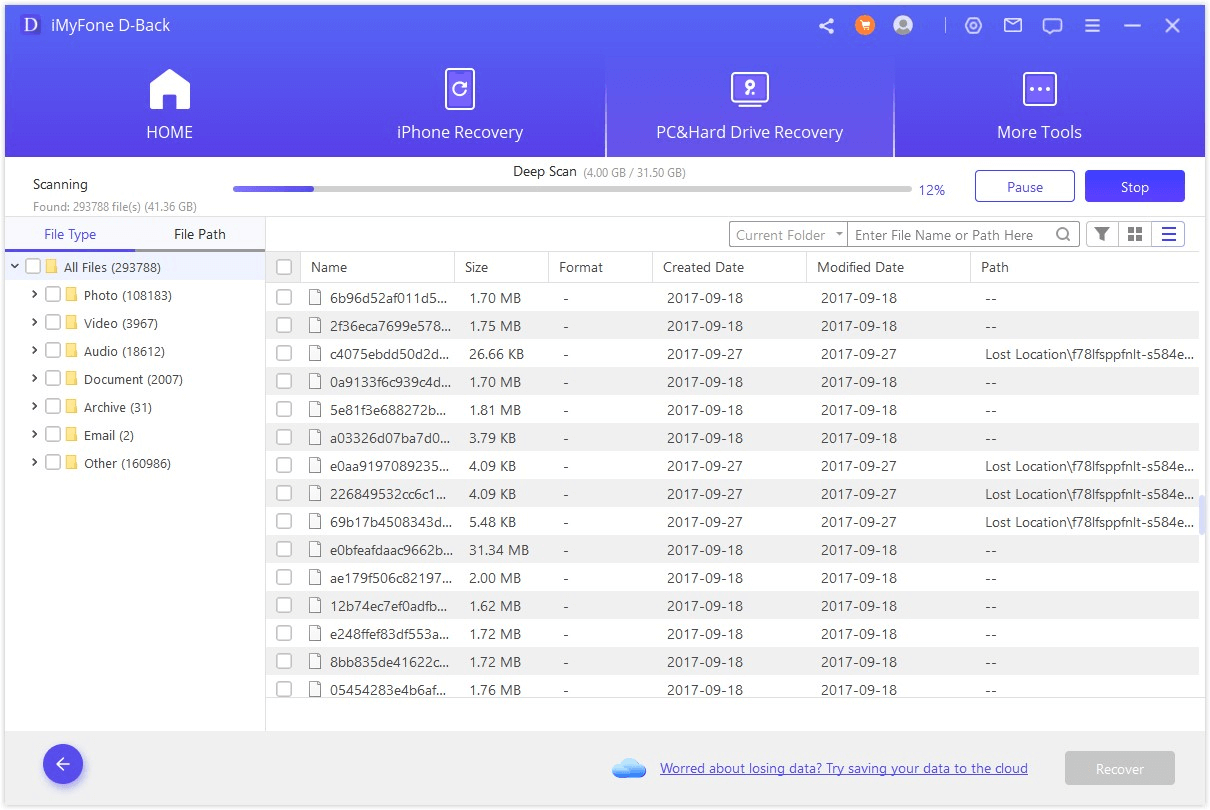
Step 3: Once you are satisfied with your selection, click "Recover" to restore the files to a secure location on your computer. Avoid saving the recovered files back to the same folder from which they were lost to prevent data overwriting.
Part 5. FAQs about Write-Protected
1 Can I enable write protection on specific files or folders?
In general, write protection is applied to an entire storage device, such as a USB drive or SD card, rather than individual files or folders. However, you can achieve a similar level of protection by using file permissions or encryption to restrict access to specific files or folders.
2Can I remove write protection from an SD card or USB drive permanently?
Yes, write protection can be permanently removed from a USB drive or SD card by using software or hardware methods. However, it is essential to exercise caution when making changes to the device's firmware or settings, as it may result in data loss or device malfunction.
3 How do I know if my USB drive is write-protected?
When you attempt to write or modify files on a write-protected USB drive, your operating system will display an error message indicating that the drive is read-only and cannot be written to. Additionally, some USB drives may have a physical switch with a "lock" symbol to indicate write protection status.
Conclusion
In conclusion, this article offers a variety of effective strategies to help you resolve the issue of USB write protection in Windows 10. These methods are designed to remove write protection from USB drives and allow you to access your data without any restrictions. With the help of iMyFone D-Back, you can easily recover your data even after it has been accidentally formatted, ensuring your valuable files are never lost.
iMyFone D-Back
Recover Data from Windows/Mac/iOS
168,282 people have downloaded it.
- Supports a wide range of data types such as messages, photos, videos
- 100% Work with a variety of data loss scenarios.
- Retrieve lost data from different types of devices
- AI repair corrupted photos, videos, files.
- Compatible with All iOS & Android versions.
(Click to rate this post)
Generally rated 5 (256 participated)
Rated successfully!
You have already rated this article, please do not repeat scoring!