


Updating iPhone software in 2026 is less about finding a random download button and more about choosing the right update path for your device state. The latest iOS 27 can be installed from Settings, from a computer, or through a guided repair flow when the normal update screen fails.
This guide explains the official iPhone software update app route first, then covers computer updates, Fixppo, and rollback limits so readers do not confuse update, restore, and downgrade steps.
Quick answer
If you need an iPhone software update download or iPhone software update download free, start in Settings > General > Software Update or use Apple’s computer update path. For iPhone update software problems, back up first, check storage and Wi-Fi, and use system repair only when the iPhone software update app flow fails or the iPhone gets stuck.
In this article:

Things to Know Before iOS Software Update
Before you start an iOS 27 update, make a current backup, connect to stable Wi-Fi, keep the battery charged, and leave enough free storage for the download and unpacking stage. Most failed updates begin with one of those checks being skipped.
01 Make A Backup
Creating a backup of all your files is essential before you proceed to update the iPhone software, as you might end up losing important data due to technical glitches during the process.
And a backup would prove very useful if you try to restore the iPhone. You can create a backup through either Finder / Apple Devices / iTunes or iCloud.
Backup Through iTunes
Step 1: Connect your iPhone to your Win/Mac through a USB cable and launch iTunes.
Step 2: Click on your iPhone once it is detected and go to Summary.
Step 3: On the right side, click on Back Up Now and then on Apply.

Backup Through iCloud
Step 1: From the iPhone Settings option tap on iCloud.
Step 2: Enable the iCloud backup feature.
Step 3: After making sure you have a stable internet connection, click on Back Up Now.

02 Update iTunes to The Latest Version
Make sure your iTunes is updated to the latest version. This can help prevent unnecessary errors when using them to update iPhone software or restore iPhone if the software update failed. Just launch any of it and you can see the prompt saying that a new update is available.
How to Download and Install iPhone Software Update in 3 Ways?
Once you finish preparing for the iPhone software update, you can proceed to download and install the iPhone iOS software update. 3 methods will be introduced below.
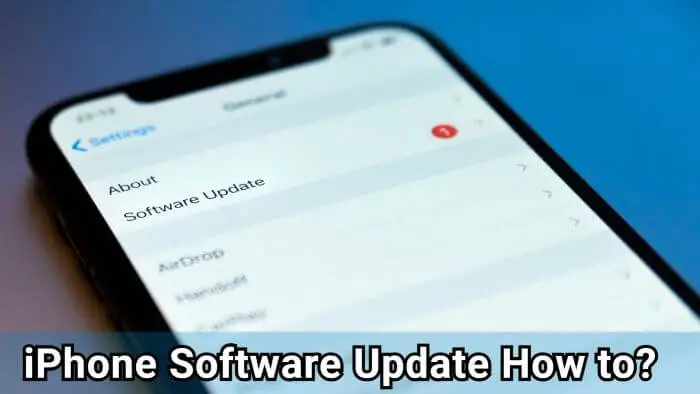
1 How to Update Software on iPhone via OTA?
Settings is the cleanest iPhone software update path when the phone works normally. Use it when the device can boot, Wi-Fi is stable, and storage is not tight.
Step 1: From the Settings option on your iPhone, tap on General.
Step 2: Navigate to Software Update and tap on Download and Install when a software update is available.
Step 3: If it's downloaded, you can click Update Now and proceed to the next step.

The new iPhone software update will be installed on your iPhone. If this method fails, you can keep reading for the other 2 options or directly get an iOS software update with Fixppo.
2 How to Update iPhone Software via iTunes?
A computer update is useful when the iPhone cannot finish the over-the-air download. Use Finder on Mac, the Apple Devices app on newer Windows setups, or iTunes where it is still required.
Step 1: Open iTunes on your PC/Mac and then connect your iPhone to the computer with a USB cable.
Step 2: After clicking on your device, tap Summary and then Check for Update on the right.

Step 3: Click on Download and Update later and when prompted, agree to the terms and conditions. Enter the passcode of your iPhone to proceed.
Sometimes iTunes couldn't detect your iPhone, if so, you can try the next method to download iOS update.
3 How to Download iPhone Software Update with Fixppo?
Use iMyFone Fixppo if Apple's normal update paths fail. It is most useful when iPhone software update is stuck, the device restarts during installation, or the normal update screen cannot complete iOS 27.
If the iPhone is healthy and can update through Settings, use Settings first. Fixppo is better for failed update recovery, firmware download guidance, and devices caught between update screens.
It's compatible with many supported iPhone models to update iOS software on iPhone. After updating, you can enjoy better performance and access all features of iPhone.
iPhone Software Update Tool:
- Quick & Safe: 4 steps download iPhone software update, guided repair to use.
- Lower Data Risk: Use a Standard Mode update or repair workflow that is designed to reduce erase risk after you back up.
- Powerful Features: It can downgrade iOS software, install IPSW files without iTunes, etc.
- Backup & Restore: Helps you back up and restore important data before update or repair work.
- Wide Compatibility: Supports many recent iPhone models, including iPhone 11/12/13/14/15/16/17, for iOS 27 update scenarios.
You can follow steps below to download iPhone software update with Fixppo.
Step 1: Download and install Fixppo on your computer, launch it and click the iOS Upgrade/Downgrade tab.

Step 2: Connect the iPhone you want to update to the computer, then choose the Upgrade iOS tab to get the iOS software for your iPhone.

Step 3: Check your device model and click the Download button to get the iOS firmware.

Step 4: When the firmware is downloaded, click the Start Upgrade iOS button for the software to download and install the iOS software to your iPhone.

Your iPhone should restart after the upgrade finishes. Check Settings > General > About to confirm the installed iOS version before disconnecting the device.

How to Undo iPhone Software Update
Undoing an iPhone software update is a downgrade decision. Back up first and confirm whether Apple still signs the version you want before attempting any rollback.
1 Stop iPhone Update In Progress
If your iPhone is still in preparing update state and the process of installing iOS is still not complete, you can follow steps below to stop the ongoing iPhone software update.
Step 1: Head to Settings > General > iPhone Storage.
Step 2: Scroll through the list of applications being shown on the screen to the icon which displays the iOS update.
Step 3: Tap on the icon and then on Delete Update to remove the iOS software update from your device.
2 Remove Installed iPhone Update
If the installed iOS version is not suitable for your device, downgrading is a separate workflow. Back up first, confirm that the target firmware is still signed, and understand that restore-based rollback can affect current data.
Step 1: Launch Fixppo again and click the Downgrade iOS to downgrade iOS version.

Step 2: You can see the current iPhone software version and the firmware to downgrade to. Click the Download button to get the iOS firmware for downgrading.

Step 3: When the firmware is downloaded, click the Start Downgrade iOS button for Fixppo to begin downgrading your current iOS version to older iOS.

When the downgrade finishes, confirm the installed iOS version and restore only compatible backup data. Do not start a rollback unless you have checked signing status first.

FAQs
Where can I download an iPhone software update safely?
Use Settings, Finder, the Apple Devices app, or Apple Devices / iTunes. Avoid random firmware download pages unless you can confirm the file is official and still signed for your exact model.
Why is my iPhone software update not installing?
The usual causes are weak Wi-Fi, low battery, insufficient storage, Apple server load, or a partially downloaded update file. A stuck update after those checks may need computer update or repair.
Can I undo an iPhone software update?
Only in limited cases. Downgrades depend on Apple signing the older iOS version, and restore-based methods can erase data, so back up before you start.
How can I update my iphone software?
To update your iPhone software, you can try updating directly from iPhone settings, via Finder / Apple Devices / iTunes or trying third-party iOS update tool like Fixppo.
Is it necessary to update iPhone iOS?
Software update comes with not only new features but bugs fixes found in the previous version. To update iPhone iOS regularly is the safest way to protct your device.
How to fix iPhone software update failed?
To fix iPhone software failed problem, you can try to change another network connection, remove the downloaded update file, force quit all background apps, free up iphone storage, force restart iPhone or fix the iOS glitches with Fixppo.
Conclusion
When updating iPhone software, use Settings for a normal iOS update, a computer when the over-the-air path fails, and repair software when the update is genuinely stuck or the iPhone cannot finish installation.
If normal update paths fail, iMyFone Fixppo can guide the update or repair workflow from a computer. Use it with a current backup and avoid treating rollback as a routine update step.
![]()
![]()
Melvin Cooper has over 10 years of experience in the technology industry and is an expert at providing tips and handy solutions to Apple and Android users. Dedicated to helping millions of users improve their experience with mobile devices, he has maintained an impressive record of solving problems.
-
Fix iPhone Stuck on Update Requested [iOS 27 Supported]
iPhone stuck on update requested? Learn why it happens and discover 8 proven solutions to get your iOS update back on normal without data loss.
3 mins read -
[2025 New] How to Stop iOS 17/18/26 Update in Progress?
How to stop iOS 17/18/26 update in progress when you feel like staying in the current iOS version? Here's how to do it via 4 methods.
3 mins read -
5 Ways for iOS 26 Beta Download [Developer & Public Beta]
How to get iOS 26 beta? Whether you want to download iOS 26 developer or public beta, you can find the suitable methods with our guide. 5 Ways here!
3 mins read -
17 Important Facebook Statistics You Should Know in 2025
Do you want to know some up-to-date Facebook statistics? We break down 17 must-know Facebook stats about demographics, engagement rate and more.
3 mins read -
[2025 Full Guide] All About iOS Update Issues and Solutions
Have you encountered different problems during or after iOS update? This article focuses on all iOS update issues and solutions. Hope you can learn from it.
5 mins read -
[Full Guide] 50+ iOS 18 Bugs and Fixes You Should Know 2025
What are some known iOS 18 bugs? Read on this article to learn everything about iOS 18 bugs and fixes.
5 mins read
Was this page helpful?
Thanks for your rating
Rated successfully!
You have already rated this article, please do not repeat scoring!