No matter when you got a new iPhone, the first thing you want is to transfer all your data from your old iPhone to your new iPhone, especially your photos on your old iPhone. Most people will choose to back up their photos first before copy any other files. If you are wondering how to transfer photos from old iPhone to your new iPhone, you are on the right spot.
Transfer Photos from Old iPhone to New iPhone with iTunes
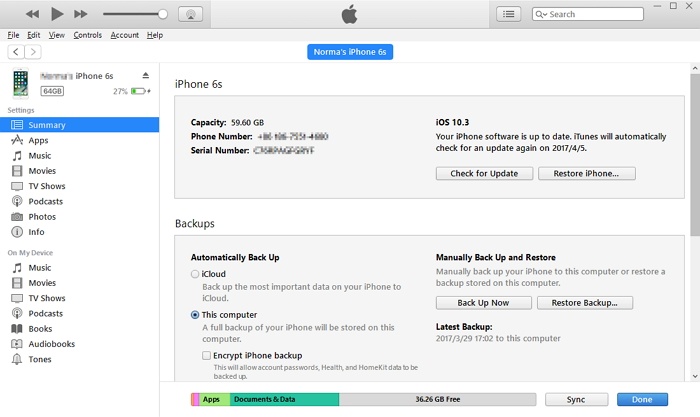
The first thing you have to do before transferring your old iPhone photos to the new device is back up the old iOS device on iTunes by following the simple steps below:
Step 1: Connect your old iPhone to a computer and launch iTunes. Select the device on iTunes.
Step 2: Tap Back Up Now. If you need to encrypt your backup, select Encrypt iPhone backup and create a memorable password. To confirm that a backup has been created, tap Preferences > click Devices to see your recent backup.
After creating your backup, you will need to restore it on your new iPhone by following the steps below:
Step 1: Launch iTunes that you used to back up your old iPhone, then connect your new iPhone.
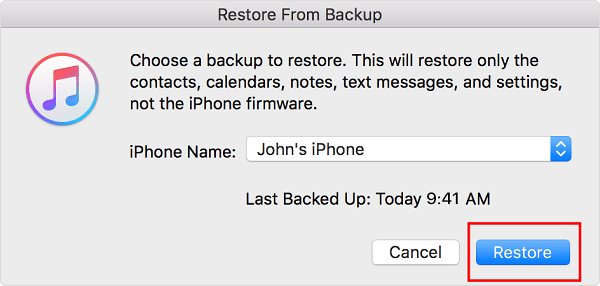
Step 2: Select your new iPhone when it appears in iTunes, then select Restore Backup in iTunes.
Step 3: Choose the backup you made of your old iPhone. Enter a password if the backup was encrypted. Wait for the restoration to finish.
Using iTunes to transfer photos to your new iPhone has several disadvantages. These include:
- All your data on your new iPhone will be erased.
- iTunes supports a maximum 5 iOS devices and 5 computers.
Transfer Photos from Old iPhone to New iPhone with iCloud
Before transferring your photos from old iPhone to your new iPhone, you will need to create a backup on iCloud for your old iPhone. We show you how below:
Step 1: After connecting your old iPhone to a stable Wi-Fi network, launch Settings > tap [your name] > click iCloud > tap iCloud Backup.
Step 2: After making sure that iCloud Backup is toggled on, click Back Up Now. Allow the device to complete the backup process.
After creating the iCloud backup, you will need to restore the backup to the new iPhone as shown below:
Step 1: Turn the iPhone on. A “Hello” screen should appear. If the device is already set up, erase it.
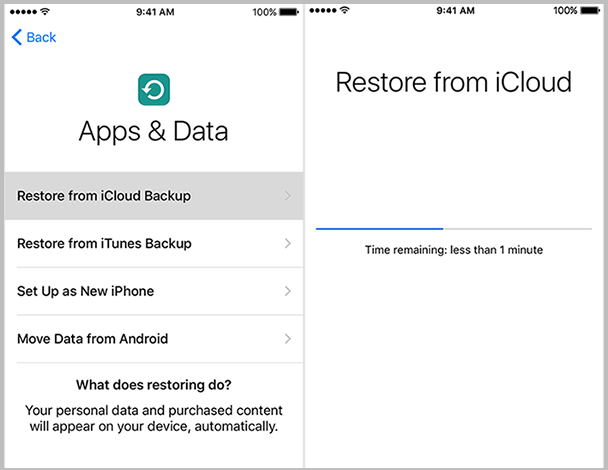
Step 2: Follow the onscreen instructions and join a Wi-Fi network on the Wi-Fi screen. When you reach the Apps & Data screen, click Restore from iCloud Backup. Sign into iCloud using your credentials.
Step 3: Choose the backup you created earlier on. Stay connected to the Wi-Fi for the restoration to finish.
The cons of transferring photos from old iPhone to new iPhone with iCloud include:
- All the data available on the new iPhone will be erased.
- You will need a strong Wi-Fi connection.
Transfer Photos from Your Old iPhone to Computer with a Transfer Tool
To avoid the serious limitations posed by both iTunes and iCloud, you can use a third-party professional transfer tool. The best tool to use is - iMyFone TunesMate. This tool which is built to work with all iOS devices allows you to transfer your photos from your old iPhone to another device. If you just want to export the photos from your old iPhone and back them up on your computer, then you are on the right way. With TunesMate you can manage and transfer your media files like photos, music, videos etc. easily to and from iPhone, iTunes and computer. The features this tool offers include:
- You get to avoid the annoying errors present in iTunes by bypassing it.
- You get to transfer all kinds of media files including photos, music, playlists, videos, etc.
- You can have a Two-way Transfer for your media files to and from your iPhone, iTunes and PC.
- You can use TunesMate to sync your iTunes library to your iOS device without overwriting the currently available iOS device data.
- You get to rebuild the corrupted or damaged iTunes library.
To transfer photos from your old iPhone to another device with a single click, follow the simple steps we have outlined below:
Step 1: After launching TunesMate on your Mac or Windows PC, connect your iOS device using a USB cable to the computer.
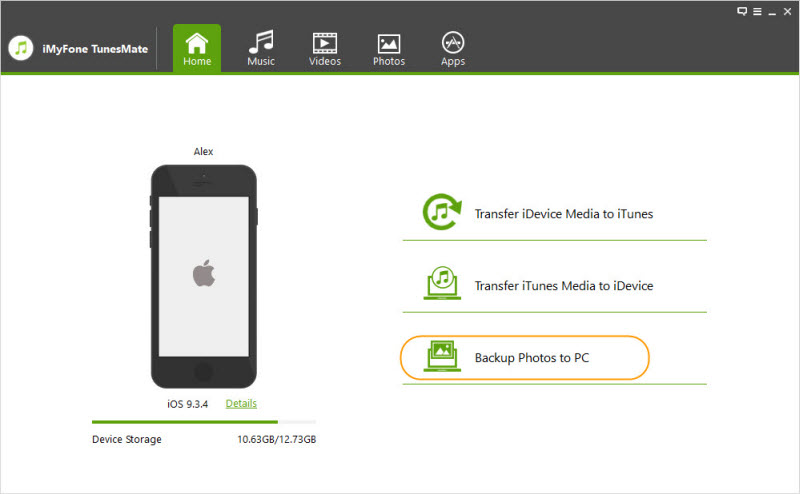
Step 2: On the TunesMate home interface, tap Backup Photos to PC. On the pop up that appears, choose a target folder to store your old iPhone photos on your computer.
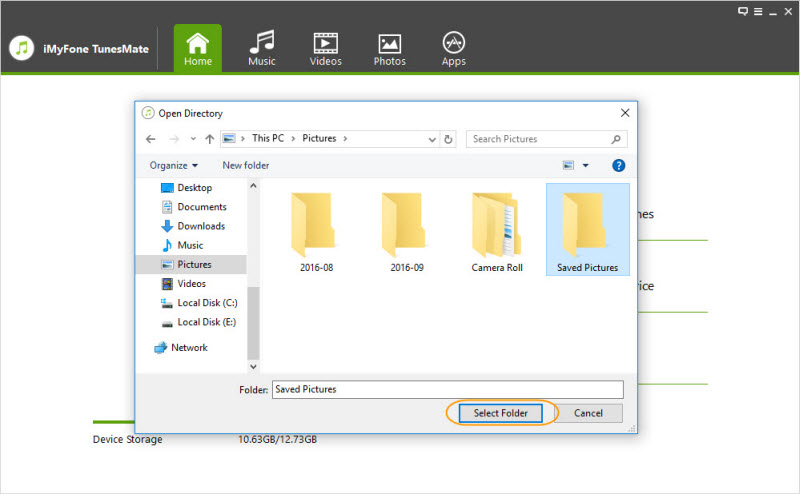
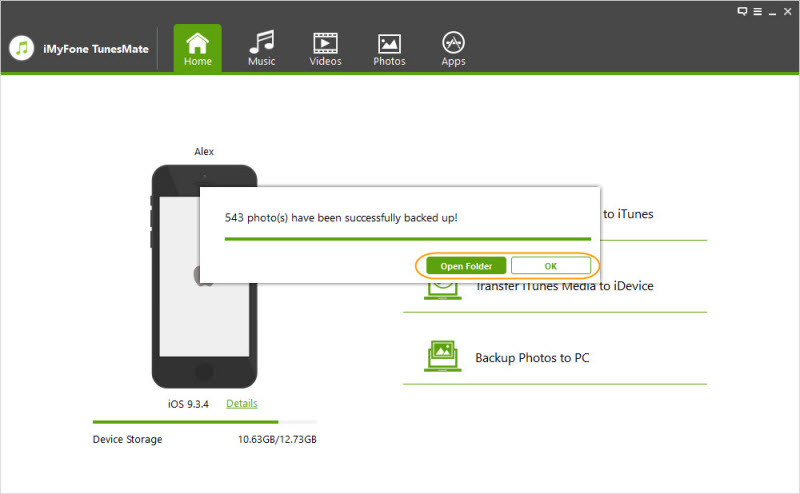
Step 3: Tap Select Folder to initiate the transfer process. After the process is done, you will see a "Backup Successful" message. Tap Open Folder to view your photos. Tap OK to close the window.
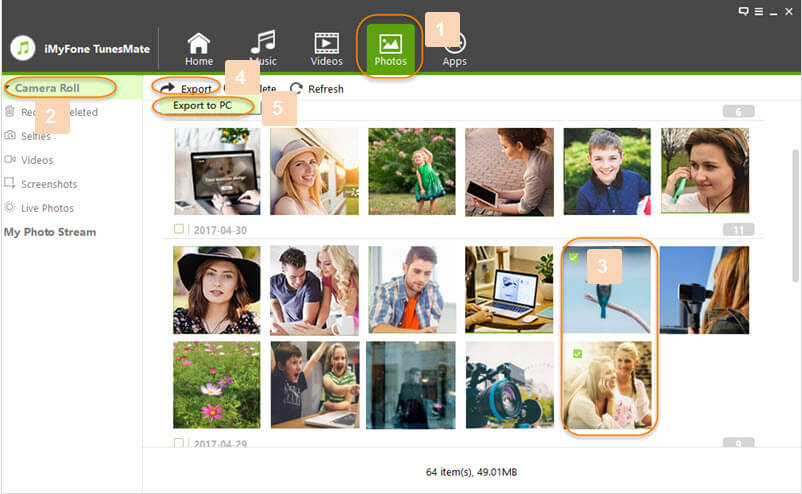
If you don’t want to back up all your photos, you can try back up them selectively.
If you would like to transfer the photos you have on your old iPhone to a new device, this article should help you out. While we have shown you how to transfer photos from old iPhone to new iPhone using iTunes and iCloud, these methods have numerous cons. Both methods will erase the data you have on your new iOS device. To avoid iTunes and iCloud limitations, you can use a third-party professional transfer tool that is your media file manager – iMyFone TunesMate.


 March 22, 2023

