


8 Ways: How to Clean Trash on an Android Phone
Category: Android Recovery Tips

7 mins read
Our Android phones can accumulate a ton of unnecessary files like cache data, downloads, and files sitting in the recycle bin. These files gobble up storage space, slowing down your phone's performance. That's why regularly cleaning up junk files on your Android is essential.
How to Access Android’s trash bin? How to Empty Trash on Android?
This guide will explore six methods to thoroughly clean your phone's internal storage and offer tips on recovering accidentally deleted files on Android.
In this article:

Part 1. 2 Things You Need to Know About Android Phone’s Trash
1 Does my Android phone have a Trash bin?
Yes. However, the Recycle Bin on Android may look different from that on a computer. Unlike desktop trash systems, Android does not provide a universal Recycle Bin to store deleted files. Instead, most Android apps manage their own trash bins, which you must empty separately to free up storage space on your phone.
The functionality of the Android trash bin is similar to that on a computer. When you delete something, a window pops up indicating it has been stored in the recycle bin and can be recovered within 30 days. After a set amount of time, these deleted files will be permanently removed, freeing up space on your Android device.
1 Where is Trash bin on Android Phone?
While Android doesn't have a system-wide trash bin, some apps offer their own recycling features. Here's how to find them:
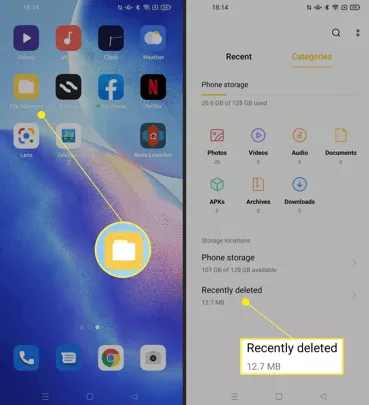
- Files App: Many file managers have a trash bin. Look for the "Trash" option in the menu (usually three horizontal lines) or within the app itself.
- Photos App: Most Photos apps have a "Trash" or "Recently deleted" folder within the Library section.
For other apps, check their settings or search online for "[app name] trash location" to find specific instructions.
Part 2. How to Empty Trash on Android for More Storage
8 Ways to Clear Trash Files on Your Android Phone:
- Method 1: Uninstall Unused Apps (Significant Storage Gains)
- Method 2: Clear App Cache (Moderate Storage Gains)
- Method 3: Delete Downloaded Files (Variable Storage Gains)
- Method 4: Empty the Recycle Bin (Small to Moderate Gains)
- Method 5: Managing Downloaded Music
- Method 6: Perform a Factory Reset (Extreme Measure - Clears All Data)
- Method 7: Using an SD Card
- Method 8: Free Up Space with Backups and Selective Deletion
Here's a breakdown of different methods to clean up junk files on your Android phone, along with specific steps for each approach.
1 Method 1: Uninstall Unused Apps (Significant Storage Gains)
Step 1: Open the Settings app on your phone.
Step 2: Tap on Apps & notifications (or a similar option depending on your device).
Step 3: See a list of all installed apps. You can sort by recently used or storage size for easier identification.
Step 4: Tap on an app you no longer use.
Step 5: Select Uninstall and confirm the deletion.
2 Method 2: Clear App Cache (Moderate Storage Gains)
Step 1: Open Settings on your phone.
Step 2: Tap on Apps & notifications (or similar option).
Step 3: Choose the app whose cache you want to clear.
Step 4: Tap on Storage.
Step 5: Look for the option labeled Cache or Clear Cache.
Step 6: Tap Clear Cache to confirm.

3 Method 3: Delete Downloaded Files (Variable Storage Gains)
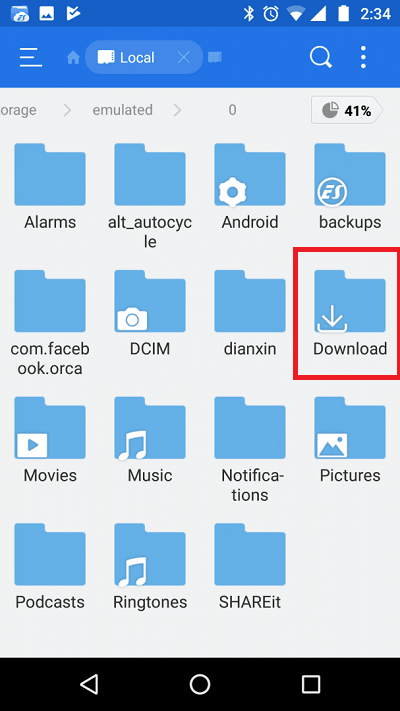
Step 1: Open the Files app (or your default file manager app).
Step 2: Look for a folder named Downloads.
Step 3: Browse through the downloaded files and identify those you no longer need.
Step 4: Tap and hold on a file to select it.
Step 5: Tap the Delete icon (usually a trash can symbol) to remove the file.
4 Method 4: Empty the Recycle Bin (Small to Moderate Gains)
The location of the recycle bin can vary depending on your phone model and Android version. It might be within a specific app's settings or a dedicated folder named "Recycle Bin" or "Recently Deleted."
Consult your phone's manual or search online for specific instructions on locating the recycle bin for your device.
Once you find the recycle bin, there should be an option to Empty or Clear All.
5 Method 5: Managing Downloaded Music
Music can be a lifesaver on long commutes or during workouts, but downloaded songs can also be storage hogs. Here's how to manage your music and free up space on your Android phone:
Most music apps allow you to delete individual songs by tapping and holding on a song, then selecting "Delete." You can also likely choose "Delete from Playlist" if you want to keep the song in your library but remove it from a specific playlist.
6 Method 6: Perform a Factory Reset (Extreme Measure - Clears All Data)
Warning: This method wipes all your data and settings from the phone. Only use this as a last resort if your storage space is critically low and other methods haven't yielded sufficient results.
Step 1: Back up all your important data (photos, videos, contacts, etc.) before proceeding.
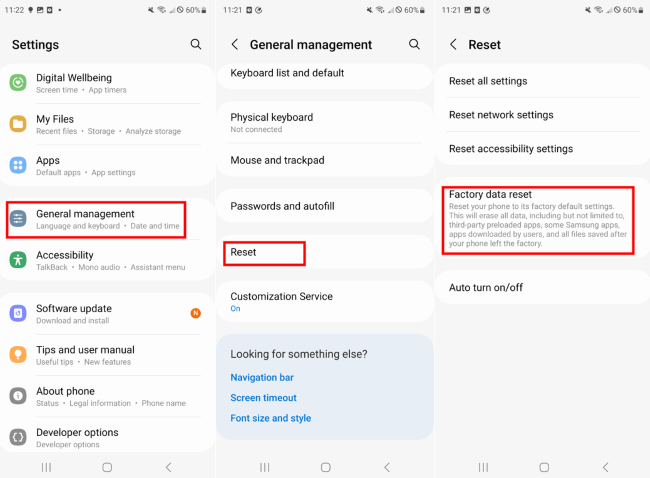
Step 2: Open Settings on your phone.
Step 3: Look for System or General Management depending on your device.
Step 4: Tap on Reset or Reset Options.
Step 5: Tap "Factory data reset" and confirm.
Note
After a factory reset, you'll need to set up your phone again and restore any backed-up data.

7 Method 7: Using an SD Card
An SD card acts like an external hard drive for your phone, significantly boosting its storage capabilities. This allows you to store more photos, videos, music, and other files without worrying about filling up your phone's internal space.
Before You Buy an SD Card:
Compatibility Check: Ensure your Android device has a microSD card slot. Not all phones, especially newer models, come with expandable storage options.
Card Capacity and Speed: Consider the storage capacity you need and choose an SD card with enough space for your data. Higher speed SD cards (e.g., Class 10, UHS-I) are recommended for smoother performance, especially when dealing with large files or 4K videos.
Once you have a compatible SD card, simply insert it into the designated slot on your phone. Your phone will usually prompt you to format the card, which erases any existing data. After formatting, you can start transferring files or using the SD card for app storage according to your phone's settings and app capabilities.

Tips
While SD cards offer a convenient storage solution, they can be susceptible to physical damage or data corruption compared to internal storage. Regularly backing up your data to a separate location like a computer or cloud storage is still recommended.
8 Method 8: Free Up Space with Backups and Selective Deletion
Here's a powerful strategy to maximize storage space on your Android phone: Back up important data to another location and then delete it from your device.
1. Create a Backup:
There are several ways to back up your Android phone:
Note
- Connect to a Computer: Physically connect your phone to your computer using a USB cable. Your computer will likely detect your phone as a removable drive, just like a USB flash drive. Access your phone's files and folders, and then copy and paste the important content (photos, videos, documents) to your computer's storage for safekeeping.
- Cloud Storage Services: Utilize cloud storage services like Google Drive, Dropbox, or OneDrive. These services allow you to upload your data to their servers, creating an online backup accessible from any device.
2. Delete Backed Up Data from Phone:
Once you've confirmed a successful backup, you can safely delete the backed-up content from your phone. This frees up significant storage space.
Part 3. How to Recover Empty Trash Files on Android?
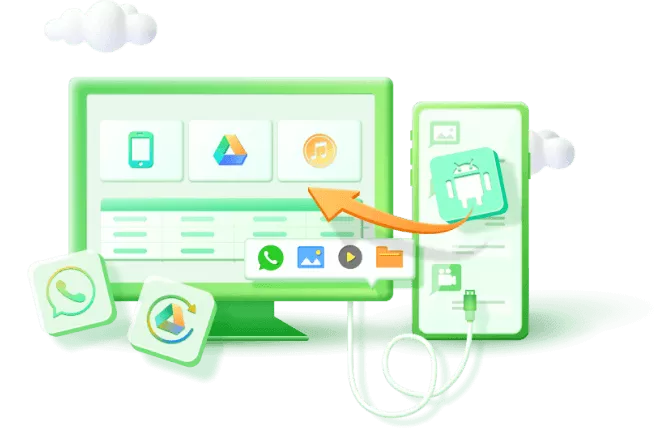
Accidentally Deleted Files? iMyFone D-Back for Android to the Rescue!
While regularly emptying your Android's recycle bin is a good practice, there might be times when you accidentally delete important files, leading to a moment of panic.
In such situations, iMyFone D-Back for Android emerges as a top-notch Android data recovery software, capable of retrieving various data types from your Android phone's internal storage .
Key Features:
- Recovers deleted photos, videos, text messages and more data from Android devices
- Retrieves deleted files from external SD cards and internal storage.
- Enables preview and selective recovery.
- Backs up deleted and existing data.
- Compatible with over 6000 Android devices and multiple Android OS versions.
Recover deleted Trash files on Android in just a few steps!
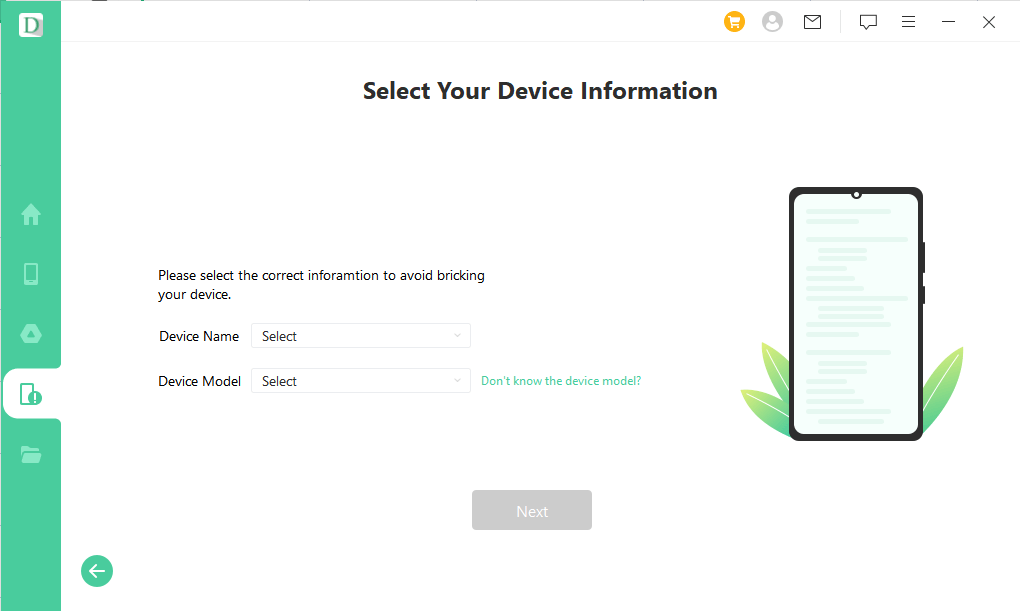
Step 1: Install and open the D-Back for Android app on your PC, then choose a recovery mode based on your needs.

Step 2: On the next screen, select your device name and model from the options provided.
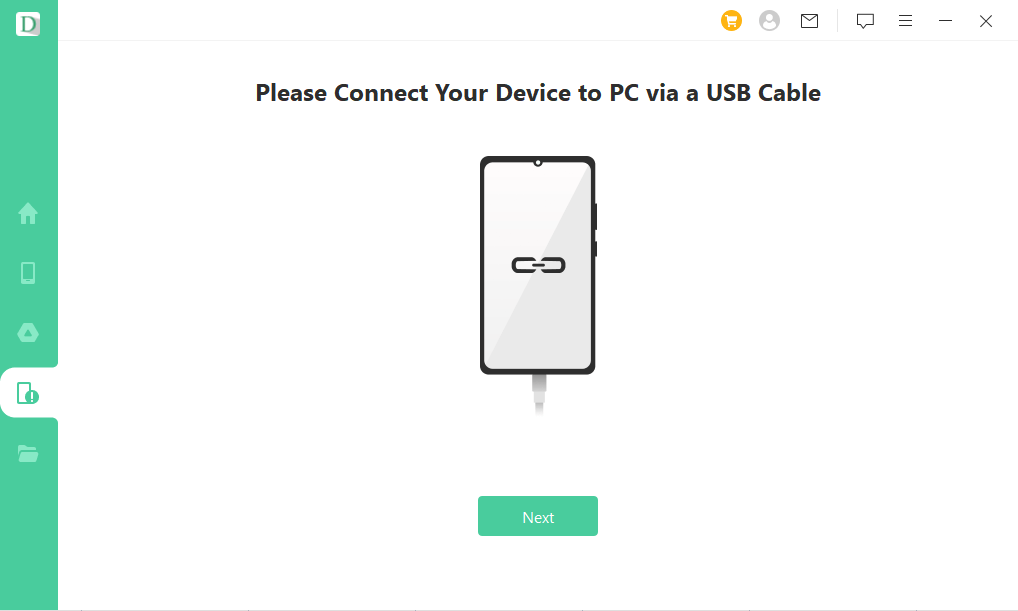
Step 3: Up next, use a USB cable to connect your device to your computer.
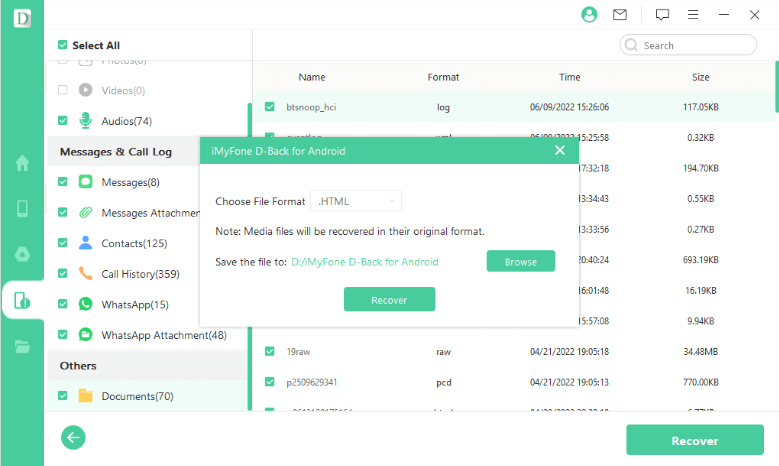
Step 4: Choose the file type from the available options. To recover deleted files from the trash on Android, select "Documents" and click "Next."
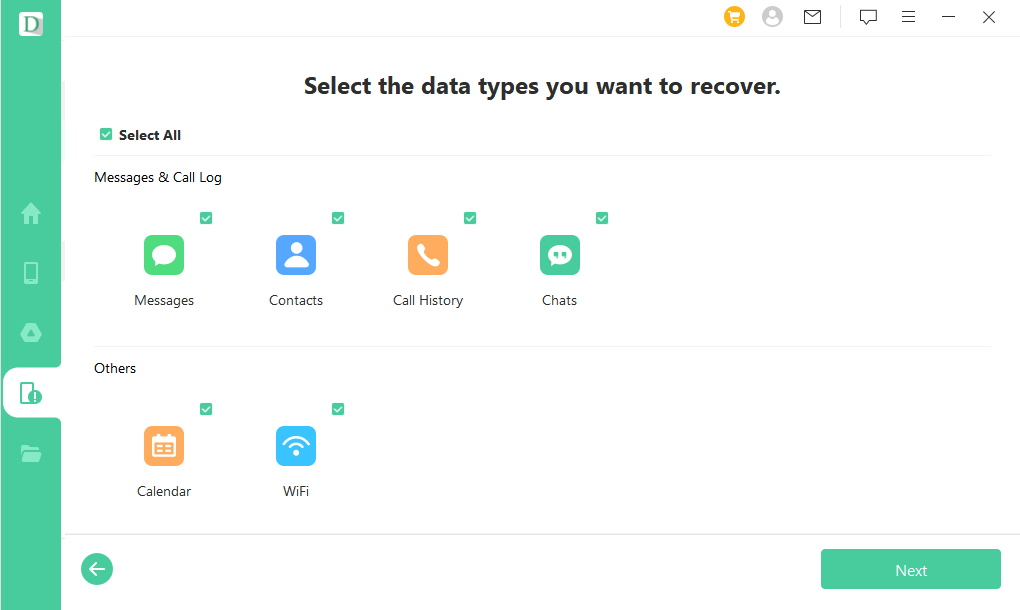
Step 5: The scanning results will appear on the screen. Select the files you want to recover and click "Recover."
Part 4. How to Clear Trash in Android Apps (Photos, Files, etc.)
While the recycle bin on your Android phone helps manage deleted files, some apps create their own hidden "trash" folders. Here's a guide on how to find and clear these app-specific junk files for three commonly used apps:
1. Google Photos
Access Trash: Open the Google Photos app and tap the hamburger menu (three horizontal lines) in the top left corner.
Locate Deleted Photos: Look for the "Trash" folder within the menu options. Here you'll find all recently deleted photos.
Clear Trash: Select individual photos you want to permanently delete or tap "Select All" to choose them all. Finally, tap the "Delete" or "Trash" icon to clear them permanently.

2. Gmail
Open Trash Folder: Launch the Gmail app and tap the hamburger menu in the top left corner.
Find Deleted Emails: Locate and tap the "Trash" folder from the list of labels.
Empty Trash: Here, you can select individual emails for deletion or tap "Select All" to choose them all. Finally, tap the "Delete" icon in the toolbar to remove them permanently. Alternatively, if you want to erase everything, select "Empty Trash Now" to completely wipe the trash folder.

3. Dropbox
Access Deleted Files: Open the Dropbox app and tap the "Trash" icon located in the top toolbar.
View Deleted Items: This section displays a list of all deleted files in your Dropbox account.
Delete Permanently: Select the files you want to remove permanently. Tap the "Delete" button again to confirm your choice. Dropbox might ask for a final confirmation before erasing the files.

Part 5. FAQs about Empty Trash on Android
1 Where are deleted files storage on Android?
When you delete files on an Android device, they're not immediately removed from storage. Instead, the space they occupied is marked as available for new data, and the files are kept until overwritten. The actual location depends on the file type and the device's file system. Typically, deleted files are stored in the device's internal storage or SD card, if one is present. They're placed in a hidden directory known as the "Trash" or "Recycle Bin."
However, Android doesn't have a built-in Trash or Recycle Bin like a computer does. Instead, some third-party file manager apps or system utilities might provide this feature. If you're looking to recover deleted files, you might need to use specialized data recovery software designed for Android.
2 How long are files kept in the app trash?
The retention period for trashed files varies by app. Some apps might hold them for a few days, while others might keep them for weeks. You can usually find this information within the app's settings or documentation.
3 Is there a way to recover permanently deleted files?
Yes, you can recover permanently deleted files from Android. The success rate depends on how long ago the files were deleted and whether the storage space they occupied has been overwritten with new data. One popular choice is iMyFone D-Back for Android. It allows you to scan your device's storage for recoverable files, including photos, videos, contacts, and messages.
Conclusion
In this comprehensive guide, we'll explore six effective methods to empty the trash on your Android device, along with additional tips on how to recover accidentally deleted files using D-Back for Android.
By implementing these strategies, you can effectively reclaim valuable storage space, enhance your phone's performance and speed, and safeguard your crucial data.
Feel free to download D-Back for Android!
iMyFone D-Back for Android
Recover Data from Windows/Mac/iOS
168,282 people have downloaded it.
- Supports a wide range of data types such as messages, photos, videos and more.
- It can recover your lost data from any scenarios
- Compatible with 6000+ Android Phones.
- 100% deep scanning and 99% successful recovery
(Click to rate this post)
Generally rated 5 (256 participated)
Rated successfully!
You have already rated this article, please do not repeat scoring!