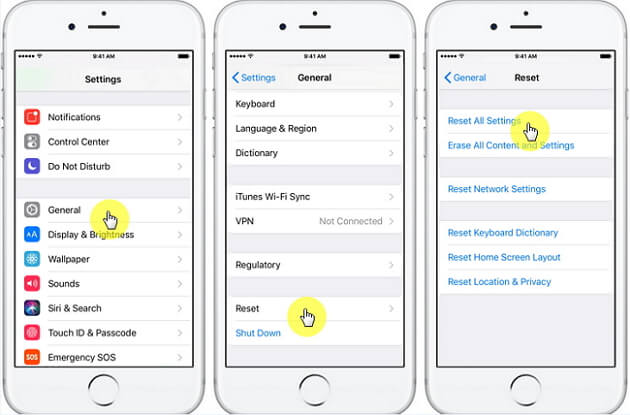
iDevices (iPhone/iPad/iPod Touch) have a built-in feature that allows you to reset the device via Settings App. Resetting your iDevice is useful when you are troubleshooting the device, want to erase all the data before selling it, and many other reasons. There are two options available under the Reset section; Reset All Settings and Erase All Content and Settings.
Difference between Reset All Settings and Erase All Content and Settings
The difference between both reset options is explained below:
Reset All Settings
Reset All Settings is an option that restores all settings of the iDevice to factory settings, without erasing user data/media.
Erase All Content and Settings
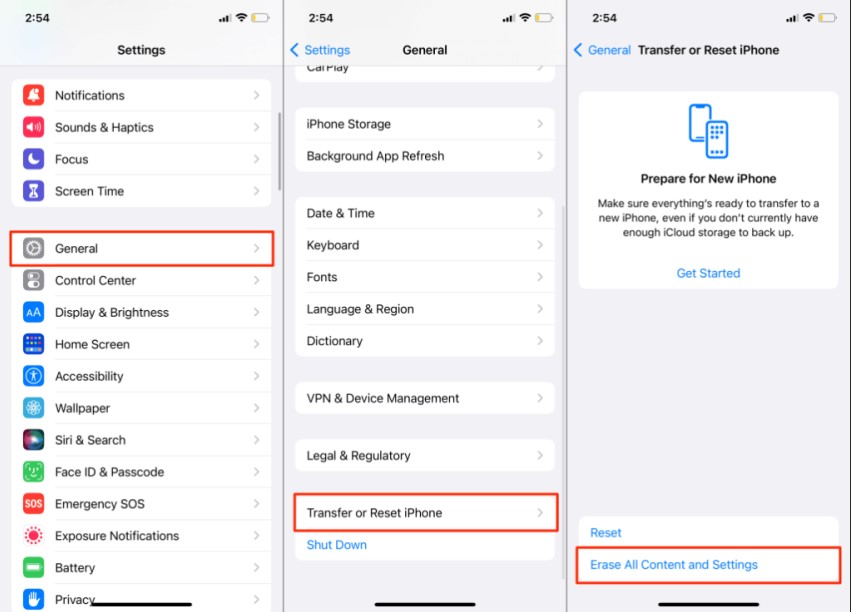
As the name suggests, Erase All Content and Settings erases everything off the iDevice, restoring it to factory settings. This reset option erases all your media files such as photos, videos, apps, email accounts, and everything else that is stored on your iDevice.
Reset All Settings or Erase All Content and Settings, Which One You Should Choose
As mentioned above, the primary difference between both reset options is that one only resets settings while the other resets settings and erases user data/media. Because of this simple yet significant difference, the reset option you should choose depends on your specific needs. Read below.
When to Use Reset All Settings
Reset All Settings is a reset option which is useful when your iDevice is encountering various issues because of the changes in device settings and configurations. These changes may include your home screen arrangement, general system settings, keyboard settings, etc. Reset All Settings will fix such issues.
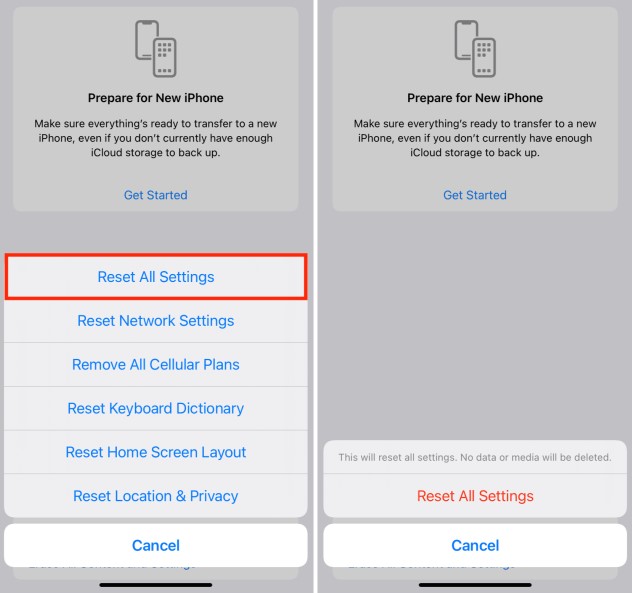
Furthermore, if your iDevice feels sluggish and you want to restore its performance without losing any of your data, then you should use this reset option. By using this reset option, you will be able to solve the problem quickly and keep your data as well.
When to Use Erase All Content and Settings
Sometimes Reset All Settings option does not solve the problem. In this case, you should choose Erase All Content and Settings option. While using this reset option takes considerably more time and erases all your data, it is sometimes the only way to solve iDevice issues. Some examples of such issues include the iDevice randomly crashing, freezing, or restarting, etc.
Note
A thing to note is that Erase All Content and Settings does not downgrade your iDevice’s firmware, it simply restores your iDevice to factory settings and erases all data.
Cons of Reset All Settings & Erase All Content and Settings
The main problem with both built-in reset options is that the data which is removed is recoverable, which means anyone with a recovery software will be able to easily recover it. This is a huge privacy risk, especially if you are resetting via these options before selling your iDevice.
The Safest Way to Reset Your iPhone/iPad/iPod Touch - Complete Reset
What is Complete Reset
As mentioned above, the data erased via built-in reset options of iDevice can be easily recovered. So you need a method to fully reset your iDevice data in such a way that it is completely unrecoverable.
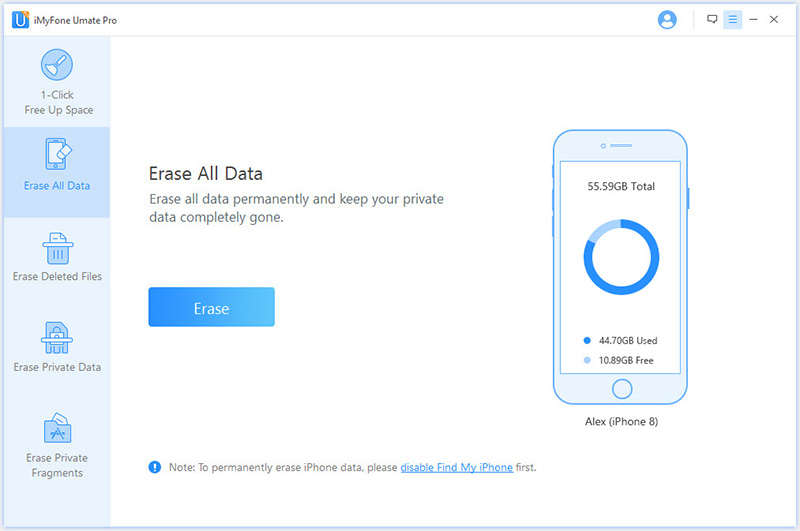
You can achieve this by using third-party data erasing tool iMyFone Umate Pro or iMyFone Umate Pro for Mac. This software has a specific feature for this purpose. It is called Erase All Data. It erases all your iDevice’s data permanently, making it 100% unrecoverable. You can consider it as a Complete Reset of your device.
When to Use Erase All Data
Erase All Data mode of Umate Pro is extremely useful when you are about to sell your iDevice and want to erase all your data permanently so that the new owner of the device cannot recover it. You can use this mode to protect your privacy.
Key Features:
- Erase Private Data: Permanently erase private data such as call logs, contacts, messages, data from WhatsApp, Kik, Viber, etc.
- Erase Deleted Files: Permanently erase traces of deleted files and make them unrecoverable.
- Erase Private Fragments: Permanently erase private data fragments left by third-party apps.
- 1-Click Free Up Space: Clean junk, temporary files with a single click and boost iDevice’s performance.
Steps to Erase All Data Via iMyFone Umate Pro
Step 1. Launch iMyFone Umate Pro and connect your iDevice to your computer. Click on "Erase All Data" tab on iMyFone Umate Pro and then click the "Erase" button when prompted.
Step 3. Choose a deletion security level from low, medium, and high depending on your preference. And then type "Delete" in the textbox provided on the same window.
Step 4. Click "Erase Now" button when everything has been configured. The deletion process will begin.


 March 12, 2024

