Today’s children tend to enjoy playing mobile phone games and spend a lot of time on the phone. Unfortunately, they might find their way to your other sensitive materials and personal data stored on your iPhone. Some parents think that by disabling Wi-Fi or cellular data will prevent them from spending time on the internet. However, this does not prevent them from accessing other apps and parts of your iPhone. If you are experiencing such issues, iPhone Guided Access is here to offer you a solution to this problem.
What is guided Access on iPhone?
iPhone Guided Access feature is an accessibility feature that disables all gestures, taps, button presses and any other activity on your iPhone outside those required for your current app. In other words, it allows access to a single app. If your child tries to leave the permitted app and try opening other apps or going to a different part of the iPhone, he or she will be stopped. If they try to click the Home button, they will be required to enter a four-digit code in order to disable the Guided Access feature.
How to use Guided Access on iPhone?
Guided Access can also be used to set up a guest mode on your iPhone. This means that with this feature enabled you can easily hand over your device to someone else to use it without worrying about them snooping through your personal information and files.
How to Turn On Guided Access on iPhone?
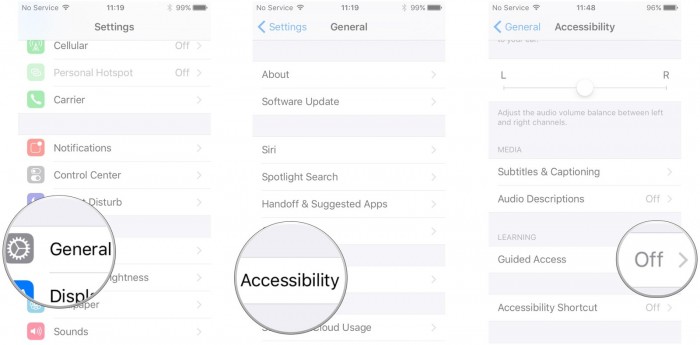
Step 1: Open the Settings app on your iPhone.
Step 2: Tap on General > Accessibility.
Step 3: Click on Guided Access found under the Learning section on your iPhone. Tap on the toggle switch to enable the Guided Access.
Step 4: Click on the Passcode Settings.
Step 5: Touch on the Set Guided Access Passcode option and then set your passcode.
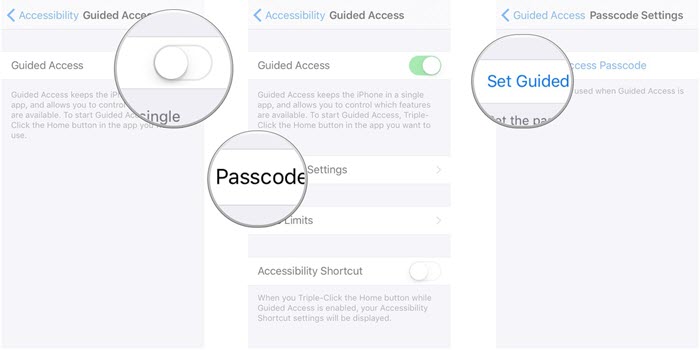
Step 6: Enable the Accessibility Shortcut by toggling the switch to On. This allows you to triple-click the Home button and then enter the Guided Access whenever you want.
How to enable Touch ID for Guided Access?
iPhone’s Touch ID feature lets you access your device without the need of entering the passcode. All you have to do is to is place your authenticated finger and the iPhone unlocks itself. If you are using this feature to unlock your device, you can also use it for Guided Access. It is ideal for those parents with clever kids who can memorize your passcode.
Step 1: Open the Settings >General > Accessibility > Guided Access > Passcode Settings
Step 2: Tap on the Switch that is next to the Touch ID to activate it.
How to Start Guided Access on iPhone?
For you to start using the Guided Access feature, you need to launch it. After enabling this feature, you can then start using it. Here are steps on how to use this iPhone feature:
Step 1: Launch the app that you would like your child or any other user to have access to. If it is a game or an app, launch it first.
Step 2: Triple-click the Home button on your device to launch the Guided Access feature.
Step 3: Circle any areas or apps on the screen that you would wish to deny access to.
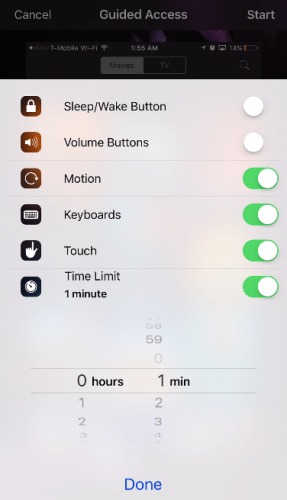
Step 4: Touch on the Options in the bottom left corner of the screen to choose whether you want to grant access to other features like the Sleep/Wake button, touch screen feature, motion sensor, and Volume buttons. Once you have made the selection, tap on Done to save.
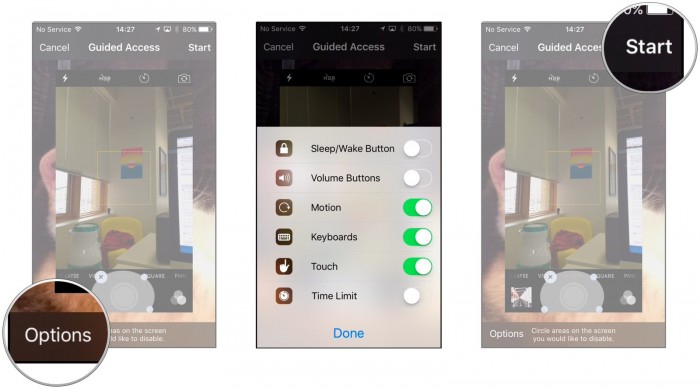
Step 5: Touch on the Start button at the top of your screen to begin the Guided Access.
How to Turn off Guided Access on iPhone?
You can decide to end the Guided Access at any time. However, for you to be able to do so, you will have to follow these steps:
Step 1: Triple-click the Home button or the Side button
Step 2: Enter your Guided Access passcode
Step 3: Tap on the End option to stop the Guided Access.
Options of Guided Access
Sleep/Wake button: Toggle off the Sleep/Wake button to prevent your kids accidentally pressing the button to lock the screen.
Volume button: When setting up the Guided Access feature, you can choose to toggle off the volume button and this will prevent other users from increasing the volume of the device.
Motion: Switch off the Motion feature of your device and the screen will not respond to the gyro sensor feature of the iPhone. However, if your kids are playing motion games do not toggle this feature off.
Keyboards: Toggle of the keyboards and prevent access to the keyboard when using the locked app.
Touch: When you toggle off the Touch feature, this will prevent the touchscreen from responding to any activity on the screen.
Dictionary Lookup: Once the Dictionary Lookup feature is toggled off, no one will be able to use this feature to find dictionary meanings of certain words.
Time Limit: You can also decide to toggle off the Time Limit feature that is set for the Guided Access feature. No one will be able to change this limit no matter what unless they have the passcode to your device.
Bonus. How to Avoid Privacy Leak on iPhone?
Instead of going through all the trouble of enabling and disabling the Guided Access, you can simply use the iMyFone Umate Pro. It is the best way to protect your privacy. With this software, you will be able to permanently erase those sensitive materials from your device and no one will be able to access them.
Key Features:
- Secure your privacy by deleting some sensitive data and make them completely unrecoverable.
- You can preview and erase your already deleted data files and make them 100% unrecoverable.
- It helps protect your personal data including contacts photos, messages, chats, call history, videos, browsing data and any other sensitive material on your iPhone.
- It lets you erase your all your messages and all attachments of 3rd-party apps including WhatsApp, Kik, WeChat, Facebook Messenger, Viber and many more.
- A great amount of professional software review sites recommend iMyFone Umate Pro to protect privacy, including MacWorld, iPhoneinCanada, APPKED, etc.

Steps on How to Permanently Erase Data
Step 1: Download, install and open the iMyFone Umate Pro on your computer. Then connect your iPhone to the computer.
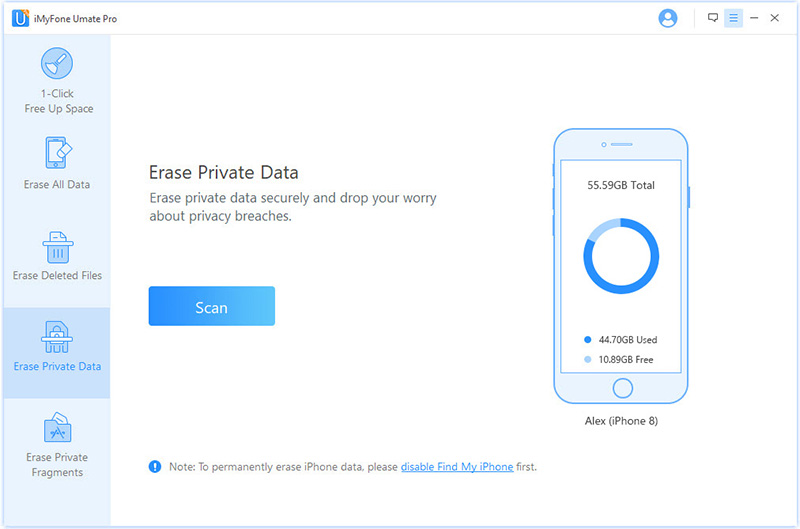
Step 2: Choose the Erase Private Data Mode and then click on Scan for the software to start scanning your device.
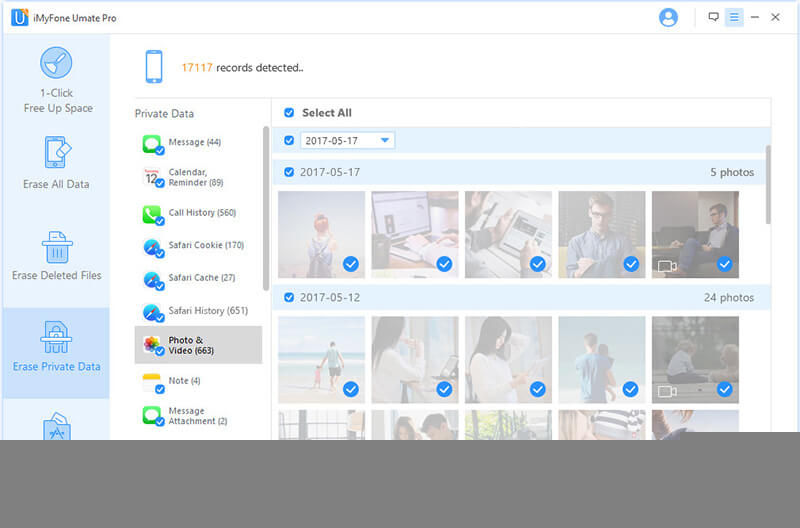
Step 3: Preview and select the data that you want to permanently erase. After the scanning process, the software will display all your private data and you can select the files you do not want to have on your device.
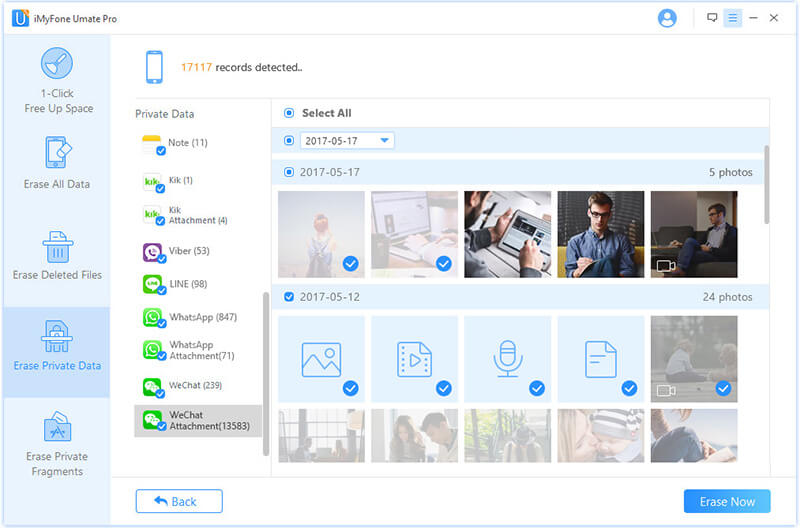
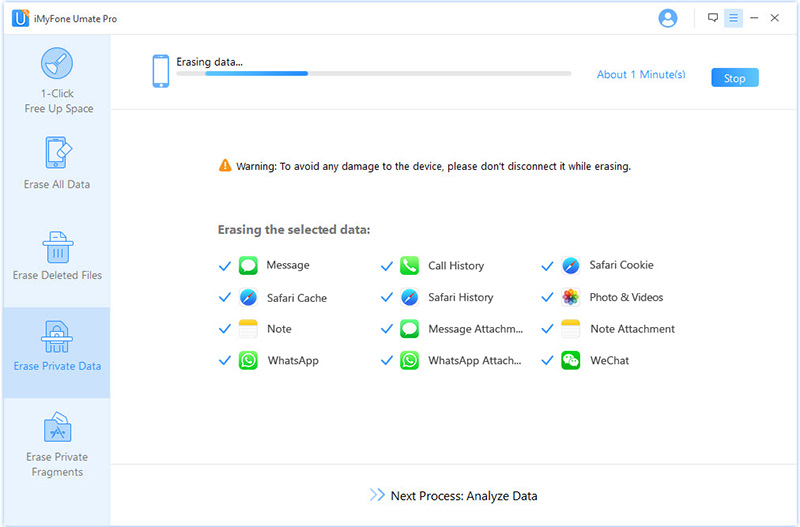
Step 4: Once you have selected the files to erase, click on Erase Now button to start erasing the private data permanently.


 March 12, 2024

