The Voice Memos app on iPhone is an excellent application coming with different features that an individual requires. People use the app for several purposes, such as recording an interview, a concert or a speech, and it fulfills their requirement without the need to write or type and store in notes.
Everybody would like to save his or her voice memos for safety or saving space on iOS device. If you are helpless in finding an appropriate solution to back up the voice memos from your iPhone to your computer, then take a quick look at the tutorial below that will give you two different methods to back up voice memos on iPhone.
Way 1 Back Up iPhone Voice Memos to Computer Using D-Port (iOS 14 Supported)
iMyFone D-Port is an iPhone data exporter tool that is skilled in extracting the existing data from iPhone in a few simple steps. It is an exception in performance due to its result-oriented nature. It works right on the target without a hassle and completes the task of backing up files from iPhone efficiently. The simple-to-use interface coupled with its technology-driven features make it outstanding from other data exporters.
iMyFone D-Port iPhone Data Exporter
Key Features:
- Back up WhatsApp, Kik, Viber, Line, SMS, contacts, notes and more on iPhone/iPad/iPod touch to computer.
- Extract voice memos and 17 more types of data from old iTunes/iCloud backups to computer.
- Won’t affect your existing data on iOS devices during extraction.
- Supports various iPhone models and iOS versions including the latest iOS 14.
How to Back Up Voice Memos Selectively Using iMyFone D-Port
Step 1: Choose Appropriate Mode
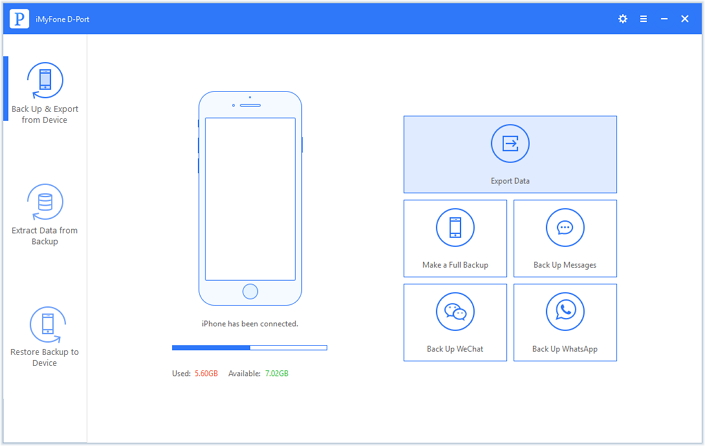
You can download and install the program on your computer, then launch it. From the main interface window, choose “Backup & Export from Device” option. Choose the “Export Data” option.
Step 2: Select Types of Data to Export
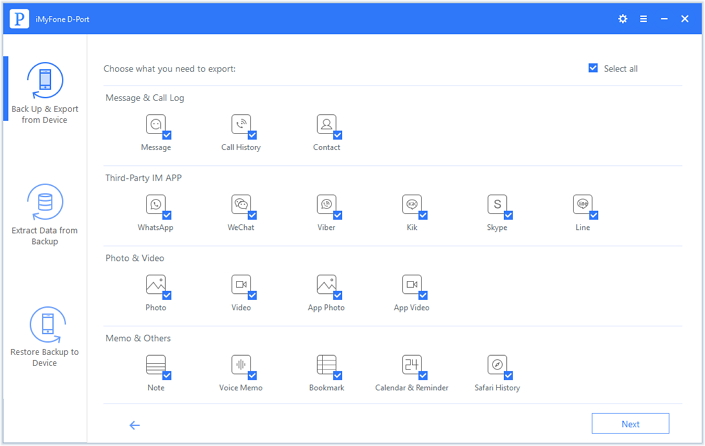
In the next screen, select the file type that you want to export. Choose “Voice Memo” under “Memos & other” category. Upon selecting the “Next” button to connect your iPhone to computer.
Step 3: Connect iPhone to Computer to Scan
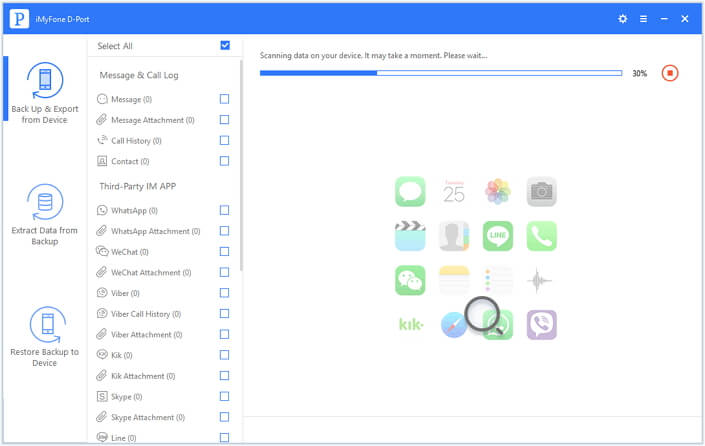
Don't forget to connect your iPhone to the computer for scanning. Once the program detects the iOS device, press the “Scan” button to begin scanning the device for voice memos.
Step 4: Preview and Back Up Voice Memos to Computer
As soon as the scan is completed, the application will display all the voice memos in the preview window. You can pick the ones that you desire to back up and press “Export” button.
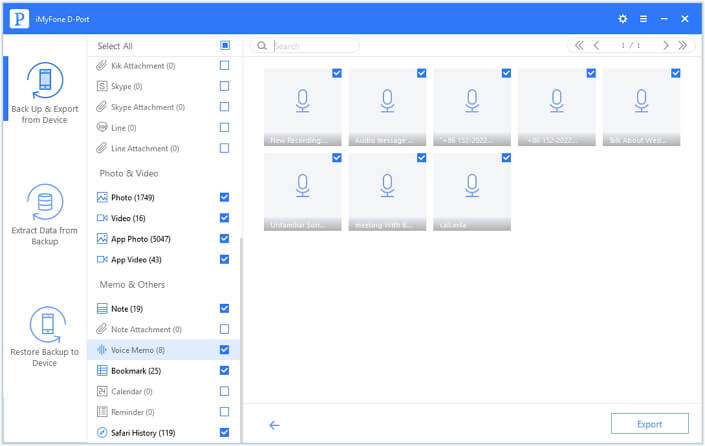
A small window pops up asking you to choose the destination where you want to save the voice memos. Browse to the folder and allow iMyFone D-Port to complete the process.
Way 2 Back Up iPhone Voice Memos using iTunes
The following steps help you import voice memos from your iPhone to a computer. Remember that the process is same for both Windows and Mac.
Step 1: Connect the iPhone to the computer. iTunes opens up automatically once it detects the iOS device. If not, launch it manually. From the main window, press the phone icon in the top header.
Step 2: Under the “Summary” tab, select “Music”.
Step 3: In the right side menu, tick mark “Sync Music” and activate “include voice memos.” It will allow iTunes to import voice memos from the device to the iTunes library.
Step 4: Press the “Apply” button at the bottom. iTunes will begin syncing the device and downloads the voice memos to the computer. You can find them in the iTunes library. You can transfer them to a separate location on your computer.
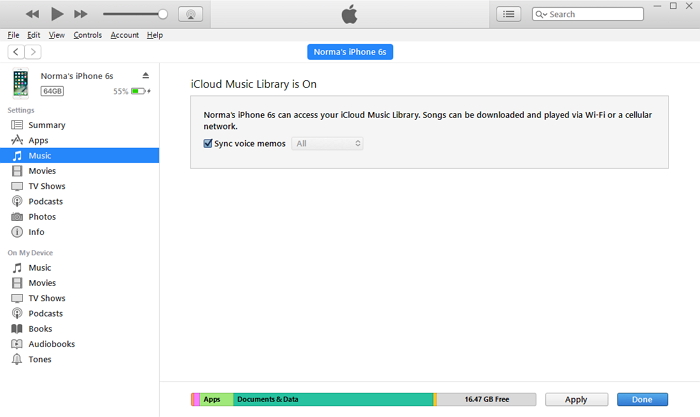
Step 5: You can find the saved voice memos in your computer at the following paths:
For Windows: C:Users(your username)MusiciTunesiTunes MediaVoice Memos
For Mac: Macintosh HD > Users > (your username) > Music > iTunes > iTunes Media > Voice Memos
The methods explained above help you back up voice memos from your iPhone to a computer so that you can save them there than the iOS devices.


 April 27, 2025
